

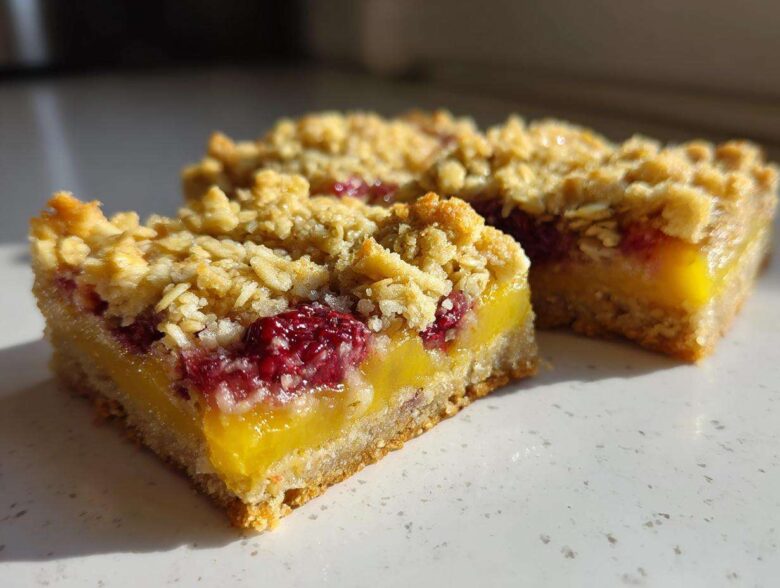
Oh my gosh, you are going to flip for these! When summer hits, I need something bright and zesty, but getting that perfect texture when baking gluten-free can be a nightmare, right? Well, I finally nailed it, and these Gluten-Free Lemon Berry Crumble Bars are pure magic. We’re talking tart lemon filling, sweet burst of mixed berries, and a buttery, crisp shortbread base that doesn’t crumble apart when you slice it. That crust took me three tries, but I finally figured out the cold butter trick for a perfect bake. They are seriously the best lemon dessert bar I’ve ever made, and you won’t miss the gluten one bit!
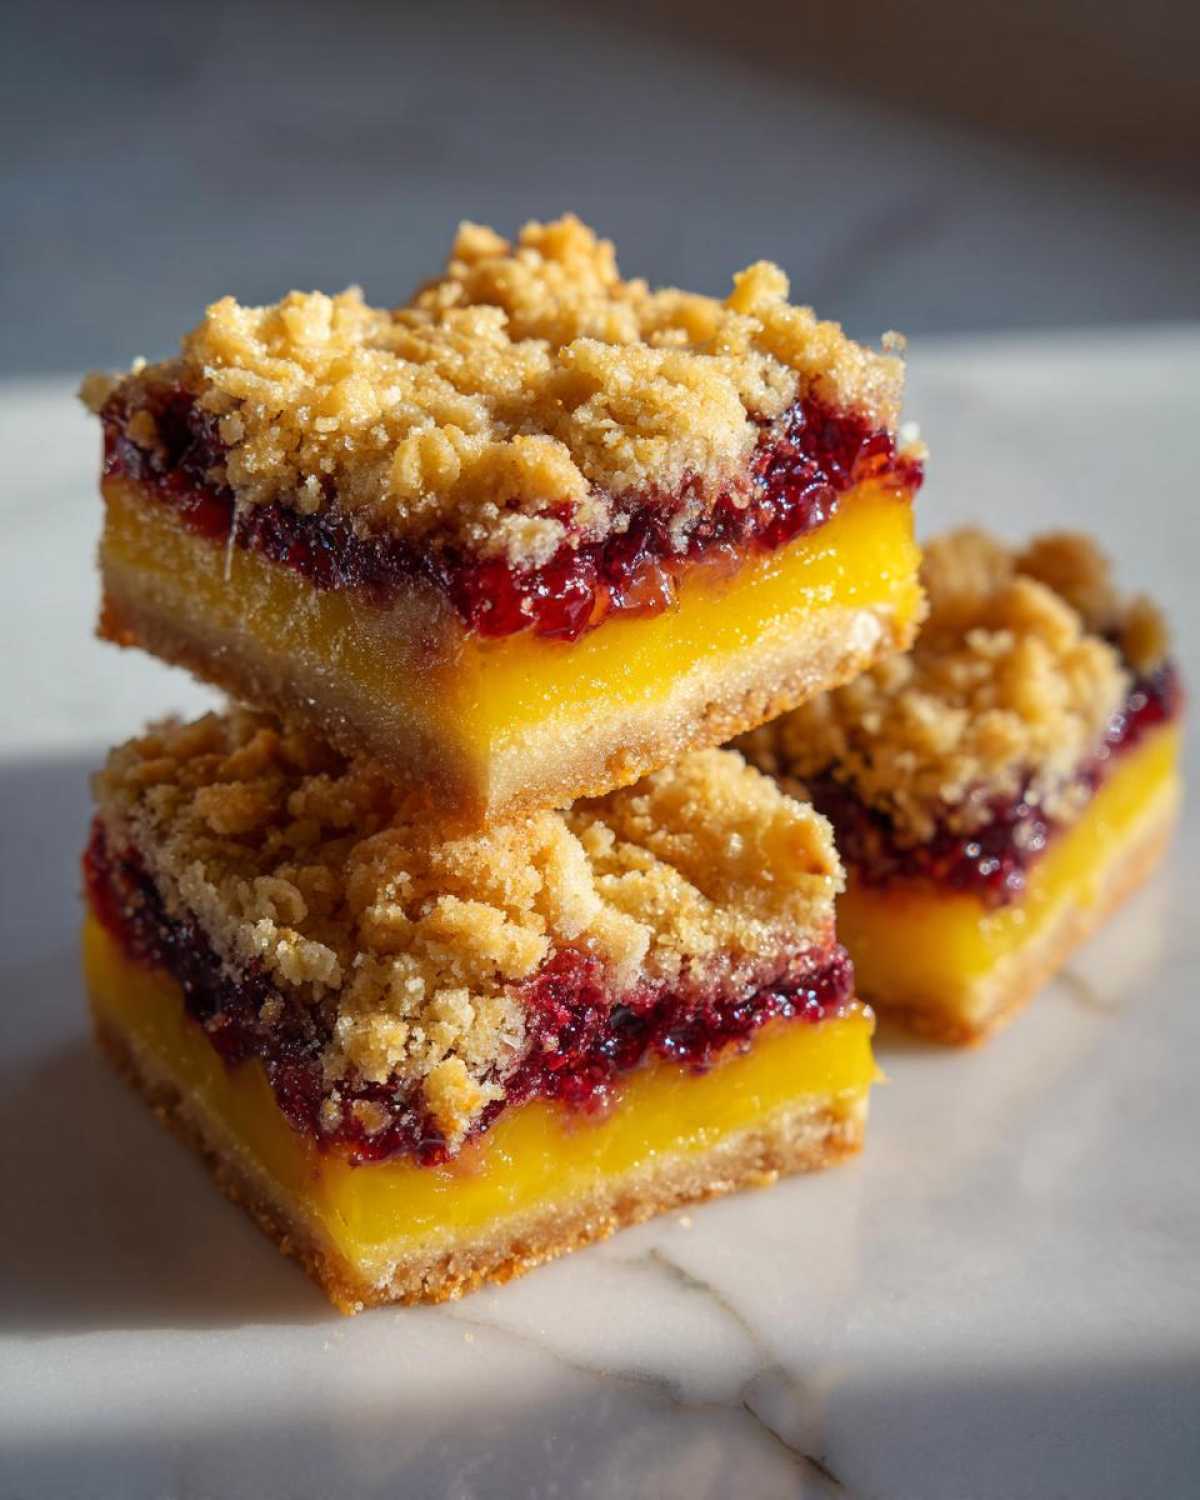
Why You Will Bake These Gluten-Free Lemon Berry Crumble Bars
I know you’ve probably tried a few gluten-free baked goods that were just… disappointing. Dry, crumbly, or gummy? Not these! These bars are my go-to for potlucks because they look gorgeous and taste incredible. Here’s why you need to drop everything and make them today:
- That Crust! It’s a proper shortbread base, incredibly buttery, and it actually holds together when you pick it up. I’m calling them my Gluten Free Shortbread Bars for a reason!
- The Filling Sets Perfectly: That pop of lemon juice and cornstarch works like a charm. You won’t end up with a puddle; it sets up beautifully into a lovely, zesty layer.
- The Crumble Topping is Next Level: It’s oat-based, which gives it such a wonderful chewiness mixed with the crisp baked edges.
- They Travel Well: Since they aren’t fussy and hold their shape (especially after that crucial cooling time!), they are perfect for picnics or taking to friends.
- Big Flavor, Easy Steps: For such an elegant Citrus Berry Dessert Squares, the list of steps is actually super straightforward. You’ll have them assembled in no time!
Essential Ingredients for Perfect Gluten-Free Lemon Berry Crumble Bars
Okay, let’s talk what goes into these beauties. Since we are dealing with gluten-free flour, the quality of your base ingredients really matters. Trust me on this one—don’t skimp!
For our crust and that wonderful oat based crumble bars topping, you need:
- 1 1/2 cups gluten-free all-purpose flour blend (make sure yours already has xanthan gum in it—it’s our structure keeper!)
- 1/2 cup gluten-free rolled oats (the regular kind, not instant)
- 1/2 cup packed light brown sugar
- 1/4 teaspoon salt
- 1/2 cup (one whole stick!) of very cold unsalted butter, cubed
- 1 large egg yolk (this keeps the crust tender)
Now for that bright, zesty center—our lemon filling. This needs to be whisked perfectly smooth, so get your best small bowl ready:
- 1/4 cup fresh lemon juice and 1 teaspoon of fresh lemon zest (use the zest, it makes all the difference!)
- 1/4 cup granulated sugar
- 1 tablespoon cornstarch—this is non-negotiable for a filling that actually sets up!
- 1 large egg white
- 1 cup mixed berries (frozen work great too, just don’t thaw them!)
Finally, for sprinkling right on top, we mix the remaining 1/4 cup oats, 2 tablespoons of granulated sugar, and 1 tablespoon of cold butter to create those final crispy bits.
Step-by-Step Instructions for Gluten-Free Lemon Berry Crumble Bars
This is where the magic happens! While this is an easy gluten free baking project, we need to respect the process, especially since we are dealing with a delicate gluten-free crust. Make sure your oven is preheated to 350°F (175°C) first. I always line my 8×8 inch pan with parchment, making sure there’s an overhang on two sides. That overhang is your handle! You’re going to lift these bars right out later, trust me on this one.
Creating the Gluten Free Shortbread Bars Crust
First things first: the base! Whisk your dry ingredients—the gluten-free flour blend, the 1/2 cup of oats, brown sugar, and salt—right in a medium bowl. Now, grab that cold butter we cubed earlier. You want to cut that butter into the dry mix until it looks like coarse, happy crumbs. Seriously, use a pastry blender or just your fingertips for this part. Then, quickly mix in that one egg yolk until it just barely comes together into a dough. That’s your cue to stop mixing! Press about two-thirds of that dough firmly and evenly into the bottom of your prepared pan. Slide that crust into the oven for a quick 12 minutes.
Mixing the Bright Lemon Berry Filling
While that crust is getting a head start, whisk up your filling. In a separate little bowl, combine the lemon juice, granulated sugar, cornstarch, lemon zest, and that single egg white. You need to whisk this hard until it is perfectly smooth—absolutely no dry pockets of cornstarch allowed, or you’ll get lumps! Once the crust comes out of the oven, spread your mixed berries right over the top of that warm, slightly hardened base. Then, gently pour that gorgeous, bright lemon mixture evenly over the berries. It should look like a vibrant little swamp, almost!
Assembling and Baking the Crumble Topping Recipes Gluten Free
Time for the final flourish! Create the topping by rubbing that last bit of cold butter into the remaining 1/4 cup of oats and 2 tablespoons of sugar using just your fingers until you have lovely, uneven crumbles. Sprinkling this crunchy goodness over the top makes these truly the oat based crumble bars you dreamed of. Pop the whole thing back into the 350°F oven for another 30 to 35 minutes. The topping should be golden, and the filling should look mostly set. But here is the most important part of the entire recipe for a proper Lemon Berry Crumble Recipe: you MUST let them cool completely—that means at least two hours on a rack—before you even *think* about slicing them. Patience gets you beautiful, clean squares, not a messy pile!
Tips for Perfect Gluten-Free Lemon Berry Crumble Bars Texture
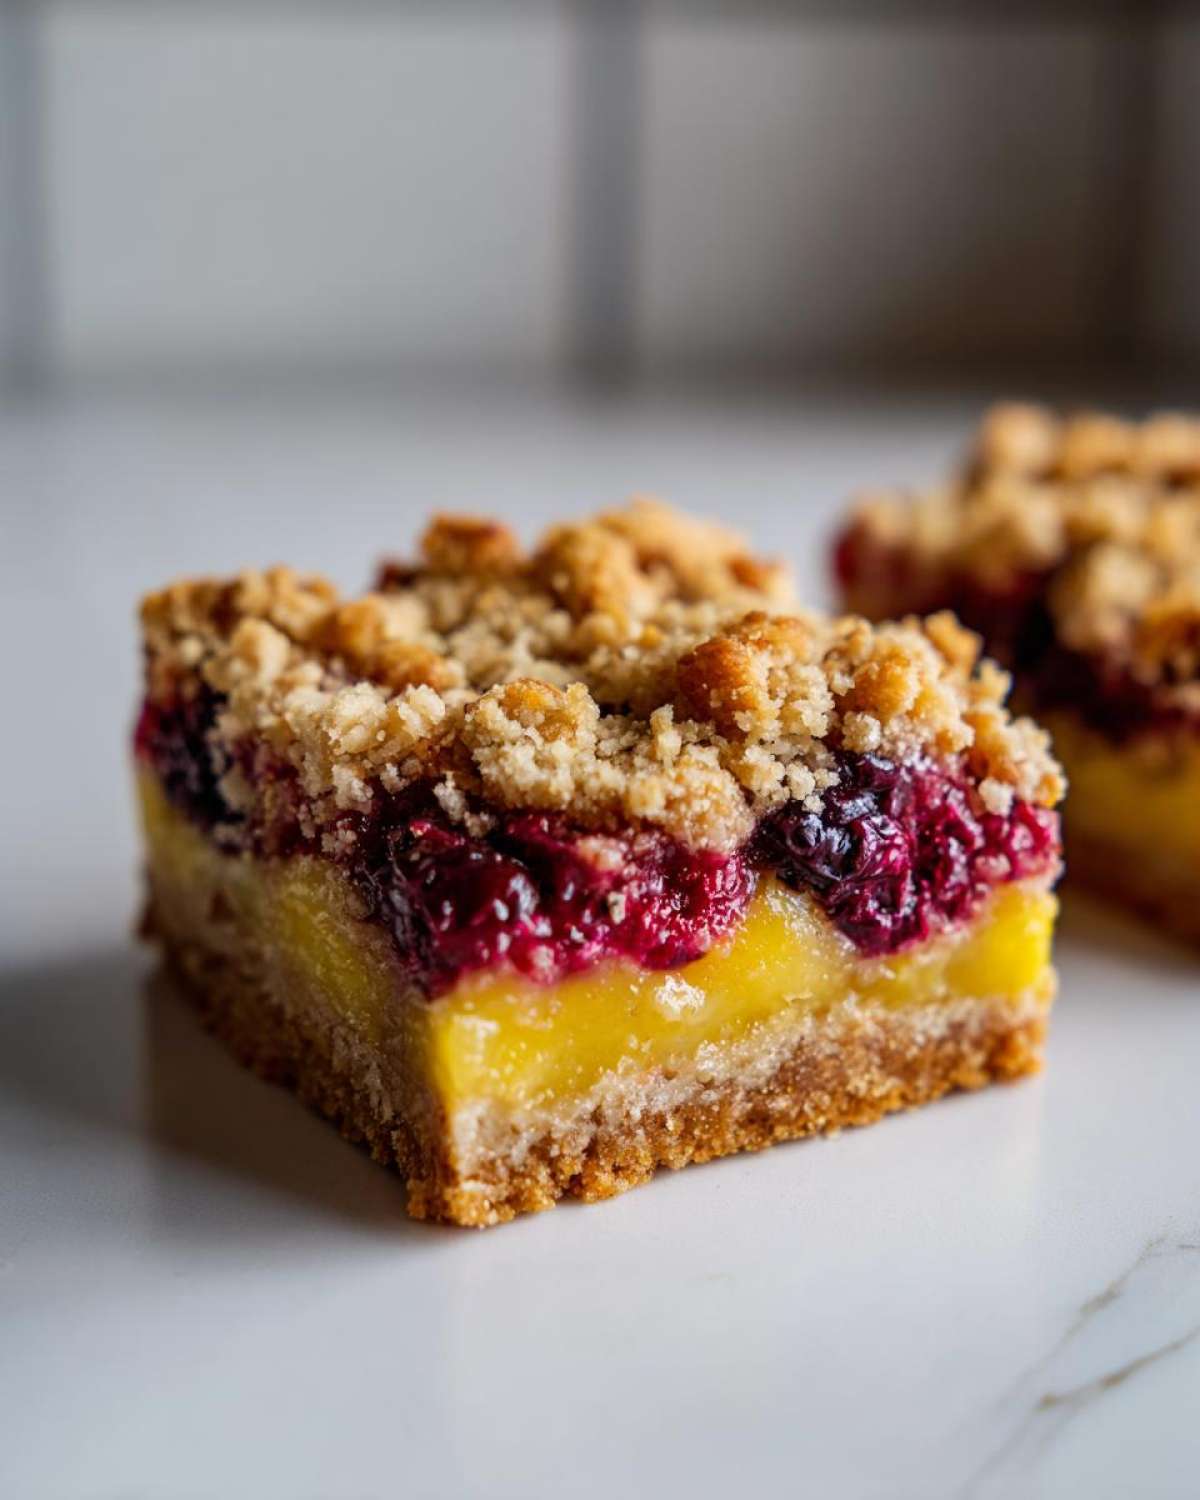
So, we talked about the bake time, but the texture of these Gluten Free Dessert Bars really hinges on what you do *after* they come out of the oven. If you try to cut them warm, it’s going to be a sticky disaster, I’ve learned that the hard way!
The initial cooling on the rack (those two hours we mentioned) is absolutely necessary to let that lemon filling firm up. But here’s my secret weapon for the absolute cleanest slices—seriously, knife-worthy squares: chilling! Once they are completely room temperature, wrap the whole slab carefully in plastic wrap and pop it in the fridge for about 30 minutes before slicing. It makes that shortbread base super distinct from the gooey middle!
Also, don’t forget the topping note! If you want a really crisp, almost crunchy topping instead of just chewy, you can add an extra 1/4 cup of almond flour to that little oat topping mix. It helps suck up some of that surface moisture and bakes up beautifully golden and firm. It’s a tiny step, but for texture fanatics like us, it pays off big time!
Ingredient Notes and Substitutions for Your Lemon Berry Crumble Recipe
I wanted to take a minute right here to talk ingredients because when you’re baking gluten-free, you can’t just swap stuff willy-nilly. The success of these Berry Crumble Bars hinges on a couple of specific items, so pay attention!
First and foremost: the flour. I know I mentioned it before, but please check your bag! You absolutely need a good quality 1-to-1 gluten-free all-purpose flour blend that *contains xanthan gum*. If yours doesn’t have it, you have to add it yourself, or your shortbread crust is just going to turn into sand. Xanthan gum is the binder that stops everything from falling apart when we take out the gluten structure. A blend without it acts very differently in a buttery crust like this one!
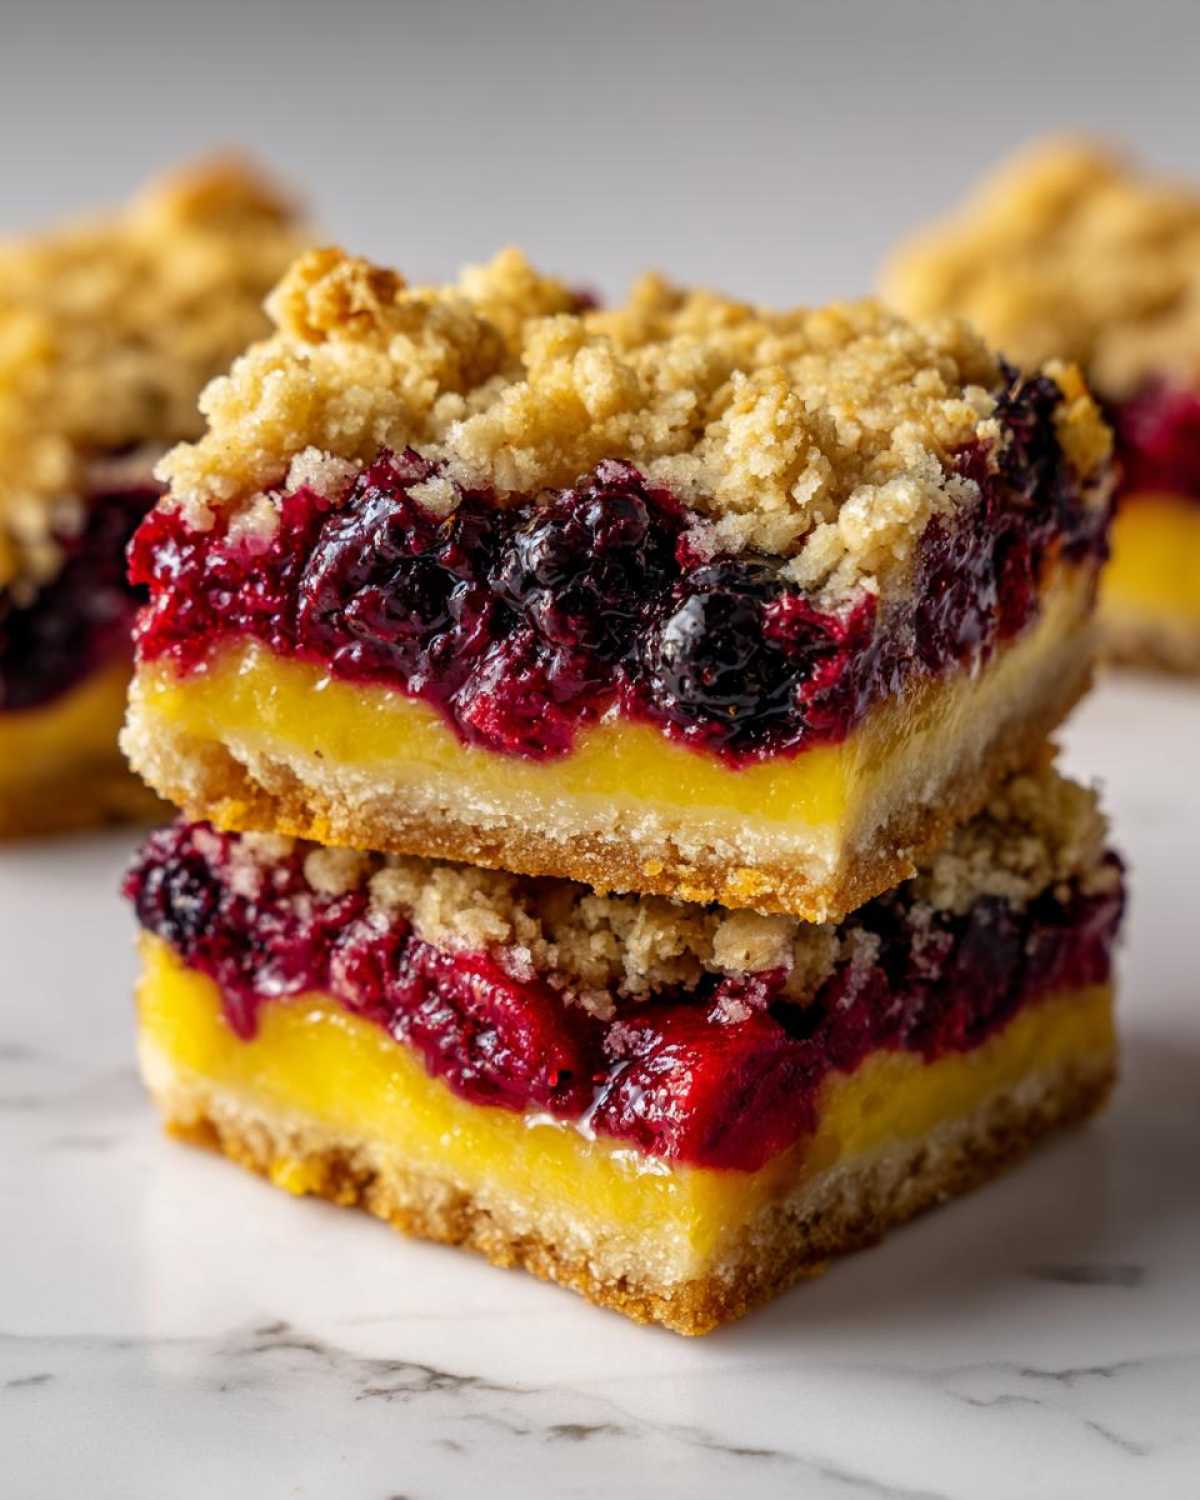
Next up, berries! The recipe calls for mixed berries, and I love that because you get great variety, but feel free to stick to one kind if that’s what you have. Blueberries alone are amazing, or just a big batch of raspberries works too. If you are using frozen fruit, super important tip: do NOT thaw them first. Toss them straight from the freezer onto that warm crust. If they thaw, they release too much water, and that messes up our lemon filling setting time.
What about dairy? Since these are inherently easy gluten free baking treats, many of you might be doing dairy-free too. Good news! You can absolutely swap out that unsalted butter for a good quality, solid dairy-free baking stick. The key is that it must be COLD, just like the butter. Don’t use the soft tub margarine; it has too much water and will make your crust greasy instead of crumbly.
Variations on These Baked Fruit Bars Gluten Free
Once you’ve mastered the fundamentals of these Gluten-Free Lemon Berry Crumble Bars, you have a fantastic canvas for playing around! These bars are so forgiving, which is why I love them for trying out new flavor combinations. Nobody needs the same thing all the time, right?
For a totally different vibe, try swapping out the lemon for another citrus. Lime works unbelievably well with mixed berries—it gives you this incredible tropical zing that keeps the bars feeling light and summery. Just use cup-for-cup lime juice and zest instead of lemon in the filling. It’s an instant upgrade for a different twist!
If you want to change up the base flavor, which works for both the crust and the topping layer, try integrating some toasted nuts. Ground almonds or finely chopped pecans blend right into the dry ingredients of the base beautifully. You get a richer, deeper shortbread flavor without changing the structural integrity too much. Just toast them lightly in a dry pan first to bring out that amazing aroma!
I also love experimenting with the spice profile in the crumble topping. While the original is perfect as is, sometimes I want something warmer, especially if I’m making these as a late-season treat. A tiny pinch of cinnamon or even a whisper of cardamom mixed in with those final oats and butter makes the whole kitchen smell incredible. It’s little adjustments like these that make a familiar recipe feel brand new!
Storage and Reheating Instructions for Gluten Free Dessert Bars
Keeping these Gluten Free Dessert Bars fresh is simple, but since they have that glorious, custardy lemon filling bubbling under the oat topping, we need to treat them a little better than regular cookies.
The number one rule? Make sure they are actually cool before you store them! Seriously, trapping steam in a container with warm bars is the fastest way to get soggy bottoms, and nobody wants a soggy shortbread crust on their Lemon Berry Crumble Recipe.
Once they are totally cooled and you’ve even sliced them (which you should only do after chilling, remember?), layer them in an airtight container. I usually put a small sheet of wax paper or parchment paper between the layers of bars just to make sure that sugary topping doesn’t get stuck to the layer above it. They do great on the counter for about a day if your kitchen isn’t too hot, but honestly, I keep mine in the fridge to lock in that perfect texture.
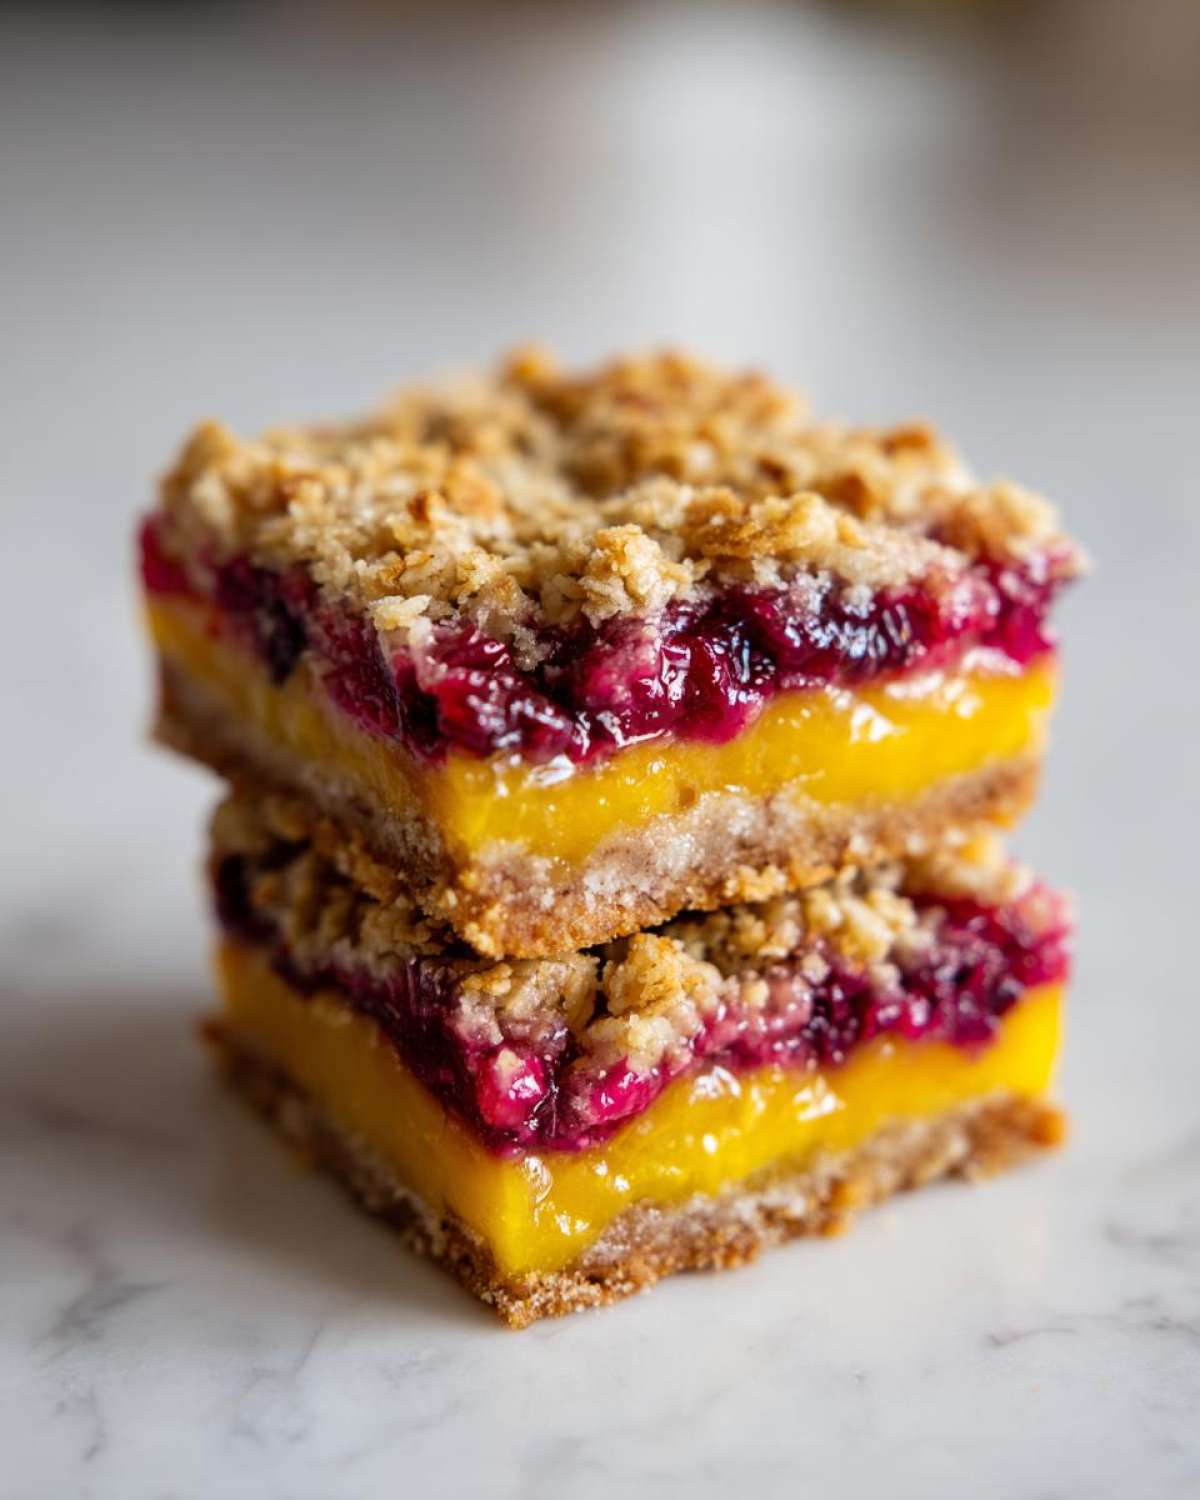
In the refrigerator, these Baked Fruit Bars Gluten Free will stay fantastic for at least four to five days. Because they are so dense, they don’t dry out easily, especially sitting next to that lovely filling.
Now, if you happen to take them out of the fridge and you want that buttery crust to have a little more life when eating them? Don’t reheat them completely, that can make the filling ooze! Just let them sit on the counter for about 15 to 20 minutes before serving. That little bit of warmth brings the buttery aroma back without sacrificing the set texture of the lemon layer.
Frequently Asked Questions About Gluten-Free Lemon Berry Crumble Bars
You’ve got questions, I’ve got answers! I’ve spent so much time tinkering with these Citrus Berry Dessert Squares that I think I’ve covered almost every potential baking hiccup. Here are the things I get asked most often about perfecting these Gluten Free Dessert Bars.
Can I make these Gluten Free Dessert Bars dairy-free?
Yes, you absolutely can! The butter is the only dairy component here, and that’s an easy swap, thank goodness. Just grab your favorite solid, block-style dairy-free butter substitute—the one you trust for baking cookies. You want something that stays firm when cold, just like regular butter. Keep it super cold when you cut it into the flour for the crust and topping, and you’ll get the same crumbly texture in your Oat Based Crumble Bars without any issues!
Why is my lemon filling runny in my Lemon Berry Crumble Recipe?
Ugh, a runny filling is the saddest thing! If you followed the recipe, it’s usually one of two things, and I’ve done both! First, you might not have whisked enough cornstarch into the wet ingredients earlier; those granules need to be totally invisible. Second, and this is the big one for the Lemon Berry Crumble Recipe, you just didn’t let it cool long enough! That filling firms up as it chills. If you slice it after only an hour or two, it will definitely slump. Give it that full two hours at room temperature, plus that optional 30-minute chill in the fridge, and it becomes beautifully sliceable.
What is the best gluten-free flour blend for these Oat Based Crumble Bars?
This is critical for the crust! For these Baked Fruit Bars Gluten Free, you need containment, which means you need xanthan gum. Look for a 1-to-1 gluten-free all-purpose flour blend that *contains xanthan gum*. If the blend is simply ground rice flours and starches without that crucial binder, your crust will be extremely sandy and fall apart. Using a quality blend ensures we get that perfect, sturdy, tender shortbread foundation for our berries and lemon!
Estimated Nutritional Data for Gluten-Free Lemon Berry Crumble Bars
Okay, now for the numbers side of things! I always keep this section short because let’s be real, when you’re eating a buttery, zesty, berry-packed treat like this, you aren’t counting every single calorie—you’re just enjoying it! But for those of you tracking macros or just curious about what goes into these magnificent gluten-free bars, here is the estimated nutritional breakdown based on 16 servings.
Remember, these are estimates! The exact amount of sugar or fat can fluctuate depending on the brand of butter, how much juice you squeezed from your lemons, and which frozen berries you tossed in there. But this gives you a solid middle ground!
- Serving Size: 1 bar
- Calories: 210
- Sugar: 18g
- Fat: 11g (with 6g of that being saturated fat)
- Carbohydrates: 27g
- Protein: 3g
- Cholesterol: 30mg
- Sodium: 75mg
I generally think of these as a wonderful treat, especially for a Summer Dessert Recipe Gluten Free. They’re bright, they feel light, and while they definitely have sugar, the whole experience of that tart lemon cutting through is just so satisfying. Enjoy them!
PrintGluten-Free Lemon Berry Crumble Bars
Make these easy, bright, and zesty gluten-free bars featuring a shortbread base, tart lemon filling, mixed berries, and a crisp oat crumble topping.
- Prep Time: 20 min
- Cook Time: 45 min
- Total Time: 170 min
- Yield: 16 bars
- Category: Dessert
- Method: Baking
- Cuisine: American
- Diet: Gluten Free
Ingredients
- 1 1/2 cups gluten-free all-purpose flour blend (with xanthan gum)
- 1/2 cup gluten-free rolled oats
- 1/2 cup packed light brown sugar
- 1/4 teaspoon salt
- 1/2 cup (1 stick) cold unsalted butter, cut into cubes
- 1 large egg yolk
- 1/4 cup fresh lemon juice
- 1/4 cup granulated sugar
- 1 tablespoon cornstarch
- 1 teaspoon lemon zest
- 1 large egg white
- 1 cup mixed berries (fresh or frozen)
- 2 tablespoons granulated sugar (for topping)
- 1/4 cup gluten-free rolled oats (for topping)
- 1 tablespoon cold unsalted butter (for topping)
Instructions
- Preheat your oven to 350°F (175°C). Line an 8×8 inch baking pan with parchment paper, leaving an overhang on two sides for easy removal.
- Prepare the base: In a medium bowl, whisk together the gluten-free flour blend, 1/2 cup oats, brown sugar, and salt. Cut in the 1/2 cup cold butter using a pastry blender or your fingers until the mixture resembles coarse crumbs.
- Mix in the egg yolk until the mixture just comes together. Press about two-thirds of this mixture evenly into the bottom of the prepared pan to form the crust. Bake the crust for 12 minutes.
- Prepare the lemon filling while the crust bakes: In a small bowl, whisk together the lemon juice, 1/4 cup granulated sugar, cornstarch, lemon zest, and egg white until smooth.
- Gently spread the mixed berries over the partially baked crust. Pour the lemon filling mixture evenly over the berries.
- Prepare the crumble topping: In a separate small bowl, combine the remaining 1/4 cup oats, 2 tablespoons granulated sugar, and 1 tablespoon cold butter. Use your fingers to mix until crumbly. Sprinkle this topping evenly over the lemon layer.
- Bake for 30 to 35 minutes, or until the topping is golden brown and the filling is mostly set.
- Let the bars cool completely in the pan on a wire rack (at least 2 hours) before lifting them out using the parchment overhang and cutting them into squares.
Notes
- For a crispier topping, you can add 1/4 cup of almond flour to the crumble mixture.
- If using frozen berries, do not thaw them before adding them to the bars.
- Chill the bars for 30 minutes after cooling completely to help the filling set firmly before slicing.
Nutrition
- Serving Size: 1 bar
- Calories: 210
- Sugar: 18
- Sodium: 75
- Fat: 11
- Saturated Fat: 6
- Unsaturated Fat: 5
- Trans Fat: 0
- Carbohydrates: 27
- Fiber: 1
- Protein: 3
- Cholesterol: 30