

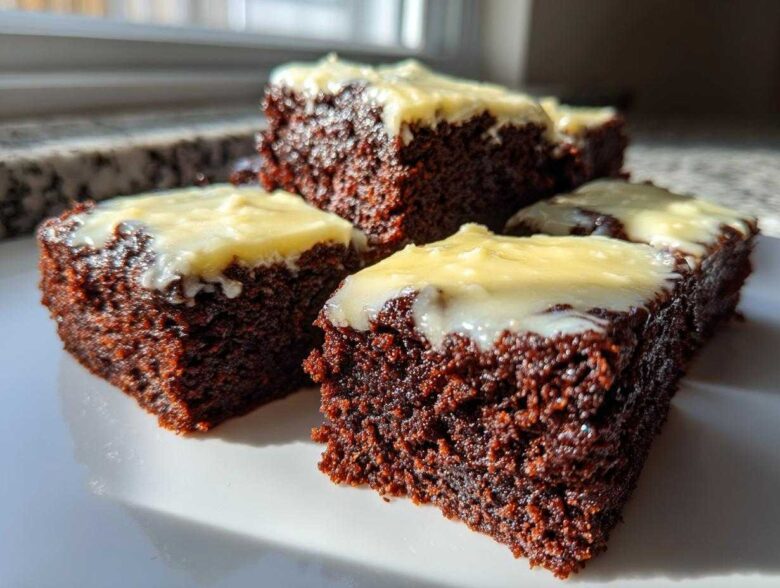
Listen, I know gingerbread is supposed to be strictly for December, right? Like, thick, dark, and served only next to hot cocoa. But I’ve discovered the most glorious secret for shaking up our winter baking routine, and you absolutely have to try it: these Gingerbread Bars with Zesty Lemon Glaze. Trust me when I say the deep, soul-warming spice of the ginger and clove just sings when it hits that bright, tart citrus kick!
This isn’t just another heavy holiday cookie; this is the perfect contrast dessert. My goal was creating a bar that was incredibly moist—not crumbly or dry—and topped with a glaze so sharp it cuts right through the molasses richness. You can find more amazing baking inspiration over on the main blog. These bars are easy enough for a weeknight treat but fancy enough for any party. I promise, once you see how easy it is to make this perfectly balanced spiced base, you’ll never look at traditional gingerbread the same way again. It’s just heavenly!
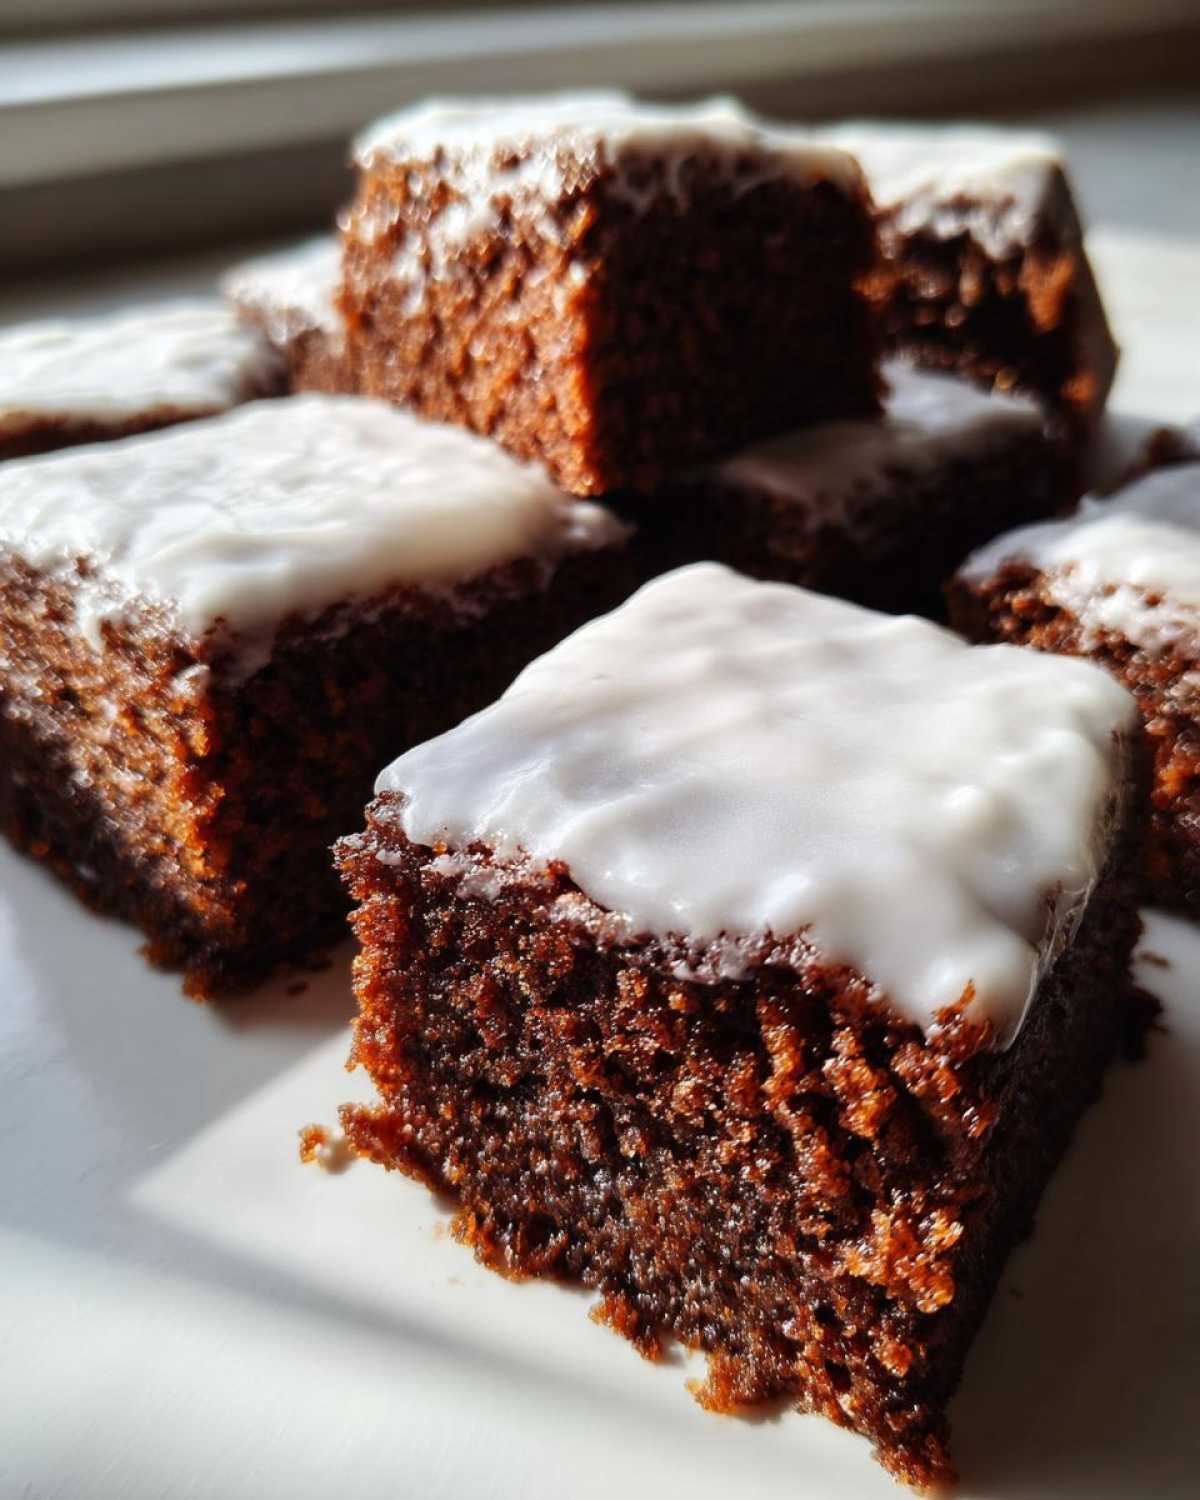
Why You Will Love These Gingerbread Bars with Zesty Lemon Glaze
Seriously, what’s not to adore about these bars? I keep making excuses to bake them, even when it’s only October! They just check every single box for a perfect baked treat:
- Unbelievably Moist Base: We use that sneaky bit of hot water and molasses to ensure these bars stay tender. No dry corners allowed!
- The Ultimate Flavor Contrast: That warm, deep spice—cinnamon, ginger, cloves—just melts away under the shock of bright, sunny lemon zest. It’s magic, I tell you!
- Easy Bar Format: No fussy rolling or cutting out shapes! Just press the dough in the pan, bake, glaze, and slice. Perfect for little hands helping out, too.
- Make-Ahead Friendly: These taste even better the next day once the spices have really settled in.
- A Unique Holiday Twist: If you’re tired of the same old Christmas cookies, this recipe is a fantastic, unexpected centerpiece for your festive spread.
- Quick Baking Time: You get all that complex, cozy flavor in under 30 minutes of bake time. We love Easy Gingerbread Baking around here!
Essential Ingredients for Perfect Gingerbread Bars with Zesty Lemon Glaze
Okay, ingredient clarity is non-negotiable here, because we are building deep flavor notes. Don’t go swapping things willy-nilly—especially not the molasses! For the spice cake base, you’ll need 1 1/2 cups of flour mixed with baking soda, and our core spices: a teaspoon each of ginger and cinnamon, plus half a teaspoon of cloves, and salt. Make sure you have 1/2 cup of good **softened butter**—and I mean genuinely soft, not melted!
Next, we need to balance that sweetness. Cream that butter with 1/2 cup of **packed light brown sugar**. That molasses content is key to the dark color and rich taste! Then add one egg and a full 1/2 cup of unsulfured molasses, always! Finally, we shock the batter with 1/4 cup of **hot water** right at the end to loosen it up. For the real star, the glaze, you need 1 cup of powdered sugar, 2 tablespoons of **fresh lemon juice**, and a teaspoon of **lemon zest**. It’s the zest that gives us that real punch of citrus aroma. If you want to check out my chocolate gingerbread loaf for another deep flavor idea, that one is amazing too!
Step-by-Step Instructions for Gingerbread Bars with Zesty Lemon Glaze
The process for these Gingerbread Bars with Zesty Lemon Glaze is super straightforward, which is why I love them for quick holiday baking sessions. Just keep an eye on your timeline, especially when it comes to that cooling period later on. We are aiming for that sweet spot of complexity in flavor without spending all day in the kitchen!
Preparing the Gingerbread Base
First, get your oven dancing at 350°F (175°C) and make sure that 8×8 inch pan is greased and floured—don’t skip that prep work! In one bowl, gently whisk your flour, baking soda, ginger, cinnamon, cloves, and salt together. That’s our dry squad!
In your big mixing bowl, cream that softened butter and light brown sugar until it gets airy; then beat in the egg. Stir in the molasses until everything is smooth. Now, here’s the tricky part: you alternate adding the dry mix and the hot water. Always start and end with the dry ingredients. Don’t let your mixer run wild!
Baking and Cooling the Bars
Once that gorgeous, dark batter is mostly combined—just streaks of flour is okay—dump it into your prepared pan and smooth it out evenly. Pop those babies in the oven for about 25 to 30 minutes. You’re looking for that toothpick test to show clean when you poke the center.
This next part is crucial: let them cool *completely* in the pan on a wire rack. I know, I know, smelling gingerbread fresh from the oven is torture, but if you try to glaze these warm, you’ll end up with a sugary puddle instead of a sharp topping. Once cooled, you’ll be able to slice them perfectly into 16 beautiful squares. You can check out some other tips for easy gingerbread baking on the site!
Crafting and Applying the Zesty Lemon Glaze
While you’re waiting for them to cool, whip up the glaze! In a small bowl, just whisk that powdered sugar, fresh lemon juice, and zest together until it shines. I often find I need just a tiny splash more lemon juice to get the perfect pourable consistency—you want it thick enough not to run right off, but thin enough to spread easily.
When those bars are stone cold, pour that vibrant zesty glaze right over the top. Use an offset spatula to gently spread it edge-to-edge. Then, you have a short wait—just let that glaze set solid before you cut them. That bright, sharp layer is what makes this recipe a total winner!
Tips for Achieving the Perfect Gingerbread Texture
So many people end up with dry, crumbly gingerbread bars, and that’s just a tragedy! We want these to be moist gingerbread squares that practically melt in your mouth. The real secret here lies in moisture management. First, about that molasses: if you use the standard light molasses, you’ll get a beautiful flavor, but if you want that super dark, almost smoky depth that fights the citrus so well, try using dark molasses instead. It adds a little density too!
Also, don’t trust your oven blindly! I always recommend pulling out my little oven thermometer because they run hot or cold constantly. If the oven is too hot, the edges set before the middle can absorb enough moisture, resulting in those inevitable hard edges. Baking for just 25 minutes instead of pushing it to 30 can often save the texture. Sometimes I even place a pan of hot water on the rack below the bars to create a little steam bath—it really helps keep things from drying out. If you love soft cookies, check out my guide on getting soft chewy chocolate chip cookies; the principle of gentle heat applies here too!
Ingredient Notes and Substitutions for Gingerbread Bars
You know how much I love getting picky about ingredients? It’s only because those little choices make such a huge difference! Let’s talk specifics for these Gingerbread Bars with Zesty Lemon Glaze, because the base has to be just right to stand up to that bright topping.
The biggest question I get is about molasses. If you happen to only have dark molasses sitting in your pantry (the richer, thicker kind), go ahead and use that! Dark molasses will give you a deeper, almost smoky spice flavor that plays so beautifully with the lemon. Light molasses is a bit milder and sweeter, which is fine too, but dark molasses is my personal favorite for creating a truly robust gingerbread. And please, if you can, use unsulfured molasses, it just tastes cleaner!
What about the butter? If heaven forbid you’re out of unsalted butter, you can rely on salted, but you absolutely must pull back on the salt measurement in the dry ingredients. I’d cut the extra salt down to just a pinch—maybe 1/8 teaspoon total. Never use margarine if you can avoid it; butter is what gives the fat structure necessary for that moist square texture.
For an extra pop of heat and texture, I sometimes toss in 1/4 cup of finely chopped candied ginger directly into the batter when I add the flour mixture. It sounds crazy to put ginger in a gingerbread recipe, but these little bursts of crystallized ginger melt beautifully and just add another layer of warmth before the cold glaze hits. It’s a fun little trick for those who really love a strong spiced dessert!
Making the Zesty Glaze for Cookies Ahead of Time
Now, about that beautiful, tart topping! While I usually prefer making fresh batches of my Homemade Lemon Icing Recipes right before drizzling, you *can* prep the glaze mixture ahead of time. The lemon juice is the tricky part, though.
If you whisk the powdered sugar and zest together, that dry mixture keeps perfectly well in an airtight container. But wait until you are ready to bake those Gingerbread Bars with Zesty Lemon Glaze before you stir in the fresh lemon juice. The acid starts breaking down the sugar over time, and honestly, the freshest zest gives the best aroma!
If you do mix it all and have leftovers, cling film pressed right onto the surface of the glaze will stop it from hardening. I’m sure you can find some great tips for handling other frostings, like my vanilla buttercream guide, but for this zesty topping, fresh is definitely best!
Serving Suggestions for Your Gingerbread Bars with Zesty Lemon Glaze
These Festive Dessert Bars are so versatile! Since they have that warm spice base and the bright, almost surprising citrus top, they pair beautifully with simple things. I love just setting them out on a white platter with a light dusting of powdered sugar around the edges for visual pop.
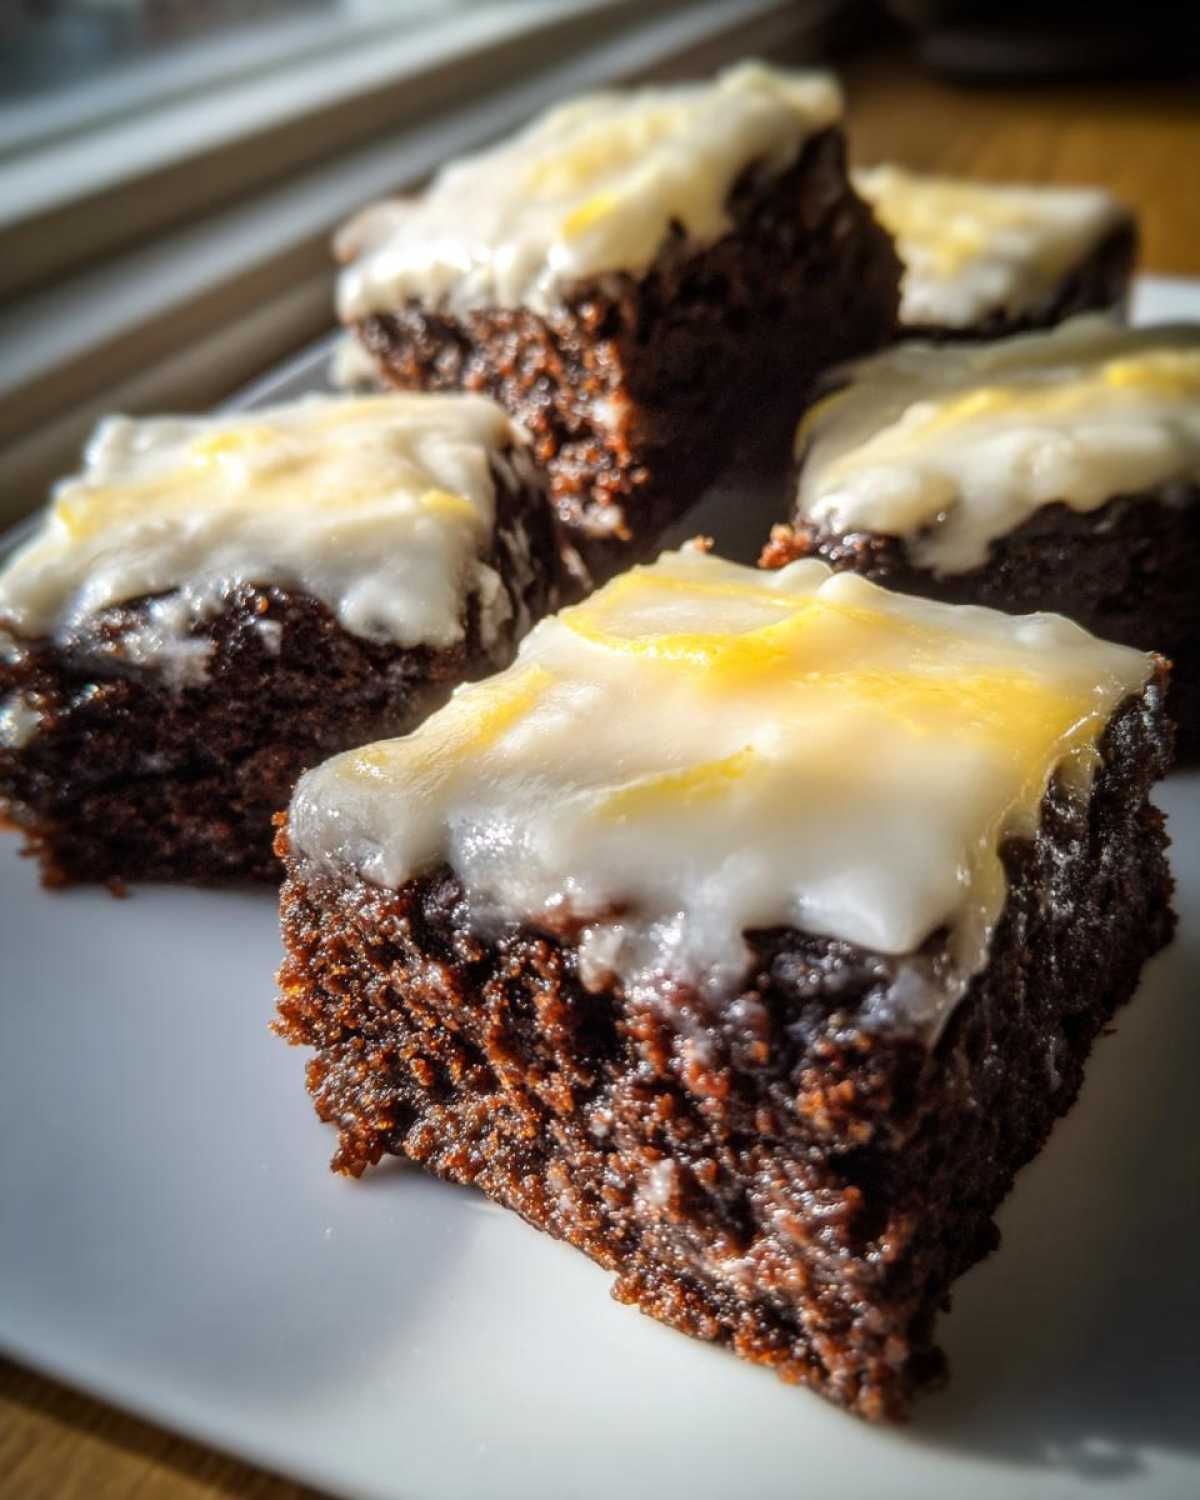
When it comes to drinks, forget super-sweet sodas. A strong, black coffee or a lightly sweetened Earl Grey tea cuts right through the sweetness of the glaze and highlights the ginger. If you’re serving them after dinner, a tiny dollop of lightly sweetened whipped cream on the side works wonders, or maybe a scoop of vanilla bean ice cream if you’re feeling decadent? You can see some other pairing ideas over at my site, like this easy crockpot steak recipe—totally different meal, but the idea of pairing bold flavors remains the same!
Storage and Reheating Instructions for Gingerbread Bars with Zesty Lemon Glaze
Now you’ve got these perfect, glossy little squares of spicy-citrus heaven, the big question is: how do you keep them tasting this amazing tomorrow? Honestly, because of that fantastic, sturdy base, these Gingerbread Bars with Zesty Lemon Glaze hold up beautifully, but you have to treat the glaze with respect!
If you plan on eating them within, say, three days, keeping them at room temperature is totally fine. The key here is an airtight container. I usually cut them right after the glaze has set, line the container with a sheet of parchment paper to stop the glaze from sticking to the next layer, and then seal it up tight. Storing them in a cool, dry spot away from direct sunlight is ideal. The molasses keeps them naturally moist, so you shouldn’t need the fridge unless your kitchen is super warm.
But should you ever reheat them? Generally, no, I wouldn’t recommend it. Warming up a bar already topped with a hard lemon glaze usually results in a sticky, messy puddle, and you lose that sharp ‘zing’ the lemon is supposed to deliver. If you *must* warm the base—maybe you want the spices extra fragrant—take a single square, pull the glaze off if you can (good luck!), and microwave it for just 5-8 seconds. But honestly, these bars are designed to be eaten at room temperature to best enjoy that texture clash between the soft gingerbread and the crisp topping.
Frequently Asked Questions About Gingerbread Bars with Zesty Lemon Glaze
I know that baking can sometimes bring up a few little snags, especially when mixing bold flavors like spice and citrus together! Here are some questions I get all the time about making these Gingerbread Bars with Zesty Lemon Glaze perfectly every time. I hope these help you feel more confident whipping up this batch!
Can I make these Gingerbread Bars with Zesty Lemon Glaze gluten-free?
Oh, absolutely! I’ve tested this with a good quality, all-purpose gluten-free flour blend that contains xanthan gum, and they come out great. You need a 1:1 swap ratio, so just replace the 1 1/2 cups of all-purpose flour with the same amount of your GF blend. The heavy molasses and butter already provide a lot of moisture, so you shouldn’t even need to add extra liquid! Just watch the baking time carefully, as GF flours can sometimes set a little faster.
How long will these Spiced Lemon Desserts stay fresh?
These are honestly wonderful for meal prepping because they last quite a while! Because the base is so rich with molasses and butter, these Spiced Lemon Desserts will stay wonderfully moist and flavorful for about 4 to 5 days when stored tightly covered at cool room temperature. If your kitchen is particularly warm or humid, popping them in the fridge is okay, but letting them warm up slightly before eating brings the spice notes out the best. I wouldn’t recommend freezing them once the glaze is on, honestly.
What is the best way to get a smooth, non-cracking lemon topping?
This brings us back to the cooling step, which is truly the make-or-break moment for any good glaze! The absolute best way to ensure a smooth, non-cracking lemon topping is patience. You must let the gingerbread base cool completely—I mean room temperature, not even slightly warm on the bottom—before you pour that glaze on. If there is any residual heat escaping the bars, the glaze will set too quickly or weep and become sticky rather than smooth and opaque. Once the glaze is on, just let it sit for at least an hour before cutting. If you want to see some other great tips for creamy toppings, check out my post on easy weeknight bolognese sauce recipes—just kidding! But seriously, patience is the key ingredient here!
Estimated Nutritional Information
Now, I always say that baking, especially when involving molasses and butter, isn’t exactly a low-calorie pursuit, and that’s perfectly fine sometimes! These rich little Gingerbread Bars with Zesty Lemon Glaze are a treat, not a lifestyle choice, right? Remember, this information is just an estimate based on the standard ingredient measurements listed earlier, assuming you cut them into 16 squares.
Here is what you can generally expect for one square:
- Serving Size: 1 square
- Calories: 205
- Sugar: 28g (That’s the molasses and glaze working together!)
- Sodium: 110mg
- Fat: 7g
- Saturated Fat: 4g
- Carbohydrates: 35g
- Protein: 2g
See? A perfect balance of cozy spice and sweet indulgence. Enjoy them guilt-free knowing you made something absolutely wonderful from scratch!
Share Your Homemade Gingerbread Bars with Zesty Lemon Glaze
That’s it! You’ve baked the most fantastic combination of warm spice and bright zing. Honestly, seeing your results is my absolute favorite part of sharing these recipes with you all. I am so proud of you for stepping out and trying this Unique Gingerbread Variation instead of just grabbing something pre-made from the store!
Now that your kitchen smells like a dream, please don’t be shy! I absolutely love hearing which part was your favorite—was it the sweet heat of the ginger, or did that sharp lemon glaze surprise you the most? Drop a comment down below and let me know what you thought, and if you stuck strictly to the recipe or added your own little twist!
If you snapped a picture of your beautiful, glossy Lemon Glazed Dessert Bars, please tag me on social media! It makes my day seeing these goodies coming out of *your* kitchens. If you ever have a burning question or just want to send a quick note about your baking adventures, you can always reach out via the contact page. Happy baking, everyone!
PrintGingerbread Bars with Zesty Lemon Glaze
Bake moist, deeply spiced gingerbread bars and top them with a bright, tart lemon glaze for a flavorful contrast.
- Prep Time: 15 min
- Cook Time: 30 min
- Total Time: 45 min
- Yield: 16 squares
- Category: Dessert
- Method: Baking
- Cuisine: American
- Diet: Vegetarian
Ingredients
- 1 1/2 cups all-purpose flour
- 1 teaspoon baking soda
- 1 teaspoon ground ginger
- 1 teaspoon ground cinnamon
- 1/2 teaspoon ground cloves
- 1/4 teaspoon salt
- 1/2 cup (1 stick) unsalted butter, softened
- 1/2 cup packed light brown sugar
- 1 large egg
- 1/2 cup unsulfured molasses
- 1/4 cup hot water
- 1 cup powdered sugar (for glaze)
- 2 tablespoons fresh lemon juice (for glaze)
- 1 teaspoon lemon zest (for glaze)
Instructions
- Preheat your oven to 350°F (175°C). Grease and flour an 8×8 inch baking pan.
- In a medium bowl, whisk together the flour, baking soda, ginger, cinnamon, cloves, and salt. Set aside.
- In a large bowl, cream the softened butter and brown sugar until light and fluffy. Beat in the egg until combined.
- Stir in the molasses.
- Alternate adding the dry ingredients mixture and the hot water to the wet ingredients, mixing until just combined. Do not overmix.
- Spread the batter evenly into the prepared pan.
- Bake for 25 to 30 minutes, or until a toothpick inserted into the center comes out clean.
- Let the bars cool completely in the pan on a wire rack.
- While the bars cool, prepare the glaze: Whisk together the powdered sugar, lemon juice, and lemon zest in a small bowl until smooth. Add a few more drops of lemon juice if the glaze is too thick.
- Once the bars are cool, pour the glaze over the top and spread it evenly. Let the glaze set before cutting into squares.
Notes
- For a richer gingerbread flavor, use dark molasses instead of light.
- Make sure the bars are completely cool before applying the glaze, or the glaze will melt.
- You can add 1/4 cup of finely chopped candied ginger to the batter for extra spice.
Nutrition
- Serving Size: 1 square
- Calories: 205
- Sugar: 28g
- Sodium: 110mg
- Fat: 7g
- Saturated Fat: 4g
- Unsaturated Fat: 3g
- Trans Fat: 0g
- Carbohydrates: 35g
- Fiber: 1g
- Protein: 2g
- Cholesterol: 25mg