


When the weather starts warming up, or even when the holiday cookie platters seem a little too heavy, my soul just craves something bright! I’m talking about desserts that actually taste like sunshine, you know? That’s why I keep my recipe for Lemon Curd Thumbprint Cookies sacred. These aren’t just any cookies; they’re the perfect marriage of a melt-in-your-mouth, buttery shortbread cookie base and that incredible, mouth-puckeringly tart lemon curd center.
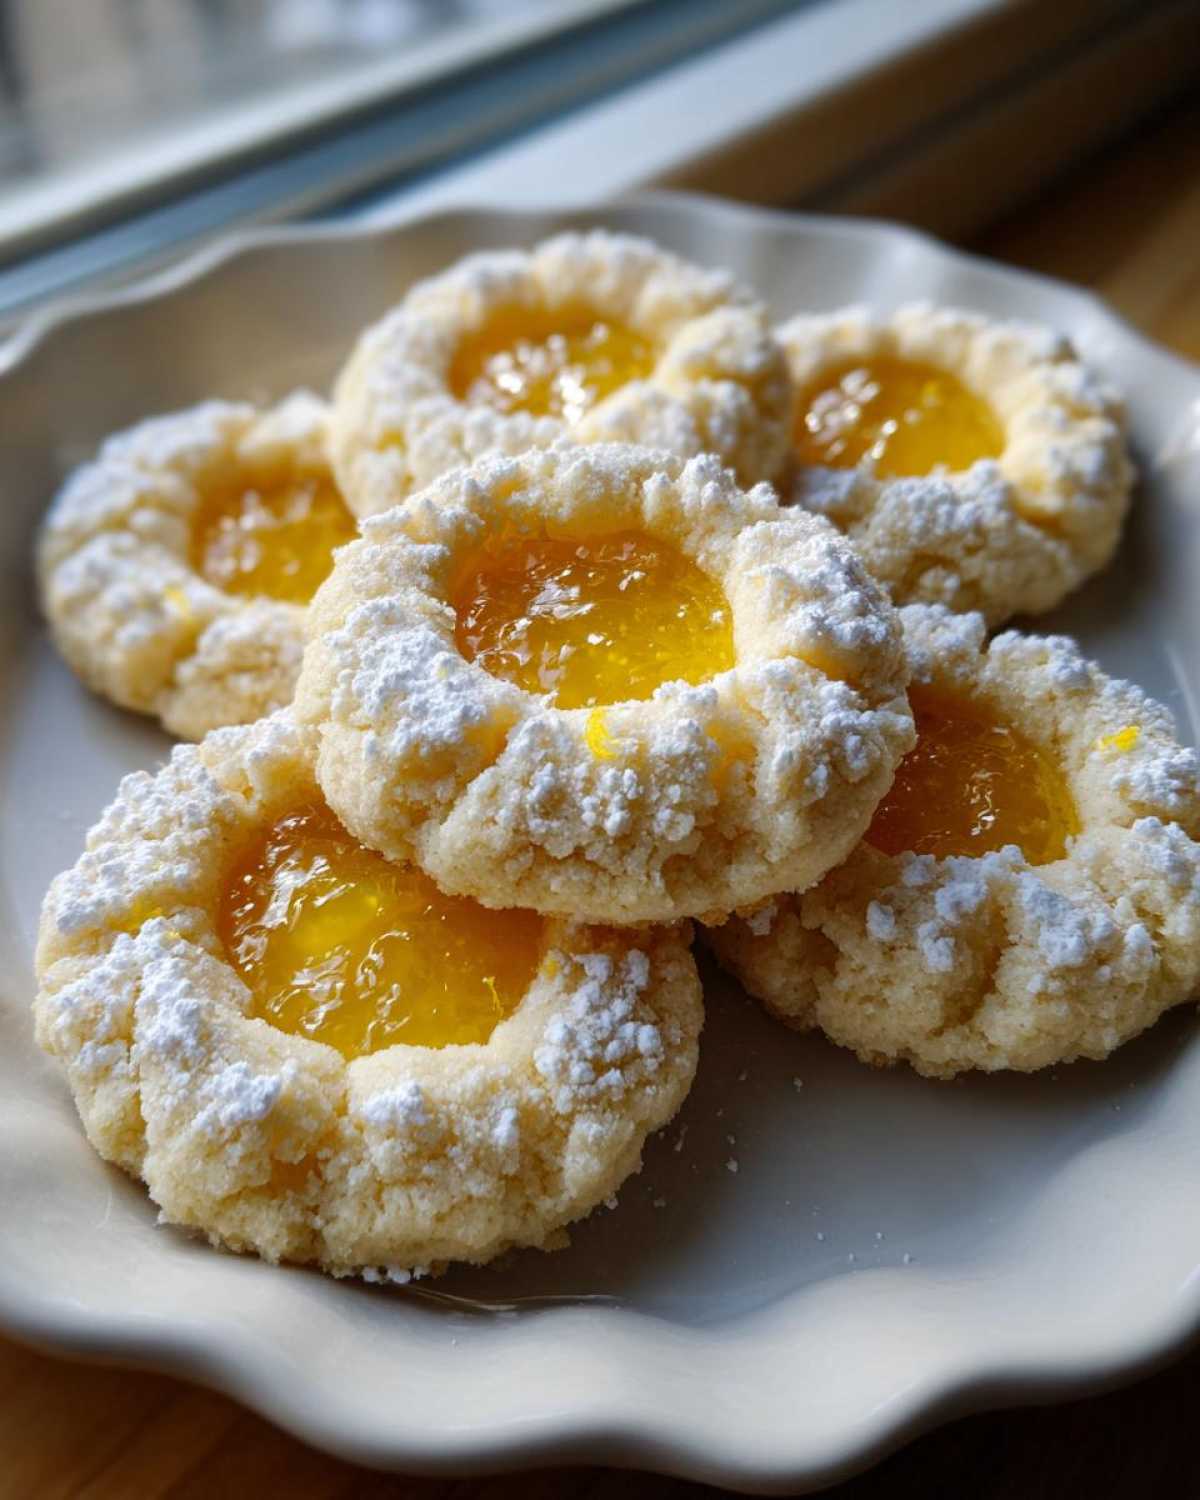
I’ve made batches of these for every church bazaar and tea party for the last ten years, and they always disappear first. Honestly, the gorgeous yellow pop against the pale, sandy cookie is half the fun. If you’re planning an epic cookie spread, you absolutely have to look at my ideas for a holiday cookie charcuterie board! But back to these beauties: It’s a classic cookie formula, sure, but the flavor contrast is what makes them seriously addictive. Trust me, you’re going to want to file this away for your next special occasion!
Why You Will Love These Lemon Curd Thumbprint Cookies
Seriously, these cookies just tick every single box. They are so much easier to assemble than they look, and the combination of textures is just divine. I’ve made these cookie variations before, like my cranberry orange ones, but the lemon is just superior in the spring.
- That incredible Buttery Shortbread Cookie Base just melts away.
- The bright, sharp pop from the Tangy Lemon Center Cookies keeps them from feeling too heavy.
- They look so elegant, perfect for any gathering!
- The dough chills easily, making them great for Make Ahead Cookie Recipes.
Ingredients for the Perfect Lemon Curd Thumbprint Cookies
Okay, gathering what you need is simple, but we have to be picky about a couple of things! For the base, you need 1 cup of unsalted butter—and it absolutely has to be softened, not melted! We also use 1/2 cup of granulated sugar, 1 large egg yolk, 1 teaspoon of vanilla extract, 2 cups of all-purpose flour, and just 1/4 teaspoon of salt. The star, of course, is the filling: 1 cup of prepared lemon curd. If you’re buying it, grab the best quality you can find because that tartness really shines through in these bright lemon baked goods. Powdered sugar dusting is totally optional but I usually skip it to let the yellow pop!
Crafting the Buttery Shortbread Cookie Base for Lemon Curd Thumbprint Cookies
Listen up, because the secret to these amazing Lemon Curd Thumbprint Cookies is developing a spectacular Buttery Shortbread Cookie Base. If you rush this part, the whole cookie falls apart, and we can’t have that!
First, you absolutely must make sure that 1 cup of butter is perfectly softened. Not greasy, not hard, but soft enough to leave an indentation if you push it. Cream that butter with your 1/2 cup of granulated sugar until it looks genuinely light and fluffy—this is where we introduce air, so don’t skimp on mixing time here!
Once the yolk and vanilla are mixed in, get your flour and salt ready in a separate bowl. Now, this is crucial for texture: you add the dry stuff gradually, mixing only until you *just* see everything come together into a soft dough. Seriously, stop the mixer the second you see the last flour streak disappear. Overmixing develops gluten, and gluten makes chewy cookies, but we want tender, shortbread-style cookies here. That’s the temperature control I preach about!
I like to wrap that beautiful dough up tight and let it chill for at least 30 minutes. Chilling keeps the shape stable when baking, which is essential for holding all that lovely lemon curd later on. You want your dough ready to form that Perfectly Rolled Cookie Dough!
Mixing and Chilling the Dough
So, remember the rule: cream butter and sugar until pale. Then, beat in the egg yolk and vanilla until they blend. Gradually introduce the flour and salt mixture, keeping the mixer on low speed until the dough just comes together. If you notice the bowl walls looking clean and the dough forming a shaggy ball—stop! Wrap it well, chill it for thirty minutes in the fridge, and then get ready for the fun part: shaping those perfect little nests for the curd!
If you struggle with keeping things neat, check out my obsession with cookies that stay soft for days—some of those techniques really help maintain the structure here too.
Shaping and Baking Your Lemon Curd Thumbprint Cookies
Now that our dough for the Lemon Curd Thumbprint Cookies is perfectly chilled, it’s time to make those signature nests we need for the filling. Preheat your oven to 350°F (175°C) and line those baking sheets with parchment paper. I can’t tell you how many times I learned the hard way that parchment paper is non-negotiable when baking shortbread!
Roll your dough into neat, 1-inch balls. I like to keep a little bowl of water nearby just in case my hands get too warm from rolling. Then, gently press down right into the center of each ball. You want a nice, deep well—not so deep that you punch right through to the pan, but deep enough to hold a good spoonful of curd later on. If the dough starts to crack severely around the edges, just pinch it back together gently.

Bake these babies for 10 to 12 minutes. This is important: the edges should just start looking lightly golden brown. Do not let the whole cookie turn dark! The centers should still look pale, almost underdone. This slight under-baking keeps that Buttery Shortbread Cookie Base tender. Take them out, wait just a minute, and get ready for a pro move.
Preheating and Pressing the Wells
This step is pure gold, and it’s why my cookies never collapse or look lopsided. As soon as you pull the cookies out, they are going to have puffed up a bit around that thumbprint. Before they cool completely, grab the back of a small measuring spoon (or your thumb again, but only if your hands are clean!) and gently press down into that center well again. This re-forms the divot so it’s ready to cradle the lemon curd perfectly!
Once that second press is done, let them cool on the sheet for five minutes, then move them carefully to a wire rack to cool all the way down. Seriously, you must wait until they are stone cold before adding the curd. If you want to see my secret for getting my cookies out of the pan without breaking a single one, you should peek at my tips for Grandma’s secret cookie that wins every swap!
Filling the Cookies: Achieving the Best Lemon Center Cookies
This is where the magic happens for our Lemon Curd Thumbprint Cookies! Once those buttery bases are completely cool—and I mean cold from sitting on the rack—it’s time to fill the wells. Don’t even think about adding the curd while they are warm, or you’ll end up with a gooey mess instead of those beautiful Tangy Lemon Center Cookies we’re aiming for.
If your store-bought lemon curd is feeling a little too stiff or jam-like, don’t panic! Just stir in a couple of drops of water or maybe a touch of fresh lemon juice until it’s spreadable, like a thick pudding. You only need about half a teaspoon in each indentation. You want that bright, tart flavor to be the star, not just a tiny speck!
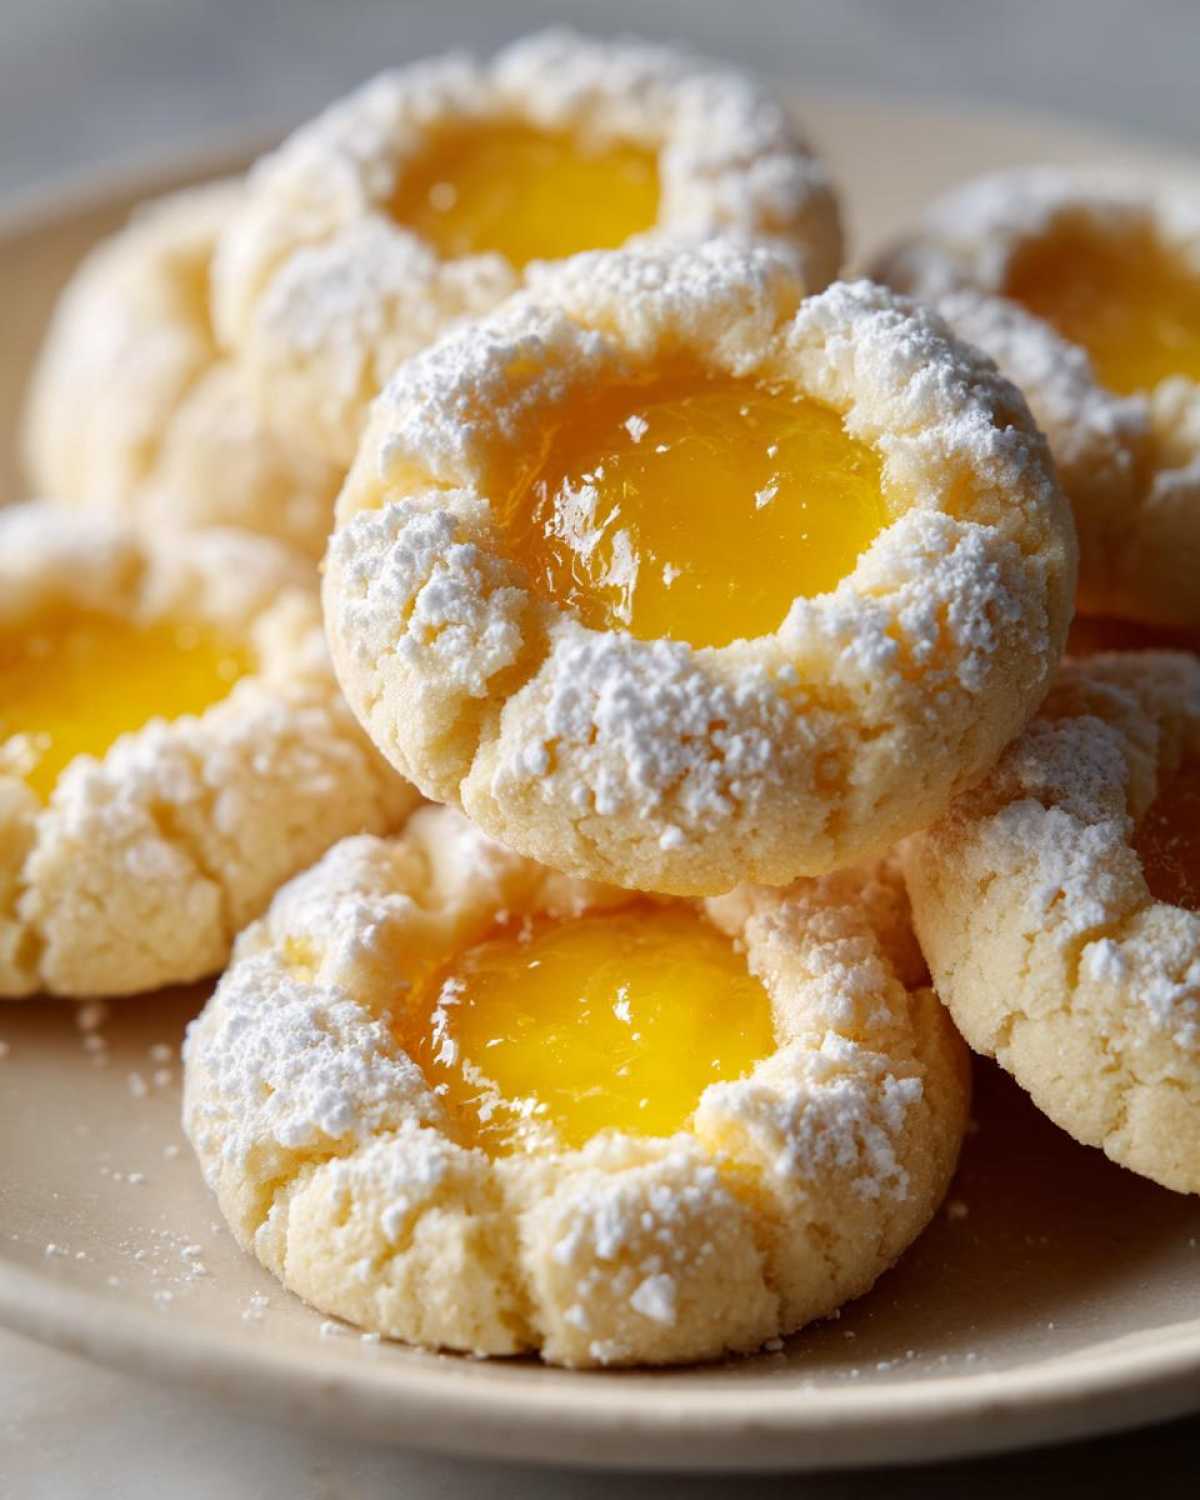
If you scroll through my post about lemon raspberry loaf cake, you know I’m a huge fan of presentation, and chilling the filled cookies is key for presentation!
Tips to Prevent Curd Sinking or Drying
Most of the time, you’re done once you fill them, but if you want extra insurance against the curd sinking into the cookie base during storage, there’s an optional little trick. If you decide you want to bake the curd in for a fully set center, you need to chill those filled cookies again for about 15 minutes before they go back into the oven.
If you do this secondary bake—which should only be for about 2 or 3 minutes back at 350°F—it helps lock that filling in place. This ensures you have perfectly set Tangy Lemon Center Cookies that hold up great for a cookie swap, but I usually skip it because I prefer the richer texture of just letting the cool curd sit in the fully baked shell overnight!
Expert Tips for Making Lemon Curd Thumbprint Cookies
To push these Lemon Curd Thumbprint Cookies from ‘good’ to ‘must-make-again,’ you need a few tricks up your sleeve. The goal here is always that perfect contrast: your Buttery Shortbread Cookie Base should be tender, almost sandy, to balance the aggressive tang of the lemon. If they taste too sweet overall, your curd isn’t sharp enough!
My biggest piece of advice for texture is to grate your own lemon zest for the dough mixture, even if you’re using store-bought curd. Just a teaspoon of fresh zest mixed into the flour helps boost the brightness in the cookie itself. Also, for these to truly qualify as Elegant Tea Party Cookies, make sure your thumbprint wells are uniform! Uniformity leads to uniform baking times.

If you want them to look professionally finished without the fuss of a glaze, try rolling the chilled dough balls in fine granulated sugar before you press the thumbprint in. That gives them a gorgeous, slightly sparkly finish. For more simple baking brilliance, check out my go-to Easy Lemon Thumbprint Cookie Recipe guide!
Storage and Shelf Life for Your Lemon Curd Thumbprint Cookies
Storing these sunny little treats is blissfully easy, which is why they are some of my favorites for holiday baking prep! You don’t need to refrigerate them at all, which is great since you want that buttery base to stay slightly soft. Just place your finished Lemon Curd Thumbprint Cookies in a good, airtight container.
They travel well and hold up beautifully at room temperature for up to four days. This confirms they are fantastic Make Ahead Cookie Recipes! If you’re planning way ahead, you can freeze the plain baked shells, but always fill them right before you plan to serve them so that curd stays perfectly bright and tangy. For more on prepping ahead, take a peek at my post on Make Ahead Cookie Recipes!
Frequently Asked Questions About These Citrus Dessert Baking Ideas
I always get the same questions when I bring these beauties out, so let’s tackle them head-on. If you’ve managed to make the dough successfully, you’re practically done with this Easy Lemon Thumbprint Cookie Recipe!
Can I use a different filling instead of lemon curd?
Oh, absolutely! That’s what makes the thumbprint cookie such a classic variation. You can easily swap the lemon curd for raspberry jam, apricot preserves, or even chocolate ganache. Just remember if you’re using jam, you might want to add that optional second, short bake to set the filling firmer, especially if you are making them for a cookie swap!
I want to emphasize the tartness—should I use fresh lemon juice?
Yes! If you are making your own curd, definitely use fresh lemon juice. But even if you are using pre-made curd, I highly recommend adding 1/2 teaspoon of fresh lemon zest to the cookie dough when you mix in the flour. It really boosts those underlying lemon notes in the Citrus Dessert Baking Ideas without making the cookie itself sour.
Can I make the dough ahead of time? Does it count as one of the best Make Ahead Cookie Recipes?
I think so! This dough is excellent for making ahead. Once you wrap that dough tightly after mixing, it handles the chill like a champ for up to three days in the fridge. Just let it sit on the counter for about 10 minutes before rolling the balls out. It really helps streamline the process when you’re busy!
Why do my cookies spread out so much when baking?
This almost always comes down to the butter temperature. If your butter was too warm or completely melted when you started creaming it, the cookie structure won’t hold up. Make sure your butter is softened but still cool, and don’t skip the 30-minute chill time for the rolled balls. That cold fat shrinks just enough in the oven to keep those perfect Tangy Lemon Center Cookies from spreading into flat discs!
Nutritional Estimate for Lemon Curd Thumbprint Cookies
Now, I’m not a nutritionist! I’m just a cook who loves using real butter and sugar, so please take these numbers with a grain of salt—or maybe a pinch of sugar! This breakdown is just an estimate based on one cookie using the ingredient amounts listed in the recipe.
For one serving, which is one cookie, you’re looking at about 145 calories. We’ve got roughly 10 grams of sugar and about 9 grams of fat in there, with 2 grams of protein. Since we’re using butter and egg yolks, expect about 5 grams of saturated fat. These are treats, not diet food, but wow, are they worth it!
Share Your Bright Lemon Baked Goods Experience
I just absolutely love seeing your kitchen adventures! Making these Lemon Curd Thumbprint Cookies is such a joy, and I really want to know how they turned out for you. Did the buttery base hold up perfectly? Was your lemon curd center as bright and tangy as you hoped? Don’t be shy—drop a rating down below and let me know what you thought!
If you ended up making these for a special event or just because you needed a burst of sunshine, share a picture! Tag me so I can see your beautiful bright lemon baked goods. It truly makes my day when I see these classic recipes coming to life in your homes.
These are definitely going to be on my list when I start planning out my Spring Dessert Recipes Cookies rotation. Let me know if you’re already planning to swap in a different fruit next time!
PrintLemon Curd Thumbprint Cookies

A recipe for buttery shortbread cookies with a tangy lemon curd center, perfect for tea parties or holidays.
- Prep Time: 25 min
- Cook Time: 15 min
- Total Time: 40 min
- Yield: About 24 cookies
- Category: Dessert
- Method: Baking
- Cuisine: American
- Diet: Vegetarian
Ingredients
- 1 cup unsalted butter, softened
- 1/2 cup granulated sugar
- 1 large egg yolk
- 1 teaspoon vanilla extract
- 2 cups all-purpose flour
- 1/4 teaspoon salt
- 1 cup prepared lemon curd
- Powdered sugar for dusting (optional)
Instructions
- In a large bowl, cream together the softened butter and granulated sugar until light and fluffy.
- Beat in the egg yolk and vanilla extract until just combined.
- In a separate bowl, whisk together the flour and salt. Gradually add the dry ingredients to the wet ingredients, mixing on low speed until a soft dough forms. Do not overmix.
- Wrap the dough in plastic wrap and chill in the refrigerator for at least 30 minutes.
- Preheat your oven to 350°F (175°C). Line baking sheets with parchment paper.
- Roll the chilled dough into small balls, about 1 inch in diameter. Place them on the prepared baking sheets, leaving space between them.
- Use your thumb or the back of a small measuring spoon to press a deep indentation, or well, into the center of each dough ball.
- Bake for 10 to 12 minutes, or until the edges are lightly golden brown. The centers should still look pale.
- Remove the cookies from the oven. While they are still warm, gently press the indentations down again if they have puffed up.
- Let the cookies cool on the baking sheet for 5 minutes before transferring them to a wire rack to cool completely.
- Once completely cool, spoon about 1/2 teaspoon of lemon curd into each indentation.
- If desired, dust the finished cookies lightly with powdered sugar before serving.
Notes
- If your lemon curd seems too thick, stir in a few drops of water or lemon juice to make it easier to spoon into the cookies.
- To prevent the curd from sinking too much during the second bake (if you choose to bake with curd), chill the filled cookies for 15 minutes before returning them to the oven for 2-3 minutes at 350°F (175°C).
- Store the finished cookies in an airtight container at room temperature for up to 4 days.
Nutrition
- Serving Size: 1 cookie
- Calories: 145
- Sugar: 10
- Sodium: 55
- Fat: 9
- Saturated Fat: 5
- Unsaturated Fat: 4
- Trans Fat: 0
- Carbohydrates: 15
- Fiber: 0
- Protein: 2
- Cholesterol: 30