

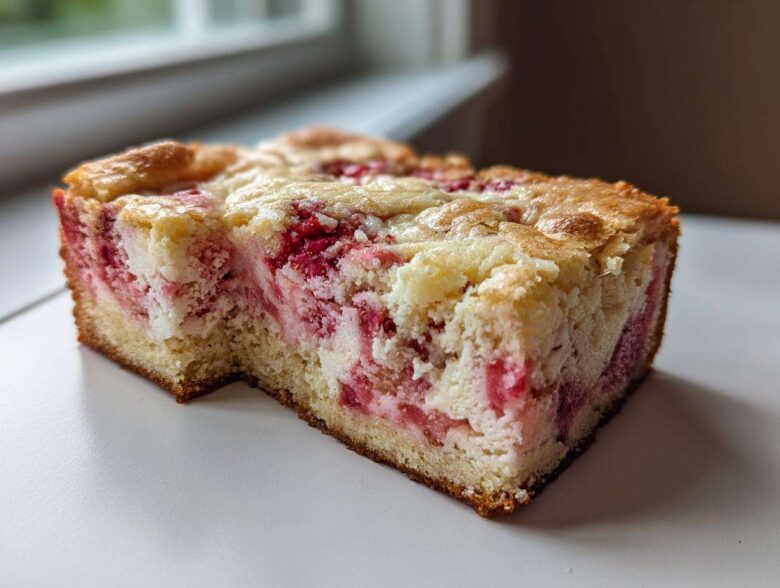
Oh, my gosh, I have to tell you about the cake that absolutely steals the show every single time I take it out of the oven! If you love desserts that look incredibly complicated but are secretly a breeze to whip up—this is it. We are talking about the ultimate showstopper: the Strawberry Earthquake Cake with Cream Cheese Swirl. Seriously, when that cake comes out, everyone stops talking. It’s that gorgeous mix of vibrant strawberry and rich, tangy cream cheese hiding underneath. I’ve tried a million desserts for parties, but none get the reaction this one does. It’s just magic!
Why You Will Bake This Strawberry Earthquake Cake with Cream Cheese Swirl
Folks, this cake hits every spot you want in a decadent dessert without making you stress out. Trust me, this recipe is amazing because:
- The texture is unreal—that gooey center is what earns it the “earthquake” name!
- The flavor balance is perfect: bright, fruity strawberry meets that rich, tangy cream cheese swirl.
- It uses a simple cake mix base, so assembly is lightning fast.
- It looks like you spent hours on it, but honestly, it comes together in minutes.
Essential Ingredients for Your Strawberry Earthquake Cake with Cream Cheese Swirl
Okay, let’s talk about the lineup. The beautiful thing about this Strawberry Cream Cheese Swirl Cake Recipe is that it relies on pantry staples and one small box of gelatin magic. You need the white cake mix for the structure, of course, along with the oil, water, and four eggs for the perfect cake batter base.
Then comes the star duo! For that jiggly, colorful layer you pour over the top, you’ll need the strawberry gelatin mix—remember to have boiling water ready for that step. And for the essential swirl? This is key: your 8 ounces of cream cheese absolutely *must* be softened. If it’s cold, you’ll get lumps, and we want smooth, gorgeous rivers of cheesecake running through our cake! Granulated sugar, one more egg, and vanilla bind that filling together beautifully.
Finally, don’t forget your strawberries! I use fresh mainly, but frozen works in a pinch. Scatter them over the top right before you swirl everything around.
Step-by-Step Instructions: Making the Strawberry Cream Cheese Swirl Cake Recipe
Ready to see the magic happen? This whole process takes about 20 minutes of active prep time, and you’ll bake it for around 50 minutes. Don’t worry that you’re using a mix; we’re just leveling up boxed baking here! Just follow these steps exactly, and you’ll have that incredible texture.
Preparing the Base and Gelatin Layer
First things first, get your oven hot! Preheat it to 350°F (175°C). Grab that 9×13 inch pan and really grease and flour it well. We need a clean release later! In your big mixing bowl, toss in your white cake mix, the 1 cup of water, the oil, and those four eggs. You want to mix this gently just until everything is combined—seriously, stop mixing right there. Then, turn the mixer to medium and beat it for exactly two minutes. Pour that batter right into your prepared pan.
Now for the liquid layer! In a separate bowl, dissolve that strawberry gelatin mix right into 1 cup of boiling water. Stir until it looks completely clear, like liquid candy. Then whisk in 1 cup of cold water. Once it’s mixed, slowly pour this entire gelatin mixture right over the cake batter in the pan. It will look thin on top, but that’s exactly how it should look!
Creating the Cream Cheese Swirl and Assembly
In your medium bowl, beat your softened cream cheese until it’s lovely and smooth. No lumps allowed here! Beat in the half-cup of sugar, the single remaining egg, and that teaspoon of vanilla until it’s perfectly uniform. This is your cheesecake filling that makes this Baking with Cream Cheese Swirl Technique work.
Drop spoonfuls of this delicious cream cheese mixture evenly over the gelatin layer. Don’t try to spread it—just drop it around the pan. Then, take your sliced strawberries and scatter them over everything. Here’s the crucial part for the signature look of the Strawberry Earthquake Cake with Cream Cheese Swirl: Take a butter knife or a skewer and gently move it through the layers just once or twice to swirl them together. You want marbled ribbons, not a purple mix. Don’t overmix, or you’ll lose the effect.
Baking and Cooling the Gooey Swirl Cake
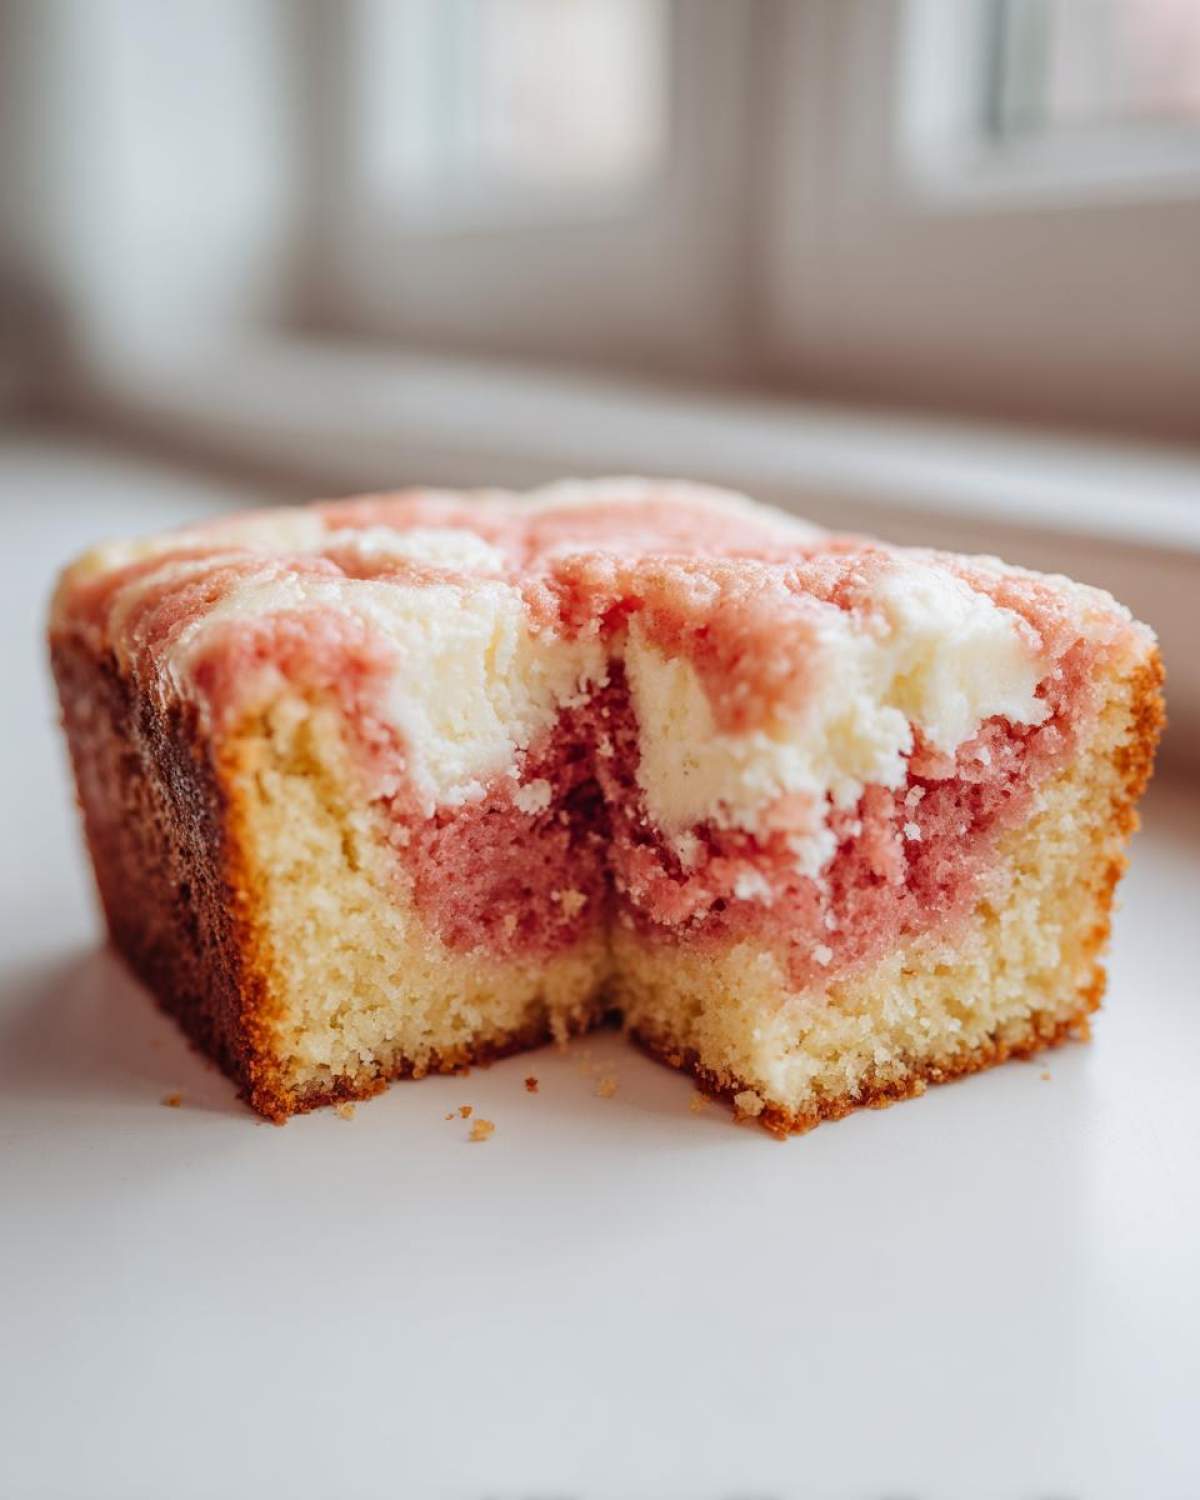
Slide that pan into the preheated oven. You are looking at 45 to 55 minutes of baking time. It cooks a little differently because of all that liquid! You’ll know it’s done when you can insert a toothpick near the center and it comes out clean, though it might have a few moist crumbs clinging to it. But listen, I have to tell you—the center is *supposed* to stay a little gooey; that makes it an earthquake cake! Let it cool completely on a rack on the counter before you even think about slicing it. It sets up perfectly as it cools.
Expert Tips for the Best Strawberry Earthquake Cake with Cream Cheese Swirl
Even though this cake is simple, a few little secrets elevate it from good to absolutely show-stopping. When I’m making this moist strawberry cake baking tips recipe for someone special, I always follow these guidelines. If you use frozen strawberries, keep them frozen solid—don’t thaw them! Thawed berries release too much water and can dilute that beautiful gelatin layer.
Here’s one thing I learned the hard way: if you really want those cream cheese ribbons to stand up nicely and not melt completely into the gelatin, chill that cream cheese mixture for about 15 minutes before you drop spoonfuls onto the batter. It gives you more control over that swirl when you drag your knife through it.
Also, think about your pan! While the 9×13 is perfect for a nice thin layer, if you try to cram this into a smaller square pan, the center might stay gummy for way too long and never set up right. Stick to the big pan for the best texture!
Ingredient Notes and Substitutions for Your Swirled Cake
Let’s talk substitutions, because I know we all raid our pantries differently! The base of this Simple Swirled Cake Baking Project is really the white cake mix. If you absolutely don’t have white, yellow cake mix will work, but you might lose a little of that perfect pale pink background color we’re aiming for. Honestly, skip the chocolate or spice mixes here—they fight with the strawberry flavor we’re highlighting.
What if you’re feeling adventurous and want a different fruit swirl? You can 100% swap that strawberry gelatin for raspberry or cherry! The technique is exactly the same, though raspberry often gives a slightly richer color. Just make sure you use the corresponding flavor of fresh or frozen fruit if you want to match them up perfectly.
Now, this is important for the “earthquake” effect: If you try using a fat-free cream cheese, you are going to mess with the density of that swirl layer, and it won’t balance the gelatin layer correctly. Stick to full-fat, softened cream cheese—it’s worth it! Changing the oil, however, is usually fine; vegetable oil is neutral, but canola oil works just as well. Just don’t try substituting oil for applesauce or anything like that, or you’ll lose the required richness in the cake bottom.
Serving Suggestions for Your Decadent Strawberry Layer Cake Tutorial
You’ve made this gorgeous, gooey masterpiece—now how do you present it? Because the Strawberry Earthquake Cake with Cream Cheese Swirl is already so rich and loaded with texture, sometimes less is truly more when it comes to toppings. I think it looks absolutely stunning just served plain after it has completely cooled. The layers of pink, white, and bright red berries peeking through are presentation enough!
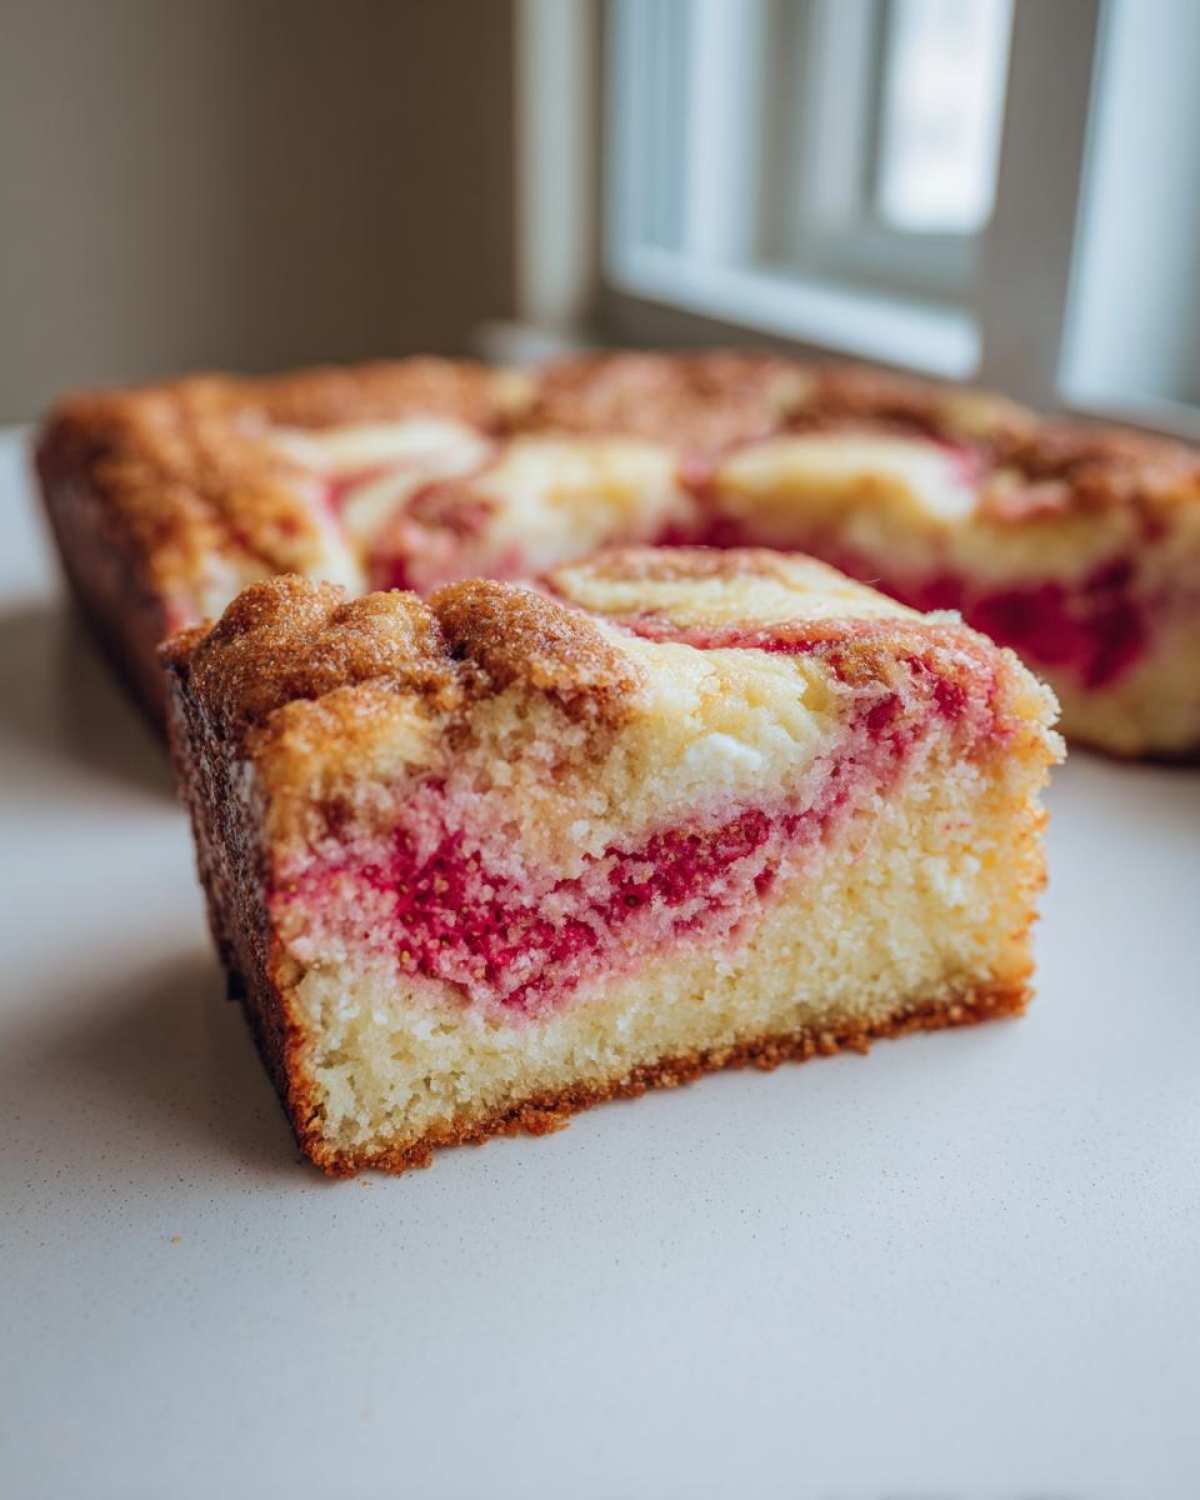
However, if you are serving it for a big gathering or maybe you just really love frosting, I highly recommend a simple dollop of freshly whipped cream on top of each slice. The lightness of the cream cuts through the density of the cake and the richness of the cheesecake swirl perfectly. It’s heavenly!
If you insist on a little something extra across the whole cake, skip the heavy frosting! Remember, the top is already swirled. A very light, delicate dusting of powdered sugar right before serving is my go-to look. It catches the light beautifully. You can use a fine mesh sieve and just barely dust it over the top; it highlights the peaks and valleys of the swirl crust.
Now, for the temperature—this is a vital point for this specific dessert. While you *can* eat it slightly warm, I strongly advise letting it cool completely to room temperature before slicing. When it’s too warm, that gooey center just oozes everywhere, and while that tastes fine, the slices won’t hold their impressive shape. If you’ve refrigerated it because you made it ahead of time (which is a great idea for the flavor!), let it sit out on the counter for at least an hour before cutting. It softens up just enough to be perfect.
Storage and Reheating Instructions for Leftover Strawberry Earthquake Cake
So, you managed to have leftovers of this showstopper? Lucky you! That’s rare around my house, I tell you. Because we have that decadent cream cheese layer in here, we have to be a tiny bit more careful with storage than with a regular cake. The good news is that being a moist cake, it keeps quite well!
For short-term keeping, you can totally leave the Easy Gooey Swirl Cake Baking Guide results out on the counter for about a day. I always make sure to cover it tightly with plastic wrap or use a proper cake dome. Room temperature is usually fine for 24 hours, especially since it has gelatin, which holds up better than a thick, real buttercream frosting would.
If you need it to last longer than that—and I hope you do!—it really needs to go into the fridge. Place your leftover slices or the whole cake (if you can fit it) into an airtight container. I find that putting a layer of plastic wrap directly onto the cake surface before putting the lid on prevents any fridge odors from getting in. It will last beautifully for about four days in the refrigerator. Trust me, the flavor actually deepens overnight!
Now, about freezing this gorgeous thing? I generally steer people away from freezing the Strawberry Earthquake Cake with Cream Cheese Swirl. Freezing can ruin that beautiful, delicate gooey center. The ice crystals mess up the texture of the gelatin and the cream cheese when they thaw, often resulting in a sad, watery patch. If you absolutely must freeze it, slice it first, wrap each slice tightly in plastic wrap, and then wrap it again in foil. Thaw it slowly in the refrigerator overnight. It won’t be quite the same, but it saves it from going stale!
When you want to serve that refrigerated slice, please, please let it come back to room temperature for about an hour. Cold cakes taste muted! Letting it warm up even slightly brings back all that wonderful strawberry and vanilla flavor. Seriously, temperature matters!
Frequently Asked Questions About the Strawberry Earthquake Cake with Cream Cheese Swirl
Why is this called an Earthquake Cake?
Oh, that’s my favorite question! It gets the name because of what happens inside the pan while it bakes. When you layer the cake mix, the gelatin mixture, and the cream cheese filling, something wild happens in the oven. The layers sink and shift, creating those gorgeous, unpredictable dips and valleys, which look just like a tiny, delicious earthquake happened right in your 9×13 pan! It’s the definition of a Simple Swirled Cake Baking Project that looks chaotic but tastes heavenly.
Can I use fresh strawberries instead of frozen?
Absolutely, and I usually prefer fresh ones myself! If you use fresh, just make sure they are ripe and slice them evenly. The only thing you must remember when using fresh berries is that they release a little more water than pre-frozen ones. If your berries look extra watery when you slice them, pat them gently with a paper towel before scattering them over the cream cheese layer. This keeps your gelatin layer from getting too thin.
Do I absolutely have to use a 9×13 inch pan?
For this specific **Strawberry Cream Cheese Swirl Cake Recipe**, yes, I really push for the 9×13 pan. When you use this method—pouring liquid gelatin over the batter—you need a pan that allows the cake to bake relatively flat and fast. If you put this batter into a deep springform or a round layer cake pan, the liquid layers might not set properly, and you might end up with an underbaked center that’s just too wet instead of that perfect gooey pocket.
What is the best way to store this dessert?
Since this is one of my favorite Dessert Recipes with Cream Cheese Layer options, storage is similar to cheesecake. It must be kept covered in the fridge after it cools completely. It stays really good for about three or four days refrigerated, and honestly, I think the flavors meld and get even better the next day!
Estimated Nutritional Data for This Dessert Recipe
Okay, listen up, because this is where we get real about what we’re digging into! This Strawberry Earthquake Cake with Cream Cheese Swirl is definitely in the decadent category—we aren’t kidding when we call it rich! The nutrition facts I’ve calculated below give you a general idea based on the ingredients listed, but remember, this is just an estimate.
I always use the same box mixes and exact measurements, but your brand of cream cheese or oil might fluctuate things slightly. If you use fresh strawberries versus frozen, that doesn’t affect the calorie count much, but it affects the overall deliciousness factor, which is unquantifiable, obviously! Always check the disclaimer on my site for the legal fine print, but for home baking purposes, here’s the scoop for one slice:
- Serving Size: 1 slice
- Calories: 350
- Sugar: 40g (Yep, it’s sweet, but that’s the point!)
- Fat: 16g
- Saturated Fat: 5g
- Carbohydrates: 48g
- Protein: 4g
See? Plenty of sugar and fat to give you that wonderful, satisfying richness that only a good cream cheese swirl can deliver. Enjoy every bite responsibly, okay?
PrintStrawberry Earthquake Cake with Cream Cheese Swirl

Follow this guide to bake a moist strawberry cake featuring a rich, gooey center and a distinct cream cheese swirl pattern.
- Prep Time: 20 min
- Cook Time: 50 min
- Total Time: 1 hour 10 min
- Yield: 12 servings
- Category: Dessert
- Method: Baking
- Cuisine: American
- Diet: Vegetarian
Ingredients
- 1 box (15.25 ounces) white cake mix
- 1 cup water
- 1/2 cup vegetable oil
- 4 large eggs
- 1 package (3 ounces) strawberry gelatin mix
- 1 cup boiling water
- 1 cup cold water
- 1 package (8 ounces) cream cheese, softened
- 1/2 cup granulated sugar
- 1 large egg
- 1 teaspoon vanilla extract
- 1 cup fresh or frozen strawberries, sliced
Instructions
- Preheat your oven to 350 degrees Fahrenheit (175 degrees Celsius). Grease and flour a 9×13 inch baking pan.
- In a large bowl, combine the cake mix, 1 cup water, 1/2 cup oil, and 4 eggs. Mix on low speed until just combined, then beat on medium speed for two minutes. Pour the batter into the prepared pan.
- In a separate bowl, dissolve the strawberry gelatin mix in 1 cup of boiling water. Stir until completely dissolved. Add 1 cup of cold water and mix well. Pour this gelatin mixture evenly over the cake batter.
- In a medium bowl, beat the softened cream cheese, 1/2 cup sugar, 1 egg, and vanilla extract until smooth.
- Drop spoonfuls of the cream cheese mixture over the gelatin layer in the cake pan.
- Gently scatter the sliced strawberries over the top.
- Use a knife or skewer to gently swirl the cream cheese mixture into the layers to create a marbled effect. Do not overmix.
- Bake for 45 to 55 minutes, or until a toothpick inserted near the center comes out clean. The center will remain slightly gooey.
- Let the cake cool completely in the pan on a wire rack before serving.
Notes
- For a richer flavor, use fresh strawberries instead of frozen. If using frozen, do not thaw them first.
- If you prefer a firmer swirl, chill the cream cheese mixture slightly before swirling it into the batter.
- This cake is best served at room temperature or slightly chilled.
Nutrition
- Serving Size: 1 slice
- Calories: 350
- Sugar: 40
- Sodium: 300
- Fat: 16
- Saturated Fat: 5
- Unsaturated Fat: 11
- Trans Fat: 0
- Carbohydrates: 48
- Fiber: 1
- Protein: 4
- Cholesterol: 55