

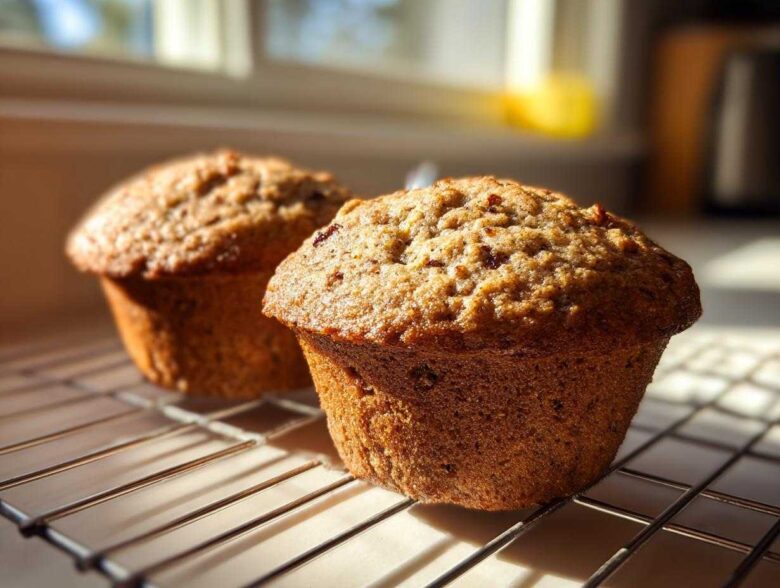
Honestly, finding a truly good breakfast muffin that doesn’t taste like cardboard after sitting out for five minutes is a true struggle. I’ve thrown out way too many batches of so-called healthy muffins that turned out dry and crumbly. But friends, I finally cracked the code, and these **bran muffins** are the answer we’ve all been waiting for! I spent ages messing around with ratios because I wanted that perfect sweet spot: high fiber for a healthy start, serious moisture that lasts, and the ultimate convenience of being freezer-friendly for those hectic mornings. Guess what? After many dry attempts, I perfected this specific **bran muffins** recipe, and trust me, these are spongy, a little sweet, and unbelievably good. You can find more of my favorite breakfast ideas over here at my breakfast section!
Why These Are the Best Bran Muffins You Will Ever Bake
So many recipes promise great things but deliver crunchy disappointments. We’re done with that! These particular **bran muffins** are different because they focus on what really matters. They are satisfyingly dense without being heavy, and they truly keep that moist texture for days. I promise!
- They are sturdy enough to handle a quick smear of butter but tender enough to feel like a real treat.
- You get a huge punch of fiber, making them perfect for that healthy morning routine.
If you want to dive deeper into how I managed to keep my muffins soft, check out my deep dive on preventing dry baked goods.
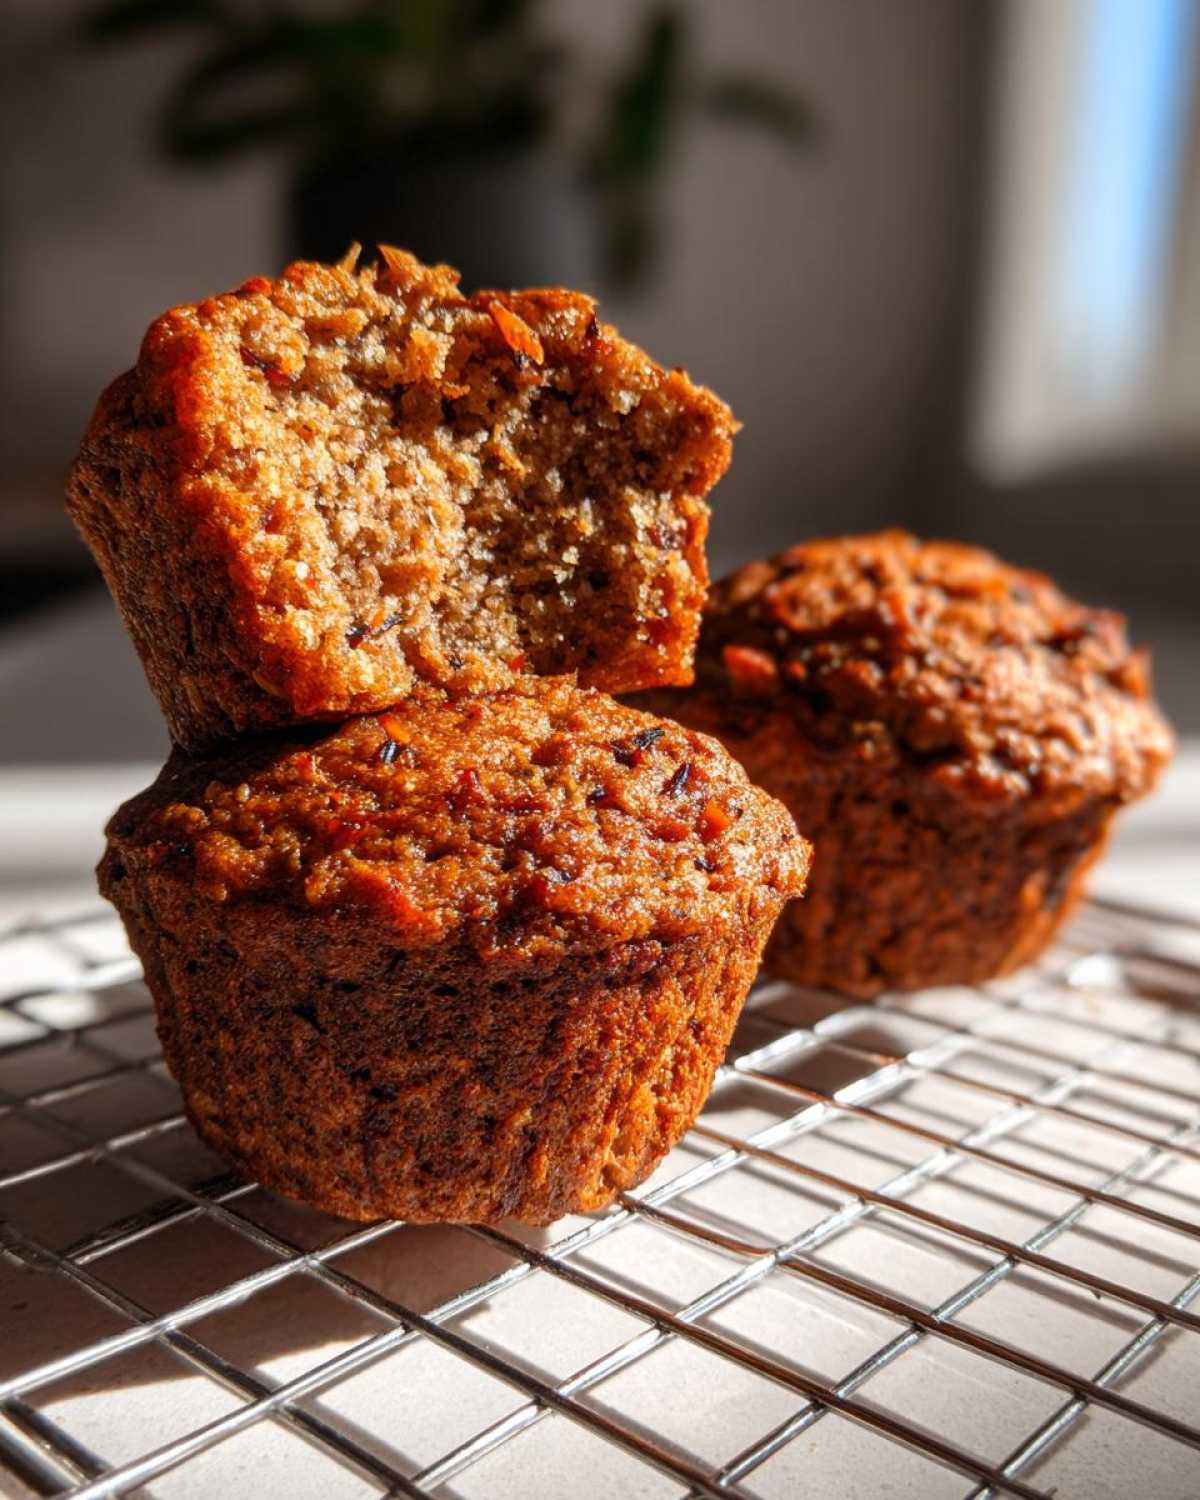
Achieving Ultimate Moisture in Your Bran Muffins
It all comes down to what we put in instead of taking out! We use buttermilk for a bit of tang and incredible tenderness, and the unsweetened applesauce replaces butter without sacrificing moisture. That combination is the secret handshake for softness in every single bite.
High Fiber Muffins Perfect for Grab And Go Breakfast
Let’s be real—life is busy. These **High Fiber Muffins** are designed to be mixed, baked, and then stashed away for your emergency breakfast drawer. They are wholesome fuel that keeps you full until lunchtime, no complicated ingredient list required!
Essential Ingredients for Moist Bran Muffins
Okay, pull out your mixing bowls! When we talk about making the best bran muffins, the ingredients aren’t just suggestions; they are the building blocks of moisture success. Trust me, using the right stuff makes separating the dry from the wet so much easier later on. Here is exactly what you need for a dozen perfect muffins:
- 1 cup wheat bran cereal (that’s the base, don’t skip this!)
- 1 cup buttermilk (Hello, tenderness!)
- 1 large egg
- 1/4 cup vegetable oil (for a silky texture)
- 1/4 cup unsweetened applesauce (my little moisture secret)
- 1/2 cup packed brown sugar (gives depth, white sugar just doesn’t hit right here)
- 1 teaspoon vanilla extract
- 1 cup whole wheat flour
- 1 teaspoon baking soda
- 1/2 teaspoon salt
- 1/2 cup raisins or dried cranberries (only if you want a fruity surprise!)
I always think about how these ingredients work together. If you’re looking for other great wholesome recipes, you can browse my hash recipes, but these muffins are definitely a staple!
Ingredient Notes and Substitutions for Bran Muffins
Now, let’s talk about tweaking things, because sometimes you run out of stuff! The brown sugar is key for that deep, slightly caramelized flavor, but if you’re aiming for something closer to Naturally Sweetened Muffins, you can swap it out for 1/3 cup of maple syrup. Just remember that maple syrup is wetter, so be careful not to add extra liquid!
Speaking of swaps, if you’re curious about an Oat Bran Muffins Idea, you absolutely can substitute oat bran for the regular wheat bran. It’s delicious! The only hitch is that oat bran doesn’t absorb liquid quite the same way. So, if you switch, only let that mixture soak for about five minutes instead of the full ten called for in the main instructions. That little adjustment keeps everything from getting too soupy.
Simple Muffin Baking: How to Prepare Your Bran Muffins
Baking these **bran muffins** is honestly so fast, which is why they made it onto my list of favorites for Easy Muffin Recipes. You can find more on my easy recipes over here at this collection! You can have these ready for the oven in about ten minutes, tops! First thing’s first: get your oven fired up to a hot 400 degrees F (200 degrees C). You need that initial blast of heat to get a nice dome on top. Then, line up your 12-cup muffin tin or grease it really well—we don’t want any sticking!
Step two is crucial for that moisture we keep talking about: combine your wheat bran cereal with the buttermilk right in a medium bowl. You need to let that sit for a full 10 minutes. Yes, 10 minutes! This lets the bran truly soak up the liquid and get soft, which is the foundation for our successful recipe. While that’s happening, whisk your egg, oil, applesauce, brown sugar, and vanilla until everything looks happy together in a bigger bowl.
Once your bran has soaked, stir it into the wet ingredients. Then, whisk your dry stuff—flour, baking soda, and salt—separately. Add the dry mix to the wet, and gently fold until just combined. You want just a few streaks of dry flour still showing when you stop! Divide that amazing batter into your cups and bake them for 15 to 18 minutes. They’ll be done when a toothpick comes out clean. Easy peasy!
Mixing Tips for Perfect Bran Muffins Texture
I cannot stress this enough: Do NOT overmix! When you add those dry ingredients, mix only until those flour streaks disappear, and then stop immediately. Seriously, put the spoon down! If you mix too much, you develop the gluten in the whole wheat flour too aggressively. That’s what leads to tough, rubbery muffins—the exact opposite of the soft, **bran muffins** we are trying to achieve here. We want tenderness, not chewiness!
Tips for Success with Homemade Bran Muffins
Baking is science, but it’s also intuition, right? I’ve learned a few little tricks over the years that take these **Homemade Bran Muffins** from ‘pretty good’ to ‘I need to hide these from my kids’ good. These aren’t complicated tricks; they just respect what the batter needs to develop that incredible, lasting moisture that makes these the Best Bran Muffins.
First, that oven temperature is important! We start hot at 400 degrees F, remember? That high heat sets the outside quickly and gives you a nice lift, preventing a dense, flat top. But don’t open that door early! Wait until that 15-minute mark has passed before you even think about peeking. Any sudden temperature drop can cause your perfectly risen muffins to deflate faster than a popped balloon.
My second tip focuses on the toothpick test. Yes, you need a toothpick to check for doneness, but don’t just stab it once and pull it out. Insert the toothpick near the center, pull it out, and look at what sticks. You are hunting for moist crumbs clinging to the wood—that means the center is cooked but still hydrated. If it comes out totally dry, you’ve gone too far, and you’ve officially lost some of that amazing texture we worked for!
Finally, don’t worry if the tops look a little cracked—that means you used whole wheat flour and applesauce, which is a win in my book! These signs of character just show you’ve made genuinely Wholesome Baked Goods that aren’t full of artificial fluff. Cool them completely on the rack before you even attempt to store them. If you bag warm muffins, you’re trapping steam, and steamed muffins turn gummy fast. Patience pays off!
For more baking wisdom about creating the best wholesome baked goods, you can check out my section dedicated to them!
Make-Ahead & Freezer Friendly Muffins Storage
This is perhaps my favorite part about this Bran Muffins Recipe: they are absolute champs when it comes to making food ahead of time! If you want true Grab And Go Breakfast options, you have to plan ahead, and these are perfect for it. But listen closely, because freezing them wrong ruins the moisture!
First, and I mean absolutely first, you must let them cool completely. I mean room temperature, totally done cooling on a wire rack. If you bag them even slightly warm, you create condensation, and that condensation turns into sad, soggy spots on your beautiful muffins. Once they are stone cold, pop them into a freezer-safe bag or an airtight container. They stay fantastic for up to three months!
When you need one, you have options! You can thaw them overnight on the counter, or, if you’re in a rush, a quick 15-second zap in the microwave brings them right back to life. It’s like magic. If you need more make-ahead ideas, I have some amazing freezer breakfast meals I prep!
Variations on Classic Bran Muffins
While this recipe stands strong as a classic, sometimes I just crave a little something extra in my morning bake, right? Don’t think you’re stuck with just bran; these batters are so forgiving! If you have leftover apples or a handful of fresh blueberries hanging around, this mix is ready for them. When you get to the point where you fold in the raisins or cranberries, that’s your moment to shine. Whether you’re looking at other Wheat Bran Recipes or just want to jazz this one up, adding about 3/4 cup of diced apple or fresh blueberries works beautifully.
If you add fresh fruit, I usually give them a quick toss in a teaspoon of flour before folding them in. This prevents them from sinking straight to the bottom of the muffin cup while baking. It’s a tiny step, but it keeps the fruit evenly distributed, which is key for a beautiful, balanced bite. Speaking of great variations, if you love seasonal baking, you must check out my pumpkin bread recipe—it has that same comforting vibe!
Creating Oat Bran Muffins Idea
I mentioned this briefly before, but let’s dive deeper into the Oat Bran Muffins Idea since it is such a popular alternative. You can absolutely swap out the wheat bran cereal for oat bran. Oat bran is really great because it often gives a slightly richer, nuttier flavor to the muffin. However, oat bran is notoriously thirstier than wheat bran, but in a different way.
The most important change here is the soaking time we discussed earlier. With **wheat bran**, we let it sit in the buttermilk for 10 minutes to soften up nicely. If you use oat bran instead, you only need about 5 minutes. If you let oat bran soak for the full 10 minutes, it turns into this thick, almost paste-like goo, and your final muffins will be too heavy. Give it 5 minutes, mix it in, and you are good to go! It’s amazing how such a small timing difference changes the entire texture.
Serving Suggestions for Your Bran Muffins
So you’ve pulled a perfect, deeply flavored batch of these beauties out of the oven—now what? While they are honestly fantastic all on their own, especially when eaten warm on a chilly morning, sometimes a little something extra seals the deal. Since these are such wholesome baked goods, I like to keep the pairings simple so they stay focused on being a great grab-and-go option.
My absolute favorite way to serve these is when they are just slightly warm, split in half, with a thin layer of salted butter melting right into those nooks and crannies. The slight saltiness against the sweet brown sugar and dried fruit—perfection!
If you need something to go with them for a fuller breakfast, try pairing them with a smear of cream cheese (maybe mixed with a tiny bit of honey if you want a sweet treat). They also drink beautifully alongside a strong cup of black coffee or, honestly, a simple glass of cold milk. If you happen to make my caramel pecan French toast bake, these muffins are a great lighter complement to that rich dish!
Frequently Asked Questions About Bran Muffins Recipe
It’s such a relief when you find a recipe that just *works*, but I know you might still have a few little questions floating around before you start mixing. We’ve covered so much ground, but here are the answers to the things I hear most often about making these Healthy Breakfast Muffins successfully!
Can I use different flour types in these bran muffins?
That’s a great question because flour makes such a difference! This recipe specifically calls for whole wheat flour because, let’s be honest, we are aiming for high fiber! If you swap it for all-purpose flour, your muffins will be noticeably lighter and fluffier, but you’ll lose a good chunk of that wholesome texture and fiber content. If you must use all-purpose, I suggest reducing the amount by about 1/8 cup, or they might dome too high and crack oddly. Keep the baking soda the same—it needs that acid from the buttermilk to react properly, no matter the flour!
How do I ensure my bran muffins are truly moist?
Ah, the million-dollar question for all Moist Bran Muffins seekers! If you take nothing else away from this whole article, remember this: do not skip the 10-minute soaking time for the bran and buttermilk. Seriously! That step is non-negotiable for achieving the ultimate softness. That mixture swells up, meaning the bran isn’t stealing moisture from your finished muffin while it bakes. That combined with the applesauce is the secret armor against dryness. Follow that soak time, and you are guaranteed soft muffins!
If you ever need to get in touch with me to ask more baking questions, you can always find my contact page over here!
Estimated Nutritional Data for These Bran Muffins
I always get asked about the nutrition when I share something that tastes this good, especially since we were aiming for healthy breakfast muffins packed with fiber. Now, I’m not a certified nutritionist, so take these numbers with a grain of salt—literally, maybe! These estimates are based strictly on the ingredient amounts listed in the recipe above, assuming you use the standard wheat bran and don’t add extra sugar or fruit.
For a single, wonderful muffin, you’re looking at a really solid foundation for your morning:
- Calories: About 185
- Fiber: A great 4 grams! That’s why these keep you full.
- Protein: Around 5 grams
- Total Fat: Just about 6 grams
- Carbohydrates: Roughly 31 grams
See? We managed to keep the sugar at about 11 grams while still making them satisfyingly sweet! It’s all thanks to that combination of brown sugar and applesauce.
Remember, this is just a baseline for one muffin. If you decide to go heavy on the raisins or perhaps add a sweet glaze later—which I sometimes do when I’m feeling decadent—those numbers are definitely going to shift. Always check your packaging if you are tracking strictly! For more official details regarding recipe information floating around my site, please review my standard disclaimer page!
PrintMoist High-Fiber Bran Muffins

Bake these simple bran muffins for a moist, high-fiber breakfast or snack. This recipe is freezer-friendly for easy grab-and-go meals.
- Prep Time: 10 min
- Cook Time: 18 min
- Total Time: 28 min
- Yield: 12 muffins
- Category: Breakfast
- Method: Baking
- Cuisine: American
- Diet: Vegetarian
Ingredients
- 1 cup wheat bran cereal
- 1 cup buttermilk
- 1 large egg
- 1/4 cup vegetable oil
- 1/4 cup unsweetened applesauce
- 1/2 cup packed brown sugar
- 1 teaspoon vanilla extract
- 1 cup whole wheat flour
- 1 teaspoon baking soda
- 1/2 teaspoon salt
- 1/2 cup raisins or dried cranberries (optional)
Instructions
- Preheat your oven to 400 degrees F (200 degrees C). Line a 12-cup muffin tin with paper liners or grease well.
- In a medium bowl, combine the wheat bran cereal and buttermilk. Let this mixture sit for 10 minutes to soften the bran.
- In a separate large bowl, whisk together the egg, vegetable oil, applesauce, brown sugar, and vanilla extract until combined.
- Add the softened bran mixture to the wet ingredients and stir briefly.
- In a small bowl, whisk together the whole wheat flour, baking soda, and salt.
- Add the dry ingredients to the wet ingredients. Mix only until just combined. Do not overmix. Fold in raisins or cranberries if using.
- Divide the batter evenly among the 12 muffin cups, filling each about two-thirds full.
- Bake for 15 to 18 minutes, or until a toothpick inserted into the center comes out clean.
- Cool the muffins in the pan for 5 minutes before transferring them to a wire rack to cool completely.
Notes
- For a sweeter muffin, substitute the brown sugar with maple syrup, using 1/3 cup total.
- You can substitute oat bran for wheat bran, but reduce the soaking time to 5 minutes.
- To freeze, cool the muffins completely, then place them in a freezer-safe bag or container for up to 3 months. Thaw overnight or microwave briefly.
Nutrition
- Serving Size: 1 muffin
- Calories: 185
- Sugar: 11
- Sodium: 180
- Fat: 6
- Saturated Fat: 1
- Unsaturated Fat: 5
- Trans Fat: 0
- Carbohydrates: 31
- Fiber: 4
- Protein: 5
- Cholesterol: 25