

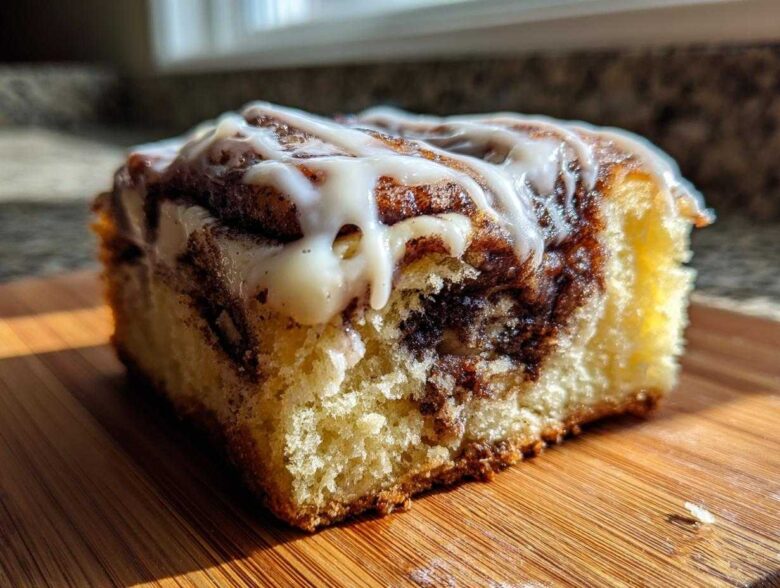
Oh, listen, I love a traditional cinnamon roll, I really do! But sometimes, you just don’t have the time—or the patience—to wrestle with yeast and wait for dough to rise when that massive craving hits you right around 10 a.m. on a Tuesday. That’s why I spent what felt like months in the kitchen trying to smash the best parts of a sticky, warm cinnamon roll into something you can just slice and eat with your hands.
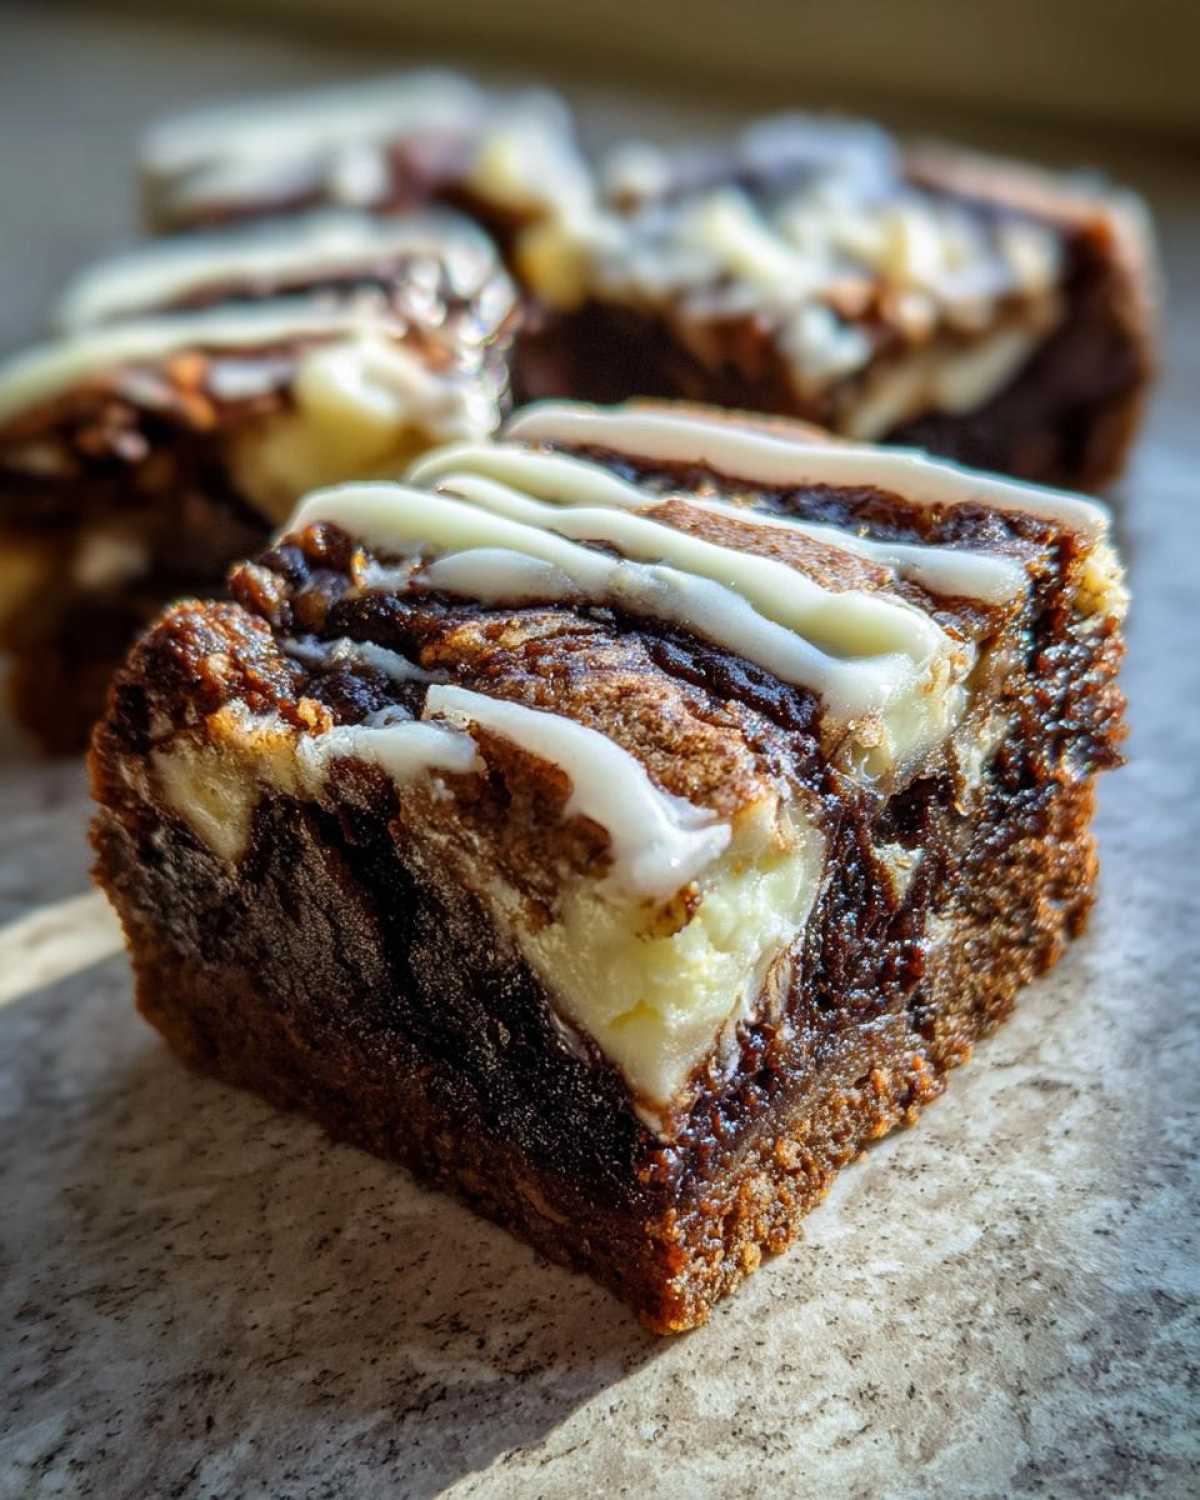
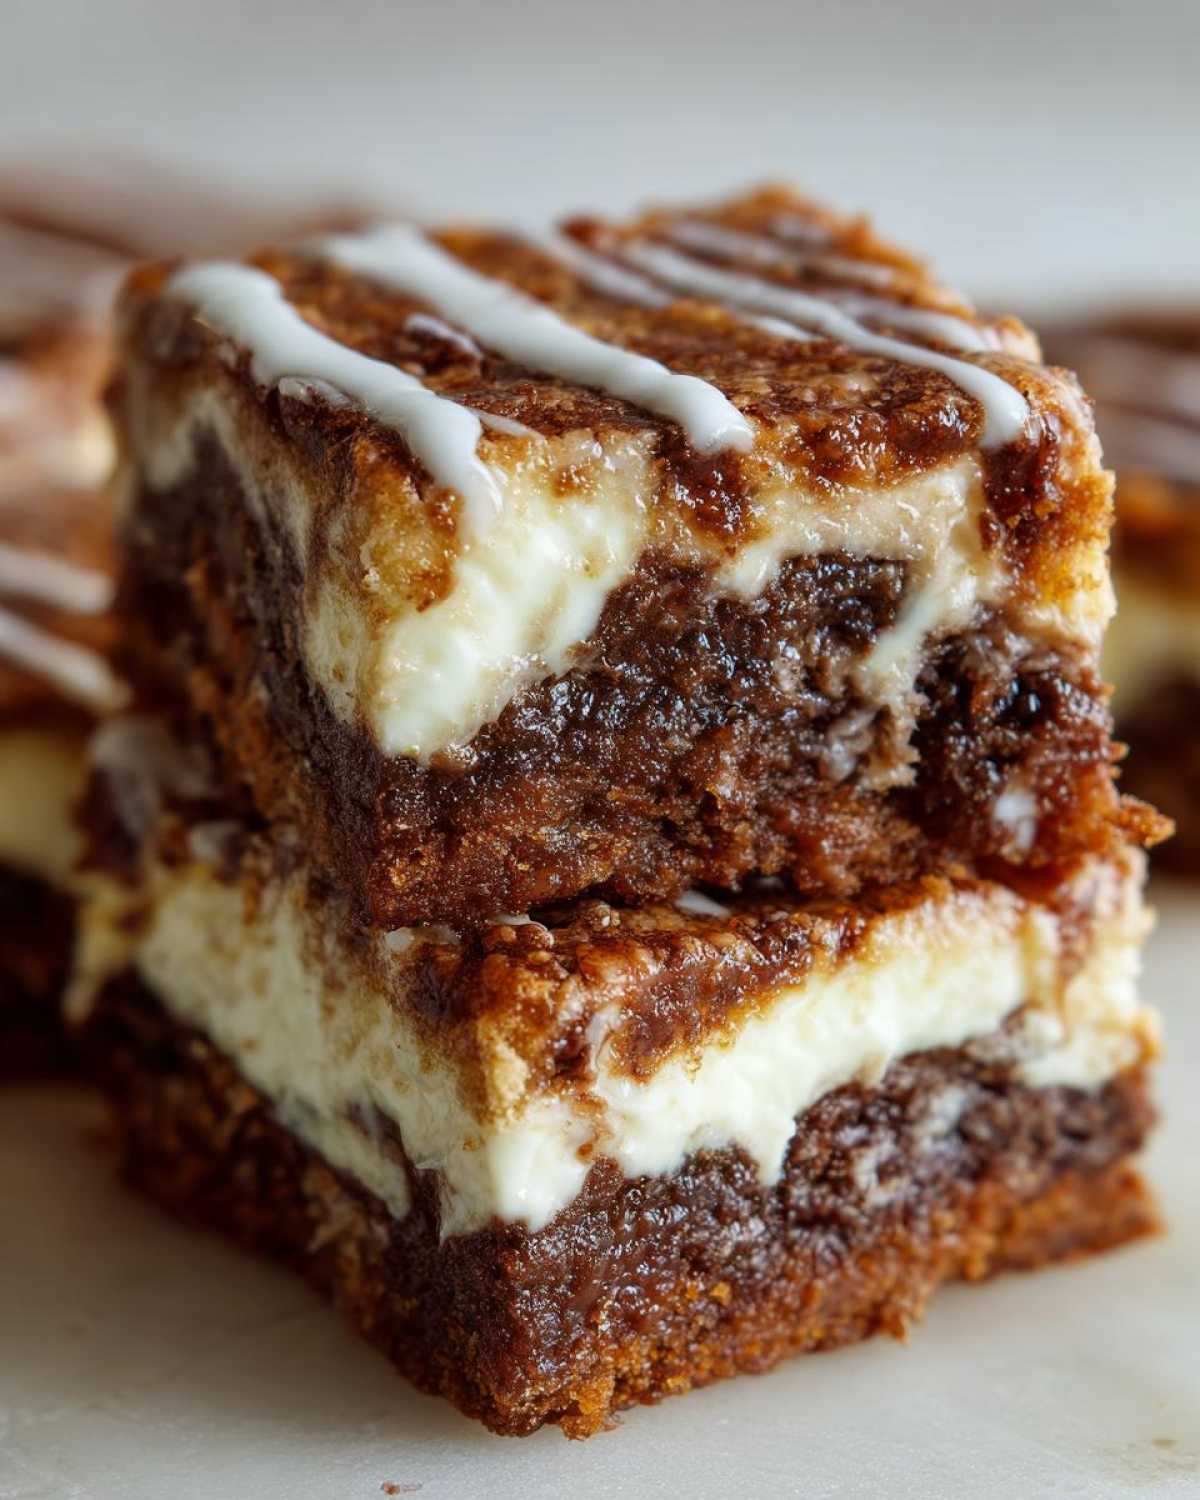
Forget the rolling pin mess! Trust me when I say these Cinnamon Roll Bliss Bars are what every sweet tooth dreams about. We’re talking about a buttery, slightly crumbly shortbread base, a thick, deep layer of cinnamon-sugar filling, and pockets of rich, tangy cream cheese all swirled together. They bake up beautifully in a 9×13 pan, and the glaze sets up perfectly on top. It’s that absolute gooey, melt-in-your-mouth satisfaction you get from the center of a perfect roll, but in bar form. I finally nailed the ratio of melted butter in the filling so it doesn’t dry out, and honestly, this hybrid recipe has replaced every traditional cinnamon roll attempt in my house.
Why You Will Achieve Cinnamon Roll Bliss Bars Success
Look, I get it—cinnamon rolls seem intimidating. But these aren’t those rolls! When you switch to these Cinnamon Roll Bliss Bars, you’re cutting out all the fuss and keeping 100% of the flavor payoff. I engineered this recipe to be so foolproof that even if you burnt toast this morning, you can nail this bake!
- This recipe is about maximum flavor with minimum effort. They are perfect for quick fixes or when you need a crowd-pleasing dessert without dedicating half your day to proofing dough.
- You’re getting that amazing contrast—a sturdy, buttery base that holds up when you slice it, topped with a melt-in-your-mouth swirl. It’s truly the best of both worlds.
No Rolling Required for These Cinnamon Roll Bliss Bars
Seriously, ditch the yeast! We don’t wait. We mix a simple dough, press it in the pan, and boom—you’re halfway done. This shortcut means you can have these ready to eat much faster than you can find your rolling pin.
Gooey Texture and Thick Swirl
The key to the ‘bliss’ part is balancing the layers. My filling has a higher fat ratio than most recipes, which keeps the center gorgeously soft, even after cooling. If you loved my cinnamon roll casserole, you’re going to adore the texture of these Gooey Cinnamon Bars Recipe, only better because they cut so cleanly!
Gathering Ingredients for Perfect Cinnamon Roll Bliss Bars
Okay, let’s talk supplies! Because these are hybrid bars, we have three distinct components—the base dough, the filling, and the swirl/glaze. Getting the right status for each ingredient, like making sure the butter is truly softened and not melted, is honestly half the battle here. This is where we build trust with the final product, so don’t skimp on quality ingredients! If you love making frosting from scratch, you might enjoy checking out my guide on the best classic cream cheese frosting recipe, because the principles are similar!
For the Sturdy Base Dough
You need that buttery substance to hold everything together. For the base, grab 1 cup (that’s two full sticks!) of unsalted butter that you’ve remembered to leave out on the counter until it’s nicely softened. You also need 1 cup of granulated white sugar, one large egg, and 1 teaspoon of vanilla extract for that classic flavor. Then, for the dry stuff, mix up 3 cups of all-purpose flour with 1 teaspoon of baking powder and half a teaspoon of salt. Remember: the butter has to be soft for proper creaming!
Creating the Thick Cinnamon Filling Bars Layer
This is where the true cinnamon magic happens for your Thick Cinnamon Filling Bars. Unlike the base, we want the butter for this layer melted—we need it completely liquid! Use 1/2 cup (one stick) of melted unsalted butter. Then, you absolutely must use 1 cup of *packed* light brown sugar; that molasses flavor is non-negotiable! And don’t be shy with the spice: measure out 2 tablespoons of ground cinnamon. Mix this all together until it’s a thick, slightly gritty paste.
The Essential Cream Cheese Swirl and Glaze
For the swirl, ensure your 8 ounces of cream cheese is also softened, just like the base butter, to avoid lumps. You’ll mix that with 1/2 cup of granulated sugar, one large egg yolk only (just the yolk adds richness without too much liquid), and 1 teaspoon of vanilla extract. For the grand finale glaze, whisk together 1 1/2 cups of powdered sugar with 3 tablespoons of milk or cream, plus another tiny splash of vanilla. This glaze is what seals the deal!
Step-by-Step Instructions for Easy Cinnamon Swirl Squares
Now for the fun part! Putting these layered beauties together is surprisingly quick, especially since we are aiming for Cinnamon Roll Bliss Bars and not fussing with yeast. Get your oven preheated to 350°F (175°C) right away. Your very best friend here is parchment paper. Line your 9×13 inch pan and make sure you leave an overhang on the sides—this is your built-in handle for lifting the whole thing out later. Don’t skip this, trust me!
Preparing the Pan and Base Dough for Cinnamon Roll Bliss Bars
First, let’s get that base pressed down. You take two-thirds of the dough you mixed earlier and press it firmly and evenly right into the bottom of your prepared pan. It needs to be a solid foundation. Take that remaining one-third of the dough and set it aside for now; we’ll use it later as the top crumble layer. Don’t mash the reserved dough into crumbs yet, just keep it in a ball or a few chunks.
Layering the Cinnamon Filling and Cream Cheese Swirl
Time to get gooey! Take that thick cinnamon-butter mixture we made and spread it over your pressed base layer. Make sure you go right to those edges! Next, drop spoonfuls of the softened cream cheese mixture over the cinnamon layer. Don’t try to spread it first, just drop dollops across the surface. Then, take that reserved one-third of base dough and drop little crumbs or pieces all over the cream cheese layer. My secret here is using a butter knife or a skewer to gently swirl everything together—just a few figure eights through the layers! You want marbling, not one muddy mess.
Baking and Finishing Your Gooey Cinnamon Bars Recipe
Pop that pan into the oven for about 35 to 40 minutes. You’re looking for set edges that are turning just a *hint* of golden brown, and the center should look mostly firm but still slightly soft when you gently jiggle the pan. Seriously, do not overbake these! If you do, they won’t be those glorious Baked Gooey Bars we’re aiming for. Once they are out, they need to cool completely. I mean it—completely! Once they are solid and cool, whisk up that simple glaze. Drizzle it on generously! You can check out how I make frosting sometimes if you want more inspiration for that finishing touch, like this vanilla buttercream frosting, though the simple glaze here works perfectly.
Tips for the Best Cinnamon Roll Bake Every Time
I’ve pulled these bars out of the oven perfectly and I’ve pulled them out looking tragically overdone. After all my testing, I know exactly what to watch for to guarantee you get those amazing Cinnamon Roll Bliss Bars that taste like they came straight from the bakery case. If you loved the texture in my cinnamon roll casserole, you’ll appreciate these tips for keeping this bar version spot-on!
Achieving the Perfect Gooey Center
The absolute biggest secret to keeping these bars gooey is time management in the oven. My recipe calls for 35 to 40 minutes, but if you really want that decadent, almost underbaked, melt-in-your-mouth texture, pull them out five minutes early! They should still look a bit jiggly in the very center. Don’t worry, they firm up as they cool down, leaving you with that perfect texture that resists crumbling and holds that gooey goodness inside.
Ingredient Temperature for Cream Cheese Swirl
Listen, using cold cream cheese is the fastest way to ruin your beautiful swirl. If your cream cheese is straight from the fridge, you’ll end up with hard little cheese lumps mixed into the batter, and you don’t want that texture contrast! Always make sure your cream cheese is totally room temperature—soft enough that you can press your finger into it easily. This makes it blend seamlessly with the sugar and yolk for that necessary smooth richness.
Variations for Your Cinnamon Roll Dessert Bars
While these Cinnamon Roll Bliss Bars are pretty much perfect as I first designed them, I always love when you guys experiment a little! Because the structure is so solid—thanks to that great base dough—it handles little additions beautifully before the bake. If you’ve already mastered the original, this is where you can start customizing! For other fun bar desserts, you absolutely have to check out my guide on chocolate chip pumpkin bars if you want to branch out later!
Adding Nuts or Fruit to Cinnamon Roll Bliss Bars
If you want some crunch, throw in about half a cup of chopped pecans right into that delicious cinnamon filling layer before you swirl it. Alternatively, if you want a little zing in the base dough layer, mix a handful of dried cranberries into the flour mixture before you press it into the pan. It cuts through the sweetness just right!
Spice Variations for Easy Cinnamon Swirl Squares
Cinnamon is king, obviously, but we can bring in some backup singers! For these Easy Cinnamon Swirl Squares, try mixing about half a teaspoon of ground cardamom or a quarter teaspoon of nutmeg into your main cinnamon filling. It gives the bars a deeper, warmer flavor that tastes amazing when paired with that tangy cream cheese swirl. It’s subtle, but it makes a huge difference!
Storing and Reheating Cinnamon Roll Bars
You made a whole pan of these amazing Cinnamon Roll Bliss Bars, so you’re probably thinking, “Can I really save these for tomorrow?” The answer is yes, you absolutely can! Since these bars don’t have yeast, they are fantastic for making ahead. If you plan on eating them within two days, just keep them covered tightly at room temperature. Seriously, the gooey center stays soft for ages!
If you need them to last longer, pop them into an airtight container in the fridge, but here’s a trick: let them sit out for about 20 minutes before you plan to eat them so they can warm up slightly. That coldness can make the base seem a bit too firm, and we definitely don’t want that!
If you are an overachiever and baked the whole batch, freezing is your best friend. Cut the bars completely, but *skip the glaze* first! You can use that parchment paper overhang like a handy lift. Wrap individual bars tightly in plastic wrap, then slip them into a freezer bag. Since these are No Yeast Cinnamon Bars, they freeze beautifully. When you want one, just unwrap it and zap it in the microwave for about 15 seconds. That quick burst of warmth brings back all that gooey, melty, fresh-baked glory. Be sure to check out my tips on prepping breakfasts ahead of time, like with this easy make-ahead egg bake recipe, for more batch cooking ideas!
Frequently Asked Questions About Cinnamon Roll Bliss Bars
When I first developed these, I had a million questions for myself, so I know you probably do, too! It’s all about getting that perfect bar texture right. I want to make sure you get that incredible, gooey result without any frustration. We’re going to troubleshoot some texture issues right here and make sure your **Cinnamon Roll Bliss Bars** live up to their name!
Can I make these Cinnamon Roll Dessert Bars ahead of time?
Yes, you absolutely can, which makes them perfect for weekend baking! You have two options, remember. If you want the ultimate freshness, you can mix up the base dough and chill it, covered tightly, for up to two days before pressing it into the pan. If you prefer to bake them fully ahead of time—which I often do—they are fantastic stored covered at room temperature for about three days. Just let them sit out for a little bit if they were in a cooler spot before you dig in!
Why are my bars crumbly instead of gooey?
Oh, the crumbly disaster, I’ve seen it happen! Nine times out of ten, this is purely an over-baking issue. Remember how I stressed pulling them out when they look *slightly* jiggly? If you bake them until a toothpick comes out perfectly clean, you’ve lost the moisture. It means the sugars have crystallized too much. If you see crumbly edges, it usually means you poured the filling layer too thinly, or you baked them 5 minutes too long. Next time, pull them sooner!
Are these Sweet Breakfast Squares suitable for freezing?
They really are the ideal make-ahead treat! If you want to freeze your **Sweet Breakfast Squares**, the key is to bake them completely, let them cool rock solid, and then cut them into squares. Don’t add the glaze yet—glaze doesn’t freeze as nicely. Wrap each square tightly in plastic wrap, put them all in a sturdy freezer bag, and they’ll be perfect for up to three months. You can check out the freezing method again in the section above, and if you want more easy prep ideas, check out my tips on easy weeknight bolognese sauce for dinner prep inspiration!
Estimated Nutritional Information for Cinnamon Roll Bliss Bars
Okay, so these Cinnamon Roll Bliss Bars are definitely a treat, not exactly a kale smoothie! Since they have that rich cream cheese swirl, the sturdy base, and that glorious thick glaze, the numbers are what you’d expect for a rich dessert. I want to be super clear about this part, because knowing what you’re eating is important, even when the food is this amazing!
The numbers below are calculated for one square, based on yielding 18 bars from the full 9×13 pan recipe. But please take this as a guideline, not a guarantee! Every brand of flour, every measurement of brown sugar—it all shifts slightly. If you want the full legal breakdown, you can always check out our detailed statement over on the privacy policy page, but here’s the quick scoop:
- Serving Size: 1 bar
- Calories: 350
- Sugar: 35g
- Fat: 20g (12g Saturated)
- Carbohydrates: 40g
- Protein: 4g
Remember, because we’re mixing the dough, the filling, and the cream cheese all together, these estimates cover all those layered components in one perfectly indulgent bite of **Cinnamon Roll Dessert Bars**!
Share Your Cinnamon Roll Bliss Bars Creation
I have shared all my secrets, and now it’s your turn! I put my heart and soul into testing these measurements so you could have the ultimate satisfaction of a warm, gooey cinnamon roll without the commitment of yeast. I really want to know how they turned out for you. Did you manage to get that perfect swirl? Did you tweak the spice blend?
Please, don’t leave without telling me! Drop a star rating right below this section—did they earn the full five stars? And if you followed my tip about pulling them out early to keep them extra gooey, let me know how that worked out for you in the comments! I love hearing about your baking successes.
If you snap a picture of your perfectly gooey Cinnamon Roll Bliss Bars, share it on social media and tag me! Seeing your beautiful bakes makes my day so much better. If you have any questions that I missed, or if you want to share your own spin on these bars, head over to my contact page, and let’s chat about making the next batch even better!
PrintCinnamon Roll Bliss Bars
Make rich, gooey cinnamon roll bars with a cream cheese swirl and thick glaze. This recipe delivers classic cinnamon roll flavor in an easy-to-slice bar format.
- Prep Time: 20 min
- Cook Time: 40 min
- Total Time: 60 min
- Yield: 18 squares
- Category: Dessert
- Method: Baking
- Cuisine: American
- Diet: Vegetarian
Ingredients
- 1 cup (2 sticks) unsalted butter, softened
- 1 cup granulated sugar
- 1 large egg
- 1 teaspoon vanilla extract
- 3 cups all-purpose flour
- 1 teaspoon baking powder
- 1/2 teaspoon salt
- 1 cup packed light brown sugar (for filling)
- 2 tablespoons ground cinnamon (for filling)
- 1/2 cup (1 stick) unsalted butter, melted (for filling)
- 8 ounces cream cheese, softened (for swirl)
- 1/2 cup granulated sugar (for swirl)
- 1 large egg yolk (for swirl)
- 1 teaspoon vanilla extract (for swirl)
- 1 1/2 cups powdered sugar (for glaze)
- 3 tablespoons milk or cream (for glaze)
- 1/2 teaspoon vanilla extract (for glaze)
Instructions
- Preheat your oven to 350°F (175°C). Line a 9×13 inch baking pan with parchment paper, leaving an overhang on the sides for easy removal.
- Prepare the base dough: In a large bowl, cream together the softened butter and 1 cup of granulated sugar until light and fluffy. Beat in the egg and vanilla extract.
- In a separate bowl, whisk together the flour, baking powder, and salt. Gradually add the dry ingredients to the wet ingredients, mixing until just combined into a soft dough. Press two-thirds of this dough evenly into the bottom of the prepared pan. Reserve the remaining one-third of the dough.
- Prepare the cinnamon filling: In a small bowl, mix the brown sugar, cinnamon, and 1/2 cup of melted butter until it forms a thick, wet mixture. Spread this cinnamon mixture evenly over the pressed dough layer.
- Prepare the cream cheese swirl: In a medium bowl, beat the softened cream cheese and 1/2 cup of granulated sugar until smooth. Beat in the egg yolk and 1 teaspoon of vanilla extract until fully incorporated.
- Drop spoonfuls of the cream cheese mixture over the cinnamon layer. Crumble the reserved one-third of the base dough over the top of the cream cheese layer.
- Gently swirl the layers together using a knife or skewer to create a marbled effect. Do not over-mix.
- Bake for 35 to 40 minutes, or until the edges are lightly golden and the center is mostly set. Let the bars cool completely in the pan on a wire rack.
- Prepare the glaze: Whisk together the powdered sugar, milk, and 1/2 teaspoon of vanilla extract until smooth. If the glaze is too thick, add milk one teaspoon at a time.
- Once the bars are completely cool, drizzle the glaze evenly over the top. Once the glaze sets, lift the bars out using the parchment paper overhang and cut into squares.
Notes
- For a thicker, gooier center, slightly reduce the baking time by 3-5 minutes.
- You can prepare the base dough ahead of time and chill it for up to 2 days before pressing it into the pan.
- Use room temperature ingredients for the cream cheese swirl to prevent lumps.
Nutrition
- Serving Size: 1 bar
- Calories: 350
- Sugar: 35
- Sodium: 180
- Fat: 20
- Saturated Fat: 12
- Unsaturated Fat: 8
- Trans Fat: 0
- Carbohydrates: 40
- Fiber: 1
- Protein: 4
- Cholesterol: 65