

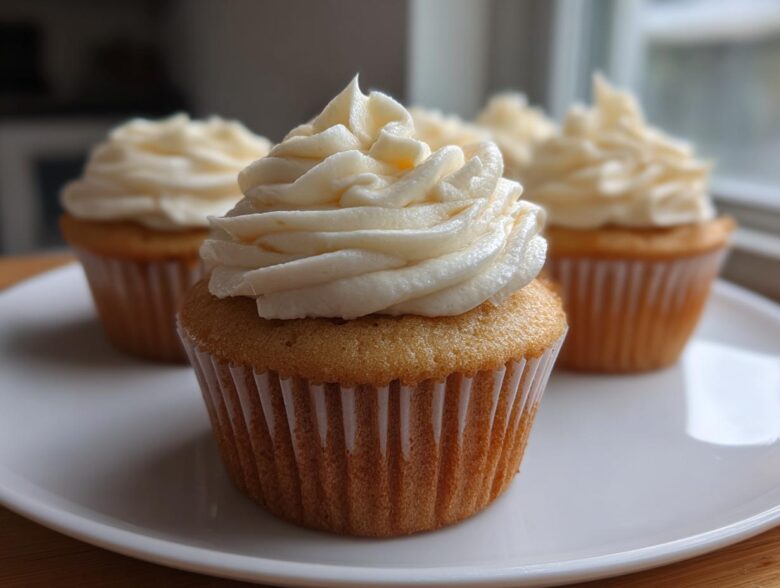
Oh, let me tell you about the sheer, unadulterated joy of biting into a homemade cupcake. There’s just something magical about those little domes, isn’t there? I spent years chasing that perfect, cloud-like texture in my kitchen—the kind that melts away but still tastes deeply of vanilla. Everyone thinks vanilla is easy, right? Wrong! It took me about twelve attempts to finally nail down what I now confidently call my best ever cupcake recipe. This recipe for a Classic vanilla cupcake is the one I turn to when I need a guaranteed win, whether it’s for a last-minute treat or a special celebration. Seriously, if you’ve struggled to get a light, fluffy cupcake before, stick with me; we’re about to fix that!
I remember the disaster batch where they all sunk in the middle; I almost gave up! But then, I found a note tucked into my old recipe box suggesting that my butter wasn’t quite soft enough. Once I started babysitting the butter temperature, everything changed. This version? It’s foolproof, incredibly light, and pairs perfectly with the simple buttercream frosting we’ll whip up later. Trust me, this is the recipe you’ll bookmark forever.
If you’re looking for variations later, you can check out my favorite fluffy adaptation here: The secret to getting those tall, professional cupcake tops!
Why This Classic Vanilla Cupcake is the Best Ever Cupcake Recipe
I know, I know—everyone claims their vanilla recipe is the “best.” But honestly, this one is something special, especially because it is such a no fail cupcake recipe. I wouldn’t have bothered rewriting the instructions so many times if it wasn’t worth it! When you pull these out of the oven, you get that signature dome without all the fuss.
What makes the difference? It’s all about the texture. We’re aiming for the ultimate in perfectly moist cupcakes that don’t taste heavy or dense. You’ll absolutely love these qualities:
- They bake up tall and proud, needing minimal frosting fuss.
- The crumb is incredibly delicate—tender, yet sturdy enough for carrying to parties.
- They taste purely of lovely, real vanilla, not just sugar!
You can learn more about my initial struggles and successes that led to this version here: Tips for perfecting the rise and moisture.
Key Attributes of Our Perfectly Moist Cupcakes
The secret to that gorgeous, moist texture isn’t magic; it’s just good technique, particularly how we treat the fat and sugar! By taking the time to properly cream the softened butter and sugar together at the beginning, we’re whipping tons of tiny air pockets into the mixture. Those air pockets are what give the final cupcake its unbelievably light lift when it bakes. It creates structure without heaviness, resulting in a cake that stays soft for days!
Ingredients for Your Easy Homemade Cupcakes and Fluffy Cupcake Frosting
Okay, let’s get down to brass tacks. You don’t need any fancy gadgets or weird items for these easy homemade cupcakes. I listed everything right up front because preparation is half the battle, right? Remember, if your butter isn’t softened properly, the creaming step won’t work its magic! This list is the foundation for your from scratch cupcake base.
When you look at the frosting ingredients, pay close attention to the powdered sugar. You MUST sift it! No exceptions here, my friend. Sifting is the only way to guarantee that smooth, cloud-like topping and avoid nasty little lumps when you’re trying to make those simple cupcake decorating ideas a reality.
If you want to see my favorite buttercream variations, check out my guide on achieving that perfect smoothness: The technique for making butter creamy, not greasy.
For the Light and Airy Cupcake Batter
- 1 1/2 cups all-purpose flour
- 1 1/2 teaspoons baking powder – make sure it’s fresh!
- 1/4 teaspoon salt
- 1/2 cup unsalted butter, softened to true room temperature
- 1 cup granulated sugar
- 2 large eggs, also at room temperature
- 1 teaspoon pure vanilla extract (don’t skimp here!)
- 1/2 cup milk, preferably whole milk, at room temp too!
For the Simple Cupcake Decorating Ideas: Fluffy Cupcake Frosting
- 1/2 cup unsalted butter, softened (again, soft!)
- 3 cups powdered sugar, very well sifted
- 1 teaspoon pure vanilla extract
- 2 tablespoons milk or heavy cream, start with less and add more as needed
Step-by-Step Instructions for the Cupcake Recipe from Scratch
This process is so straightforward, you’ll barely believe these little gems came from your own oven. We’re dividing this into two parts: getting the batter right and then whipping up that glorious, fluffy topping. Always remember to preheat your oven first while you gather everything up! That’s rule number one for any quick dessert.
I’m using a standard 12-cup muffin tin today, lined with paper liners. You want to get this ready before the batter comes together!
Preparing the Cupcake Base and Baking
First up, in a medium bowl, just give your flour, baking powder, and salt a quick whisk together. This marries the dry ingredients nicely. Set that aside—it’s waiting for its moment.
Now, for the major fluff step! In your big bowl, using your mixer, beat that softened butter and the sugar together for a good three minutes. You want it pale and fluffy, almost like whipped clouds. Mix in your room-temperature eggs one by one, making sure each one disappears before you add the next. Then, pour in your vanilla.
This is where you need to be gentle! We’re going to alternate the flour mixture and the milk. Start with some of the flour mix, mix until just combined—I mean minimally—then add some milk, mix, then more flour, and so on. You must finish and start with the dry stuff. And I cannot stress this enough: Do not overmix the batter! Stop as soon as you don’t see white streaks. Overmixing means dense, chewy cupcakes, and we worked too hard for that!
Spoon the batter into your lined cups, filling them just two-thirds full. Pop them into that 350°F oven for 18 to 20 minutes. When a toothpick slides in and comes out clean, they are done! Let them sit in the pan for five minutes—no more—then move them onto a cooling rack so the bottoms don’t get soggy. They must be totally cool before we frost them, or we’ll have a buttery puddle.
If you need a little help visualizing those alternating steps, take a peek at this guide: Visualizing the alternation in cake making.
Making the Fluffy Cupcake Frosting
While those little guys are cooling down completely, let’s make the topping. This is the easiest American buttercream you’ll ever make. Beat that 1/2 cup of softened butter by itself until it’s super smooth. Now, add that sifted powdered sugar gradually. It’s going to look crumbly at first, but keep mixing!
Once it comes together, add your vanilla and the milk. This is key: start with just one tablespoon of milk. Beat it on high speed for a solid two to three minutes. I mean it—three full minutes! This whipping process is what incorporates the air that makes the frosting lovely and light, rather than heavy and greasy. If it looks too stiff to spread easily, add the second tablespoon of milk slowly, a teaspoon at a time. You want it creamy and spreadable!
Expert Baking Tips for Perfect Cupcakes Every Time
You’ve got the recipe down, but I want to share a few more secrets—the little things I learned the hard way that elevate these from just being good cupcakes to being truly *my* signature cupcakes. If you follow these baking tips for cupcakes, you’ll feel like a total pro. This is the stuff they don’t always put on the recipe card, but it makes all the difference in achieving that beautiful, consistent texture we talked about.
These tips really helped me move past the sad, sunken batches. When you’re dealing with a quick dessert cupcakes recipe like this one, timing and temperature are everything. Don’t skip reading the notes section on the original recipe card—that’s where the real wisdom is hiding!
Achieving a Light and Airy Cupcake Batter
My number one rule, which I sometimes break but shouldn’t, involves the oven door. You absolutely cannot open the oven door in the first fifteen minutes of baking. I swear, the temperature dropping shocks the risingbatter, and boom—you get a crater right in the middle of that gorgeous vanilla dome. If you’re nervous, just peek through the glass, but keep that door shut tight. It’s a test of patience, I know!
Also, if you’re using a stand mixer and have that paddle attachment, switch to the “cake” setting or just use the very lowest speed when you’re alternating the milk and flour. My note mentioned this, but I want to emphasize: you want to gently fold the ingredients together, not beat the air *out* of them! We whipped the air in during the creaming stage, and we need to keep it safe in there. A light hand at this stage keeps them beautifully fluffy for days. You can read more about my journey becoming an expert in the kitchen on my contact page: Learning the science behind the sweetness.
Creative Variations for Your Next Cupcake Adventure
Now, don’t get me wrong, this perfect vanilla cupcake base is amazing exactly as written. But sometimes, you just need to switch things up, right? That’s when you start playing with additions and turning the simple into something truly special—think gourmet cupcake flavors!
It’s all about making small changes that yield huge flavor results. I encourage everyone to try this once they feel comfortable with the base recipe. Next time you’re ready to bake, skip the vanilla extract entirely and prepare for a flavor explosion!
For inspiration on making an incredible fruit-based batch, check out my strawberry version: Super moist strawberry cupcakes.
Swapping Extracts and Zests in Your Cupcake
The easiest way to change this recipe is right in the extract step. Instead of using 1 teaspoon of vanilla, try swapping it out for 3/4 teaspoon of almond extract instead. Wow! That gives you a lovely, almost bakery-style flavor that’s amazing with the buttercream.
Or, if you want something super bright and sunny, skip the extract and add the zest of one whole lemon or one orange directly into the butter and sugar while you are creaming them. The oils release their fragrance right then, and your whole kitchen will smell incredible. It makes these easy homemade cupcakes taste totally different!
Simple Cupcake Decorating Ideas and How to Pipe Frosting
Once you have those perfectly cooled cakes, the real fun begins—decorating! Honestly, even if you just slather the frosting on with a butter knife, these cupcakes taste amazing. But if you want to make them look spectacular for a birthday party cupcakes spread or just because you feel fancy, piping is the answer. I promise, it’s less intimidating than it looks!
The secret to beautiful swirls isn’t fancy piping skills; it’s all about the consistency of your fluffy cupcake frosting. If it’s too loose, it slumps right off. If it’s too stiff, you can’t get it out of the bag easily. For this specific vanilla buttercream, I usually find it’s perfect consistency right out of the mixer, but if yours seems soft, just whisk in an extra tablespoon of sifted powdered sugar.
Quick Tips for Piping Perfect Swirls
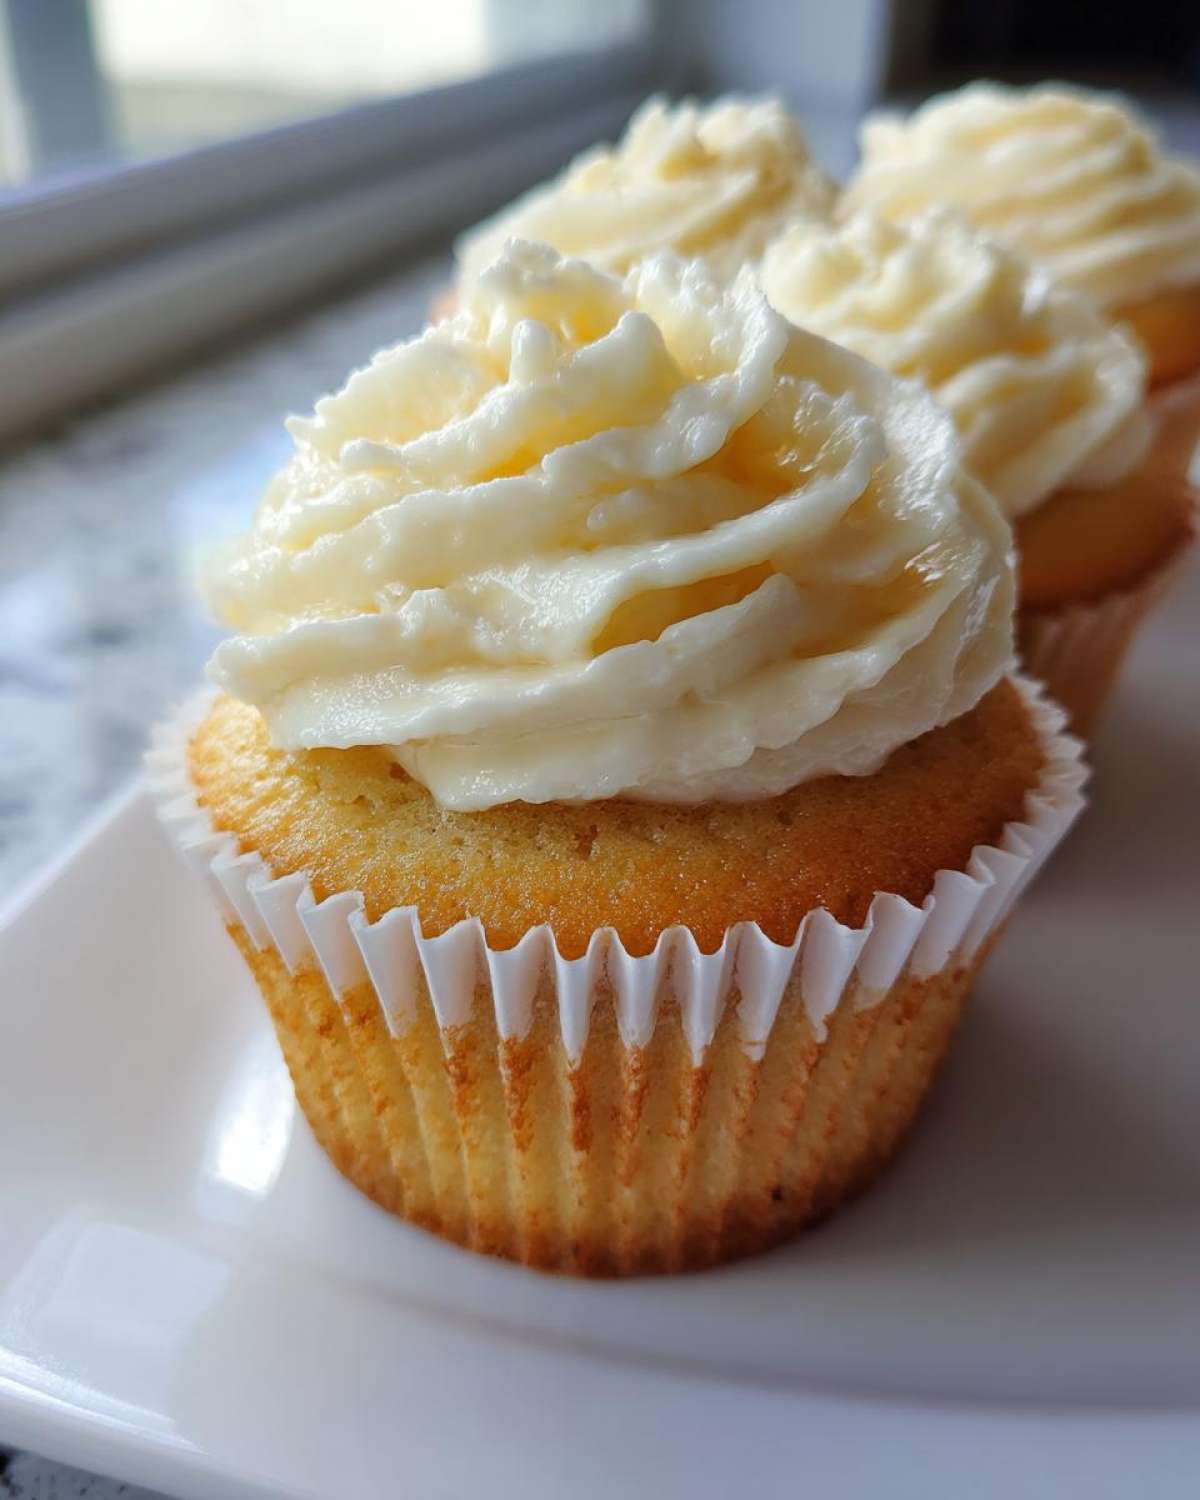
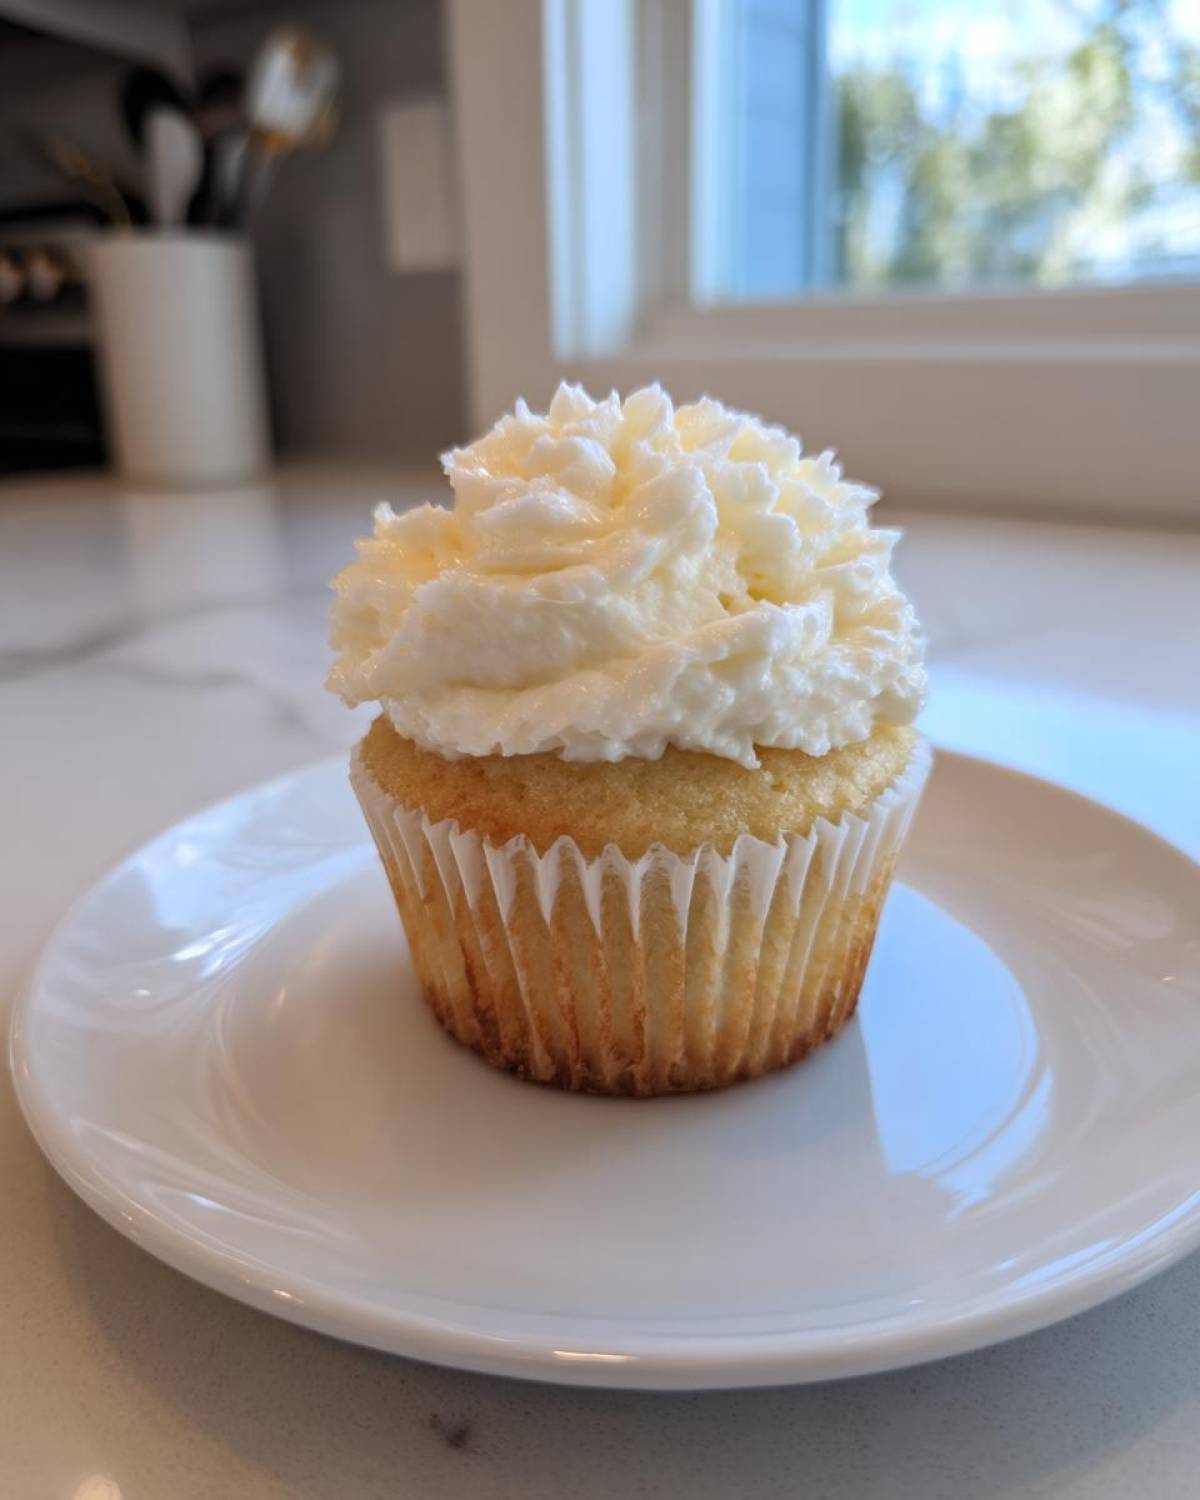
To get that classic tall swirl that looks professional, you need a piping bag fitted with a large open star tip—they’re super inexpensive and make a huge difference. Fill your bag about two-thirds full; overfilling makes it impossible to manage.
Here’s the motion: Hold the bag straight up and down, directly over the center of the cooled cupcake. Start squeezing the bag *just* near the base of the cupcake, moving in a gentle, continuous spiral motion outward, then back toward the center, building up height as you go. Stop squeezing, then very gently pull the tip upwards. If you’re aiming for a gorgeous, towering swirl that looks like the ones you see in bakeries, slow down, be confident, and don’t be afraid to make a mess!
If you’re interested in trying a different topping that complements the vanilla so well, you absolutely must check out my recipe for a rich cream cheese topping: The best classic cream cheese frosting. It’s slightly tangy and pairs beautifully with a plain vanilla base!
Make Ahead Cupcakes and Storage Instructions
One of the best things about having a solid, reliable base recipe for cupcakes is that you can plan ahead! If you’re hosting a party or just busy during the week, knowing you can whip these up in advance saves so much stress. These are excellent make ahead cupcakes, but you have to store them correctly to keep that airy texture we worked so hard for.
My rule is simple: never frost ahead of time unless you absolutely must. The moisture from the frosting can start to soak into the cake dome, and the buttercream can get a bit crusty sitting out. If you’re planning more than 24 hours out, keep the tops separate!
For the best results over a few days, always check out my guide on recipe longevity here: How to keep baked goods fresh longer.
Here’s the quick breakdown for storage:
- Unfrosted Cake Base: Once your cupcake bases are completely cool, place them in an airtight container or a large zip-top bag. They will stay perfectly fresh at cool room temperature for two full days. You can even freeze them airtight for up to two months! Bring them to room temperature slowly before frosting.
- Frosted Cupcakes: If you need to store the finished product, keep them in the refrigerator in an airtight container. The fridge keeps the buttercream firm, but the cake structure might firm up a bit. Let them sit out on the counter for about 30 minutes before serving—this lets the butter in the cake soften up again.
If you follow this roadmap, you’ll always have a delicious, perfectly moist batch of cupcakes ready to go!
Frequently Asked Questions About Baking the Perfect Cupcake
I get so many emails asking the same little questions about this recipe, which tells me sometimes even the simplest cupcake recipes for beginners can leave you scratching your head! That’s totally normal. Baking is chemistry, but once you have the answers to these little sticking points, you’ll feel like a seasoned pro. Here are the things people ask me most often when they are trying to achieve that perfect vanilla dome.
Don’t let a little hiccup stop you! We all learn by fixing mistakes. If you have another question after reading these, feel free to reach out to me directly; I love hearing from fellow bakers: Send me a note!
Can I substitute the milk in this cupcake recipe?
Oh yes, you absolutely can! Since we are only using half a cup, it’s easy to swap. Whole milk gives the best body because of the fat content, but if you need to sub it out, use an equal amount of plain yogurt, buttermilk, or even an unsweetened plant-based milk like soy or oat milk. Just make sure whatever you use is room temperature, just like the original milk was supposed to be. That temperature consistency really helps keep the batter balanced as we alternate the ingredients!
Why did my cupcake tops crack?
This is the classic panic moment! Most often, cracking happens for one of two reasons, and remember what I said about not opening the oven door? The biggest culprit is usually the oven running too hot, or having the rack set too close to the top heating element. If the outside cooks and sets too quickly, the middle keeps rising, forcing a crack in the top crust. Make sure your oven temperature is accurate, and try to keep the tin centered on the rack. Also, if you overfill your liners—more than two-thirds full—the batter spills over the top edges and bakes into a hard rim, causing the middle to burst upwards and crack!
Nutritional Estimates for This Classic Cupcake
Now, I always bake with love first, and counting calories second, but I know some of you plan things out, and it’s good to know what you’re working with! These figures are just an estimate, of course. They change depending on what brand of butter you use or exactly how much powdered sugar clumped into your frosting bag. I use these numbers as a general guide only, but they’re based on the standard recipe proportions we just used.
We don’t want anyone getting too worried about the sugar content in the fluffy cupcake frosting; remember that most of that is the powdered sugar, and it’s part of the indulgence! If you ever want to check out my thoughts on data privacy, you can peek at my policy here: My commitment to your privacy.
Here’s the breakdown based on 12 standard servings:
- Serving Size: 1 cupcake
- Calories: 350
- Sugar: 40g
- Sodium: 150mg
- Fat: 18g
- Saturated Fat: 11g
- Unsaturated Fat: 7g
- Trans Fat: 0.5g
- Carbohydrates: 45g
- Fiber: 0.5g
- Protein: 4g
- Cholesterol: 60mg
Classic Vanilla Cupcakes with Buttercream Frosting
A straightforward recipe for making moist, light vanilla cupcakes from scratch, topped with simple American buttercream.
- Prep Time: 20 min
- Cook Time: 20 min
- Total Time: 40 min
- Yield: 12 servings
- Category: Dessert
- Method: Baking
- Cuisine: American
- Diet: Vegetarian
Ingredients
- 1 1/2 cups all-purpose flour
- 1 1/2 teaspoons baking powder
- 1/4 teaspoon salt
- 1/2 cup unsalted butter, softened
- 1 cup granulated sugar
- 2 large eggs
- 1 teaspoon vanilla extract
- 1/2 cup milk
- 1/2 cup unsalted butter, softened (for frosting)
- 3 cups powdered sugar, sifted (for frosting)
- 1 teaspoon vanilla extract (for frosting)
- 2 tablespoons milk or heavy cream (for frosting)
Instructions
- Preheat your oven to 350 degrees Fahrenheit (175 degrees Celsius). Line a 12-cup muffin tin with paper liners.
- In a medium bowl, whisk together the flour, baking powder, and salt. Set aside.
- In a large bowl, beat the softened butter and sugar with an electric mixer until light and fluffy, about 3 minutes.
- Beat in the eggs one at a time, mixing well after each addition. Stir in the vanilla extract.
- Gradually add the dry ingredients to the wet ingredients, alternating with the milk, beginning and ending with the flour mixture. Mix until just combined; do not overmix.
- Fill each cupcake liner about two-thirds full with batter.
- Bake for 18 to 20 minutes, or until a toothpick inserted into the center comes out clean. Let the cupcakes cool in the pan for 5 minutes before transferring them to a wire rack to cool completely.
- To make the frosting, beat the 1/2 cup softened butter until smooth. Gradually add the sifted powdered sugar, beating until combined.
- Add the vanilla extract and 2 tablespoons of milk. Beat on high speed until the frosting is light and fluffy, adding more milk one teaspoon at a time if needed to reach a spreadable consistency.
- Once cupcakes are completely cool, frost and serve.
Notes
- For a finer crumb, use the cake setting on your stand mixer or use a paddle attachment on low speed when combining wet and dry ingredients.
- Do not open the oven door during the first 15 minutes of baking to prevent the cupcakes from sinking.
- If you want a stiffer frosting for piping, reduce the amount of milk used in the final step.
Nutrition
- Serving Size: 1 cupcake
- Calories: 350
- Sugar: 40g
- Sodium: 150mg
- Fat: 18g
- Saturated Fat: 11g
- Unsaturated Fat: 7g
- Trans Fat: 0.5g
- Carbohydrates: 45g
- Fiber: 0.5g
- Protein: 4g
- Cholesterol: 60mg