

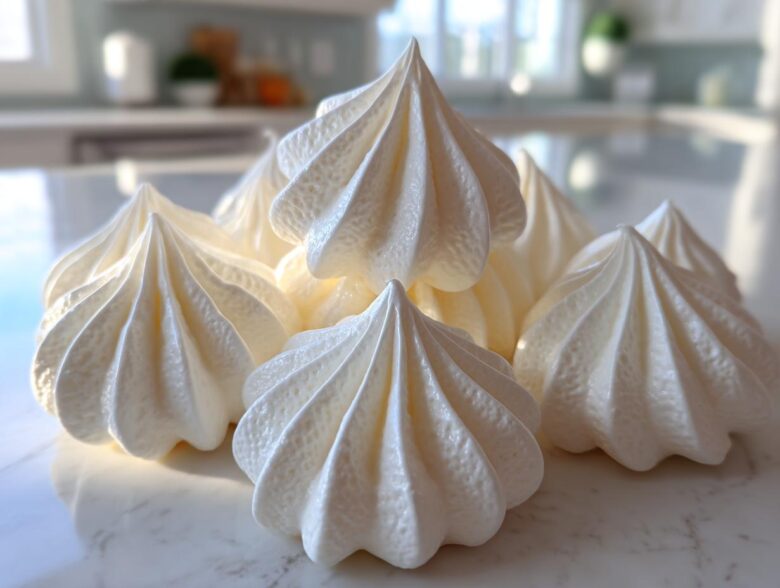
If you’ve ever been terrified of making meringue cookies, thinking they’re going to collapse or turn into sticky puddles, STOP right there! I used to feel the same way, honestly. But I finally cracked the code to making the most incredible, cloud-like meringue cookies that are unbelievably light, wonderfully crisp on the outside, and just melt the second they hit your tongue.
This is truly the ultimate recipe because it uses the simple French meringue method, which is perfect for anyone starting out. Seriously, mastering these delicate sweet treats changed everything for me in the kitchen! And the best part? This Meringue Cookie Recipe is accidentally light, fluffy, and naturally gluten-free, so everyone can enjoy them.
If you want a recipe that works every single time, you need to check out the secrets I learned when figuring out how to make the perfect batch. We’ll talk lots about the mixing technique, but trust me, it’s easier than you think! You can see some other game-changing simple cookie recipes here if you want more foolproof baking inspiration later!
Why This Easy Meringue Cookies Recipe Works for Beginners
I know, I know, meringue sounds fancy, but that’s why I love this specific foundational recipe so much! We’re using the French method here, which is the most straightforward way to start baking meringue for beginners. You only need four core ingredients, plus vanilla for flavor, which means fewer chances for things to go sideways. Since it’s just sugar and egg whites, these easy meringue cookies are naturally gluten-free too, which is fantastic for guests with sensitivities.
The real magic? It all boils down to nailing that perfect meringue texture. If you follow the mixing order exactly, you get these beautiful, structured cookies that look like professional desserts but were secretly super simple to make. Trust me, once you get the whipping down, you’ll never look back!
Achieving Light and Airy Cookies Texture
The secret sauce for getting those wonderfully light and airy cookies is twofold, and it has nothing to do with fancy equipment. First, your egg whites absolutely *must* be at room temperature. Cold egg whites just don’t whip up into the volume we need!
Second, we use cream of tartar. This little powerhouse prevents the air bubbles you’re creating from collapsing once the sugar starts going in. It acts like a scaffolding for the entire structure. When you beat those whites and see them start to hold their shape stiffly, you’re winning! It’s all about trapping that air so they bake up crisp instead of sagging.
Essential Ingredients for Perfect Meringue Cookies
When you’re making something as delicate as these, you can’t just toss things in willy-nilly. Ingredients matter, and how you prepare them matters even more! I’ve made this list tight because we aren’t dealing with flour here; it’s just egg whites and sugar doing all the heavy lifting. Precision equals success, so pay attention to the details here. You definitely want to make sure your bowl is spotless before starting—any trace of grease will stop your whites from whipping up properly.
If you want to learn more about handling egg whites in general, I have a whole deep dive on that over here. It’s super helpful for things like macarons, too!
Here is exactly what you need for about three dozen of these beautiful, crisp treats:
- 4 large egg whites. This is huge: they have to be completely at room temperature. If they’re cold, they won’t reach the volume we need!
- 1 cup granulated sugar. Yes, just plain white sugar! We use exactly one cup because the measurement has to be exact for the stability.
- 1 teaspoon pure vanilla extract. Don’t use the imitation stuff; the pure vanilla adds a touch of warmth that really makes these delicate sweet treats shine.
- 1/4 teaspoon cream of tartar. Don’t skip this! It stabilizes everything, so you get mountains of fluff instead of sinking puddles.
- A tiny pinch of salt. Just a whisper to balance out all that sweetness.
See? It’s simple stuff! But because there are so few players in this game, their quality makes all the difference in ending up with those perfect melt in your mouth cookies you’re dreaming about.
Step-by-Step Instructions for Crispy Meringue Treats
Alright, this is where the magic actually happens! Don’t rush this part, because the technique guarantees that final, beautiful texture for your crispy meringue treats. We’re aiming for cookies that are impossibly light but sturdy enough to package up as homemade meringue gifts later. Make sure your oven is preheated to a super low temperature—we’re not really baking these; we’re drying them out gently. Line two baking sheets with parchment paper. If you’re nervous about sticking, I highly recommend making a little homemade cake goop mixture to brush lightly across the paper!
First things first: your equipment *must* be clean. I mean squeaky clean! Any trace of grease or egg yolk residue will ruin your volume. Get your room-temperature egg whites and the cream of tartar into that clean bowl and start mixing on medium speed.
Whipping Technique: How to Make Meringue
The moment you start beating the egg whites with the cream of tartar, you’ll see them start to froth up. Keep going until you hit soft peaks—that means when you lift the whisk, the peaks droop over immediately, like a sad little cartoon dog’s ears.
Now comes the slow part. You need to add that full cup of sugar, but you can’t dump it in! Add it one tablespoon at a time. I try to count to thirty Mississippi’s between each spoonful. This gives the sugar time to dissolve properly. If you rush this, your final meringue cookies will weep syrupy tears later, and nobody wants that mess!
Once all the sugar is in, crank the mixer up high—we’re talking high speed—and beat it for a solid 8 to 10 minutes. You are looking for stiff, glossy peaks. How do you know they’re ready? Lift the whisk straight up; the peak should stand tall and proud, like a tiny white cone that doesn’t even wobble. If you gently bend one over, it should hold its shape perfectly, not sag at all. That gorgeous, thick mixture means you’re ready for flavoring. Quickly beat in your vanilla.
Piping and Shaping Your Meringue Kisses Recipe
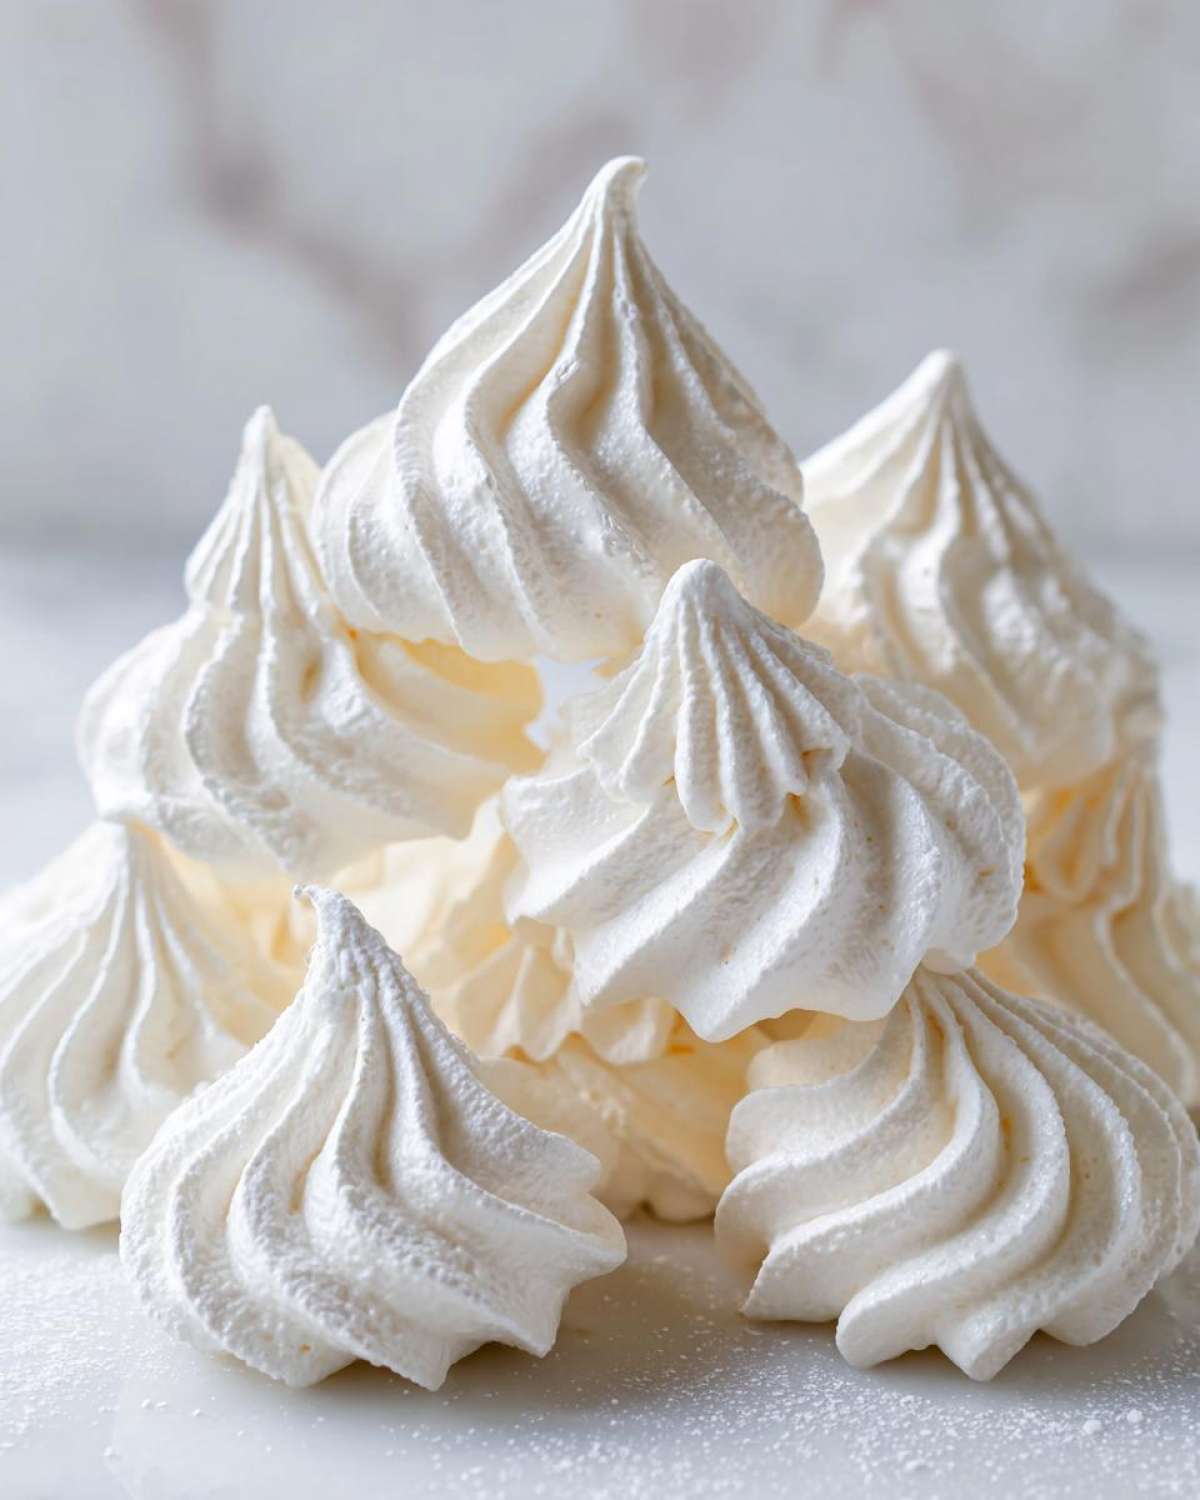
This is my favorite part! You can load that glorious, stiff meringue into a piping bag using a big star tip—like the Wilton 1M—to make little swirls, your very own meringue kisses recipe! If you aren’t feeling fancy, just use two spoons to scoop rustic little dollops onto the parchment. Just try to keep them roughly the same size so they bake evenly.
They go into that barely warm oven (200°F / 95°C) for about an hour and fifteen minutes, maybe an hour and a half. You’re looking for them to be dry and light enough to slide right off the paper without any coaxing. But here’s the non-negotiable final trick for those perfect melt in your mouth cookies: turn the oven OFF when they look done.
Prop the oven door open slightly with a wooden spoon or the handle of a spatula. Leave them in there to cool down slowly for at least an hour, or honestly, overnight is even better. This slow drying process is the last critical step to prevent cracking and ensure maximum crispness!
Tips for Success with Your Vanilla Meringue Recipe
Even though this Vanilla Meringue Recipe is super straightforward, there are a few crucial things I’ve learned over the years about making sure humidity doesn’t sabotage your hard work. We’re dealing with pure protein and sugar here, so environmental factors can sometimes throw a wrench in the works.
First off, let’s talk about cleanliness again because it’s worth repeating. When you separate your eggs, make sure you do it slowly and gently. If even a tiny speck of yolk lands in your whites, the fat content will prevent them from ever reaching those stiff peaks we need. It’s a pain, but separating them one egg at a time into a clean little bowl before adding it to the main mixing bowl saves the whole batch if one yolk breaks!
The other big concern, especially if it’s raining outside, is the humidity. Egg whites love dry environments. If you’re trying to make these on a super damp day, the finished cookies might feel slightly tacky, even after drying overnight. If you notice that happening, just toss them back into the turned-off, still-warm oven for an extra hour of drying time before you take them out. Also, if you happen to make a batch that turns out a little soft, don’t throw them away! I wrote a quick little trick for reviving slightly soft cookies over here that might come in handy when reheating them slightly.
Finally, storage is non-negotiable for keeping them perfect. As soon as they are fully cooled from the oven, get them into an airtight container right away. They don’t need to be refrigerated, but they do need to be protected from any outside air. This keeps that crisp exterior locked in until you’re ready to serve them!
Flavor Variations for Festive Meringue Kisses
Okay, once you have this classic meringue cookies recipe locked down, the sky is the limit! The base vanilla flavor is gorgeous—it’s so clean and sweet—but naturally, I can never stop myself from playing around with them, especially when holidays roll around. Since these are basically pure sugar and air, they take on other flavors so beautifully. You get these stunning, vibrant, and totally customizable little treats!
If you want to try something really fun and vibrant without changing the texture much, you have to try adding a little powdered flavoring. The search results are full of people asking about Jello Meringue Cookie Recipe variations, and it’s so simple! After your stiff peaks form (right before you fold in the vanilla), just gently fold in about a tablespoon of powdered Jello—strawberry or lime work great for color! It adds a lovely subtle fruitiness.
For the winter months, I personally go straight for something minty. Making Peppermint Meringue Cookies is so rewarding. I usually swap out the vanilla extract for a half-teaspoon of pure peppermint extract. If I’m feeling extra festive, I’ll even reserve about a quarter of the meringue and gently fold a tiny bit of red food gel coloring into it. Then, you alternate piping the white and red meringue together! They look amazing stacked up.
And don’t forget about swirling! If you’ve ever wanted to try a pretty swirl, take some melted chocolate or raspberry reduction—maybe something like the one I use in my raspberry swirl brownies—and drizzle it right onto your piping bag tip before you load the meringue in. When you pipe out your beautiful kisses or swirls, you get this gorgeous ribbon effect running through them!
Honestly, these variations make fantastic homemade meringue gifts because they look so professional, even though we know how incredibly easy the base recipe is!
Storage and Keeping Meringue Cookies Fresh
Okay, you’ve done the hard work: you whipped them perfectly, you baked them low and slow, and now they’re fully dry. Congratulations! But don’t mess up the finish line by storing them wrong! These little guys are the definition of delicate. Exposure to moisture—even just the air in your kitchen—can turn those beautifully crisp treats into sad, slightly chewy blobs overnight. Yuck!
The number one rule for keeping your baked meringue firm and snappy is airtight storage at room temperature. I always use large, flat cookie tins if I can, but any container with a really good sealing lid works just fine. The key is locking out humidity. Don’t even think about trying to put them in the fridge! The cold air inside the refrigerator is just way too damp and will make them weep and liquefy almost instantly.
I try not to get moisture in there at all, but sometimes I’ll toss one of those little silica gel packets—you know, the ones that come in shoe boxes or vitamin bottles—into the container when I store them. Just make sure it’s the food-safe kind! If you stack them, put a piece of wax paper or parchment paper between the layers. This prevents any slight friction from knocking off those lovely little peaks you just piped by hand.
If you’ve stored them well, they should stay perfectly crisp for at least a week, maybe even two. Honestly, ours never last that long because everyone grabs them first when they see them coming out of the oven!
Frequently Asked Questions About Meringue Cookies
I get so many messages asking about tricky spots in this recipe, and honestly, it just means you’re trying to make these beautiful meringue cookies, which I love! It’s all about troubleshooting those little baking gremlins. Don’t worry if your first batch doesn’t look perfect; that’s just part of the learning curve when working with something as light as air. Here are the most common things people ask me about.
Can I make meringue cookies without cream of tartar?
You *can* try, but I really, really wouldn’t recommend it for this recipe if you want that perfect structure. Cream of tartar is your stabilizer; it’s what helps those egg whites form strong, stiff peaks that don’t deflate under the weight of the sugar. If you absolutely don’t have any, you can substitute about a teaspoon of fresh lemon juice—it does the same job as an acid stabilizer.
However, I always suggest sticking to the recipe for your first batch of these delicate sweet treats. The stabilization power of cream of tartar is unmatched, ensuring you get those high, beautiful peaks that lead to evenly baked, crispy results. You want guaranteed success, right?
Are meringue cookies naturally gluten free?
Yes! This is one of the things I adore about these simple egg white desserts. Since this recipe relies entirely on egg whites and sugar for its structure—we aren’t adding any flour, baking powder, or almond meal whatsoever—they are inherently gluten-free! They are a fantastic, light option for anyone avoiding gluten. You just need to make sure any extracts you use, like vanilla or peppermint, are also certified gluten-free, just to be safe!
Why are my meringue cookies weeping or sticky?
Oh, the weeping! That’s the most frustrating part of making any meringue. If you see little beads of sticky syrup forming on the surface of your cookies, or if the whole batch feels tacky instead of wonderfully crisp, it usually comes down to one of two things, maybe three!
First, always check the humidity. If it’s raining heavily outside, the sugar in the meringue is moisture-hungry, and it will pull water from the air, leading to stickiness. Second, and more common, is insufficient baking and drying time. Meringue needs to dry out completely, not cook through like a standard cookie. If you pull them out too soon, they will be sticky underneath.
Make sure you check the oven temperature again—it needs to be low (200°F) for a long time! If you think they baked long enough but are still sticky, just pop the oven back on to 200°F for another 30 minutes, or just leave them in the cooling oven overnight as the recipe suggests. That slow, gentle finish dries them out perfectly!
If you still have troubleshooting questions once you start baking, feel free to reach out to me directly through my contact page; I love hearing from fellow bakers!
Making Homemade Meringue Gifts and Holiday Meringue Cookie Ideas
When I finish a batch of these beautiful meringue cookies, I immediately think about how perfect they would be to package up. Because they are so light and they last wonderfully if stored correctly (which we talked about!), they make the loveliest homemade meringue gifts. Who wouldn’t want a box of these airy, sweet puffs?
For general gifting, I love lining small, tin gift boxes with festive cellophane or tissue paper, then carefully nesting the cookies inside. They look stunning on their own, but they also look gorgeous mixed in a platter with some chocolate-dipped pretzels or these little cranberry brie bites if you’re serving savory things too.
For holiday meringue cookie ideas, you absolutely have to use the peppermint variation we discussed earlier! The red and white stripes look exactly like old-fashioned candy canes. They are a beautiful addition to any Christmas cookie plate. For Easter, you can easily pipe them into small egg shapes and use a touch of food coloring in the batter for soft pastel colors. These little delights truly elevate any spread; you’ll feel like a total pro when you hand over a box of these melt-in-your-mouth bites!
Nutritional Snapshot of These Simple Egg White Desserts
Since these simple egg white desserts are primarily made of egg whites and sugar, the nutritional profile is pretty straightforward, but I always want to be clear about what you’re eating! Remember, these figures are just estimates based on the ingredients listed in the recipe, assuming you get about 36 cookies per batch. They are fantastic for being naturally low in fat, which is a huge plus!
Here is a quick look at what one single meringue cookie offers:
- Serving Size: 1 cookie
- Calories: 35
- Sugar: 9g (Don’t forget, it takes a lot of sugar to stabilize the volume!)
- Sodium: 2mg
- Fat: 0g
- Protein: 0g
- Carbohydrates: 9g
They are definitely a pure sugar indulgence, but hey, they are fat-free! And considering how incredibly satisfying they are—it takes me about three of these to equal one rich chocolate chip cookie—I feel pretty good about them being on the table!
Share Your Perfect Meringue Cookies Creations
Well, that’s it! You now have all my secrets for making the most perfectly crisp, light, and airy meringue cookies imaginable. It really just comes down to clean bowls, patient sugar incorporation, and that crucial slow cooling process. These are my favorite cookies to bake during the holidays because they are so unexpectedly simple once you know the ropes.
Once you try this recipe, please come back and let me know how they turned out for you! Did you try the Jello swirl? Did you go for the peppermint? Leave a comment below, let me know the flavor you chose, and definitely give the recipe a 5-star rating if it worked perfectly for you—that helps other bakers trust the process!
I always love seeing your baking adventures, so if you post a picture on social media, tag me! You can find more tips and recipes over on the main blog page anytime you need a dose of baking inspiration. Happy whipping!
Making Homemade Meringue Gifts and Holiday Meringue Cookie Ideas
When I finish a batch of these beautiful meringue cookies, I immediately think about how perfect they would be to package up. Because they are so light and they last wonderfully if stored correctly (which we talked about!), they make the loveliest homemade meringue gifts. Who wouldn’t want a box of these airy, sweet puffs?
For general gifting, I love lining small, tin gift boxes with festive cellophane or tissue paper, then carefully nesting the cookies inside. They look stunning on their own, but they also look gorgeous mixed in a platter with some chocolate-dipped pretzels or these little cranberry brie bites if you’re serving savory things too.
For holiday meringue cookie ideas, you absolutely have to use the peppermint variation we discussed earlier! The red and white stripes look exactly like old-fashioned candy canes. They are a beautiful addition to any Christmas cookie plate. For Easter, you can easily pipe them into small egg shapes and use a touch of food coloring in the batter for soft pastel colors. These little delights truly elevate any spread; you’ll feel like a total pro when you hand over a box of these melt-in-your-mouth bites!
Honestly, these variations make fantastic homemade meringue gifts because they look so professional, even though we know how incredibly easy the base recipe is!
Nutritional Snapshot of These Simple Egg White Desserts
Since these simple egg white desserts are primarily made of egg whites and sugar, the nutritional profile is pretty straightforward, but I always want to be clear about what you’re eating! Remember, these figures are just estimates based on the ingredients listed in the recipe, assuming you get about 36 cookies per batch. They are fantastic for being naturally low in fat, which is a huge plus!
Here is a quick look at what one single meringue cookie offers:
- Serving Size: 1 cookie
- Calories: 35
- Sugar: 9g (Don’t forget, it takes a lot of sugar to stabilize the volume!)
- Sodium: 2mg
- Fat: 0g
- Saturated Fat: 0g
- Unsaturated Fat: 0g
- Trans Fat: 0g
- Carbohydrates: 9g
- Fiber: 0g
- Protein: 0g
- Cholesterol: 0mg
They are definitely a pure sugar indulgence, but hey, they are fat-free! And considering how incredibly satisfying they are—it takes me about three of these to equal one rich chocolate chip cookie—I feel pretty good about them being on the table!
Share Your Perfect Meringue Cookies Creations
Well, that’s it! You now have all my secrets for making the most perfectly crisp, light, and airy meringue cookies imaginable. It really just comes down to clean bowls, patient sugar incorporation, and that crucial slow cooling process. These are my favorite cookies to bake during the holidays because they are so unexpectedly simple once you know the ropes.
Once you try this recipe, please come back and let me know how they turned out for you! Did you try the Jello swirl? Did you go for the peppermint? Leave a comment below, let me know the flavor you chose, and definitely give the recipe a 5-star rating if it worked perfectly for you—that helps other bakers trust the process!
I always love seeing your baking adventures, so if you post a picture on social media, tag me! You can find more tips and recipes over on the main blog page anytime you need a dose of baking inspiration. Happy whipping!
PrintThe Ultimate Easy Meringue Cookies Recipe: Light, Crisp, and Perfect Every Time

Make light, crisp meringue cookies that melt in your mouth using this simple French meringue method. This recipe is naturally gluten-free and perfect for beginners.
- Prep Time: 15 min
- Cook Time: 90 min
- Total Time: 1 hour 45 min
- Yield: About 3 dozen
- Category: Dessert
- Method: Baking
- Cuisine: American
- Diet: Gluten Free
Ingredients
- 4 large egg whites, room temperature
- 1 cup granulated sugar
- 1 teaspoon pure vanilla extract
- 1/4 teaspoon cream of tartar
- Pinch of salt
Instructions
- Preheat your oven to 200°F (95°C). Line two baking sheets with parchment paper.
- Ensure your mixing bowl and whisk attachment are completely clean and dry. Add the egg whites and cream of tartar to the bowl.
- Beat the egg whites on medium speed until soft peaks form.
- Slowly add the granulated sugar, one tablespoon at a time, while beating continuously on medium-high speed. Wait about 30 seconds between additions.
- Once all the sugar is added, increase the speed to high and beat until stiff, glossy peaks form. When you lift the whisk, the peak should hold its shape without drooping. This usually takes 8 to 10 minutes total.
- Beat in the vanilla extract until just combined.
- Transfer the meringue to a piping bag fitted with a large star tip (like Wilton 1M) or use a spoon for rustic dollops.
- Pipe small mounds (about 1.5 inches wide) onto the prepared baking sheets.
- Bake for 1 hour and 15 minutes to 1 hour and 30 minutes. The cookies should look dry and lift easily from the parchment paper.
- Turn off the oven, prop the door open slightly with a wooden spoon, and let the cookies cool completely inside the oven for at least 1 hour, or preferably overnight. This drying process helps achieve the crisp texture.
Notes
- For best results, use egg whites that have been separated a day ahead and allowed to come to room temperature.
- If you want to add color or flavor (like Jello powder or peppermint extract), mix it in during the last minute of beating after the stiff peaks form.
- Store finished, cooled meringue cookies in an airtight container at room temperature.
Nutrition
- Serving Size: 1 cookie
- Calories: 35
- Sugar: 9
- Sodium: 2
- Fat: 0
- Saturated Fat: 0
- Unsaturated Fat: 0
- Trans Fat: 0
- Carbohydrates: 9
- Fiber: 0
- Protein: 0
- Cholesterol: 0