

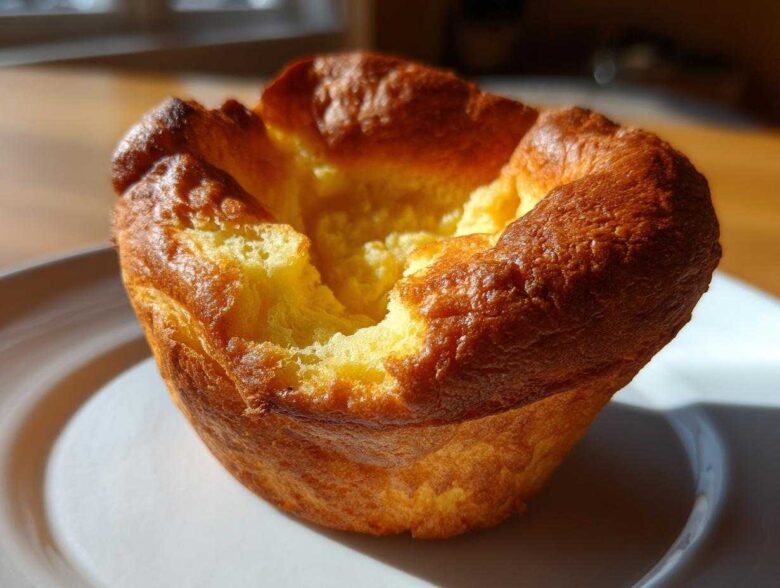
Oh, the dreaded flat Yorkshire pudding! If you’ve ever stared miserably at those sad, flat puddings next to your beautiful roast beef, wondering where you went wrong, trust me, I’ve been there. It’s the bain of many a British baker’s existence. But I’m here today because I finally cracked the code. This isn’t just another recipe; this is the secret manual for making the ultimate yorkshire pudding—the kind that rises ridiculously high, gets super crispy on the outside, and stays deliciously light and fluffy right in the middle. It took me ages, but I figured out the vital little steps that take you from flat disc to puffy cloud. If you loved how easy the technique was for scalloped potatoes, you’ll find these steps just as straightforward. Get ready to impress everyone at your next Sunday Roast!
Why This is the Best Yorkshire Pudding Recipe (Foolproof Yorkshire Puddings)
What makes this the absolute best yorkshire pudding recipe? Honestly, it’s the commitment to simplicity and temperature shock. Lots of recipes confuse you with complicated ingredient ratios or suggest using things like soda water, but that just complicates things! My goal here was creating foolproof yorkshire puddings that anyone—even if your stove runs hot or cold—can nail perfectly. We are aiming for that stunning contrast: deeply golden and shatteringly crispy yorkshire puddings edges giving way to the softest, fluffiest inside.
Trust me on the resting time here. I used to rush this step, thinking the batter was fine if it looked smooth right after whisking. Big mistake! Letting that batter chill or just sit on the counter for at least 30 minutes lets the starch molecules relax. It’s a little bit of kitchen science working for us. When that relaxed batter hits the smoking hot fat? That’s when the magic happens and you get that incredible, unmatched lift every single time. Try making the batter ahead of time, maybe even the night before you plan on serving your buttery garlic naan pizza, and you’ll see the difference!
Essential Ingredients for Authentic Yorkshire Pudding
Forget fancy stuff! The beauty of a classic yorkshire pudding is that it uses five incredibly basic things. You probably have everything in your pantry right now. But listen closely, because the way you treat these simple items makes all the difference. We need 140g of plain flour, four large eggs, 200ml of milk, a pinch of salt, and the cooking fat.
While those items look straightforward, I need you to do two specific prep jobs before you start mixing. First, make sure those 4 large eggs are brought close to room temperature—cold eggs hitting that hot fat create steam but they don’t help create that perfect structure like room-temp eggs do. Second, about the fat! For the *most* traditional taste, nothing beats beef dripping. It gives you those incredible brown caramelized edges. If you aren’t doing a beef roast, though, a good neutral, high-heat oil works just fine. We’ll talk swaps in a moment.
Ingredient Notes and Substitutions for your yorkshire pudding
Let’s talk dairy. Whole milk is my go-to. It has the perfect fat content to make the puddings rich but still light enough to rise. If you only have semi-skimmed milk, it will still work, but your puddings might be slightly less rich and maybe a touch less golden. Don’t use skimmed milk, though; it’s just too watery for this recipe!
If you are following the vegetarian route, which is totally doable, you simply swap the beef dripping for a decent vegetable oil—something like sunflower or rapeseed oil works well because it has a high smoke point. Just ensure whatever fat you choose is high quality, because if the fat tastes bad, your yorkshire pudding will definitely taste bad! You could try making brown sugar glazed carrots while you wait for your tin to heat up!
How to Make yorkshire pudding: Step-by-Step Instructions
Alright, let’s get down to business because this is where most people lose that crucial lift we’re aiming for. Remember, we need that easy yorkshire pudding batter to be perfectly rested—I insist on 30 minutes minimum, but honestly, an hour is even better. Once it’s rested, move on to the heat setup. Crank that oven up high, 220°C is what I use. Then comes the critical part: the fat.
You must preheat your baking tin—whether you’re doing 12 small ones or one big one—with the oil or dripping inside for a full 10 minutes. When you pull that tin out, that fat should be shimmering and just starting to smoke. If it’s not smoking, it’s not hot enough! You need that instantaneous sizzle when the batter hits the pan. I learned this the hard way. When you pour, you have to be confident! Don’t hover or dither. Pour the batter quickly and evenly into the smoking fat, filling those holes only about halfway max, and get that tin RIGHT back into the oven. Hesitation means losing heat, and losing heat means flat puddings. Don’t worry about splashing a little batter onto the sides; that’s part of the charm!
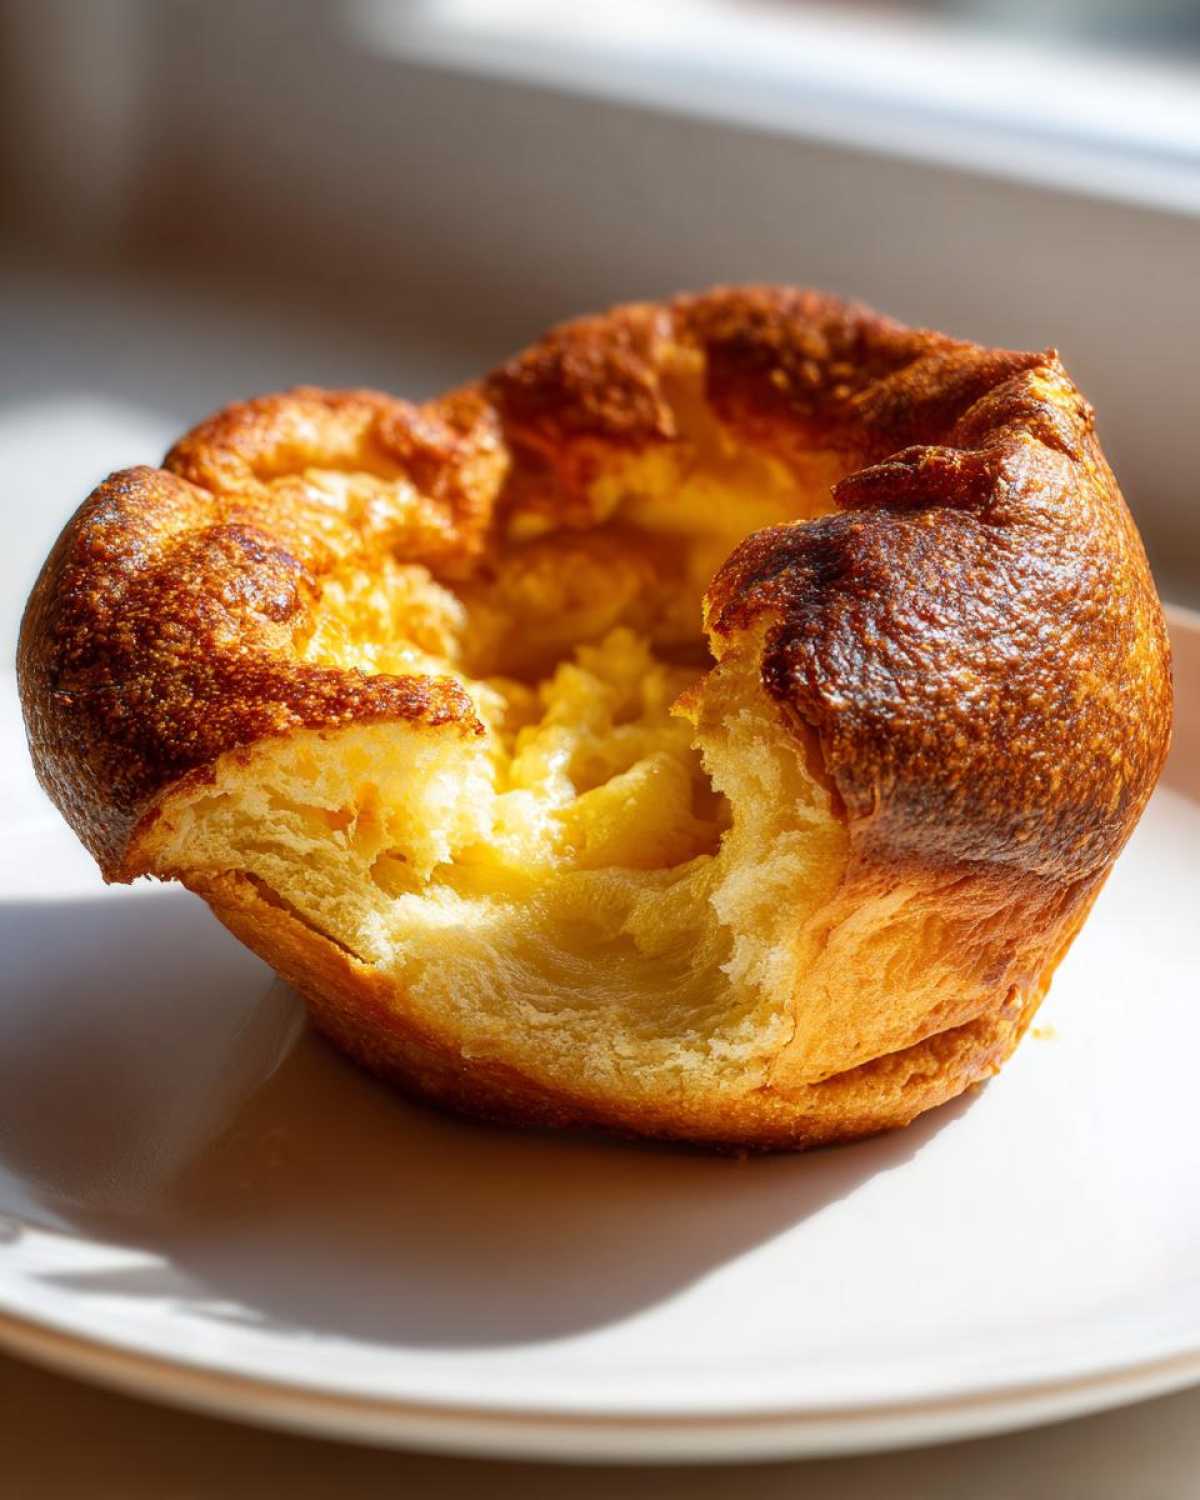
Once they are safely in the oven, you have to treat them like delicate newborn babies. Seriously, don’t peek! Keep that oven door firmly shut for the first 20 minutes. Even if you think you hear them collapsing—which you shouldn’t if you followed the steps—don’t open it! Opening the door releases the steam that forces them upwards. We bake them for about 20 to 25 minutes, aiming for that deep, unmistakable golden-brown color that screams crispy yorkshire puddings.
Yorkshire Pudding Tips and Tricks for Maximum Rise
The number one reason for failure is usually temperature inconsistency. For truly puffy yorkshire puddings, you need that ferocious heat shock. Think of it like a soufflé; you need maximum energy right at the start to set the structure before the weight of the pudding pulls it down.
So, here’s the deal on the no-peek rule: Never open the oven door until the minimum specified bake time has passed. The rush of cold air from opening the door causes condensed steam inside the puddings—steam that hasn’t yet fully set the flour structure—to collapse instantly. That’s why you end up with those dense, heavy bottoms. If they look incredible after 20 minutes, give them another 5 minutes, but keep the door shut! This commitment keeps them light and airy, making them perfect for soaking up gravy during your creamy pesto chicken soup (okay, maybe save them for the beef, but you get the idea of pairing them with delicious mains!).
Serving your Traditional British Side Dish yorkshire pudding
The moment of truth! You’ve pulled out perfectly puffed, beautifully golden brown puddings, and now you need to serve them fast. These are best served immediately straight from the oven so you maintain that wonderful shatteringly crisp exterior. There is almost nothing sadder than a damp, chewy yorkshire pudding that’s been sitting on the counter too long.
As a quintessential Traditional British Side Dish, these belong right next to mountains of tasty roast potatoes and gravy on your plate for a proper Sunday Roast Recipes spread. If you made the small individual ones, just slide them right off the muffin tin onto the serving plate. If you opted for one giant one, make sure you cut it quickly so everyone gets a piece straight from the middle section, which is always the puffiest and airiest!
Think about what you’re serving them with—homemade gravy is a must! And if you’ve got some sweet chili roasted sweet potatoes handy for balance, that’s a lovely modern twist on the classic plate.
Storage and Reheating yorkshire pudding
Okay, confession time: sometimes I actually prefer the next-day, reheated pudding! They can totally make a quick lunch, but you have to treat them right when warming them up. If you have any leftovers, let them cool completely first, then tuck them away in an airtight container. Keep them on the counter for up to a day, or pop them in the fridge if you need them to last longer.
The absolute biggest mistake? The microwave. Please, for the love of high-rising puddings, do not microwave them! They turn into sad, soggy sponges instantly. The only way to bring back that crispy edge is high heat. Pop them straight onto a baking tray in a hot oven—I’m talking 200°C—for about 5 to 7 minutes. They will crisp up beautifully, tasting almost as good as fresh. They pair brilliantly with leftover gravy or even dipped into some leftover creamy Greek yogurt mac and cheese, oddly enough!
Yorkshire Pudding Variations and Dietary Swaps
Once you master the technique for the basic batter, the fun really begins! You can totally change the shape without changing a thing about the recipe, or you can look at making swaps if you have guests with dietary needs. My favorite way to serve them is often just slightly different based on the size of the roast I’m doing that week.
If I’m cooking for a huge crowd and have a massive piece of beef roasting, I usually skip the 12-hole tin and make one colossal yorkshire pudding in a deep roasting pan. Pour all the batter in once the fat is smoking hot—you have to be quick! It puffs up ridiculously high around the edges, creating a wonderful trough in the middle perfect for holding about a gallon of gravy. Just remember that a giant pudding takes longer to cook through completely, so be prepared to add 10 or 15 minutes to the baking time. Don’t worry if the center looks just slightly softer than the rest; that’s the best part for spooning gravy onto, like a big bread bowl!
Making Individual Yorkshire Puddings is the classic pub style, of course, and honestly? It’s less stressful if you’re worried about them collapsing because the small ones tend to be sturdier helpers after they come out of the oven. But if you’re feeling ambitious, you can absolutely make dessert puddings too! Just swap out the oil for melted butter or a little refined coconut oil in the bottom of the tin. You still use the savory batter, but instead of serving it with beef, you fill that airy center with stewed apples, ice cream, or jam. It’s just a fun way to use up any leftover batter!
Now, let’s talk about those dietary swaps, because everyone deserves a proper Yorkshire pudding with their Sunday dinner. If you’re dealing with gluten-free guests, the base recipe is still a great starting point, but you absolutely need to swap that plain flour for a high-quality, balanced gluten-free all-purpose flour blend that already contains a binder like xanthan gum. If you don’t use a blend with a binder, your puddings will likely be flat and crumbly. Just sift the GF flour exactly as you would regular flour, and whisk gently. You might find you need to add an extra splash of milk, as GF flours can sometimes absorb liquid a bit differently. It’s worth the effort to ensure everyone can enjoy a side of creamy taco gnocchi, or whatever delicious main you’ve prepared!
Frequently Asked Questions about yorkshire pudding
Why did my yorkshire pudding sink after rising?
This usually happens for one reason: opening the oven door too early! If you peek before the 20-minute mark, the rush of cooler air cools the inside steam, and that steam collapses the delicate, unset structure of the pudding. Also, if your batter wasn’t rested properly, it might not have enough structure to hold itself up in the first place. Stick to the recipe guidelines for the best yorkshire pudding, and you won’t have this issue!
Can I use cold batter, or is resting time really necessary?
I know we’re all pressed for time, especially when getting a massive Sunday Roast ready, but please, try to rest the batter for at least 30 minutes. Cold batter hitting smoking hot fat creates a steam shock, yes, but the gluten in the flour needs time to relax; otherwise, the batter is springy and tough and won’t create those lovely airy pockets. For truly the fluffy yorkshire puddings you dream about, give the batter time to settle on the counter. If you really can’t wait that long, at least let it sit on top of the warm oven for 15 minutes!
Is using beef dripping absolutely necessary for crispy yorkshire puddings?
For the most authentic, traditional, deeply flavorful result, yes, beef dripping is unbeatable! It gives those fantastic, deep brown, savory notes that vegetable oil just can’t match when achieving crispy yorkshire puddings. However, if you are making them vegetarian or just don’t have dripping on hand, a refined vegetable oil with a high smoke point (like canola or sunflower) is a perfectly fine substitute. The key isn’t the fat itself, it’s that the fat must be absolutely smoking hot before you pour that easy yorkshire pudding batter in. Don’t skimp on the heat!
Does Gordon Ramsay’s method for yorkshire pudding differ much from this one?
You know, I checked out a few celebrity approaches, and honestly, most of the really great ones stick to the same core principles we use here: good quality flour, rested batter, and screaming hot fat. Some people swear by adding a tiny bit of oil to the fat, or using only egg whites, but for a reliable, foolproof yorkshire puddings approach, the classic 4-egg, milk, and flour ratio we use here is tried and tested across generations. We’re keeping it classic and reliable, just like making air fryer buffalo cauliflower wings—stick to the essentials, and you can’t go wrong!
Estimated Nutritional Data for your yorkshire pudding
Now, I know when we’re making something this glorious, we aren’t really worried about the numbers, are we? But just for completeness—because after all that work, you should know what magnificent things you’re eating—here’s a rough nutritional estimate for one of these beauties. Keep in mind, this is based on using vegetable oil, not the richer beef dripping!
- Serving Size: 1 pudding
- Calories: About 130
- Fat: Roughly 7g
- Carbohydrates: About 13g
- Protein: A solid 5g
The fat content is really where things shift drastically depending on what you cook them in. If you use beef dripping—which you totally should for a traditional Sunday Roast—you’re looking at slightly higher saturated fat content, but honestly, that’s where all the incredible flavor comes from! If you’re pairing these with your lovely sausage potato breakfast hash, just remember these numbers fluctuate based on how much oil you pour into that hot tin. These are just guiding figures, but they prove that an authentic, Golden Brown Puddings side dish doesn’t have to weigh you down too much!
Share Your Perfect yorkshire pudding Results
I’m so excited for you to try this technique! Getting that dramatic rise on your yorkshire pudding is such a satisfying moment, and I really want to hear about it. Did you manage those ridiculously crispy edges? Did everyone at your table gasp when you pulled out that tray of puffy, golden treats?
When you make these, please come back and drop a comment down below! Tell me how long you let your batter rest and, the big question: did you use the beef dripping or did you stick to oil? Knowing what works best for folks in different kitchens really helps me keep refining these classic recipes. It’s so exciting to see everyone mastering these Golden Brown Puddings.
And if you took a photo of your perfectly puffed creations—maybe sitting next to some incredible roast gravy or perhaps cooling down beside a delicious chocolate peanut butter mug cake you made for dessert—be sure to tag me on social media! Seeing your success stories is the best part of sharing these home-tested recipes. Happy baking, and I can’t wait to see those magnificent rises!
PrintThe Perfect Foolproof Yorkshire Pudding

Make classic British Yorkshire puddings that are crispy outside and light inside using this simple, reliable recipe.
- Prep Time: 10 min
- Cook Time: 25 min
- Total Time: 65 min
- Yield: 12 small puddings
- Category: Side Dish
- Method: Baking
- Cuisine: British
- Diet: Vegetarian
Ingredients
- 140g plain flour
- 4 large eggs
- 200ml milk (whole milk works best)
- Pinch of salt
- Vegetable oil or beef dripping, for cooking
Instructions
- Sift the flour and salt into a large bowl. Make a well in the center.
- Crack the eggs into the well. Begin whisking the eggs, gradually incorporating the flour from the sides.
- Slowly pour in the milk while continuously whisking until you have a smooth, thin batter, similar to single cream.
- Cover the bowl and let the batter rest at room temperature for at least 30 minutes, or up to several hours in the refrigerator. This resting time is important for the rise.
- Preheat your oven to 220°C (425°F or Gas Mark 7). Place a 12-hole muffin tin (or a roasting tin for larger puddings) into the oven.
- Add about 1 teaspoon of oil or beef dripping into each hole of the tin. Place the tin back into the hot oven for 10 minutes until the fat is smoking hot.
- Carefully remove the hot tin from the oven. Quickly and evenly pour the batter into the hot fat, filling each hole about halfway.
- Immediately return the tin to the oven. Do not open the oven door for at least 20 minutes while they cook.
- Bake for 20 to 25 minutes until the puddings are well risen, deep golden brown, and crisp. Serve immediately with your roast dinner.
Notes
- Use beef dripping instead of oil for the most traditional flavor and best crispness.
- The fat must be smoking hot before you add the batter; this shock helps them rise.
- Do not overcrowd the oven; ensure there is space around the tin for air circulation.
- If you prefer individual large puddings, use a deep roasting tin and ensure the fat is deep enough to come halfway up the sides of the batter.
Nutrition
- Serving Size: 1 pudding
- Calories: 130
- Sugar: 2
- Sodium: 90
- Fat: 7
- Saturated Fat: 2
- Unsaturated Fat: 5
- Trans Fat: 0
- Carbohydrates: 13
- Fiber: 0
- Protein: 5
- Cholesterol: 75