

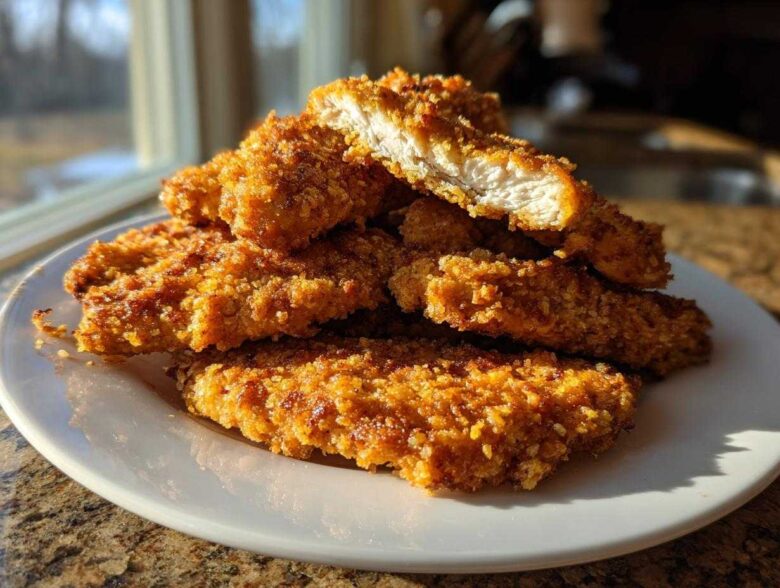
Oh my gosh, are you craving that perfect crunch right now? You know the one—the sound of biting through a golden crust that instantly crumbles away to reveal juicy, tender chicken? And when you add salty, nutty Parmesan into the mix? It’s just heaven! For years, I struggled to get that texture right in the oven; everything ended up soft and sad. But I finally nailed the technique, and now I can share the secret to making the best Crispy Parmesan Chicken Tenders you’ve ever had. Forget takeout! These are perfect for a super quick weeknight dinner or when you need easy game-day snacks. Seriously, once you get the breading station organized just right, you won’t ever look back. If you’re looking for another amazing Parmesan coated chicken option for dinner later, you should check out my guide on how to get Parmesan-crusted chicken crispy and juicy!
Why You Will Love These Crispy Parmesan Chicken Tenders
Okay, listen up, because this is why you need to drop everything and try these tonight. I’m not just saying they are good; I’m saying they solve dinner problems! This is my go-to for impressing people without stressing myself out.
- They are genuinely crispy! Thanks to the Panko breadcrumbs and a quick spray of oil, these bake up with an incredible crunch that lasts way longer than standard breaded chicken.
- The flavor is just spot on—that sharp, savory hit of Parmesan cheese blends perfectly with the garlic powder. It’s the ultimate cheesy chicken tenders recipe without the frying mess.
- It’s truly an easy chicken tender recipe. If you can set up three bowls, you can master this chicken. Prep flies by in about 15 minutes!
- It’s lighting fast! With only 22 minutes in the oven, this is the ideal quick weeknight chicken meal when you need something satisfying fast.
- They are super versatile. Whether you’re packing them for lunch or serving them up for picky eaters, these crowd-pleasers work every single time.
Honestly, just trust me on the texture alone. Those oven fried chicken tenders you’ve been dreaming about? This is them!
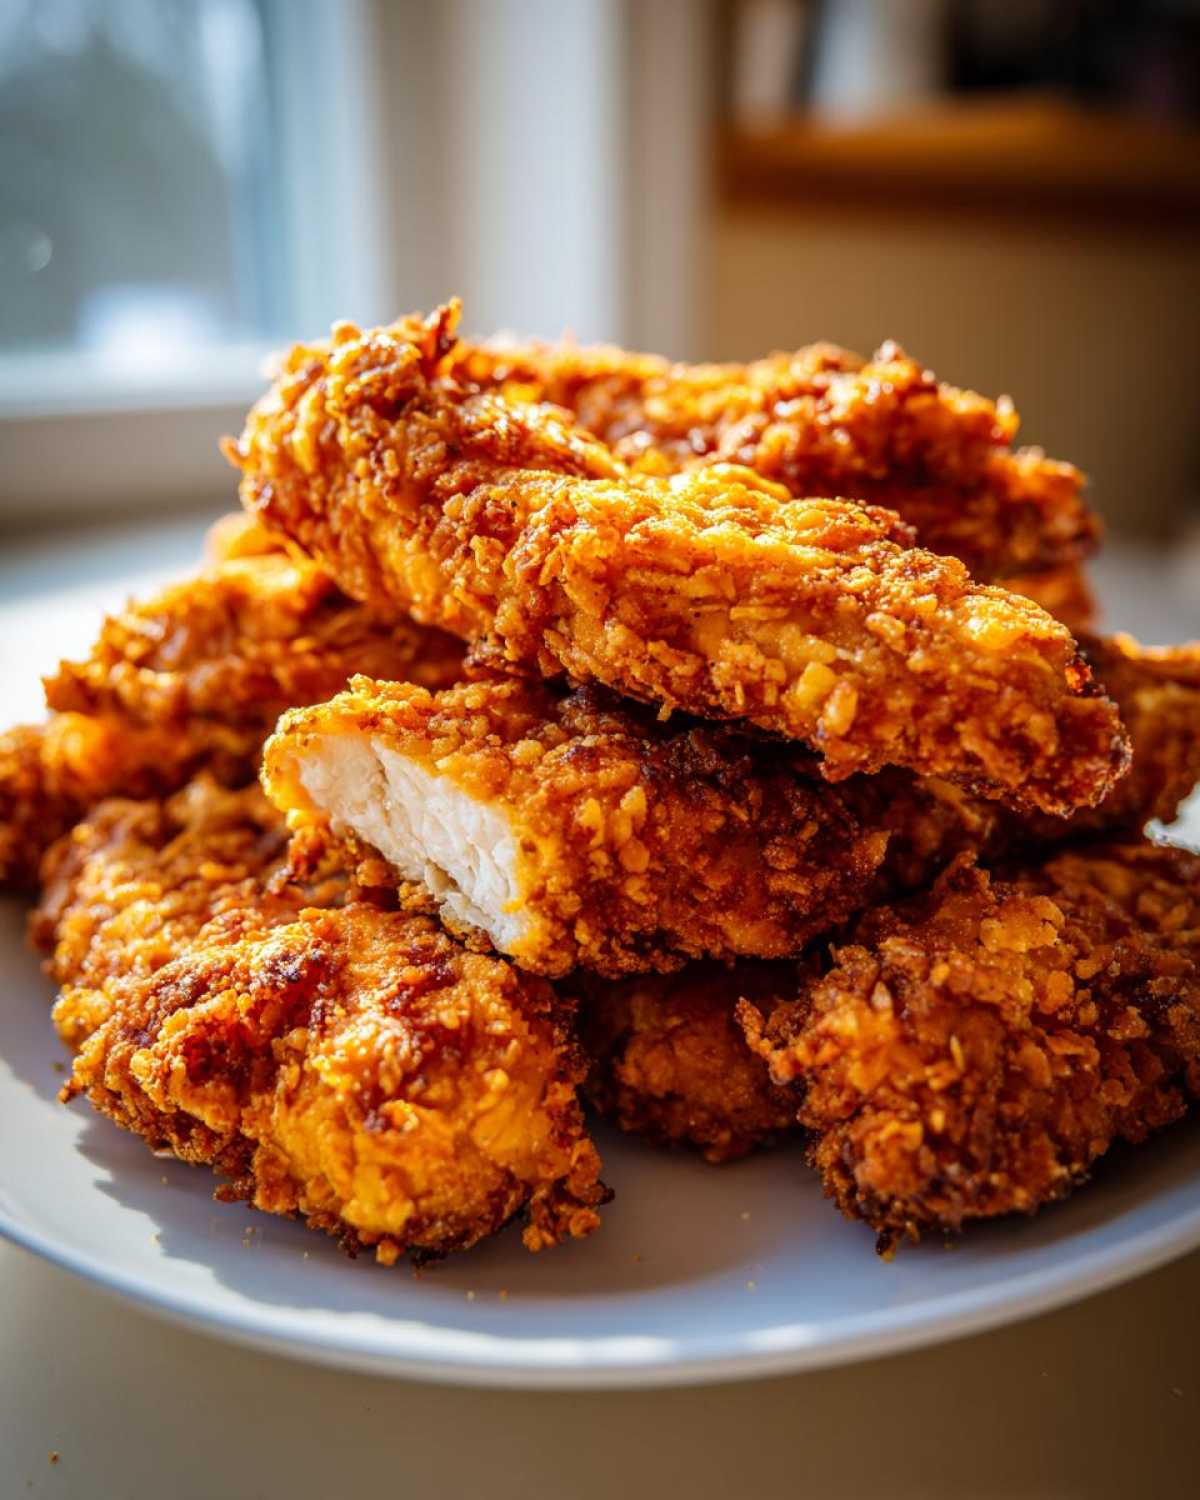
Ingredients for the Best Crispy Parmesan Chicken Tenders
Okay, ingredient list alert! This is where you gather your troops. I keep all of these stocked because once you taste these panko chicken tenders recipe beauties, you’ll want to make them constantly. Remember, quality matters here, especially the cheese!
Before you start chopping, you might want to bookmark my guide on the best way to use panko breadcrumbs—it really makes a difference in achieving that signature crunch for these Parmesan coated chicken strips! You can find the whole breakdown right here: best way to use panko breadcrumbs.
- 1.5 lbs boneless, skinless chicken breasts, cut into 1-inch strips (Make sure they are roughly the same size so they cook evenly, that’s a big rookie mistake!)
- 1 cup all-purpose flour (This is for the first dredge to help the egg stick.)
- 2 large eggs, beaten (Just whisk these until the yolks and whites are fully combined.)
- 1 cup Panko breadcrumbs (This is non-negotiable for maximum crispiness, trust me on this one!)
- 1/2 cup grated Parmesan cheese (Use the real stuff if you can; the flavor difference is huge.)
- 1 teaspoon garlic powder
- 1/2 teaspoon salt
- 1/4 teaspoon black pepper
- Cooking spray (This is our secret weapon for that golden-brown finish!)
That’s everything you need for a fantastic low carb Parmesan chicken base, minus the starch from the flour, of course. Look at that list—it’s so simple! Let’s get that famous breading station set up next!
Essential Equipment for Perfect Crispy Parmesan Chicken Tenders
Listen, you don’t need a deep fryer or a fancy gadget for these babies to work out perfectly. My kitchen is tiny, so I rely on simple tools to get the job done! Preparation is everything when you’re setting up your breading station; that’s half the battle won right there.
You’ll want to grab these items before you start cutting the chicken. See how easy this is? We’re just prepping for success!
- Baking Sheet: You need a good sturdy one! We’re baking these buddies, so make sure it’s large enough to hold all the tenders without them touching too much. Crowding leads to steaming, and steaming leads to soggy chicken—no thank you!
- Parchment Paper: This is essential for easy cleanup and it helps the crispy coating on the bottom stay firm. Seriously, don’t skip this step; it keeps your pan spotless.
- Three Shallow Dishes or Bowls: This is the heart of a successful breading effort. You need one dish for flour, one for the egg wash, and one for your glorious Panko-Parmesan mixture. Shallow ones are best so you can actually press the chicken into the coating later.
- A Reliable Meat Thermometer: Look, this is a non-negotiable item for me, especially when dealing with chicken. It’s the only way to guarantee these tenders are perfectly cooked through (165°F!) without drying them out. Don’t guess!
That’s it! No weird whisks or specialized spatulas needed. Get those three dishes lined up, and we can move on to the breading mayhem. It’s going to be so much fun getting these tenders ready!
How to Prepare Crispy Parmesan Chicken Tenders (Oven Method)
Alright, this is the main event! Getting these Crispy Parmesan Chicken Tenders ready for the oven takes precision, but it’s so satisfying. We are aiming for that perfect breading that seals in the juices and makes them unbelievably crunchy. First things first: crank that oven up! We need it hot—preheat your oven to 400°F (200°C) before you even pick up a piece of chicken. Once it’s heating, line that baking sheet with parchment paper and give it a little spritz of cooking spray. This prevents sticking and helps the bottom get nice and golden.
Now that we’re prepped, let’s get the breading station set up so we don’t lose momentum. We follow the standard three-step dance, which sounds simple, but the order is crucial for making sure you get the ultimate Crunchy Parmesan Crusted Chicken result. We’re going to bake these for about 18 to 22 minutes total, but we definitely need to flip them halfway through!
Setting Up the Breading Station
You need three stations, lined up in order right next to each other. Think of it like an assembly line for flavor!
- Dish One: The Flour Dust. Just dump in your cup of all-purpose flour. This first coat is super important because it dries the surface of the chicken a tiny bit, which helps the egg wash grab on tighter.
- Dish Two: The Sticky Binder. Pour in your two beaten eggs. This is the glue that holds everything together. Make sure the eggs are thoroughly mixed so you don’t end up with streaks of just white or just yolk on your tenders.
- Dish Three: The Crunch Master. This is where the magic happens! Mix your Panko breadcrumbs, the grated Parmesan cheese, the garlic powder, salt, and pepper right here. Mix it well so that salty Parmesan is evenly distributed throughout those light Panko flakes.
Have your chicken strips ready to go. We’re moving fast now, so try not to let your fingers get too coated between steps!
The Breading and Baking Dance
Time to coat those chicken strips one by one! Take a tender and dredge it lightly in the flour first—shake off the excess; we don’t want clumps! Next, dip it right into that egg wash, letting the extra drip back into the bowl. Finally—and this is key for a great oven fried chicken tender—press that egg-coated piece *firmly* into the Parmesan-Panko mixture. Really press it on all sides! You want that coating to stick tight.
Lay the fully coated tender on your prepared baking sheet. Repeat until you run out of chicken. Now for the pro move to get that amazing exterior:
- Give the tops of all the coated tenders a generous misting with cooking spray. This fat mimics the oil from frying and helps achieve that deep golden, crackly texture we want.
Pop them into that 400°F oven. Set a timer for 10 minutes. When that timer rings, carefully flip every single tender over. Put them back in for another 8 to 12 minutes. You are aiming for an internal temperature of 165°F (74°C). Use that thermometer! Keeping that temperature safe is how you ensure you have a fantastic and safe easy chicken tender recipe. Don’t pull them out early; that slightly higher bake time is what cooks the coating properly and melts the cheese just right!
For more tips on how to get chicken perfectly crispy without frying, I put together a quick guide here: how to get chicken perfectly crispy without frying.
Air Fryer Chicken Tenders Recipe Variation
I know, I know, not everyone has time to set up the oven and wait, or maybe you just love that turbo-charged crunch an air fryer offers! If you own one of those amazing countertop cookers, you absolutely have to try this Air Fryer Chicken Tenders Recipe variation. It cooks faster, uses even less oil, and honestly, the results are ridiculously crunchy. It’s my go-to when I’m lazy but still crave the best Crispy Parmesan Chicken Tenders.
The prep work is exactly the same—we still need that beautiful three-step breading station. Once they’re coated? We swap out the oven for the air fryer basket. Trust me, using the air fryer is a game changer for texture!
Here are the quick settings you need to follow to get perfection in half the time. If you want to explore other air fryer wonders, I have some fantastic tips on general air fryer chicken that you might want to check out later!
- Preheat: Get your air fryer nice and hot first! Set the temperature to 380°F (195°C). Preheating is key here, just like with the oven.
- Arrange: Place your breaded tenders in the air fryer basket in a single layer. If you have to cook in batches, do it! Overcrowding is the enemy of crispiness, even in the air fryer. I usually do mine in two small batches.
- Cook Time: Air fry for about 10 to 12 minutes total.
- Shake/Flip: About halfway through (around the 5-minute mark), stop the machine and give that basket a good shake—or if they are large, carefully flip them over. This ensures both sides get that perfect golden brown color.
If you are worried about your chicken temperature, just give one of your thickest tenders a quick probe with your thermometer after 12 minutes. If it hits 165°F, you’ve got perfectly cooked, unbelievably crunchy Parmesan coated chicken strips ready to go!
Ingredient Notes and Substitutions for Parmesan Coated Chicken Strips
Even though my recipe is pretty locked down—because, hey, I worked hard to get this just right—I totally get that sometimes you need to swap things out based on what’s in your pantry or what your family prefers. I like to think of this recipe as a fantastic framework for the best crispy chicken tenders around, but we can absolutely tweak it!
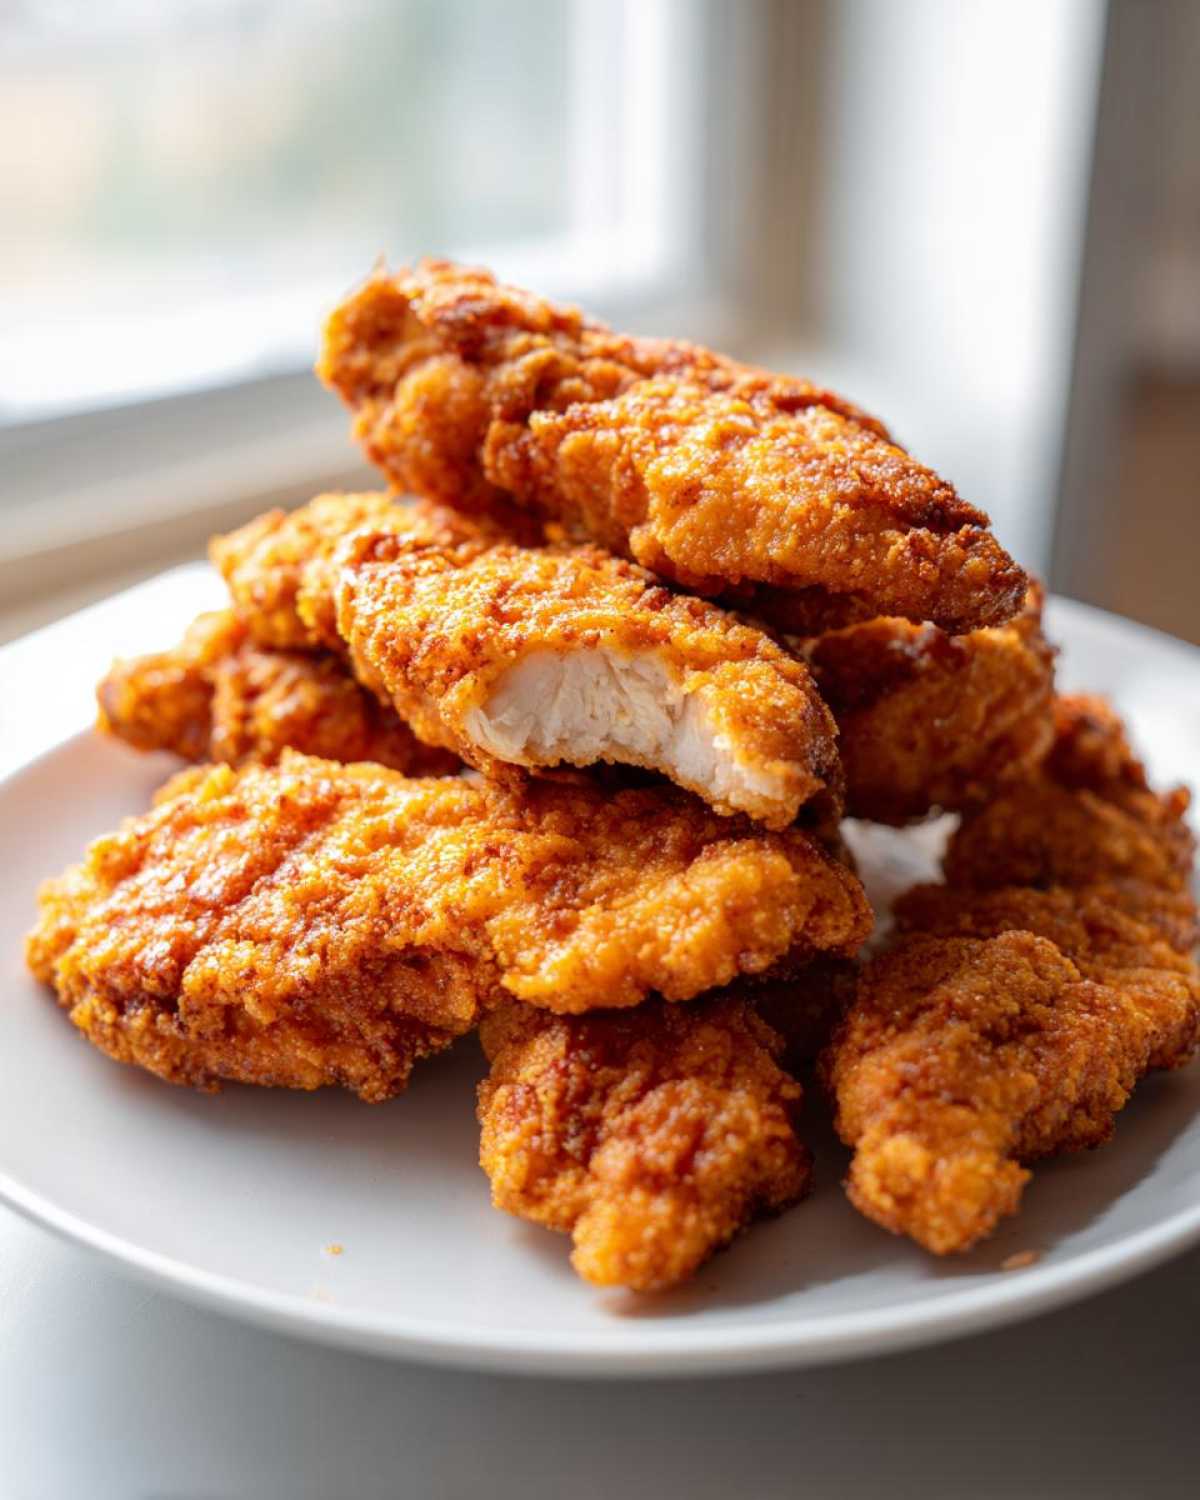
Mostly, we stick to the core ingredients, but let’s talk about that breading mixture for a second, because it’s the defining feature of these Cheesy Chicken Tenders Recipe. The main thing you can’t compromise on too much is the Panko. If you’ve never used Panko breadcrumbs, you are in for a treat! Standard breadcrumbs are dry and finely ground, so they really just soak up oil or steam when baked. Panko, though? Those are Japanese flakes, and they are lighter and coarser. They create millions of tiny air pockets that puff up when heated, giving you that incredible, airy crunch that stays crispy. That’s the secret to my low carb Parmesan chicken when you skip the flour dredge, too—Panko just survives the heat better!
Now, for the doable swaps:
- Flour Substitute: The recipe calls for all-purpose flour, but if you want to keep this closer to a true low carb Parmesan chicken meal, you can use almond flour or even finely ground pork rinds for that first dredging step instead. Just use the same amount!
- Whole Wheat Flour Option: If you are trying to sneak in a tiny bit more fiber or prefer a slightly nuttier taste, you can absolutely substitute the all-purpose flour with whole wheat flour during that initial coating step. Be warned, the color might be a little darker, but the texture will still be great!
Remember how I mentioned the air fryer? That’s a method variation, but it relies heavily on the ingredients being right! If you’re making these babies in the air fryer, you might want to add a tiny pinch more garlic powder to the Panko mix since the heat is so direct. It helps that flavor deepen really quickly!
Bottom line: Stick to the Panko, but feel free to play with the first layer if you’re feeling adventurous. It’s all about making this Easy Chicken Tender Recipe work perfectly for *your* kitchen!
Serving Suggestions and Dipping Sauce Ideas for Chicken Tenders
You have managed to pull off the impossible! You’ve got perfectly golden, impossibly crunchy Crispy Parmesan Chicken Tenders sitting on the counter, just waiting to be devoured. But honestly, they need friends! Chicken tenders are just better with something glorious to dip them into. I always think about what I’m serving these with; are they the main event, or are they a snack for a big game?
If these are the main course, you need some fresh, bright sides to balance out all that wonderful cheesy, savory coating. I love keeping it simple for a Family Friendly Chicken Dinner. A big, crunchy Caesar salad is always a winner (extra Parmesan on top, obviously!), or maybe some roasted green beans tossed in lemon zest. If you have little ones, some easy roasted sweet potato wedges are fantastic because they bring a little natural sweetness.
Dipping Sauce Ideas for Chicken Tenders
This is where things get really fun, and honestly, you can spend way more time making the sauces than you did on the tenders themselves! If you’re looking for Dipping Sauce Ideas for Chicken Tenders, you need variety. You can’t just serve ranch; that’s just amateur hour, bless their hearts.
Here are my absolute must-haves when I’m serving a platter of these Parmesan beauties:
- The Classic Upgrade: A good quality honey mustard. The tanginess cuts right through the rich cheese flavor. If you want to get fancy, swirl a little Dijon into your regular honey mustard!
- The Creamy Comfort: Always—and I mean *always*—have a good ranch dressing ready. I make mine with fresh herbs. If you want to surprise everyone, try pairing these with my ultra-quick 10-minute nacho cheese sauce recipe! It feels indulgent, but it’s so simple. Weirdly good with the parmesan coating!
- The Zesty Kick: A simple homemade aioli! Just mayonnaise, a squeeze of lemon juice, a tiny crush of fresh garlic, and a dash of black pepper. It feels fancy, but it takes literally one minute to stir together.
Seriously, don’t settle for those sad little ketchup packets. A quick sauce elevates these Crispy Parmesan Chicken Tenders from a snack to an *event*. Enjoy every last cheesy bite!
Storage and Reheating Your Crispy Parmesan Chicken Tenders
So, you made a huge batch because, let’s be real, these things disappear fast—but maybe, just maybe, you have a couple left over! If you’re lucky enough to have any hanging around, we need to treat them right so they aren’t sad and mushy tomorrow. Nobody wants soggy leftovers. That beautiful, crunchy crust we worked so hard for needs protection!
You can definitely keep these around! Store any remaining Crispy Parmesan Chicken Tenders in an airtight container. I prefer glass containers because they don’t leech plastic smells, but whatever you have works, as long as it seals tightly. Pop it in the fridge, and they should be good for about three days. Honestly, they usually don’t last that long in my house, but technically, that’s how long they hold up well.
The Secret to Bringing Back the Crunch
Now, here is the most critical advice I can give you for leftovers: do not use the microwave! If you microwave these, you are basically steaming them back into a soft, rubbery texture, and we just can’t have that massacre happen to our beautiful Oven Fried Chicken Tenders.
To restore that glorious crunch reminiscent of when they first came out of the oven, you have two fantastic options:
- The Oven Revival: This is my preferred method. Set your oven or toaster oven to a moderate 350°F (175°C). Lay the cold tenders in a single layer on a baking sheet (you don’t even need to spray it this time). Bake them for about 5 to 8 minutes. Keep an eye on them! This gentle heat warms them through and crisps the crust right back up without burning the Parmesan.
- The Air Fryer Blitz: If you used the air fryer initially, you’ll get the best results bringing them back this way. Set it to about 375°F (190°C). Cook for just 3 to 5 minutes, checking them around the 3-minute mark. They come back to life almost instantly, and the texture is amazing!
If you skip the reheating step and just eat them cold, they are still perfectly fine and safe, but you miss out on that amazing crackle! It’s worth the 5 minutes of oven time, trust me!
Frequently Asked Questions About This Easy Chicken Tender Recipe
It’s always smart to ask questions before diving in, especially when you want to guarantee that the first batch turns out perfectly crispy! I’ve gathered up some of the things people ask me most often about making sure these are the best Cheesy Chicken Tenders Recipe they’ve seen all year. I want you to succeed on the first try!
Can I make these Crispy Parmesan Chicken Tenders ahead of time?
Oh, yes, you absolutely can prep ahead! That’s one of the best tricks for a hectic weeknight. You can fully set up your breading station and even coat all the chicken tenders perfectly—flour, egg, Panko—and arrange them on the baking sheet just like you would before baking. Cover that sheet tightly with plastic wrap and pop it in the fridge for up to 12 hours. When you’re ready to eat, pull them out, give them that necessary extra spritz of cooking spray, and then bake them exactly as the recipe says. Cooking them straight from cold helps that crust stay nice and firm, so don’t let them sit out on the counter too long!
How do I ensure the coating sticks well to the chicken?
This is a huge topic! If the coating falls off, you just end up with greasy chicken strips, not Baked Parmesan Chicken Tenders. The secret—other than making sure your egg wash is well mixed—is drying the chicken first. Before you even start the flour dredge, take a paper towel and gently pat the chicken strips dry. Excess moisture on the chicken prevents the flour from gripping. Once you’re pressing them into that final Panko mixture, don’t be gentle! Really press firmly all over to create a solid crust. If you notice any thin spots, dip that spot back into the egg and then firmly back into the Panko mix.
Is the oven method truly crunchy, or should I fry them?
I totally understand that hesitation! Deep frying gives you crispy, no question, but it’s messy, heavy, and takes way too long to clean up afterward. I promise you, the combination of Panko breadcrumbs and the light spray of cooking spray—which acts like frying oil but controlled—creates a result so close to deep-fried that your family won’t notice the difference! This recipe is designed specifically to deliver impressive texture through baking, making them excellent Oven Fried Chicken Tenders. Trust the high heat (400°F is hot enough!) and the Panko; you get all the satisfaction without any of the oil splatter. It works perfectly!
For even more speedy ways to master chicken at home, take a look at my guide on the easiest ways to make chicken tenders!
PrintCrispy Parmesan Chicken Tenders

Follow this recipe to make easy, oven-baked Crispy Parmesan Chicken Tenders with a crunchy coating.
- Prep Time: 15 min
- Cook Time: 22 min
- Total Time: 37 min
- Yield: 4 servings
- Category: Dinner
- Method: Baking
- Cuisine: American
- Diet: Low Fat
Ingredients
- 1.5 lbs boneless, skinless chicken breasts, cut into 1-inch strips
- 1 cup all-purpose flour
- 2 large eggs, beaten
- 1 cup Panko breadcrumbs
- 1/2 cup grated Parmesan cheese
- 1 teaspoon garlic powder
- 1/2 teaspoon salt
- 1/4 teaspoon black pepper
- Cooking spray
Instructions
- Preheat your oven to 400°F (200°C). Line a baking sheet with parchment paper and lightly coat it with cooking spray.
- Set up a standard breading station with three shallow dishes.
- In the first dish, place the flour. In the second dish, place the beaten eggs.
- In the third dish, combine the Panko breadcrumbs, grated Parmesan cheese, garlic powder, salt, and pepper. Mix well.
- Take one chicken tender and dredge it lightly in the flour, shaking off any excess.
- Dip the floured tender into the egg mixture, allowing excess to drip off.
- Press the tender firmly into the Parmesan-Panko mixture until it is completely coated.
- Place the coated tender on the prepared baking sheet. Repeat with the remaining chicken.
- Lightly spray the tops of the coated tenders with cooking spray for extra crispiness.
- Bake for 18 to 22 minutes, flipping the tenders halfway through, until they are golden brown and the internal temperature reaches 165°F (74°C).
Notes
- For an air fryer method, cook at 380°F (195°C) for 10 to 12 minutes, shaking the basket halfway through.
- Serve immediately with your favorite dipping sauce ideas for chicken tenders.
- You can substitute whole wheat flour for a slightly different texture.
Nutrition
- Serving Size: 4 tenders
- Calories: 310
- Sugar: 1
- Sodium: 450
- Fat: 10
- Saturated Fat: 3
- Unsaturated Fat: 7
- Trans Fat: 0
- Carbohydrates: 15
- Fiber: 1
- Protein: 38
- Cholesterol: 110