

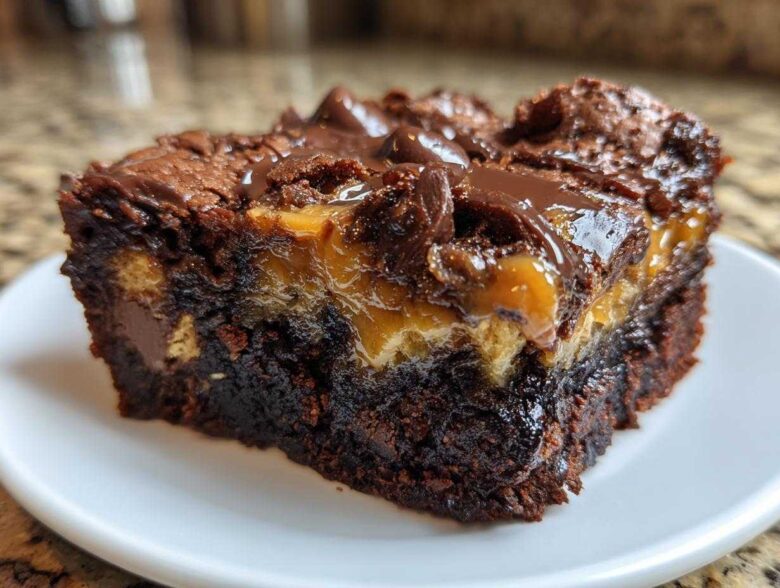
Okay, real talk for a second. Some days, you just need dessert, like, *yesterday*. You don’t have time for creaming butter for twenty minutes or waiting for things to cool before frosting. That’s when you pull out the secret weapon I’ve been perfecting for years: the Chocolate Caramel Dump Cake. Seriously, this isn’t just mixing things in a bowl; it’s layering magic! I’ve tested this exact layering process countless times to make sure those flavors separate just right during baking. You dump the cake mix in, drizzle the gooey stuff, pour the hot water, and walk away while your kitchen smells like a five-star candy shop. It’s the definition of low-effort, high-reward baking, and trust me, it works every single time.
If you’re looking for the best soft chewy cookies, that takes patience! But for a decadent, ready-in-an-hour treat, the dump cake is king. Grab your pan; we’re making this fast!
Why This Chocolate Caramel Dump Cake is a Must-Make
When my schedule gets tighter than a jar lid I forgot to loosen, this recipe saves my life. If you’re done with fussy baking and just want something unbelievably rich, this is your answer. It’s what I turn to when I need a last-minute bake for my kid’s school function or when that sweet craving hits hard.
- It’s the definition of an Easy Chocolate Caramel Dessert—we’re talking five minutes of prep time before the oven takes over. You simply can’t beat that speed!
- Hello, No Fuss Chocolate Dessert! There’s zero mixing, no creaming, and absolutely no electric stand mixer required. If you can carefully layer things, you can nail this recipe.
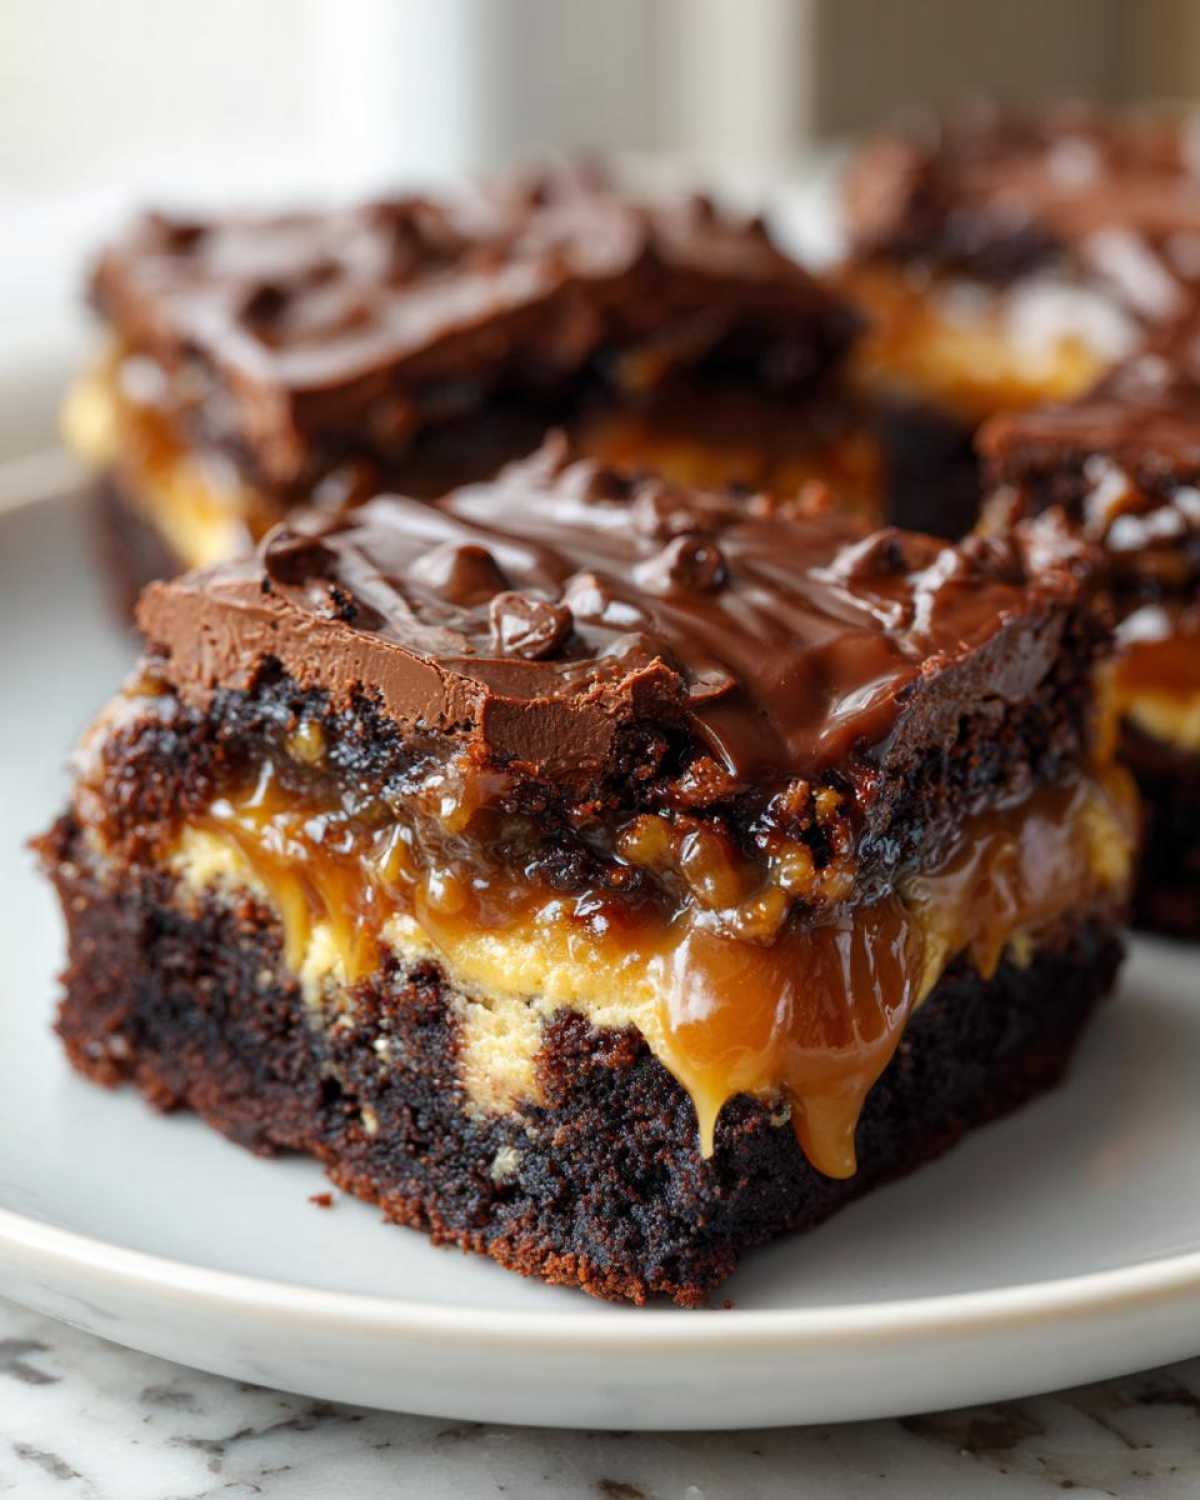
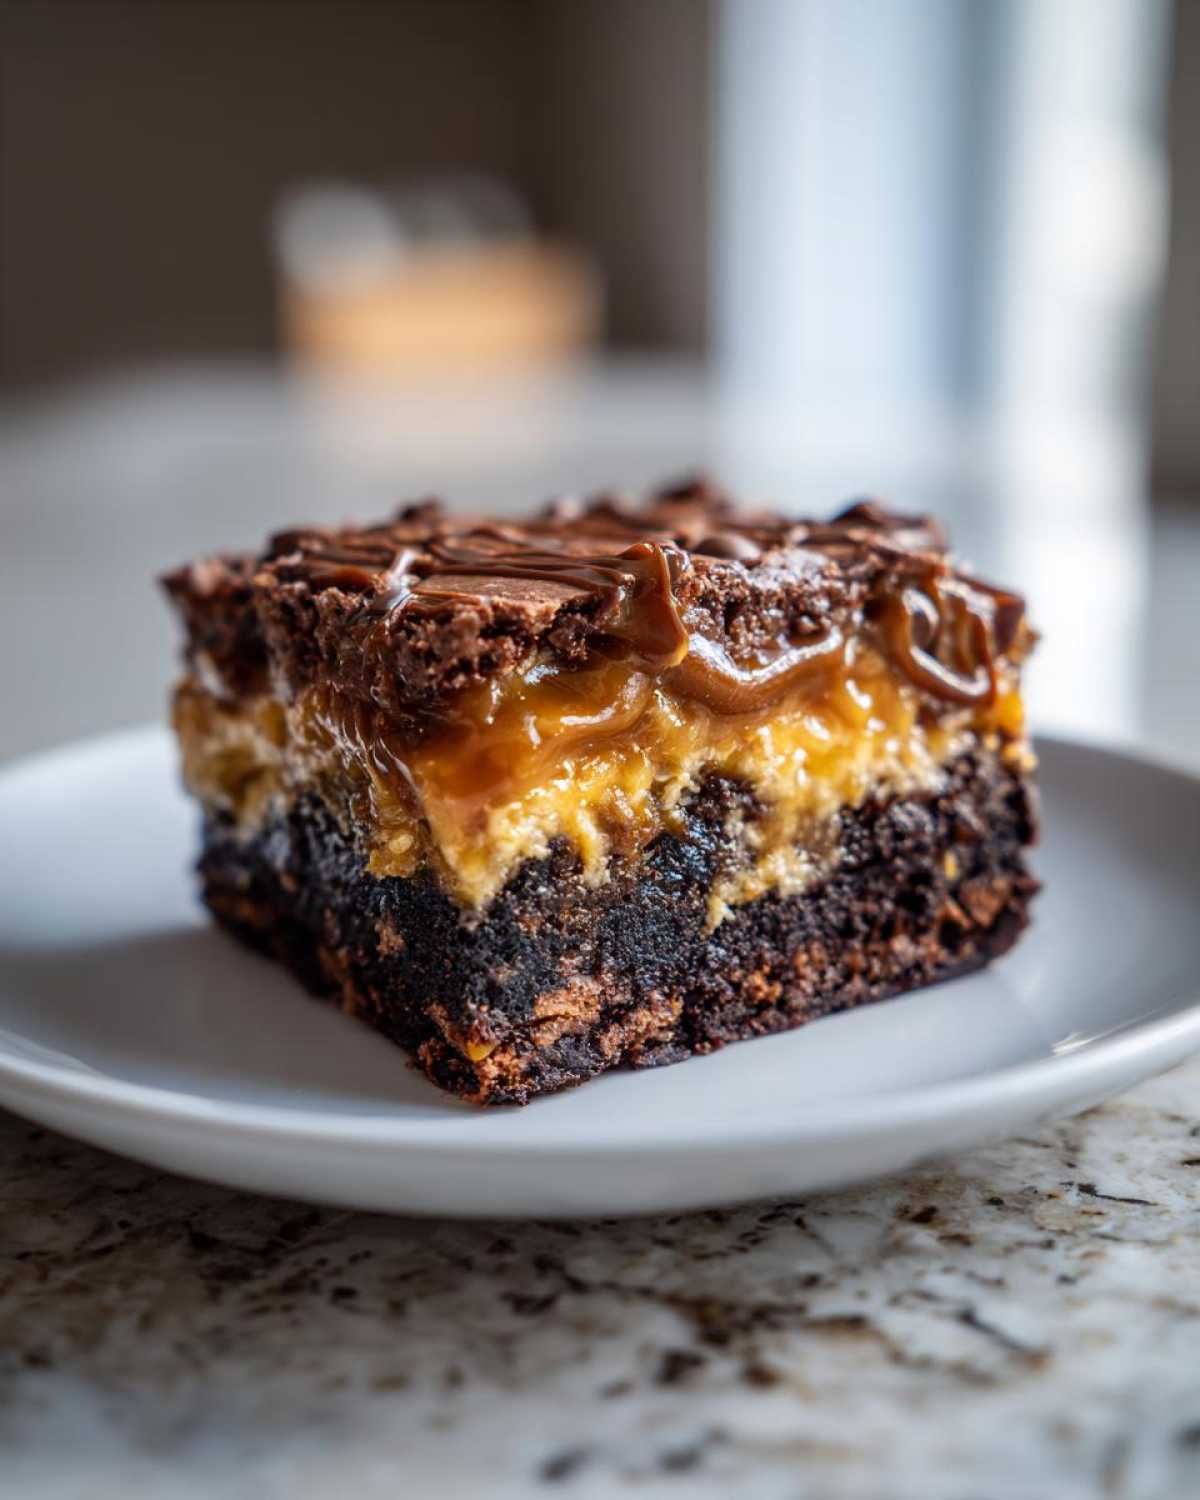
- The texture is unbelievable. Because the boiling water steams through the layers, you get this amazing soft, almost pudding-like chocolate bottom layer topped with caramelized crumbles. It just melts in your mouth.
- This is a fantastic, budget-friendly way to feed a crowd. A simple box of cake mix turns into something that tastes like it came from a fancy bakery. It’s such a satisfying result for so little effort.
Honestly, if I can make this after a long day, anyone can! If you’re looking for more easy weeknight wins, you should check out my recipe for easy weeknight bolognese sauce—sometimes dinner needs to be fast too!
Gather Your Ingredients for the Chocolate Caramel Dump Cake
The best part about a dump cake is that you’re probably already halfway to having these ingredients in your pantry! We’re keeping this list super tight because we don’t believe in complicating a simple treat. Remember, since we aren’t stirring, the quality of the ingredients really shines through, especially that caramel sauce. Don’t cheap out there—a really rich, thick sauce makes all the difference between good and OMG.
Here’s what you need to pull this together in five minutes:
- One box (about 15.25 ounces) of chocolate cake mix—any brand works, just grab your favorite!
- One can (14 ounces) of sweetened condensed milk. This is the glue that holds our gooey layers together!
- One cup of caramel topping or sauce. See my note below about which kind I prefer!
- One bag (12 ounces) of semi-sweet chocolate chips. You can use milk chocolate if you like it sweeter, but I adore the slight bitterness of semi-sweet against the caramel.
- One cup of boiling water. Yes, boiling! This is crucial for triggering that steam action we need.
- One cup of chopped pecans or walnuts (this is totally optional, but please try it!).
For more quick baking inspiration that really delivers on flavor, check out my recipe for easy peanut butter cookies—another winner when you need fast results!
Ingredient Notes and Substitutions for Your Chocolate Caramel Dump Cake
Let’s talk about those optional nuts for a second. If you choose to use them, sprinkling them over the very top ensures they get slightly toasted, giving you a wonderful sweet-and-salty crunch. If you have a nut allergy, just leave them out; the cake is still sensational.
Now for that boiling water—while the recipe calls for that to activate everything, I’ve experimented a ton, and here’s a pro tip for you: If you want a deeper, richer chocolate note, go ahead and swap that boiling water for one cup of hot, freshly brewed coffee. It won’t taste like coffee, I promise! It just enhances the chocolate flavor incredibly well, turning this into a sophisticated Quick Dump Cake Recipe without adding any extra work or steps.
Essential Equipment for Simple Layered Cake Baking
Okay, this recipe is about as simple as it gets, but even a dump cake needs the right tools! Since we aren’t using a big mixing bowl—thank goodness—we are keeping the equipment list short and sweet. Having everything ready to go means you can literally dump and run. If you’re looking for shortcuts everywhere, check out my 10-minute nacho cheese sauce—sometimes you just need food to happen *fast*!
You really only need three main things to make this happen:
- A 9×13 Inch Baking Dish: This is important! You need that surface area so the layers are reasonably thin. If you use a smaller 8×8 pan, the batter will be too thick, and it’ll take forever to cook through.
- Measuring Cups: You absolutely need a cup measure for that crucial boiling water. Don’t try to eyeball the water; pouring too much or too little impacts how the dry mix hydrates on top.
- Something to Grease the Pan: I always use a little cooking spray or a smear of butter, just to be safe, even though dump cakes usually don’t stick terribly badly.
That’s honestly it! No fancy whisks, no spatulas needed for folding, and definitely no pastry bags. Just the essentials to get this Simple Layered Cake Baking project off the ground and into the oven!
Step-by-Step Guide to Making the Chocolate Caramel Dump Cake
Alright, my friend, this is where the fun—and the speed—really kicks in. I need you to listen closely on one thing: we are not mixing. If you stir this cake, you’ll end up with a muddy mess, and we want distinct layers of chocolate, goo, and caramel bliss, right? This is the ultimate payoff for making quick baking look effortless. Before we even touch an ingredient, grab that oven rack and put it in the middle position. We need that heat circulating perfectly around our 9×13 pan.
First things first, get that oven warmed up to 350 degrees Fahrenheit. While it’s heating, lightly grease your baking dish. You want to make sure nothing sticks later when you’re eager to dig in! My technique for keeping things moving fast is to have my measuring cup ready with the water already boiled right when I start layering. If you want to see how I make fluffy bases for other treats, check out my best moist fluffy blueberry muffins recipe—it takes a bit more effort, but the principle of preparing ingredients first is the same!
Preparing the Layers: The Dump Method Explained
This sequence is non-negotiable if you want the classic dump cake effect. Think of it like building a delicious, edible sedimentary rock layer! Remember, we are gently layering, not mixing anything until it bakes. This is the secret to a Quick Dump Cake Recipe that stays beautifully structured.
Here is the specific order you must follow:
- Step 1 (The Base): Sprinkle the entire dry chocolate cake mix evenly across the bottom of your greased 9×13 dish. Just try to get it flat. Don’t worry if it’s not perfect!
- Step 2 (The Goo): Take your can of sweetened condensed milk and drizzle it slowly and evenly right over that dry cake layer. Try to cover as much surface area as possible.
- Step 3 (The Sweet Swirl): Pour that thick caramel topping right on top of the milk. Again, spread it gently so it covers most of the milk layer underneath.
- Step 4 (The Crunch/Chip): Scatter your chocolate chips and those optional nuts (if using) over everything.
- Step 5 (The Steam Starter): Finally, slowly pour that cup of boiling water right over the entire surface. Slow and steady! This hot water melts the top chips slightly and penetrates the layers without mixing them.
I’m repeating myself because it’s so important for this Easy Chocolate Caramel Dessert: DO NOT STIR. Seriously, put your spoon down. If you stir, the dry mix turns into a paste, and the boiling water mixes everything into one uniform sludge. We want layers!
Baking Times and Doneness Check for Your Chocolate Caramel Dump Cake
Now that the hard work (the layering) is done, slide that pan into your preheated 350°F oven. Set your timer for 45 minutes. This cake relies on that even heat to cook through the dense layers.
When the timer goes off, it’s time for the final check. The edges should look set, perhaps a little crusty, and the caramel pockets should be bubbling furiously. For the Chocolate Caramel Dump Cake, the toothpick test is a little tricky because it’s so moist in the middle. Insert a toothpick near the center. You don’t want it bone dry—that means it’s overcooked! You are looking for moist, sticky crumbs clinging to the toothpick. If you see wet batter, give it another 5 to 10 minutes. Don’t panic if it takes the full 55 minutes; every oven is slightly different, and we are aiming for that perfect, rich center!
Tips for the Best Moist Caramel Delight
I know I keep hammering this point home, but seriously, the ‘dump’ part of this cake is truly the most important element that locks in that perfect texture. If you’re tempted to stir everything together—maybe because you think you’re making brownie batter—resist that urge with everything you have! When I first tried making this years ago, I thought, “A little stir can’t hurt, right?” Wrong! I ended up with a dense, grainy chocolate square that had neither the gooey pools of caramel nor the fluffy cooked cake top we want. It was just sad, heavy sludge.
The magic of this Moist Caramel Delight comes from the layers cooking independently, separated by the condensed milk and topped by that hot water. The result is almost two desserts in one: a fudgy, warm chocolate base and a slightly caramelized top crust.
Here are my top tricks to guarantee that perfect texture every time:
- Don’t Skimp on the Condensed Milk: That milk isn’t just for sweetness; it’s what keeps the dry cake mix from drying out the whole thing as it bakes. It creates a lovely, almost custardy layer right above the pure cake base.
- The Cooling Rule: This is huge, especially for retaining moisture. Let the cake sit on the counter for at least 20 minutes after it comes out of the oven. It sets up beautifully as it cools, and that resting time allows any residual steam to redistribute moisture evenly. Trying to cut into it piping hot risks it crumbling apart before you can appreciate how tender it is.
- Serve Warm, Not Hot: When you serve it warm (after that short cool-down), the caramel will be perfectly flowing, and the chocolate part won’t be steaming hot, so you can actually taste the rich flavor combo.
If you’re looking for other recipes that nail moist texture reliably, you absolutely have to try my recipe for moist date nut bread. It uses a similar trick of adding inherent moisture right into the batter!
Serving Suggestions and Storage for Leftovers
Once your decadent creation is out of the oven and has settled down a bit—which, trust me, is the hardest part—you get to the best part: eating it! This cake is truly best enjoyed warm. It’s that perfect moment where the chocolate layer is soft and slightly fudgy, and the caramel sauce has loosened up just enough to drip beautifully.
My absolute favorite way to serve this is definitely à la mode. Get a high-quality vanilla ice cream, like the kind you have to fight for in the freezer aisle. The cold creaminess of the vanilla against that rich, warm chocolate and slightly salty caramel is just divine. If you’re feeling less formal, a dollop of fresh whipped cream works wonders too. If you happen to have some leftover, you might want to check out my recipe for vanilla buttercream frosting—while this cake doesn’t need it, it’s great for cupcakes!
Now, assuming you have any leftovers (which is rare in my house, honestly), storage is super easy because this cake is so rich!
How to Store Your Caramel Dessert
Because of that high sugar and fat content, this cake is fairly resilient. You have two options for storage, depending on how soon you plan to eat it.
- Room Temperature: If you plan on finishing it within 2 days, keep it covered tightly with plastic wrap or foil right on the counter. It stays nice and soft this way. Don’t leave it out in a super hot kitchen, though!
- Refrigeration: If you need it to last 3 to 5 days, wrap it well and pop it in the fridge. It will firm up significantly when cold, but that’s totally normal.
The Best Way to Reheat Leftovers
If you refrigerated that deliciousness, you definitely don’t want to eat it cold! Cold caramel is tough!
I find the microwave is your best friend here. Cut a serving size (or two!) and microwave it for just 15 to 20 seconds. That’s just long enough to soften the caramel back up and bring the chocolate layer back to its gooey prime. If you want that decadent, straight-from-the-oven experience, reheat your slice in a toaster oven for about 5 minutes at 325°F! It crisps up the top layer just a bit, which I love.
Frequently Asked Questions About Dump Cakes
I get so many questions whenever I post this, which just proves how popular these Quick Dump Cake Recipes are! People always want to know if they can bend the rules or if the magic will stop working. It’s such a great option for Fast Baking for Beginners because the steps are so straightforward, but a few little tweaks can sometimes trip people up. Here are the most common things I hear, so you don’t have to worry! If you’re looking for dinner ideas that are less dramatic than a dump cake experiment, try my easy baked Caesar chicken recipe for a lighter meal!
Can I use a different flavor of cake mix?
Oh, absolutely! That’s the beauty of this method. You can swap the chocolate mix for yellow cake mix, white cake mix, or even spice cake mix. If you use yellow cake mix, you’ll end up with a rich caramel-vanilla layered cake, which is fantastic. Just remember that if you change the cake mix flavor, you should probably stick to semi-sweet chips, but you could try adding peanut butter chips instead of nuts for a new twist!
How long does this cake last?
Because of everything going on in there—the condensed milk, the chips—this stays moist for days. If you keep it covered tightly, it’s perfectly good at room temperature for about two days. If your kitchen is warm or you made a huge batch, put it in the fridge, wrapped up, for up to five days. You might need to zap it for 15 seconds in the microwave the next day to get that fudge factor back, but it holds up really well!
Why do I have to use boiling water? Can I use room temperature?
This is one of the most important questions for anyone trying Simple Layered Cake Baking! You *can* use room temperature water, but I really, really don’t recommend it. The hot water flash-starts the cooking process in the dry mix on top, turning it from a dry powder into a slightly cooked, cake-like layer instantly. If you use cold water, you risk having damp, gummy spots on the top layer when you cut into it tomorrow. Trust me, boil that water!
Is it supposed to look messy after pouring the water?
Yes! If it looks messy, you did it right! When you pour that boiled water over the top, it’s going to swirl around, and the cake mix will look broken up. It’s supposed to look wrong! You’ll see streaks of chocolate mix, some areas where the caramel is peeking through, and patches of liquid. When you finally bake it, the hot water works its way down, and the ingredients steam and meld together perfectly into those distinct layers. Don’t panic, and do not stir it!
Nutritional Estimates for Your Dessert
Now, I’m going to be completely honest with you: this Chocolate Caramel Dump Cake is pure, decadent heaven, and it is NOT a diet food! I mean, come on, we’re piling cake mix, condensed milk, and caramel sauce into a pan. These are joy calories, plain and simple! But I know some of you like to keep track, so I ran the numbers based on the standard ingredients I use and cut the whole thing into 12 equal servings. This gives you a rough idea of what you’re diving into when you grab a square!
It’s important to remember that these nutritional facts are just estimates. Every brand of cake mix is a little different, and if you use a gourmet caramel sauce or add those nuts, the numbers will shift slightly. Think of this as a general guideline for your glorious, easy-baked treat. If you’re looking for things that taste indulgent but are actually a bit better for you, you have to try my recipe for fudgy black bean brownies—they are secretly packed with good stuff!
Here are the ballpark figures for one square, serving size assumed to be 1/12th of the pan:
- Serving Size: 1 square
- Calories: ~380
- Sugar: ~45g (Yep, that’s the caramel talking!)
- Fat: ~19g
- Saturated Fat: ~10g
- Carbohydrates: ~50g
- Protein: ~5g
Take a look at that sugar count—it confirms why this is such a rich dessert! But even knowing that, I still find myself going back for seconds when it’s fresh and warm. That’s the power of an incredible, No Fuss Chocolate Dessert!
Share Your Baking Results
Whew! Now that you’ve made the easiest, most decadent dessert known to humankind, I absolutely need to hear what you thought! Seriously, taking just a minute to share your experience helps me know that this recipe is standing up to the hype. Did your layers stay separate? Did you go gourmet with the caramel sauce or try the coffee trick? Don’t keep those tasty secrets to yourself!
Head right down to the comments below and leave me a rating. I aim for five stars on everything I share with you guys, and I want to see if this Quick Dump Cake Recipe hit the mark for your family!
If you snapped a picture of your glorious, bubbling, gooey pan—I want to see it! Knowing I inspired someone to skip the complicated baking steps for an evening makes my whole week! Feel free to tag me on social media if you share your masterpiece. If you’re looking for more posts and other fun kitchen experiments, you can always browse my full recipe index here!
Happy baking, and thanks for trusting me with your dessert needs. This is how we build a community of successful, happy, and full-bellied bakers!
PrintUltimate Easy Chocolate Caramel Dump Cake
Make this simple, rich dessert by layering ingredients directly into a pan. This recipe requires minimal preparation for a moist chocolate and caramel cake.
- Prep Time: 5 min
- Cook Time: 50 min
- Total Time: 55 min
- Yield: 12 servings
- Category: Dessert
- Method: Baking
- Cuisine: American
- Diet: Vegetarian
Ingredients
- 1 box (15.25 ounces) chocolate cake mix
- 1 can (14 ounces) sweetened condensed milk
- 1 cup caramel topping or sauce
- 1 bag (12 ounces) semi-sweet chocolate chips
- 1 cup chopped pecans or walnuts (optional)
- 1 cup boiling water
Instructions
- Preheat your oven to 350 degrees Fahrenheit. Lightly grease a 9×13 inch baking dish.
- Spread the dry chocolate cake mix evenly over the bottom of the prepared baking dish. Do not mix the cake mix.
- Slowly drizzle the entire can of sweetened condensed milk over the dry cake mix layer.
- Pour the caramel topping evenly over the condensed milk layer.
- Sprinkle the chocolate chips over the caramel layer. If using nuts, sprinkle them on top now.
- Carefully pour 1 cup of boiling water over the entire surface of the ingredients. Do not stir.
- Bake for 45 to 55 minutes, or until the edges are set and a toothpick inserted near the center comes out mostly clean.
- Let the cake cool slightly before serving.
Notes
- Serve warm with a scoop of vanilla ice cream for extra richness.
- For a slightly different texture, you can substitute the boiling water with 1 cup of brewed hot coffee.
- If you prefer a sweeter topping, use a thicker caramel sauce.
Nutrition
- Serving Size: 1 square
- Calories: 380
- Sugar: 45
- Sodium: 250
- Fat: 19
- Saturated Fat: 10
- Unsaturated Fat: 9
- Trans Fat: 0.2
- Carbohydrates: 50
- Fiber: 2
- Protein: 5
- Cholesterol: 25