

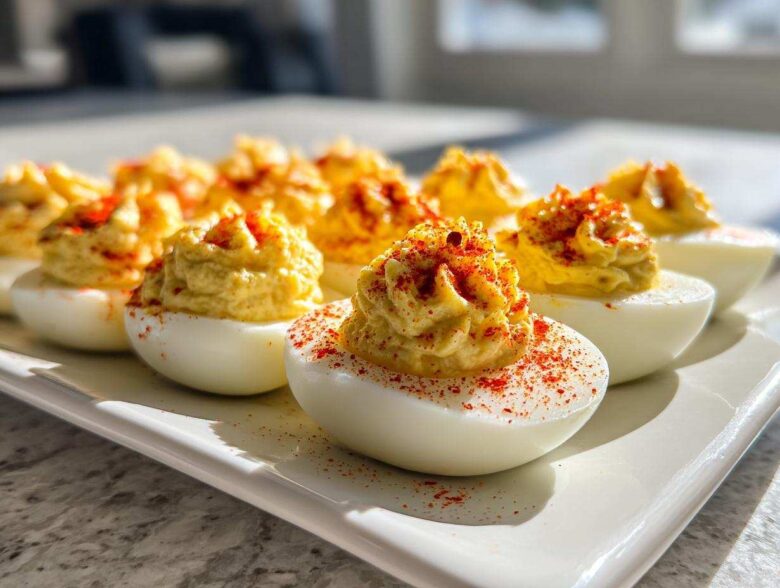
Oh my gosh, remember those picnics from childhood? You always knew they were a *real* party when the platter of deviled eggs showed up. They just taste like happy gatherings, don’t they? For years, mine were a disaster—gray yolks, crumbly filling, and peeling them felt like cracking an ancient relic! But I finally cracked the code. Trust me, this fool-proof **deviled eggs recipe** gives you the creamiest, tangiest, most perfectly nostalgic bite every single time. When I finally timed the boiling right, and those yolks came out that beautiful, sunny yellow? It was a revelation! You absolutely need this classic version in your party rotation.
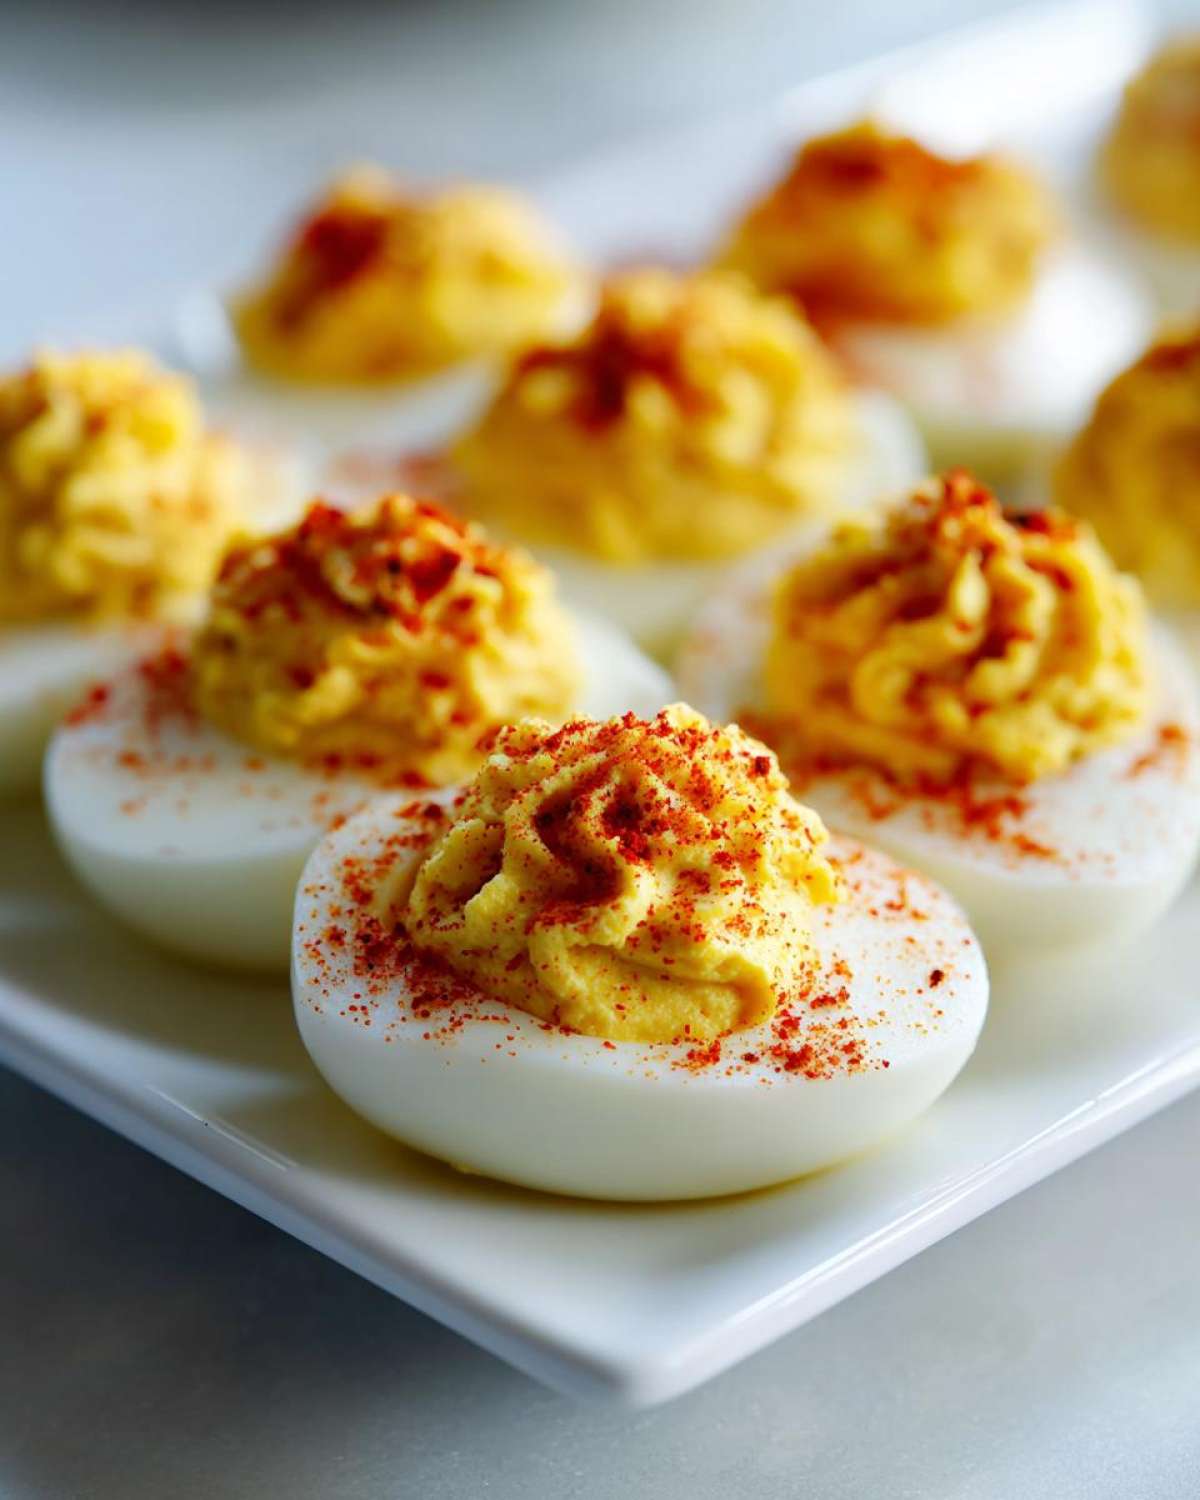
Why This is the Best Deviled Eggs Recipe for Your Next Gathering
Honestly, when you bring these to a potluck, they vanish first. I’m not kidding! I’ve tried fancier hors d’oeuvres, but nothing beats the joy of a perfect deviled egg. This is the best deviled eggs recipe because it tackles the two biggest irritations: the impossible peel and the gritty filling. We use a simple cooling method that guarantees easy peeling every single time. Plus, the tang from the vinegar really cuts through the richness of the yolk, turning it into that perfect classic appetizer everyone remembers. You can read more about our kitchen philosophy over at our about page!
Key Features of Our Deviled Eggs Recipe
- Perfectly smooth filling, no lumps!
- Ice bath trick ensures super easy peeling.
- Balanced, traditional salty and tangy flavor.
- Bright yellow yolks, zero gray edges.
Gathering Ingredients for Perfect Deviled Eggs
Okay, ingredients matter here, but don’t panic! This is not complicated stuff, just good, clean ingredients handled correctly. For this recipe, I always grab a dozen of the biggest, freshest eggs I can find—start with 12 large eggs, and make sure they are chilled when you begin. Chilled eggs actually seem to handle the boiling shock better!
We aren’t inventing anything new here; we are just perfecting the basics. Having the right proportions of the filling items is what keeps these from tasting flat or, worse, too vinegary.
Essential Components for Creamy Deviled Eggs
Here is the lineup. You’ll notice everything is listed clearly because precision helps guarantee that smooth texture we are aiming for. Don’t swap out that vinegar for lemon juice in this batch—we need that specific tang!
- 12 large eggs: The foundation! Make sure they start cold.
- 1/2 cup mayonnaise: Please use the good stuff, the full-fat kind. This creates the rich body of the filling.
- 2 tablespoons yellow mustard: This brings the classic yellow color and that perfect spicy kick.
- 1 tablespoon white vinegar: This is crucial for balancing the richness. Don’t skip it!
- Exactly 1/4 teaspoon salt and just a tiny pinch, about 1/8 teaspoon black pepper. Taste before you adjust!
- Paprika, for garnish: This is non-negotiable! It finishes the look and adds a little smoky note.
When you scoop out those cooked yolks, you want to mash them until they are absolutely fine, like soft sand, before you even think about adding the mayo. It makes all the difference to the final mouthfeel!
How to Make Deviled Eggs: Step-by-Step Instructions
Alright, here’s where we stop fussing and start achieving that perfect party finger food. Learning how to make deviled eggs that look and taste professional is really about timing the cooling process. You can pop over to read our privacy policy whenever you have a spare minute, but for now, let’s focus on these eggs!
Mastering the Hard-Boiled Egg for Easy Peeling
The first step is critical for easy peeling! Place those 12 cold eggs into a big saucepan and cover them with about an inch of cold water. Bring the water to a rolling, hard boil over high heat. The second it starts boiling furiously, kill the heat completely, cover the pot with a tight lid, and just let them sit there quietly for exactly 12 minutes. Don’t peek! Once that 12 minutes is up, drain the hot water immediately and plunge those eggs straight into a big bowl loaded with ice and cold water—we call this the ice bath. They need to sit there until they are completely cool, about 10 minutes. This shock prevents that annoying gray ring from forming around the yolk and naturally loosens the shell!
Creating the Smooth Filling for Your Deviled Eggs
Once peeled, slice all the cooled eggs lengthwise and scoop those gorgeous yellow yolks into a medium bowl. Now, attack those yolks with a fork! Mash them until you have a fine, uniform powder with absolutely no lumps to start. This is the secret to a truly creamy filling. Only once they are this fine do you carefully mix in your mayonnaise, mustard, vinegar, salt, and pepper. Keep folding and mixing until that filling is perfectly homogenous and silky smooth. If you have nervous hands, pushing the mashed yolks through a fine-mesh sieve first works wonders!
Piping and Garnishing Classic Deviled Eggs
Now for the pretty part! You can use two little spoons to carefully mound the filling back into the egg white halves, or if you have a piping bag (even a Ziploc bag with the corner snipped off works!), it looks super fancy. Fill those little boats evenly. The very last touch? A generous, light dusting of paprika over the top of every single one. Seriously, don’t forget the paprika! Then, cover them loosely and put them in the fridge to chill for at least 30 minutes. They always taste better when they’ve had a little nap together in the cold.
Tips for Success When Making Deviled Eggs
If you’re worried about your yolks getting that gross greenish-gray halo, the secret is the ice bath! Seriously, move those eggs immediately from the hot water cooler. That rapid temperature drop stops the cooking process dead in its tracks, which keeps that yolk sunshine yellow and beautiful. We want these to be easy deviled eggs, not a science project, so don’t skip that crucial cooling step.
Another thing people mess up is the filling consistency. If your mayo-mustard mix gets too sloppy, you’ll end up with a puddle instead of a pretty swirl. If you accidentally add too much vinegar or mustard, just add another half-spoon of the mashed yolk material you saved on the side, or even a tiny bit more mayo, to bring it back to that thick, scoopable texture. It’s all fixable! You can check out our contact page if you ever run into trouble while cooking!
Variations on Traditional Deviled Eggs
While this recipe is the cornerstone of what I consider the classic appetizer, sometimes you just need a little twist, right? I love keeping the core ingredients—the mayo, mustard, and vinegar—the same, but adding a little something extra to the yolk mix just before piping. You don’t want to get too far off base, or you lose that nostalgic charm, but a small addition can really wake things up.
I always tell people that the filling is where you can sneak in a little personalization. Feel free to try these out next time you make a batch. You can find links to some of my other favorite simple flavor combinations, like my Lemon Raspberry Loaf Cake Recipe, for when you are planning dessert!
A Touch of Crunch with Sweet Pickle Relish
This is probably the most common upgrade, and for good reason! If you want a little texture and a bright pop of flavor, stir in about one full tablespoon of finely drained sweet pickle relish along with your mayonnaise. Make sure you pat the relish dry first! If it’s too watery, you’ll end up with that runny issue we talked about earlier. The relish adds a lovely, recognizable tang that people absolutely expect in a holiday spread.
Turning Up the Heat Dial
For those of us who like a little bit of a bite, a tiny dash of heat works beautifully. I usually add just two or three small shakes of your favorite hot sauce—think Cholula, not ghost pepper sauce! You only need enough to warm your tongue slightly, not burn it off. Alternatively, if you have some Dijon mustard handy instead of the standard yellow, swap it in! The Dijon offers a sharper, more complex mustard flavor that feels a bit more grown-up.
Smoked Paprika and Chives Finish
We already put regular paprika on top, but try swapping that out for smoked paprika! Trust me, it gives the finished deviled eggs this incredible subtle smokiness that pairs wonderfully with the richness of the yolk. It’s visually the same, but the flavor profile changes instantly. Then, right before serving, shower them lightly with finely snipped fresh chives. They look vibrant green against the red paprika and yellow filling—instant visual appeal for your party finger food!
Storage and Keeping Deviled Eggs Fresh
So, you made a huge batch of these incredible deviled eggs, and now you’re wondering if you can make them ahead of time for the big game or holiday meal. Absolutely, you can! But because they involve eggs and mayo, storage is super important for safety, especially since these are such a popular party finger food.
For the best results and maximum freshness, I always recommend assembling them the day you plan to serve them, but if you must prep early, here is my rule: Separate the yolks and whites! Boil, cool, and peel your eggs, then slice them in half. Store the empty egg white halves and the creamy yolk filling—in separate airtight containers—in the refrigerator. They keep perfectly fine this way for up to 24 hours.
When you are ready to serve, just mix up the filling (or use the pre-made filling) and pipe it back into the whites. This prevents the exposed filling from drying out or absorbing smells from the fridge. If you absolutely must fill them all the way ahead of time, cover that platter tightly with plastic wrap—like, really tightly—and keep them chilled below 40°F (4°C). They are best eaten within two days, but frankly, they never last that long at my house!
If you have any questions about ingredient sourcing or liability while cooking amazing food like this, please take a moment to review our site disclaimer. Keeping food safe is just as important as making it taste delicious!
Frequently Asked Questions About Deviled Eggs
I always get tons of questions about these eggs because everyone wants theirs to be absolutely perfect! It’s funny, even with the easy deviled eggs recipe laid out, people still run into tiny snags. Let’s clear up the most common things I hear down in the comments section. It’s all about avoiding that runny filling and keeping the yolks bright!
How do I prevent my deviled eggs filling from becoming runny?
This is the number one complaint! Runny filling almost always happens for two reasons. First, if you didn’t mash the yolks finely enough *before* adding the mayo and mustard, the mixture sometimes breaks and turns liquidy. Second, you added too much liquid—maybe a heavy hand with the vinegar or mustard. If you realize it’s too wet, quickly mash up one or two extra cooked yolks you might have set aside and mix those in until the texture thickens back up. Remember, you want thick, scoopable clouds, not soup!
Can I make the hard-boiled eggs for these deviled eggs a day ahead?
Yes, absolutely, and I sometimes do this for huge holiday rushes! Hard-boiling and cooling the eggs the day before is a fantastic time-saver. However, I strongly suggest you only peel them right before you plan to mix the filling. Once peeled, the egg white starts to dry out just a bit, and it can sometimes absorb fridge odors. Storing the *peeled whites* in an airtight container layered with a slightly damp paper towel keeps them fresh for slicing the next day.
What is the trick to getting the best yolk color for my deviled eggs?
The best color—that beautiful, vibrant yellow—comes down to how quickly you stop the cooking process. You *must* use the ice bath immediately after the 12-minute rest period. That rapid cooling prevents the sulfur in the whites from reacting with the yolks, which causes that dull, slightly greenish or gray film. Fresher eggs also seem to yield a brighter yolk to begin with, so try to source quality eggs when making this classic appetizer!
If you’re still curious about how we handle your information after you leave us a comment, you can always check out our cookie policy here on the site. Happy cooking!
Nutritional Estimates for Classic Deviled Eggs
Now, I’m no nutritionist by any means, so please take these numbers with a big grain of salt—hopefully, not too much salt from the recipe itself! We bake these deviled eggs for pure enjoyment; they aren’t exactly a health food, but hey, they are delicious party finger food! These estimates are based on serving two halves, which is just about the size of one and a half eggs, before all the fluff added back in.
I always use full-fat mayo, which pushes the numbers up slightly, but in my opinion, that’s non-negotiable for that creamy texture we worked so hard to achieve! Remember, because mayonnaise brands and egg sizes vary, these are just rough guides, okay? You can always look up the specific nutrition label for your mayo if you need exact counts.
- Calories: About 90 per serving.
- Total Fat: Around 8 grams. Most of that is healthy-ish fat from the yolk and mayo!
- Protein: A solid 3 grams in every bite to keep you going!
- Carbohydrates: Very low—only about 0.5 grams. Great news for low-carb fans!
- Sugar: Pretty negligible, less than 1 gram.
We definitely get a fair bit of cholesterol from the yolks, which is expected, but wow, these are satisfying! If you’re looking for more transparency about how we handle user data while visiting the site, please check out our GDPR compliance statement. Happy snacking!
Share Your Perfect Deviled Eggs Creations
Now that you know all my secrets for creamy fillings and easy peeling, I absolutely want to hear how they turned out for you! Did you stick to the classic recipe, or were you tempted to add smoked paprika or a dash of heat? Don’t keep your culinary victories to yourself!
Go ahead and leave a star rating right here on the recipe card—it really helps other bakers feel confident trying out this recipe next. And if you made any wonderful little tweaks, drop them in the comments below. Seriously, I love seeing photos if you share them on social media; tag me! Let’s keep this tradition of perfect, savory, crowd-pleasing bites going strong for everyone.
If you’re sticking around the site, please take a moment to check out our terms and conditions before you go. Enjoy the leftovers—they’re even better the next day!
PrintClassic Deviled Eggs Recipe
A simple recipe for making traditional, creamy deviled eggs, perfect for any gathering.
- Prep Time: 20 min
- Cook Time: 12 min
- Total Time: 32 min
- Yield: 24 halves
- Category: Appetizer
- Method: Boiling and Mixing
- Cuisine: American
- Diet: Vegetarian
Ingredients
- 12 large eggs
- 1/2 cup mayonnaise
- 2 tablespoons yellow mustard
- 1 tablespoon white vinegar
- 1/4 teaspoon salt
- 1/8 teaspoon black pepper
- Paprika, for garnish
Instructions
- Place eggs in a large saucepan and cover with cold water by one inch.
- Bring water to a full boil over high heat. Once boiling, remove the pan from the heat, cover it, and let the eggs stand for 12 minutes.
- Immediately transfer the eggs to an ice bath (a bowl of ice and water) and let them cool completely, about 10 minutes.
- Peel the cooled eggs. Slice each egg in half lengthwise.
- Carefully scoop the yolks into a medium bowl. Place the egg white halves on a serving platter.
- Mash the yolks with a fork until fine. Add the mayonnaise, mustard, vinegar, salt, and pepper. Mix until the filling is smooth.
- Spoon or pipe the yolk mixture back into the hollows of the egg white halves.
- Sprinkle paprika over the top of each filled egg half before serving.
Notes
- For easier peeling, gently crack the shell all over and peel under cool running water.
- If you want a smoother filling, press the mashed yolks through a fine-mesh sieve before mixing in the other ingredients.
- Chill the finished deviled eggs for at least 30 minutes before serving for the best flavor and texture.
Nutrition
- Serving Size: 2 halves
- Calories: 90
- Sugar: 0.5
- Sodium: 110
- Fat: 8
- Saturated Fat: 2
- Unsaturated Fat: 6
- Trans Fat: 0
- Carbohydrates: 0.5
- Fiber: 0
- Protein: 3
- Cholesterol: 95