

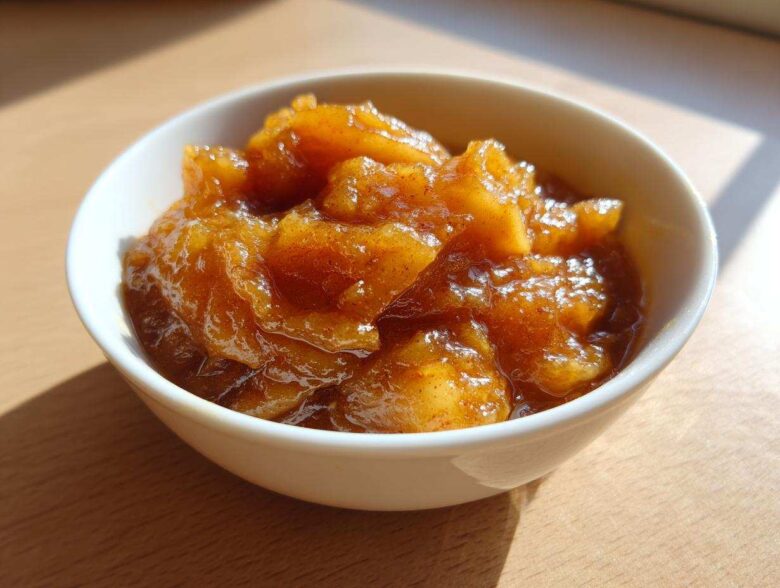
Oh, fall—there’s just nothing like the scent of warm spices mingling with baked apples, is there? It instantly makes my whole kitchen feel cozy, even if it’s only Tuesday afternoon! Forget those jars of suspiciously clear, overly sweet stuff from the grocery aisle. When I want real, honest-to-goodness comfort food, I only make homemade applesauce. This recipe right here? It’s truly the Best Applesauce Recipe you’ll ever try. We’re talking about a quick stovetop method that gets tender, flavorful applesauce on your table in about 30 minutes flat. It’s fast, it’s healthy, and you get to control exactly how chunky, spicy, or sweet your final product is. Trust me, once you try this applesauce, you won’t go back.
Why This Stovetop Homemade Applesauce Recipe is Your New Favorite
Honestly, the biggest argument for this recipe is just how ridiculously fast it is! We’re talking 30 minutes total from when you decide you want applesauce to having it simmering on the stove. It’s the ultimate Quick Apple Recipe for those unexpected cravings when you need a snack right away.
Here is why I dump the store-bought stuff now:
- Speed: It cooks down on the stove faster than you can believe—way quicker than waiting hours for the Crockpot to do its thing.
- Natural Sweetness: We only rely on the apples and maybe a tiny hint of maple syrup if I’m feeling extra indulgent. It’s truly Healthy Applesauce.
- Texture Control: This is my favorite part! You decide if you want it perfectly uniform and smooth, or if you want those satisfying, rustic, leftover chunks.
It’s just better, warmer, and it makes the kitchen smell incredible. You should definitely check out how good these apple cider donut holes smell when this simmers, too!
Gathering Ingredients for Perfect Homemade Applesauce
See? I told you this was simple! Making superior applesauce doesn’t require heading out on a massive grocery run. You probably have most of this sitting in your pantry already. The most important thing you need to focus on is getting good apples. I always aim for a mix—something sweet like Fuji or Honeycrisp, balanced out with something tart like Granny Smith. If you stick to just sweet apples, the final product can taste a little flat.
For this batch, we’re keeping things ultra-traditional and pure. You’ll need:
- 6 large apples (I strongly recommend that sweet and tart mix!)
- 1/2 cup of simple water (just enough to help them steam without scorching)
- 1 teaspoon of ground cinnamon – don’t skimp here!
- 1 tablespoon of fresh lemon juice (this brightens everything up)
That’s it! We don’t need sugar or excessive spice because the apples do all the heavy lifting for us. If you’re planning on making these amazing cinnamon roll apple crumble muffins later, having this pure applesauce on hand is key!
Step-by-Step Instructions for Easy Applesauce
This process is so straightforward, I swear even my teenager can handle this batch of Easy Applesauce without setting off the smoke alarm! We are not messing around with complicated steps here. The goal is tender apples that melt in your mouth. Just follow these steps precisely, especially that simmer time, and success is guaranteed.
- First things first, we prep the fruit. You need to grab your apples, peel them, core them, and then chop them up into pretty uniform 1-inch pieces. Keep those pieces somewhat consistent so they cook evenly.
- Toss those prepared chunks right into your biggest, sturdiest pot. We add just a half cup of water and that tablespoon of lemon juice right over the top.
- Now, turn the heat up to medium-high and let that water just come up to a rolling boil. You’ll see those apples start bubbling around the edges.
- As soon as it boils, drop that heat way down to low—we want a gentle simmer, not a frantic boil. Pop the lid on slightly askew so steam can escape, and let it cook, stirring here and there, for about 15 to 20 minutes. This is crucial timing! They need that time to get totally soft.
- Once they are fork-tender, pull the whole thing off the burner. Now, stir in that teaspoon of ground cinnamon. Smell that? That’s homemade perfection right there!
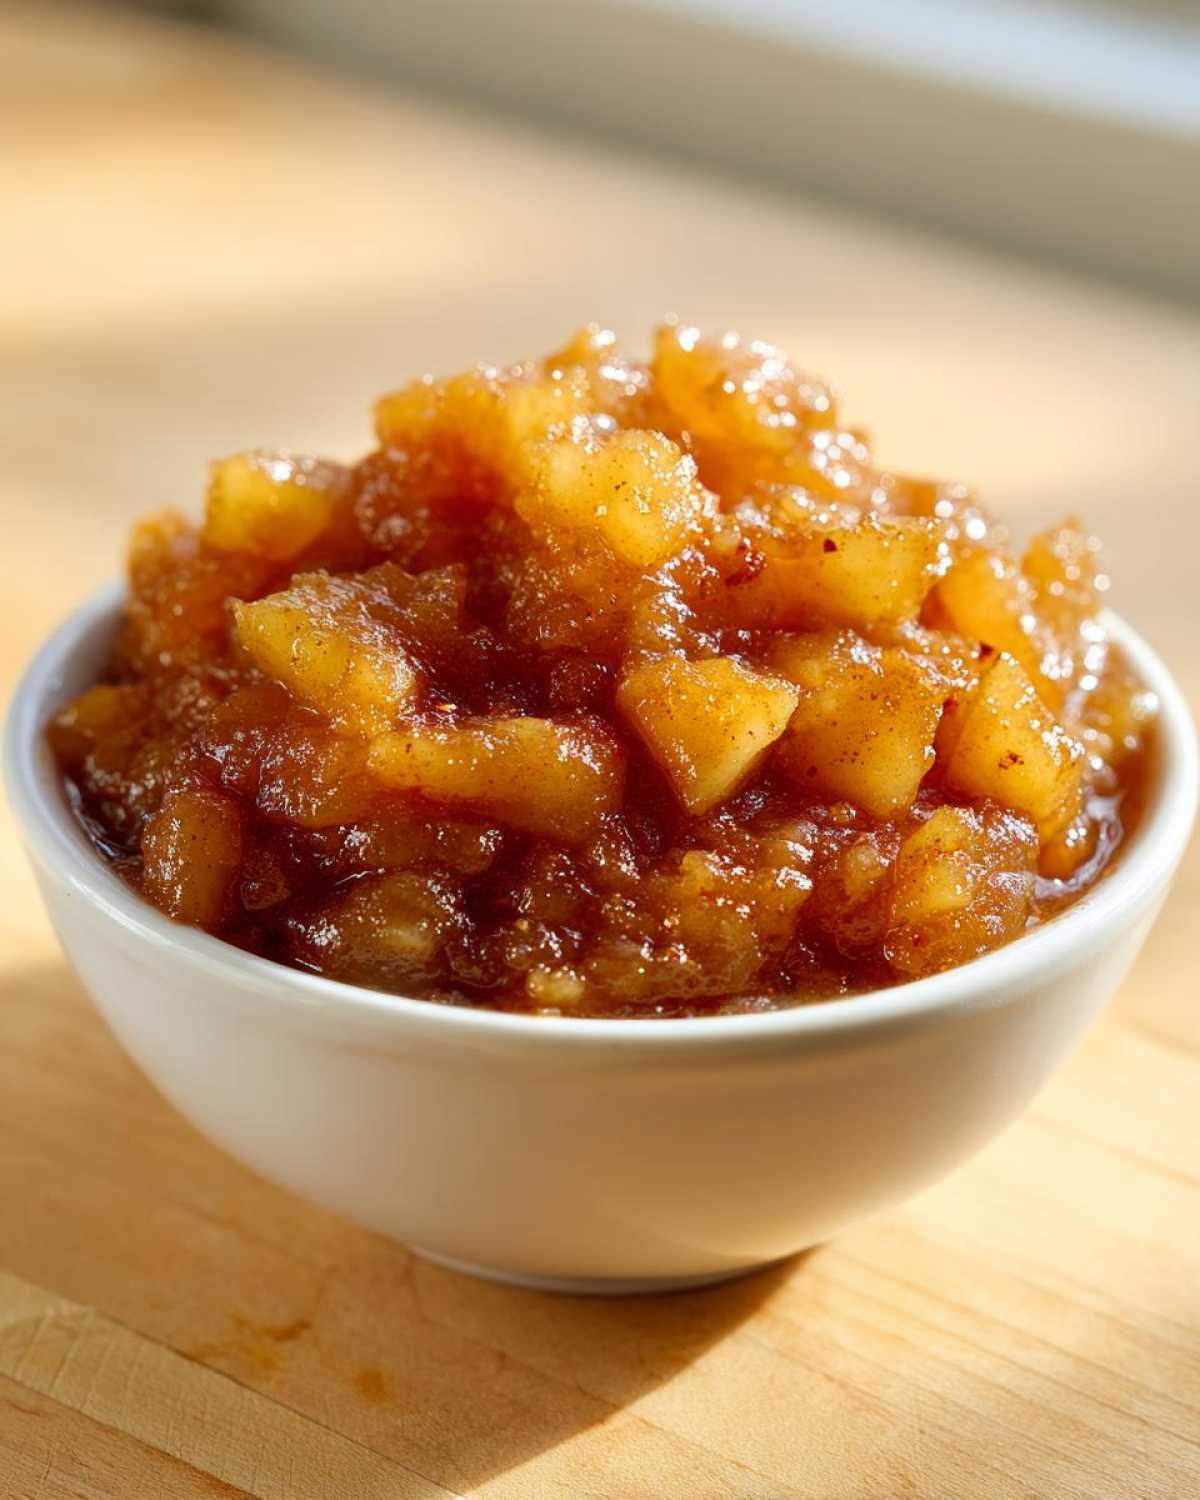
- The final step is customizing the look. For rustic, chunky applesauce, grab your potato masher and go to town! If you want it silky smooth for baking or for tiny eaters, grab an immersion blender right in the pot and blend until you can’t see any lumps anymore.
- Serve it hot now, or pop it in the fridge to chill for later. Easy peasy lemon squeezy! You can even check out this cinnamon swirl coffee cake while you wait for it to cool down a bit.
Preparing the Apples and Initial Cook for Applesauce
When you are peeling, try to be quick! The skins are what we are generally removing unless you’re going for a rustic texture, in which case you can try making No Peel Applesauce. If you go skin-on, make sure you have a good immersion blender because you’ll want to blitz those skins down completely, otherwise, you end up with chewy bits!
The initial cook needs that gentle heat after the boil. If you keep it too high, the bottom layer will scorch before the top apples even start to soften up. We need that gentle steam doing the work evenly across the whole pot for those full 15 to 20 minutes.
Achieving Your Preferred Texture for Homemade Applesauce
This is where you get to be the artist! If you love a good scoopable side dish that still has body, use the potato masher. Just press down firmly a few times around the pot. Don’t mash it into oblivion; you want some nice, firm-ish chunks remaining.
However, if this applesauce is destined for a recipe—or if you just prefer it utterly smooth—the immersion blender wins every time. Dip it in and keep it moving for maybe thirty seconds until everything just vanishes into a creamy consistency. Just make sure you pull it off the heat source *before* blending, okay? Safety first!
Tips for the Best Applesauce Recipe Variations
Okay, now that you’ve nailed the standard super-easy applesauce, let’s talk about jazzing it up! The beauty of these 30-minute stovetop recipes is how easily they adapt to whatever you’re craving. My absolute top tip, remember from the ingredient list? Apple selection is everything. If you want a sweeter result without adding sugar, lean into Fuji or Gala—they are naturally sugary treats. For something tangier, swap half of those out for something like Cortland.
If you want to make this next level Spiced Applesauce, don’t stop at just cinnamon! Try adding a tiny pinch of ground cloves or allspice right when you add the cinnamon. Wow factor, seriously. A fresh grind of nutmeg makes it taste unbelievably autumnal.
Another request I get all the time is about sweetness. If the apples you picked aren’t quite cutting it, wait until the very end when you stir in the cinnamon. That’s your chance! Add a tablespoon of maple syrup—it mixes in beautifully and gives a deeper flavor profile than regular white sugar. Speaking of maple, these maple apple pork chops go perfectly with a batch of this homemade side dish!
And hey, if you want a genuine Cinnamon Applesauce experience, just double that cinnamon! It’s hard to overdo it when the spices are just that warm and comforting.
Storage and Serving Suggestions for Your Applesauce
So, you made a huge, glorious batch of applesauce! Good job! Now, you need to know how to keep that sunshine tasting fresh for later. Storing it is super easy, but you have to be smart about it. Since we only used water and lemon juice, it doesn’t have the shelf life of the sealed stuff. Keep it in a good airtight container in the fridge.
I find this homemade applesauce stays perfectly delicious for about 7 to 10 days in the refrigerator. Any longer than that, and you might notice the color starting to dull slightly, though it’s usually still fine to eat if there’s no mold. If you made a really massive batch, freezing is your best bet! Pop it into freezer-safe containers, leaving about an inch of space at the top because liquids expand when they freeze. It keeps well in the deep freeze for almost four months.
When you want to use it, just pull a container out the night before and let it thaw in the fridge. It reheats beautifully on the stovetop or even quickly in the microwave.
But the real fun is deciding how to eat it! Of course, it’s fantastic served simply warm, maybe with a little extra dash of cinnamon, acting as a wonderful, simple Homemade Side Dish, especially alongside pork chops or potato pancakes. But don’t stop there!
I use leftover applesauce constantly:
- It’s the world’s best topping, hands down, for plain Greek yogurt in the morning—a real Natural Sweetener Snack boost.
- It makes brownies and cakes incredibly moist when you substitute it for oil or butter; that’s why it’s great for Applesauce for Baking!
- Drizzled warm over vanilla ice cream is my secret late-night treat.
If you’re using it in baked goods, make sure it’s room temperature, unless the recipe specifically calls for cold ingredients. I always keep this on hand, especially when I’m whipping up something like this cinnamon roll bread pudding, where the moisture really helps the texture!
Comparing Methods: Stovetop vs. Slow Cooker Applesauce
Now, I know what you’re thinking. “This stovetop way is great, but I’m making a mountain of food for a party and don’t want to babysit a pot for 20 minutes.” And that’s totally fair! While my 30-minute Stovetop Applesauce is unbeatable for speed, the slow cooker is your best friend when you need hands-off cooking.
If you’re using the Slow Cooker Applesauce method (sometimes called Crockpot Applesauce—I use my crockpot all the time for other things, like this amazing French Onion Soup!), you are trading speed for convenience.
The main difference is timing. Stovetop focuses on rapid softening through direct heat and steam; it’s intense but quick. For the slow cooker, you toss everything in, set it to low, and forget it for 6 to 8 hours. The apples break down beautifully, often resulting in a richer color and a naturally sweeter taste because the sugars concentrate slowly.
The texture tends to be a bit softer in the slow cooker, leaning towards smooth almost automatically. My verdict? Use the stovetop when you need that applesauce tonight for dinner. Use the Crockpot when you prep it on Sunday, and you have amazing, wholesome snacks ready all week long without lifting a finger!
Frequently Asked Questions About Making Applesauce
I get so many questions about my Homemade Applesauce Recipe—it’s wild! People can’t believe how simple it is until they try it. Here are the top things readers always ask me when they decide to make their first batch of this delicious apple cider sangria, because they are nervous about switching from store-bought.
Can I make this without peeling the apples?
Absolutely, you can make No Peel Applesauce! I mention this in the tips, but it bears repeating. If you hate peeling—and who doesn’t?—just leave the skins on. The key here is that you *must* use an immersion blender or a good regular blender in the final steps if you leave the skins on. If you only use a potato masher, you’ll end up with chewy little bits of skin in every bite, and nobody wants that texture, right?
What apples are best for applesauce?
This is the real secret to the Best Applesauce Recipe! You need balance. If you use only tart apples like Granny Smith, your applesauce will need a lot of added sweetener, which defeats the point of making a Healthy Applesauce. If you only use sweet apples like Gala, it can turn out a little bland.
My rule of thumb (and this comes from years of tasting!) is to use a 50/50 mix of a sweet apple and a tart apple. My go-to combo is Fuji for sweetness and Granny Smith for that necessary zing. If you can only find one type, it’s better to use a sweeter one and maybe add that extra tablespoon of maple syrup at the end rather than having it taste sour.
How do I make this recipe sugar-free?
That’s easy, and it’s why I love this recipe so much! This basic Stovetop Applesauce is naturally sweet from the fruit itself. If you want it completely sugar-free—meaning no added maple syrup or honey—just skip the optional sweetness note. If you’re trying to avoid all natural sugars, you’d probably need to use very tart apples (like pure Granny Smith) and replace the water with plain water, skipping the lemon juice too, to keep the pH lower. But honestly, the natural sugars you get from even six large apples provide fantastic flavor and texture for a great Natural Sweetener Snack base.
Can I use this for baking if I want it smoother?
Yes, and I highly recommend it! If you plan on using this as a fat replacer in muffins or cakes, you definitely want that super-smooth texture, which is why using an immersion blender is perfect for that goal. If you blend it until it looks like velvet, it incorporates seamlessly into doughs and batters, making your baked goods lighter and moister without affecting the flavor much.
Nutritional Estimates for Homemade Applesauce
Now, I’m not a nutritionist—you know I’m just a cook who loves good food—but I always like to give you a general idea of what you’re putting into your body when you make this wonderful, wholesome treat. Because we’re using fresh ingredients and intentionally keeping the sugar low, this applesauce is a fantastic choice for snacking! Remember, because you’re using different apples or maybe adding that splash of maple syrup I mentioned, these numbers are just an estimate for one standard serving size.
This data is based on the recipe yielding about 4 servings, with each serving being about a half-cup. Look how low the fat content is—it’s primarily just fruit!
Here are the approximate figures for your per-serving analysis:
- Serving Size: 1/2 cup
- Calories: Around 105 calories
- Fat: A tiny 0.2g (Practically fat-free!)
- Carbohydrates: About 28g, mostly natural fruit sugars
- Fiber: A great boost at 3g per serving—that’s why it keeps you full!
- Protein: Less than half a gram, as expected from fruit.
- Cholesterol: Zero, which is what we want from a Wholesome Apple Treat!
See? It’s real food, made by you, without all those weird preservatives or high-fructose corn syrup the big brands use. This is why making your own applesauce is always the best choice when you’re after a Healthy Applesauce option!
Share Your Experience Making This Applesauce
Alright, my friends, we’ve cooked, we’ve blended, and your kitchen smells like absolute autumn heaven! That means the final step is the best part: I want to hear all about it! Did you try my trick of mixing Fuji and Granny Smith apples? Or maybe you went rogue and added cardamom instead of cinnamon?
Please, please, please come back and leave a star rating right below this section. It really helps other folks see that this is a winner for making simple, delicious applesauce. Don’t be shy about telling me what worked best for your family. Did your kids love the smooth version? Did you use the leftover applesauce for baking?
If this quick stovetop adventure brought a little bit of cozy comfort into your day, please share it around! A quick pin on Pinterest or a share on Instagram helps spread the word about moving away from the jarred stuff. You can easily find more of my favorite meals and baking projects over on the main blog page. Happy cooking, and I can’t wait to see your results!
PrintEasy Stovetop Homemade Applesauce
Make simple, naturally sweet applesauce on the stovetop. This recipe requires minimal ingredients and cooks quickly, resulting in a smooth or chunky side dish.
- Prep Time: 10 min
- Cook Time: 20 min
- Total Time: 30 min
- Yield: 4 servings
- Category: Side Dish
- Method: Stovetop
- Cuisine: American
- Diet: Vegan
Ingredients
- 6 large apples (like Fuji or Gala)
- 1/2 cup water
- 1 teaspoon ground cinnamon
- 1 tablespoon lemon juice
Instructions
- Peel, core, and chop the apples into 1-inch pieces.
- Place the chopped apples, water, and lemon juice into a large pot.
- Bring the mixture to a boil over medium-high heat.
- Reduce the heat to low, cover the pot, and simmer for 15 to 20 minutes, or until the apples are very soft. Stir occasionally.
- Remove the pot from the heat. Stir in the ground cinnamon.
- Mash the apples with a potato masher for a chunky texture, or use an immersion blender for a smooth consistency.
- Serve warm or chill for later use.
Notes
- For a sweeter applesauce, add 1 tablespoon of maple syrup during the last five minutes of cooking.
- Use a mix of sweet and tart apples for balanced flavor.
- If you prefer no peel applesauce, simply omit the peeling step; the skins will blend in if you use an immersion blender.
Nutrition
- Serving Size: 1/2 cup
- Calories: 105
- Sugar: 18g
- Sodium: 3mg
- Fat: 0.2g
- Saturated Fat: 0g
- Unsaturated Fat: 0.1g
- Trans Fat: 0g
- Carbohydrates: 28g
- Fiber: 3g
- Protein: 0.4g
- Cholesterol: 0mg