


Oh, the balance! That perfect, breathtaking moment when the intense, bright zing of fresh lemon meets the soft, cloud-like sweetness of toasted meringue. That’s what we’re chasing here with this absolute classic lemon meringue pie recipe. Forget everything you think you know about wobbly, weeping messes, because this version is my tried-and-true method for a stable, towering confection. I spent years battling the dread of meringue shrinkage until I figured out the secret: temperature control is everything! Trust me, after you master this homemade lemon pie from scratch, you’ll be making it for every single gathering. If you are looking for other zesty bakes, you absolutely have to check out my lemon raspberry loaf cake recipe sometime too!
Why This Classic lemon meringue Pie Recipe Works
The success of this classic lemon pie isn’t magic; it’s pure science executed patiently! The main reason this pie comes out as a stunning showstopper dessert is how we treat the components. We are deliberately putting a very hot lemon filling onto the meringue base. That heat seals the meringue to the filling instantly, which stops that awful weeping you see when the moisture tries to escape. Also, room temperature egg whites give you the most volume, plain and simple. If you want to see how I get my cookies perfectly crisp, you have to check out Grandma’s secret cookie that wins every swap!
Achieving a Perfect Buttery Pie Crust Tutorial
Listen, you can have the best filling and meringue in the world, but if your crust is soggy, the whole thing sinks! We have to blind bake that buttery pie crust tutorial completely ahead of time. This means baking it until it’s actually golden brown and totally dry. When you pour in that glorious, hot, tart and sweet pie filling, the cool, crisp crust keeps its shape. If you need a dedicated tutorial on getting that perfect pre-bake, check out my guide!
Ingredients for the Ultimate lemon meringue Filling
This filling is where you need to be precise, friends. It’s all about the ratio of starch to liquid, and using *real* citrus. I always lay out a clean station so I don’t accidentally cross-contaminate anything with fat, which would ruin the meringue later! We are making a true, thick lemon curd recipe, not just a loose custard.
- 1 1/2 cups granulated sugar (the larger amount for the base, not the meringue!)
- 1/3 cup cornstarch – this is your thickening workhorse.
- 1/4 teaspoon salt – don’t skip this, it balances the sweetness.
- 1 1/2 cups cold water
- 4 large egg yolks, lightly beaten – make sure you separate these perfectly!
- 1/2 cup fresh lemon juice – only fresh will give you that pop.
- 1 tablespoon lemon zest – don’t be shy with the zest!
- 2 tablespoons unsalted butter – cold butter adds that final richness.
Assembling the Zesty lemon Dessert Base
When we talk about that signature zesty lemon dessert flavor, it comes from using that fresh juice and zest right at the end. The cornstarch slurry is crucial; you must whisk it until there are zero lumps before the heat goes on. This mixture becomes the perfectly tart foundation that the meringue sits on. If you like fish recipes that use real lemon, check out my lemon butter tilapia with rice!
How to Make Perfect Meringue for Your lemon meringue
Alright, this is where bakers get nervous, but I promise you, once you nail how to make perfect meringue, you’ll feel unstoppable! The absolute first rule for getting that high, fluffy meringue topping is cleanliness. I mean it—your bowl and your whisk attachments must be surgically clean. Even a tiny speck of grease or egg yolk will stop the egg whites from whipping up correctly. You want 6 large egg whites that have sat out on the counter for about 30 minutes; no cold eggs allowed!
We start beating those whites on medium speed until they look foamy, like sea foam, then we add the cream of tartar. This little helper is essential for stabilizing the structure so it holds those gorgeous peaks. Then, we slowly, slowly stream in the sugar reserved for the meringue, little by little. If you dump it all in, you deflate the whole thing! Beat until stiff, glossy peaks form. That means when you lift the whisk, the peak stands straight up without flopping over. It feels amazing seeing that tower!
No Weep lemon Meringue Tips for Stability
If you’ve ever cut into a pie and seen little beads of sad, sugary liquid sitting on top, you’ve experienced meringue weeping. To avoid this disaster on your beautiful lemon meringue, you’ve got to seal the deal. You must spread that meringue right away onto the *hot* lemon filling—make sure it touches the crust all the way around, like a perfect seal!
Also, resist the urge to pop it straight into the cold fridge once it’s done baking! Rapid temperature changes cause contraction and weeping. We cool it slowly on the counter first. If you follow these no weep lemon meringue tips, you’ll get a perfectly baked, non-weeping topping every time. Don’t forget to check out my delicious lemon parmesan roasted broccoli recipe for a savory side dish!
Step-by-Step Instructions for the lemon meringue Pie Recipe
Now that we have our components ready—the cool crust, the hot filling base, and the stiff meringue holding its breath—we need to move with purpose! This lemon meringue pie recipe is fast-paced once the cooking starts, so have everything measured out. Don’t walk away from the stove during the thickening steps; that’s when things go from perfect to scorched paste in a second!
First, you’ll whisk together the larger sugar portion, the cornstarch, and the salt right in the saucepan. Slowly whisk in the cold water until it looks totally smooth. Next, crank up the heat to medium and stir constantly until it gets thick and starts to boil vigorously. You must let it boil for a solid sixty seconds while stirring non-stop—this cooks out the raw cornstarch flavor base for our lemon curd recipe.
Now, the tempering part! This is crucial to avoid scrambled eggs. While whisking the 4 egg yolks separately, you need to slowly drizzle in about one cup of that hot sugar mixture into the yolks. Take your time here! Once they are warmed up, pour that yolk mixture back into the main saucepan. Cook it again, stirring, until the whole thing thickens up one more time and just starts to bubble gently—do not let it aggressively boil again after the yolks are added!
Once it’s thick, pull it off the heat immediately. Stir in your lemon juice, zest, and the butter until everything is silky smooth. This hot, zesty mixture gets poured right into that cooled pie shell. Remember, we are using the heat of this filling to bake our meringue topping later, so move fast! If you need a great recipe for a meal pairing, you should look at my creamy lemon orzo with chicken.
Baking and Cooling Your Showstopper lemon meringue
Okay, we’ve sealed the deal! The moment your lemon meringue filling meets that beautiful, peaked meringue, you need to get it into the oven—no waiting around! Pop that pie into a preheated 350°F oven for just about 12 to 15 minutes. We aren’t trying to cook the filling again; we just want to kiss the meringue with some heat until those peaks look beautifully golden brown. Don’t leave it too long or the meringue will dry out too much!
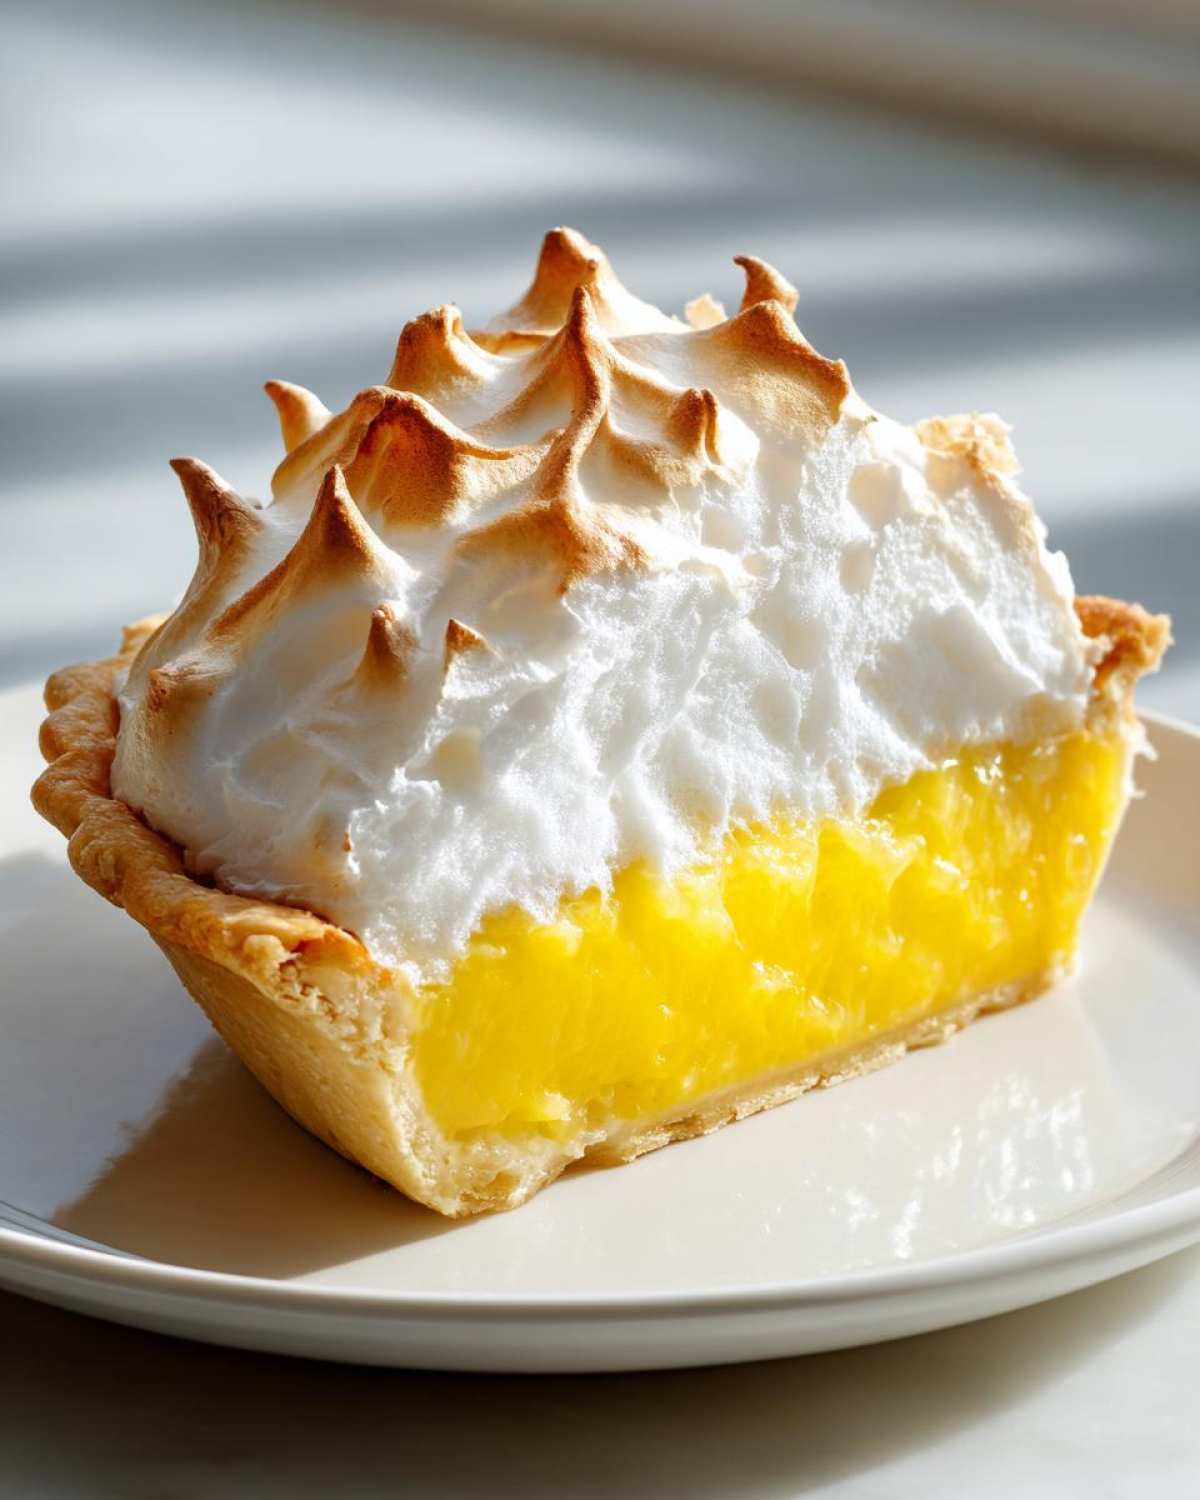
Now for the crucial finish: cooling. This is where so many homemade pies go wrong! You have to let this pie cool slowly, completely, at room temperature on a wire rack for at least four full hours before you even think about putting it into the fridge. This gradual cooling ensures there’s no shock to the meringue structure. If you chill it too fast, that moisture gets trapped underneath and you get weeping. Patience is your final ingredient for the best lemon meringue!
Variations: Beyond the Classic lemon Meringue Pie
While nothing beats a slice of that towering, traditional pie, sometimes you need portability or a fun twist! If you want to serve individual portions, this lemon meringue base is perfect for making mini lemon meringue tarts. You just use small shortbread shells instead of a full crust. Or, if you’re feeling like something totally different for a summer citrus dessert, you can adapt this fantastic lemon curd recipe into crisp, chewy lemon meringue cookies or dense, tangy lemon meringue bars. Just skip the meringue baking step for the bars and use a lower oven temperature briefly to set the curd if needed. For a great pairing recipe, you’ve got to try my lemon blueberry bread recipe!
Storage & Reheating Instructions for lemon Meringue
Once your beautiful lemon meringue pie has fully cooled down on the counter—remember, that’s four hours minimum—it’s ready for the fridge! Cover it loosely, perhaps with some plastic wrap tented high so it doesn’t touch the meringue peaks. The pie should generally last about three days chilled. Now, hear me out: do NOT try to reheat this pie! Meringue doesn’t respond well to warming up; it gets sticky and sad. Enjoy it cold right out of the fridge for that perfect sharp bite!
Frequently Asked Questions About Making lemon Meringue
I know you probably have a million thoughts swirling around, just like I did when I first started baking this classic lemon pie! Here are the few things folks ask me most often when they’re tackling their first tall, fluffy tower of citrus sunshine.
Why is my meringue weeping?
That sad little puddle of syrup happens when the meringue isn’t sealed properly to the hot filling or if you cool it too fast! Remember my big rule: spread that meringue immediately over the piping hot lemon base, sealing it tight all the way to the edges of the crust. Also, don’t rush the cooling process; let it sit on the counter for a good few hours so it acclimates slowly. These simple no weep lemon meringue tips make a huge difference!
Can I use a pre-made crust here?
You totally *can* cheat a little if you’re short on time! I prefer my own buttery pie crust tutorial, but if you need to save time, a store-bought, pre-baked shell works fine. Just make sure it’s fully baked (blind baked) and completely cool before you pour in that hot lemon filling. It won’t have the same depth of flavor, but it gets you to that amazing lemon meringue finish line faster!
Can this be considered a summer citrus dessert?
Oh, absolutely! While it’s a showstopper any time of year, a slice of this tart and sweet pie is unbeatable on a warm evening. It’s light, bright, and refreshing. Plus, since it’s chilled after the initial cooling, it makes a magnificent summer citrus dessert. If you want a savory snack to balance out the sweet, check out my recipe for savory lemon herb popcorn recipe!
What is the secret to the tartness in the lemon filling?
Freshness is key for that vibrant flavor in my lemon curd recipe! Don’t rely on bottled juice; it’s too flat. You need at least a half-cup of freshly squeezed lemon juice, plus the zest to really amp up that zing. That bright burst is what cuts through the richness of the crust and balances the sweetness of the meringue perfectly.
Estimated Nutritional Information for This Dessert
Now, I always say that if you’re making a magnificent pie like this, you aren’t really counting calories, but it’s good to know what you’re working with! The following figures are just estimates for one slice of our beautiful lemon meringue creation. Real life always varies based on your crust recipe and how generous you are with that buttery filling!
- Calories: Approx 380
- Total Fat: 15g
- Carbohydrates: 60g
- Protein: 6g
- Sugar: 45g
Just a little reminder that these numbers can shift depending on what kind of crust you use. You can always check out the full details over on our disclaimer page if you need more technical specifics!
PrintClassic Homemade Lemon Meringue Pie

Make a traditional lemon meringue pie with a tart, sweet filling and a tall, fluffy meringue topping. This recipe focuses on a stable meringue.
- Prep Time: 30 min
- Cook Time: 45 min
- Total Time: 5 hours 15 min
- Yield: 8 servings
- Category: Dessert
- Method: Baking
- Cuisine: American
- Diet: Vegetarian
Ingredients
- 1 recipe for 9-inch single pie crust, baked (blind baked)
- 1 1/2 cups granulated sugar
- 1/3 cup cornstarch
- 1/4 teaspoon salt
- 1 1/2 cups cold water
- 4 large egg yolks, lightly beaten
- 1/2 cup fresh lemon juice
- 1 tablespoon lemon zest
- 2 tablespoons unsalted butter
- 6 large egg whites, room temperature
- 1/2 teaspoon cream of tartar
- 6 tablespoons granulated sugar (for meringue)
Instructions
- Prepare the pie crust and let it cool completely after blind baking.
- In a medium saucepan, whisk together 1 1/2 cups sugar, cornstarch, and salt. Gradually whisk in the cold water until smooth.
- Cook the mixture over medium heat, stirring constantly, until it thickens significantly and boils. Boil for one minute, stirring constantly. Remove from heat.
- In a separate bowl, whisk the egg yolks lightly. Slowly temper the yolks by whisking about 1 cup of the hot sugar mixture into the yolks.
- Pour the tempered yolk mixture back into the saucepan with the remaining hot mixture. Cook over medium heat, stirring constantly, until the filling thickens again and just begins to bubble. Do not boil.
- Remove the filling from the heat. Stir in the lemon juice, zest, and butter until the butter melts completely.
- Pour the hot lemon filling immediately into the cooled, baked pie crust.
- In a clean, grease-free bowl, beat the egg whites with an electric mixer on medium speed until soft peaks form. Add the cream of tartar.
- Gradually add the 6 tablespoons of sugar, one tablespoon at a time, beating well after each addition. Increase speed to high and beat until stiff, glossy peaks form.
- Spread the meringue over the hot lemon filling, making sure the meringue touches the edges of the crust all the way around to seal it. Create decorative swirls with the back of a spoon.
- Bake the pie at 350°F (175°C) for 12 to 15 minutes, or until the meringue is lightly golden brown.
- Cool the pie completely on a wire rack at room temperature for at least 4 hours before slicing. Avoid placing it in the refrigerator immediately to prevent weeping.
Notes
- To prevent the meringue from weeping, ensure your mixing bowl and whisk attachments are completely free of grease or yolk residue.
- Bake the pie immediately after topping the hot filling with the meringue.
- Cool the finished pie at room temperature for several hours before chilling. Rapid cooling can cause the meringue to contract and weep.
Nutrition
- Serving Size: 1 slice
- Calories: 380
- Sugar: 45g
- Sodium: 180mg
- Fat: 15g
- Saturated Fat: 7g
- Unsaturated Fat: 8g
- Trans Fat: 0.2g
- Carbohydrates: 60g
- Fiber: 1g
- Protein: 6g
- Cholesterol: 110mg