

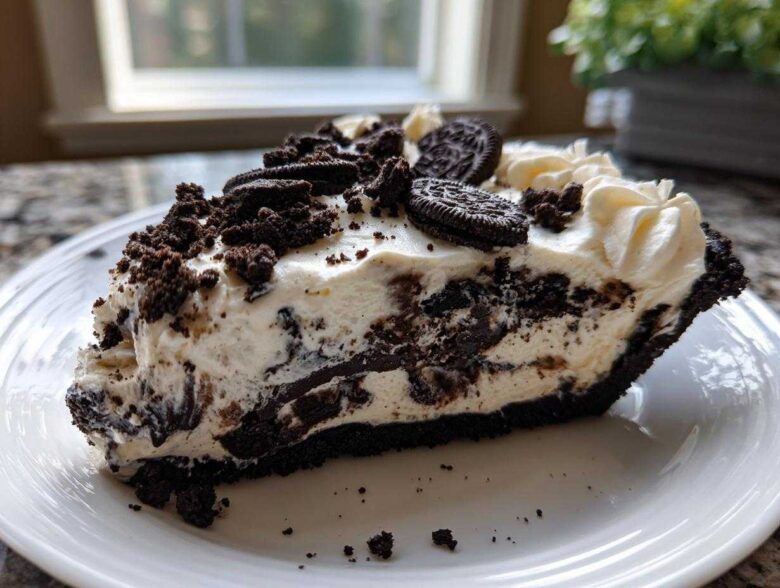
You know those nights? The ones where you suddenly decide you absolutely *must* have something rich, chocolatey, and utterly decadent, but the thought of turning on the oven makes you want a nap instead? Yep, I live for those moments, and that’s why this **No-Bake Oreo Pie** lives permanently taped to my fridge door.
Seriously, this isn’t just any dessert; this is my emergency, instant-gratification, crowd-pleasing savior. I first whipped up this recipe years ago when a friend announced they were coming over thirty minutes before they showed up. Panic? Nope. This oreo pie came together so fast, and the taste is pure magic—creamy, crunchy, and absolutely loaded with that cookies and cream flavor we all crave.
It’s the ultimate simple Oreo treat because you literally do zero baking. Just mix, chill, and devour! You can find tons more easy recipes over on my blog archives, but trust me, start right here.
Why This Creamy Oreo Pie Recipe is Your New Favorite Easy Oreo Dessert
I’ll tell you right now, if you’re looking for an Easy Oreo Dessert that steals the show without stealing your whole afternoon, this is it. This Quick Oreo Dessert transforms a handful of pantry staples into something that looks incredibly fancy. It’s the texture that really gets me every time—that rich, velvety filling contrasting with the crunchy base?
It sets up perfectly in the fridge, giving you the ultimate satisfaction every time you dig in. If you love quick wins in the kitchen, you need to check out my roundup of other no-bake energy bites too, but this pie is definitely the star.
Key Features of This No Bake Oreo Pie
- No Oven Needed: Seriously, turn off the heat! This pie is entirely chilled, making it perfect for hot summer days or when your oven is already hogged by dinner.
- Minimal Ingredients: We’re using ingredients you likely already have, which is half the battle when you need a dessert fast.
- Make-Ahead Friendly: It actually tastes *better* after it has a good long chill, so you can prepare it a day ahead of your party.
Ingredients for the Ultimate Oreo Pie
Gathering your supplies for this oreo pie is half the fun because you know nothing needs to bake! We aren’t messing around here; we want that deep, satisfying chocolate crunch, which starts with the best cookies. Don’t skimp on those Oreos—they are the backbone of this entire operation, both for the crust and that chunky texture we want folded into the filling later.
Keep your cream cheese chilling until just before you use it; we need it soft, but not greasy or melty! Here is exactly what you’ll need to scoop up and mix together. If you want to see what else I do with Oreos (yes, including Oreo Sushi—don’t ask, just look!), swing by that link.
- 1 package (14.3 oz) Oreo cookies, divided (We use most for the crust, so buy an extra package if you really love cookie chunks!)
- 6 tablespoons unsalted butter, melted (Melt this gently on the stove or in the microwave—careful, it gets hot fast!)
- 8 ounces cream cheese, softened (This needs to be truly soft so it mixes like silk.)
- 1 cup powdered sugar
- 1 teaspoon vanilla extract
- 1 container (8 oz) frozen whipped topping, thawed (Make sure this is fully thawed but still holds its shape!)
- 1 package (3.4 oz) instant chocolate pudding mix (Make sure it’s instant, not cook-and-serve!)
- 1 1/2 cups cold milk (Must be cold for the instant pudding to set up right.)
- 1 cup mini chocolate chips (optional for topping—I always add them, you should too!)
How to Prepare Your No Bake Oreo Pie Instructions
Okay, this is where the magic happens, and I promise you, it’s easier than boiling water! Since we aren’t using the oven, timing our chill periods is the most important move we make. You want everything set up perfectly before you dive into that delicious filling. If you’ve been looking for a recipe that’s as fun to make as biting into a fresh cheesecake brownie cookie, this is it!
Making the Homemade Oreo Crust
First things first: the base. You need to crush 24 of those Oreos into fine, fine crumbs. I use my food processor, but banging them in a Ziploc bag with a rolling pin works just as well if you need to work out any stress! Mix those crumbs right away with your melted butter until everything looks like damp, dark sand. Now, press this mixture firmly into your 9-inch pie plate. And here’s my tip: press it down hard, especially up the sides, so it stays put when you slice it! Pop that crust into the freezer right away while we move on. This ensures you won’t have a soggy bottom on your beautiful oreo pie.
Creating the Velvety Oreo Filling
Next up is the filling, which gives us that amazing ‘Velvety Oreo Filling’ texture. Grab your softened cream cheese, powdered sugar, and vanilla, and beat them until they look absolutely flawless and creamy—no lumps allowed! In a separate bowl, whisk your pudding mix and cold milk together vigorously for about two minutes until it starts to thicken up just a bit. Now, gently fold the thawed whipped topping into that cream cheese mix. Be gentle! We’re keeping the air in there. Finally, fold in that thickened pudding mixture. Then, coarsely chop about 8 more of those reserved Oreos and gently fold them in at the very end. Don’t overmix!
Chilling and Serving the Oreo Cookie Pie
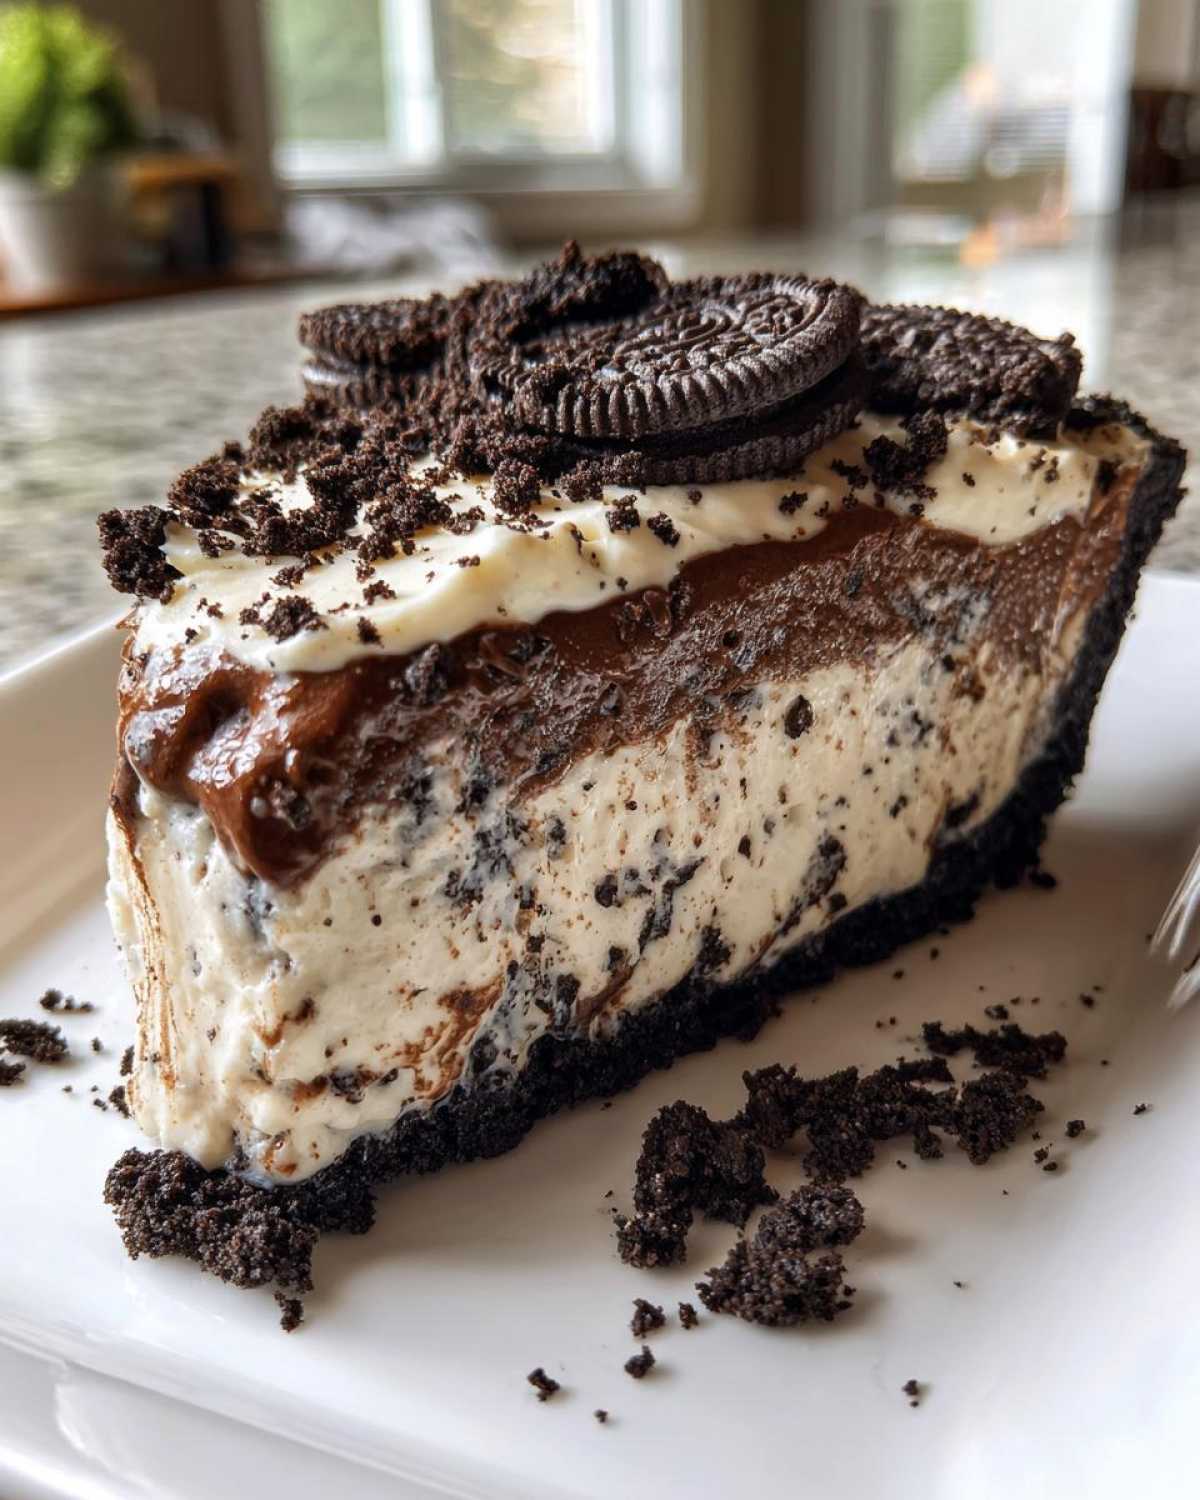
Pour that glorious, thick filling right into your chilled crust and spread it out nice and even. Now, the hardest part: waiting! This pie needs to chill in the refrigerator for a minimum of four hours, but honestly, overnight is where it truly shines and firms up perfectly. Once it’s solid, it’s time to decorate! Top it with those remaining chopped cookies or add those mini chocolate chips if you want that extra chocolate punch. People always rave about how perfect this Oreo Cookie Pie turns out, and it’s all thanks to that chill time!
Tips for the Perfect Creamy Oreo Pie Recipe
Getting this Creamy Oreo Pie Recipe right relies on feeling the ingredients, not just measuring them! My biggest tip, pulled right from the recipe notes, is about the crust. While mine goes straight to the freezer, which works great for a softer dessert, if you prefer a really sturdy base, give the crust a small bake. Just 10 minutes at 350°F after you press it in, then let it cool completely before you add anything wet.
Secondly, remember that cream cheese! It absolutely must be softened to room temperature. Cold cream cheese equals lumpy, sad filling that won’t fold properly into the pudding and whipped topping. If you’re finding your filling breaks down too quickly, try whipping your heavy cream yourself instead of using thawed whipped topping—it holds its structure way better, though it takes a little more elbow grease!
For more ideas on how to handle textures in desserts that stay soft for days, check out my post on cookies that stay soft for days!
Variations for Your Simple Oreo Treats
One of the reasons I love this base recipe so much is just how often you can change it up without changing the core method! It’s the perfect canvas for mixing things up when you realize you’re out of instant chocolate pudding, or maybe you just feel like switching things up for the next potluck. I’ve tried a few sneaky additions that just work beautifully.
My favorite swap involves the pudding flavor itself. If chocolate isn’t your mood, swap the instant chocolate pudding mix for instant vanilla or even butterscotch. When you use the vanilla version, it cuts down on the deep cocoa flavor, making the cream cheese and vanilla notes really sing. Remember to use cold milk regardless, or your whole filling won’t set up correctly!
If you have some fun mix-ins lying around, this is the time to bring them out. When I’m feeling extra indulgent, I’ll chop up a handful of peanut butter cups and gently fold them into the filling right before pouring it into the crust. The chocolate and peanut butter combination with the dark Oreo bits is just divine. You can even try drizzling some melted caramel sauce down the sides of the pie before chilling it for an extra layer of fancy flavor!
If you’re looking for other lightning-fast, rich chocolate desserts that bake in a mug (for when you only need one serving!), you have to see my Chocolate Peanut Butter Mug Cake recipe. It gives you that instant hit!
Storage and Make-Ahead Tips for Your Chilled Oreo Dessert
Because there’s no baking involved, this amazing oreo pie lasts beautifully in the fridge, which is just one more reason why it’s my favorite make-ahead hero. You can absolutely prepare the whole thing the day before you need to serve it. In fact, I think the flavors meld overnight, making it even richer for the next day’s serving time!
Keep it tightly covered with plastic wrap—make sure the wrap doesn’t touch the top marshmallows or cookie pieces if you’ve added a delicate topping layer. Stored this way, it stays wonderfully creamy and perfect for about three to four days. It’s the perfect recipe to get done early when you’re planning for a big party!
If you are looking for other brilliant items you can prep ahead of time, like my make-ahead mini omelette muffins, check out that post!
Serving Suggestions for This Indulgent Oreo Dessert
We’ve created this incredible, rich, chocolatey masterpiece, but how do we serve it up to make it look like we spent all day in the kitchen? It’s all about contrast! Because this dessert is so heavy and fulfilling—it’s meant to be indulgent, after all—we need something bright to cut through that creamy sweetness when we serve it.
My absolute favorite little trick is pairing a slice with a small bowl of fresh raspberries or strawberries. The tartness of the berries dances perfectly with the dark cocoa of the crust and the vanilla sweetness of the filling. It just balances everything out so nicely, making you feel slightly less guilty about that second slice!
If you’re serving this after a big dinner, a tiny cup of black coffee or a rich espresso shot alongside the dessert is fantastic. The bitterness of the coffee really enhances the deep chocolate notes in the pie. Speaking of coffee and chocolate together—you have to see how amazing my Coffee Chocolate Chip Banana Bread is if you want another great pairing option!
For a more decadent finish, a light dusting of sea salt flakes right before serving does wonders, too. It sounds weird, but that little pop of salt against the sugary filling is just *chefs kiss*.
Frequently Asked Questions About Making Oreo Pie
I get so many questions about this recipe—it’s a popular one for a reason! People always want to know the little secrets that make sure their oreo pie turns out absolutely perfect and sliceable. Don’t stress if you need to swap things around; I’ve figured out a few common snags you might run into. If you have more questions after this, feel free to shoot me a message on my contact page!
Can I skip the instant pudding in this oreo pie?
You totally could, but I wouldn’t recommend it if you want the official texture of this No Bake Oreo Pie. The pudding mix is crucial because it whips up with the milk and stabilizes the whole filling. If you skip it, you are essentially making a cream cheese mousse pie. It will still taste amazing, but it will be much softer—more like a dense cheesecake consistency that might lean a little too much toward pudding if it warms up. It won’t have that fluffy structure a classic Oreo Pudding Pie offers!
What is the best way to cut clean slices of this No Bake Oreo Pie?
Ah, the eternal struggle of serving creamy, chilled desserts! You want those beautiful, intact slices for company, right? Here is my trick for getting perfect wedges from this Chilled Oreo Dessert: Get a long, sharp knife and dip it into a glass of very hot water. Let it sit for about fifteen seconds to heat up that blade. Slice straight down through the pie, and then wipe the knife completely clean and dry before you reheat it for the next cut. Hot blade equals clean release every single time!
Estimated Nutritional Data for This Oreo Cheesecake Pie
Now, here’s the part where we look at the science behind the indulgence! Remember, since we are dealing with store-bought Oreos and changeable mix-ins (like if you add those optional chocolate chips!), these numbers are just my best estimate based on the specific ingredients I listed. Think of this as a friendly guideline rather than a strict lab result—after all, this is an Oreo Cheesecake Pie, not a diet salad!
For a single slice of this delightful dessert, here’s what you can generally expect. You can read about how I calculate these figures and standard disclaimers over on my official disclaimer page.
- Serving Size: 1 slice
- Calories: 450
- Sugar: 35g
- Sodium: 320mg
- Fat: 28g
- Saturated Fat: 15g
- Unsaturated Fat: 13g
- Trans Fat: 0.5g
- Carbohydrates: 48g
- Fiber: 2g
- Protein: 5g
- Cholesterol: 45mg
See? Pure, delicious, unadulterated fun. Enjoy every single bite!
PrintNo-Bake Creamy Oreo Cheesecake Pie

Make this simple, no-bake Oreo pie using a few ingredients for a creamy, chocolatey dessert perfect for any occasion.
- Prep Time: 20 min
- Cook Time: 0 min
- Total Time: 4 hr 20 min
- Yield: 8 servings
- Category: Dessert
- Method: No Bake
- Cuisine: American
- Diet: Vegetarian
Ingredients
- 1 package (14.3 oz) Oreo cookies, divided
- 6 tablespoons unsalted butter, melted
- 8 ounces cream cheese, softened
- 1 cup powdered sugar
- 1 teaspoon vanilla extract
- 1 container (8 oz) frozen whipped topping, thawed
- 1 package (3.4 oz) instant chocolate pudding mix
- 1 1/2 cups cold milk
- 1 cup mini chocolate chips (optional for topping)
Instructions
- Crush 24 Oreo cookies into fine crumbs using a food processor or by placing them in a sealed bag and crushing with a rolling pin. Reserve the remaining cookies for the filling and topping.
- Mix the Oreo crumbs with the melted butter until fully combined. Press the mixture firmly into the bottom and up the sides of a 9-inch pie plate. Place the crust in the freezer while you prepare the filling.
- In a large bowl, beat the softened cream cheese, powdered sugar, and vanilla extract until smooth.
- In a separate bowl, whisk together the instant chocolate pudding mix and cold milk for 2 minutes until slightly thickened.
- Gently fold the whipped topping into the cream cheese mixture until just combined.
- Fold the pudding mixture into the cream cheese mixture until smooth. Coarsely chop 8 of the reserved Oreo cookies and fold them into the filling.
- Pour the filling into the prepared crust and spread evenly.
- Chill the pie in the refrigerator for at least 4 hours, or until firm.
- Before serving, top the pie with the remaining chopped or crushed Oreo cookies and mini chocolate chips, if using.
Notes
- For a firmer crust, bake the crust at 350°F for 10 minutes, then cool completely before filling.
- You can substitute the instant chocolate pudding with instant vanilla pudding and add 1/4 cup of cocoa powder for a different flavor profile.
- If you do not have whipped topping, you can use heavy cream whipped to stiff peaks.
Nutrition
- Serving Size: 1 slice
- Calories: 450
- Sugar: 35g
- Sodium: 320mg
- Fat: 28g
- Saturated Fat: 15g
- Unsaturated Fat: 13g
- Trans Fat: 0.5g
- Carbohydrates: 48g
- Fiber: 2g
- Protein: 5g
- Cholesterol: 45mg