

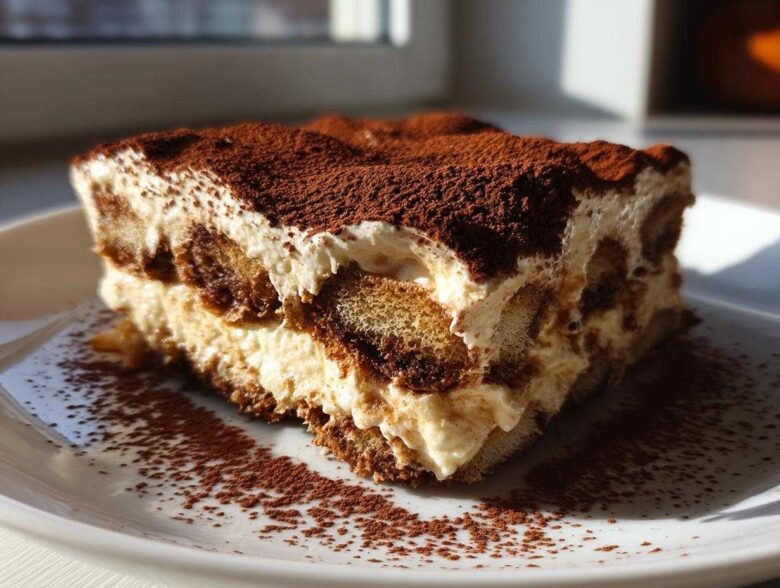
Oh my goodness, is there anything more satisfying than a dessert that tastes like pure elegance but takes zero actual baking? Believe me when I say that mastering that quick, delicate dip into the coffee mixture is everything when it comes to making the tiramisu recipe of your dreams!
I remember the first time I managed perfect layers—no soggy bottom, no dry top—it felt like I’d unlocked ancient Italian secrets right there in my own kitchen. I learned so much about balancing structure and moisture when I read up on the history of these classic desserts, which you can check out on our About Us page. This version is my holy grail: an Easy, No-Bake Classic Tiramisu Recipe that relies completely on that dreamy, creamy mascarpone. It’s truly the ultimate make-ahead treat for any gathering, and I’m so excited to share exactly how I get that rich, coffee-soaked perfection every single time.
Why This is the Best Tiramisu Recipe Ever (Easy Homemade Tiramisu)
Honestly, this has claimed the spot of the Best Tiramisu Recipe Ever in my house, and I truly think it will in yours too! The magic is how simple the assembly is, even though the flavor profile screams *Authentic Italian Tiramisu*. Since we aren’t turning on the oven, it’s stress-free entertainment dessert perfection.
The texture is what makes it shine. That gorgeous Creamy Mascarpone Dessert filling just melts in your mouth, thanks to us using heavy cream whipped right into the mascarpone. It’s rich, intensely flavored with coffee, but miraculously light when you eat it. Trust me, people always ask for the recipe! It makes me think of all those amazing cookies we experimented with over at that post about winning cookies.
Perfect for Dinner Party Planning (Make Ahead Dessert Ideas)
This is my secret weapon when I know I have a busy weekend. The best part about this dessert is that it demands time in the fridge! You absolutely have to make it the day before you plan to serve it. Chilling doesn’t just help it set up firm enough to slice beautifully; it actually allows those deep coffee and cocoa flavors to marry everything together.
The structure gets stronger overnight, which means less stress the day of your dinner party. You just pull it out, dust that glorious cocoa on top, and you’re done. It’s the easiest, most elegant finish to any meal!
Gathering Ingredients for Your Tiramisu Recipe
Okay, let’s get our game face on and gather what we need for this tiramisu recipe. I’ve listed everything below, and I want you to pay close attention to the temperature of the dairy—it matters! We need things like six large egg yolks, which we’ll treat carefully, and then that marvelous mascarpone cheese, and don’t forget the heavy cream has to be ice cold.
We also need our ladyfingers, of course, and that very strong brewed coffee—cooled down, please! And while coffee liqueur or rum is optional if you’re making this for little ones, I highly recommend adding just a splash; it really boosts that simple coffee flavor.
Ingredient Notes and Substitutions for the Tiramisu Recipe
Now, I know some folks get nervous about raw eggs, even in my pasteurized version, so if you’re aiming for a Tiramisu Without Raw Eggs, don’t panic! Skip the yolks and sugar step entirely. Just whip an extra cup of heavy cream with about a quarter cup of powdered sugar until it’s stiff, then fold that into your mascarpone. It works beautifully!
Another thing: the coffee has to be strong. I mean, espresso strong! This is what defines your entire Simple Coffee Soaked Dessert experience. If you use regular drip coffee, honestly, the flavor gets lost underneath the sweet cream, and we can’t have that!
Mastering the Creamy Mascarpone Dessert for Your Tiramisu Recipe
This is where the real magic happens for your glorious tiramisu recipe—making the base for that incredible, rich cream! Look, Step One, the egg yolks and sugar, is paramount. You have to gently warm them over simmering water, whisking constantly until they’ve thickened up and you’ve hit that safe temperature. It sounds fiddly, but this pasteurization step gives you such peace of mind, and it makes the yolks pale and fluffy—a huge difference in texture!
While that mixture cools just a touch, whip your heavy cream until it holds stiff peaks. Don’t stop short, or your filling will be runny later! Once the yolks are cool, gently whisk in that cold mascarpone. And I mean *gently*. If you beat the mascarpone too long at this stage, it separates on you, and we definitely don’t want lumpy patches in our Creamy Mascarpone Dessert.
Finally, take your beautiful whipped cream and gently, I mean *gently*, fold about a third of it into the mascarpone mixture to lighten it up. Then, fold in the rest until there are no white streaks left. It should look cloud-like and perfectly light. Check out how we handled cream consistency in this savory post—the principle of folding gently is exactly the same!
No Bake Tiramisu Instructions: Layering the Coffee Soaked Dessert
Alright, we’ve got this incredible, fluffy filling ready to go, and now we get to the fun part—assembling the layers! This is where people make tiny mistakes that ruin the whole structure, but I promise, if you follow my mantra here, your tiramisu recipe will be textbook perfect.
The absolute rule for dipping those ladyfingers is: Be quick! I mean it. You are not making French toast here. You want to dip each side of the ladyfinger into that cooled coffee mixture—maybe one Mississippi on the first side, one Mississippi on the second side, and pull it out.
If you let them sit even a second too long, they get waterlogged, and when you try to slice your dessert later, you’ll just have a soggy, unhappy mess. We want structure, my friend! This quick dip is what keeps the final product elegant and delicious. Also, after finishing the layers, remember to see our tips on a super creamy soup base over at this post—the same gentle technique applies here!
Step by Step Tiramisu Guide: Dipping and Layering
We’re building this beauty in an 8×8 inch dish for the perfect proportions, but any square or rectangular serving dish of similar volume works wonders. Start by creating your base layer. Grab those coffee-dipped ladyfingers and fit them snugly across the bottom of your dish.
Next up, take exactly half of that beautiful mascarpone cream we just made and spread it evenly over that first layer of cookies. Don’t smash it down; keep it light! Then, repeat the whole process. Dip the rest of your ladyfingers quickly and layer them directly on top of the cream.
Finally, take the remaining cream and spread it smooth over the top. That’s it for the assembly! You’ve managed the whole architecture of the dessert in just minutes. It’s practically cheating how easy this layered coffee dessert comes together.
Setting and Finishing Your Classic Italian Tiramisu Recipe
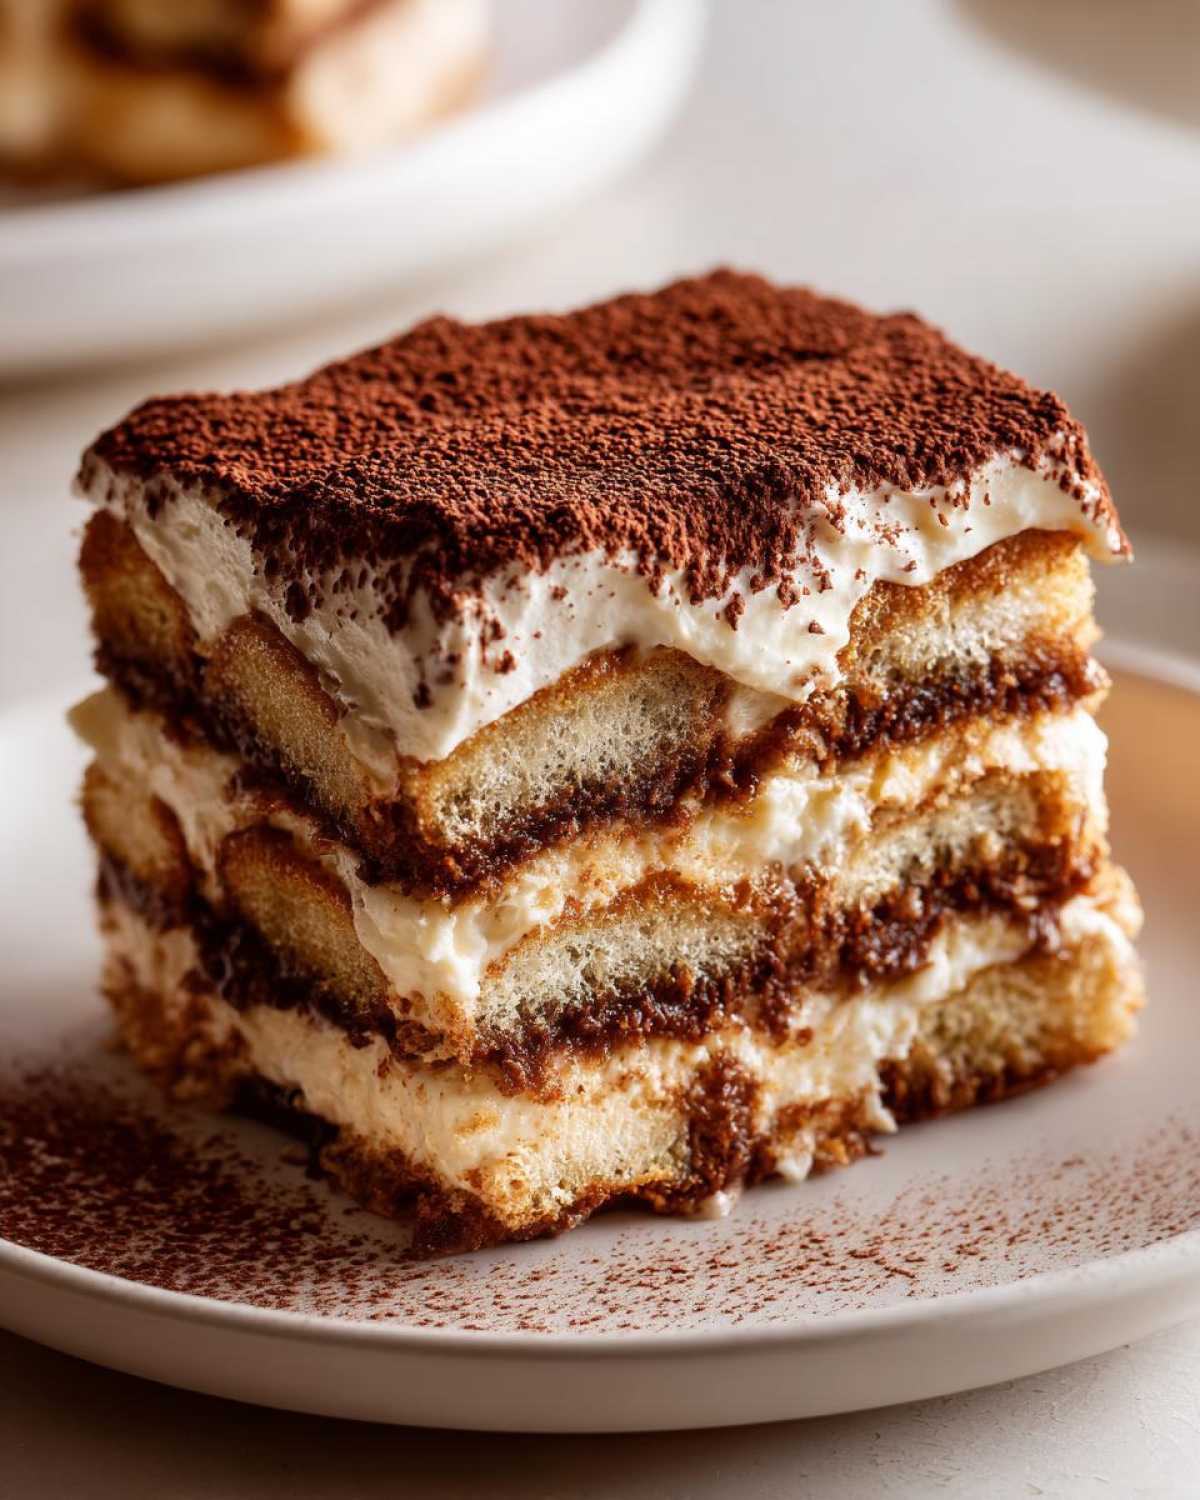
Now, you might be tempted to grab a spoon right away, but hold your horses! The hardest part of making this tiramisu recipe is being patient and waiting for it to chill. We absolutely must cover this dish tightly—plastic wrap works best—and push it to the very back of the fridge.
Overnight chilling is what I always recommend, but you need at least six hours for the layers to truly meld. While it chills, that coffee flavor soaks beautifully up through the cream, and everything firms up perfectly. It’s a waiting game, but worth it! Think about how great those flavors will be—it’s almost as satisfying as our recipe for sweet chili roasted sweet potatoes, where resting the flavors makes all the difference.
The grand finale is the dusting! This is my favorite part because it instantly transforms the dessert. You must only dust with unsweetened cocoa powder right before you serve it. If you dust it too early, the cocoa soaks up moisture from the cream and turns into a dull, brown sludge. A heavy, even layer right before you slice it is the sign of a true professional, giving you that beautiful contrast against the richness beneath. It’s the perfect, simple finish!
Serving Suggestions for Your Layered Coffee Dessert
Once your tiramisu has chilled overnight and is ready to face the world, it’s time to think about presentation! Since this is such a popular choice for a Dessert for Dinner Party, a little attention to detail goes a long way. You want those clean, beautiful layers to show off all your hard work.
When it comes to slicing, this is key: always use a long, thin knife dipped briefly in hot water and wiped clean between each cut. I know, I know—it sounds like extra work! But trust me, that hot, clean blade glides right through the cream and ladyfingers without dragging the layers all messy-like. Wipe and dip for every single slice you make.
To really elevate the experience, think about what you’re serving alongside this indulgent treat. A tiny, strong cup of espresso is the absolute traditional companion; it keeps the palate refreshed between rich bites. If you made this for an adult gathering, serving it with a small glass of amaretto or maybe a nice, smooth aged rum really complements the coffee notes beautifully.
I sometimes sprinkle a little extra powdered sugar on the plate *around* the slice rather than right over the top—just a delicate dusting on the white plate makes the dark cocoa really pop! I saw a great technique for balancing flavors when I was putting together that tofu stir-fry post, and the same principle applies here: contrast makes everything taste better!
Storage and Reheating Instructions for the Tiramisu Recipe
I often get asked if this amazing dessert freezes well, and honestly, while you *can*, I really don’t recommend it for a first-time batch! Freezing and thawing can sometimes mess with the delicate texture of the mascarpone cream, making it a little grainy when it thaws out. So, let’s focus on refrigeration, which is where this tiramisu recipe truly shines as a make-ahead champion.
Because we assembled everything perfectly, this dessert holds up beautifully in the fridge. You want to make sure it is covered extremely well! I use plastic wrap pressed right down onto the surface of the cocoa powder, and then I usually put a lid or foil over the entire container just to be safe. This keeps any fridge odors out and stops the cocoa from drying to a hard crust.
I find that this tiramisu recipe is actually better on Day 2 than it is on Day 1. The chilling time allows the ladyfingers to fully absorb the coffee liquor while the cream sets up rock solid. It tastes just as marvelous, if not more so, on Day 3! However, after about four days, the cookies can start getting a little too soft for my liking, so try to get it eaten within that window.
And this is vital: you absolutely will not reheat this! It’s a chilled dessert through and through. The goal is cool, creamy satisfaction. If you’re taking it out of the fridge to serve, just give it about 15 minutes on the counter—not long enough to soften the cream, but just long enough to take the hard chill off so the flavors bloom perfectly for you!
Frequently Asked Questions About This Tiramisu Recipe
When you’re aiming for a show-stopping dessert like this, it’s totally normal to have a few questions pop up! I’ve pulled together the most common things people ask me when they’re trying to nail this tiramisu recipe for the very first time. We want this to be easy, not intimidating! For even more tips and behind-the-scenes cooking thoughts, make sure you check out my general blog index.
Can I make this Tiramisu recipe without alcohol?
Absolutely, yes, you can make this tiramisu recipe without any alcohol at all! If you skip the coffee liqueur—or rum, if that’s what you have on hand—you just need to make up that missing liquid volume. My go-to fix is simply to use extra strong coffee. Brew a little bit more of that espresso-strength coffee until you have the full amount needed for dipping. It maintains that wonderful deep flavor profile without the booze, making it perfect for everyone.
How long does the Tiramisu need to chill?
This is probably the most important question, because chilling is non-negotiable! You need to aim for a minimum of six hours. Anything less, and you risk your cream collapsing when you try to slice it; it won’t be that perfect, firm structure you want in your Layered Coffee Dessert. But honestly, for the absolute, phenomenal flavor integration that changes the whole experience, you should chill it overnight. Seriously, if you can wait, the extra 12 hours makes a huge difference in how rich this tastes.
What is the best way to get a rich chocolate dusting dessert finish?
You want that stunning, velvety black top, right? That beautiful, Rich Chocolate Dusting Dessert look that hints at the indulgence underneath? Use only high-quality, unsweetened cocoa powder—none of that overly sweet hot chocolate mix! And this is my biggest tip: dust it on right before you serve it. I mean it, don’t do it the night before! If you dust it too early, the cocoa absorbs moisture from the mascarpone cream and turns muddy and wet-looking. Dust it generously right before bringing it to the table for the best visual impact and flavor contrast.
Nutritional Estimates for This Indulgent Coffee Flavored Treat
Now, I know some of you food lovers are also tracking macros, and I totally get it! Even though this is a super Indulgent Coffee Flavored Treat, it’s good to have a general idea of what you’re diving into. Keep in mind that these numbers are just estimates based on the ingredients listed in this tiramisu recipe.
Things change so much depending on the brand of mascarpone you use or exactly how much sugar you might have whisked in! So please, take these figures as a fun guide rather than strict tracking data. For the most accurate information, you’ll want to check out the full details over on our official site disclaimer page.
Here is a quick breakdown based on a standard serving size:
- Serving Size: 1 slice
- Calories: About 450
- Sugar: Around 30g
- Fat: 32g (with 19g Saturated Fat)
- Carbohydrates: 35g
- Protein: 10g
It’s definitely a rich dessert, folks, but that’s what makes it so satisfying! Enjoy every cool, creamy bite.
PrintEasy No-Bake Classic Tiramisu Recipe
Follow these simple steps to make an authentic, creamy Italian Tiramisu dessert using mascarpone cream. This no-bake recipe is perfect for dinner parties and can be made ahead of time.
- Prep Time: 30 min
- Cook Time: 0 min
- Total Time: 30 min
- Yield: 8 servings
- Category: Dessert
- Method: No-Bake Assembly
- Cuisine: Italian
- Diet: Vegetarian
Ingredients
- 6 large egg yolks
- 3/4 cup granulated sugar
- 1 1/2 cups heavy cream, cold
- 16 ounces mascarpone cheese, cold
- 2 cups strong brewed coffee, cooled
- 1/2 cup coffee liqueur or rum (optional)
- 2 packages (7 ounces each) ladyfingers
- Unsweetened cocoa powder, for dusting
Instructions
- In a heatproof bowl set over a saucepan of simmering water (do not let the bowl touch the water), whisk the egg yolks and sugar constantly until the mixture is pale, thick, and reaches 160 degrees Fahrenheit. This pasteurizes the eggs. Remove from heat and let cool slightly.
- In a separate large bowl, whip the cold heavy cream until stiff peaks form. Set aside.
- In another bowl, gently whisk the cooled egg yolk mixture with the cold mascarpone cheese until just combined and smooth. Do not overmix.
- Gently fold the whipped cream into the mascarpone mixture until fully incorporated, creating the cream.
- In a shallow dish, combine the cooled coffee and coffee liqueur, if using.
- Quickly dip each ladyfinger, one at a time, into the coffee mixture. Do not soak them, just a quick dip on each side.
- Arrange a single layer of dipped ladyfingers in the bottom of an 8×8 inch baking dish or a similar sized serving dish.
- Spread half of the mascarpone cream evenly over the layer of ladyfingers.
- Repeat the process: dip the remaining ladyfingers and arrange them over the cream layer.
- Spread the remaining mascarpone cream over the top layer of ladyfingers.
- Cover the dish tightly with plastic wrap and refrigerate for at least 6 hours, or preferably overnight, to allow the dessert to set.
- Before serving, generously dust the top surface with unsweetened cocoa powder. Slice and serve cold.
Notes
- If you prefer to avoid using eggs entirely, you can substitute the egg yolk and sugar mixture with 1 cup of chilled heavy cream whipped with 1/4 cup powdered sugar until stiff peaks form, then fold into the mascarpone.
- For the best flavor, use high-quality, strong coffee. Espresso works well.
- Dusting with cocoa powder should always be done immediately before serving to prevent the powder from absorbing moisture.
Nutrition
- Serving Size: 1 slice
- Calories: 450
- Sugar: 30
- Sodium: 120
- Fat: 32
- Saturated Fat: 19
- Unsaturated Fat: 13
- Trans Fat: 1
- Carbohydrates: 35
- Fiber: 1
- Protein: 10
- Cholesterol: 250