

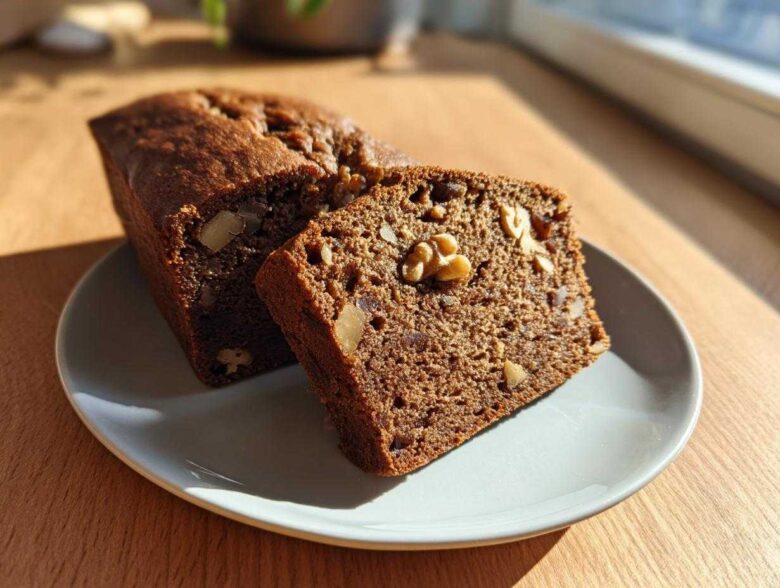
Oh, you know that feeling, right? That deep, cozy craving only a truly moist, throwback baked good can satisfy? Forget those dry, crumbly loaves you sometimes get. When I need something that tastes like pure comfort and always works on the first try, I turn straight to my tried-and-true classic. This recipe for Old-Fashioned, Ultra-Moist Date Nut Bread Recipe is my absolute favorite, and honestly, it’s why people always ask me for the recipe! I inherited a version of this from my great-aunt—and after tweaking the soaking time just so—it became the most reliable thing in my kitchen. If you want bread that makes people think you’re a professional baker, this date nut bread is the one that never lets you down.
Why This Moist Date Nut Bread Recipe Delivers Comfort
Look, there are quick breads, and then there are *great* quick breads. This Moist Date Nut Bread Recipe falls firmly in the latter camp. People request this loaf constantly because it’s truly foolproof. It’s the definition of Easy Quick Bread Baking done right. If you want that amazing lift you see in muffins that finally stay moist, this recipe has the secret! You get that rich flavor without any fuss!
- Guaranteed moisture that lasts for days.
- Uses simple pantry staples for reliability.
- That perfect dense but tender crumb every time.
Key Features of Our Classic Loaf Cake
What makes this our go-to Classic Loaf Cake? It all comes down to treating those dates right. We soak them first, which is crucial! Plus, the simple creaming of the butter and brown sugar whips in just the right amount of air so you get tenderness without needing fancy equipment. It’s old-fashioned methods yielding modern results, trust me!
Gathering Ingredients for Your Date Nut Bread
Okay, let’s talk about what you need for this incredible date nut bread. The beauty of this recipe is that it relies on honest, straightforward ingredients. No weird extracts or exotic spices here! But just because they are simple doesn’t mean you shouldn’t treat them well. Specifically, the dates you choose make a huge difference in the final texture of your homemade date bread.
For the absolutely best, most naturally sweet flavor in your loaf, I highly suggest splurging a little on Medjool dates if you can find them—they are much softer and almost caramel-like when steeped. If you can’t swing those, any soft, pitted date will work, but make sure you chop them up nice and small! You want them dissolving into the batter, not sitting there like big chunks. If you’re ever curious about my cooking philosophy, you can always check out my ‘About Me’ page!
- 1 cup boiling water
- 1 teaspoon baking soda
- 1 cup packed pitted Medjool dates, chopped
- 1/2 cup (1 stick) unsalted butter, softened
- 1 cup packed light brown sugar
- 2 large eggs
- 1 teaspoon vanilla extract
- 1 3/4 cups all-purpose flour
- 1 teaspoon baking powder
- 1/2 teaspoon salt
- 1 cup chopped walnuts or pecans
Ingredient Specifications and Preparation Notes
Precision matters, even in a classic recipe like this! When you look at the list, pay close attention to how things should be measured or prepared. First off, when the recipe says 1 cup of brown sugar, it means *packed*—press that sugar down firmly into your measuring cup to ensure you get that rich molasses flavor that makes this bread so unique.
For the fat, make sure your butter is genuinely softened. Not melted, just soft enough that your finger leaves an easy dent. This is critical for the creaming process later! And regarding the nuts? I usually go with walnuts, but my neighbor swears by pecans in her batch. Feel free to swap them one for the other; either one gives a wonderful crunch against the soft crumb of the nut and date cake recipe.
Step-by-Step Instructions for Perfect Date Nut Bread
This is where the magic happens! Before you even think about mixing, make sure your oven is preheated to 350 degrees F (175 degrees C) and you’ve generously greased and floured that 9×5 inch loaf pan. That prep step is just as important as getting the batter right, especially if you want that beautiful presentation!
Now, about that incredible moisture you crave in your date nut bread: it starts with the soak! You must pour that hot water right over the baking soda and chopped dates in a bowl. Let that sit for ten whole minutes. Seriously, don’t rush this; this step activates the soda and starts softening the dates perfectly, setting you up for the Best Date Nut Loaf.
Preparing the Batter for Your Homemade Date Bread
Once those dates have sweated it out, move to your big bowl where the butter and brown sugar are waiting. Cream them together until they look pale and puffy—this step builds structure! Then, beat in your eggs one by one, making sure each egg is incorporated fully before adding the next. Don’t forget that tiny splash of vanilla! If you’re looking for more dependable baking tutorials, check out my guide on other simple baking recipes.
When you mix the flour, baking powder, and salt, you need to be gentle. Add the dry ingredients slowly, and STOP mixing the second they disappear into the wet stuff. I mean it—Do not overmix! Overmixing ruins the tender quality we are aiming for in this Simple Baking Recipes entry. Finally, gently fold in that date/water mixture and those wonderful chopped nuts until everything is just combined.
Baking and Cooling the Classic Date Nut Bread
Pour that beautiful batter into your prepared pan and slide it into the preheated oven. It’s going to bake anywhere between 55 to 65 minutes. You can’t just walk away, though! Start checking around the 55-minute mark by inserting a wooden skewer right into the center. If it comes out clean or with only a few moist crumbs clinging to it, you’re done! That’s the telltale sign for your Classic Loaf Cake.
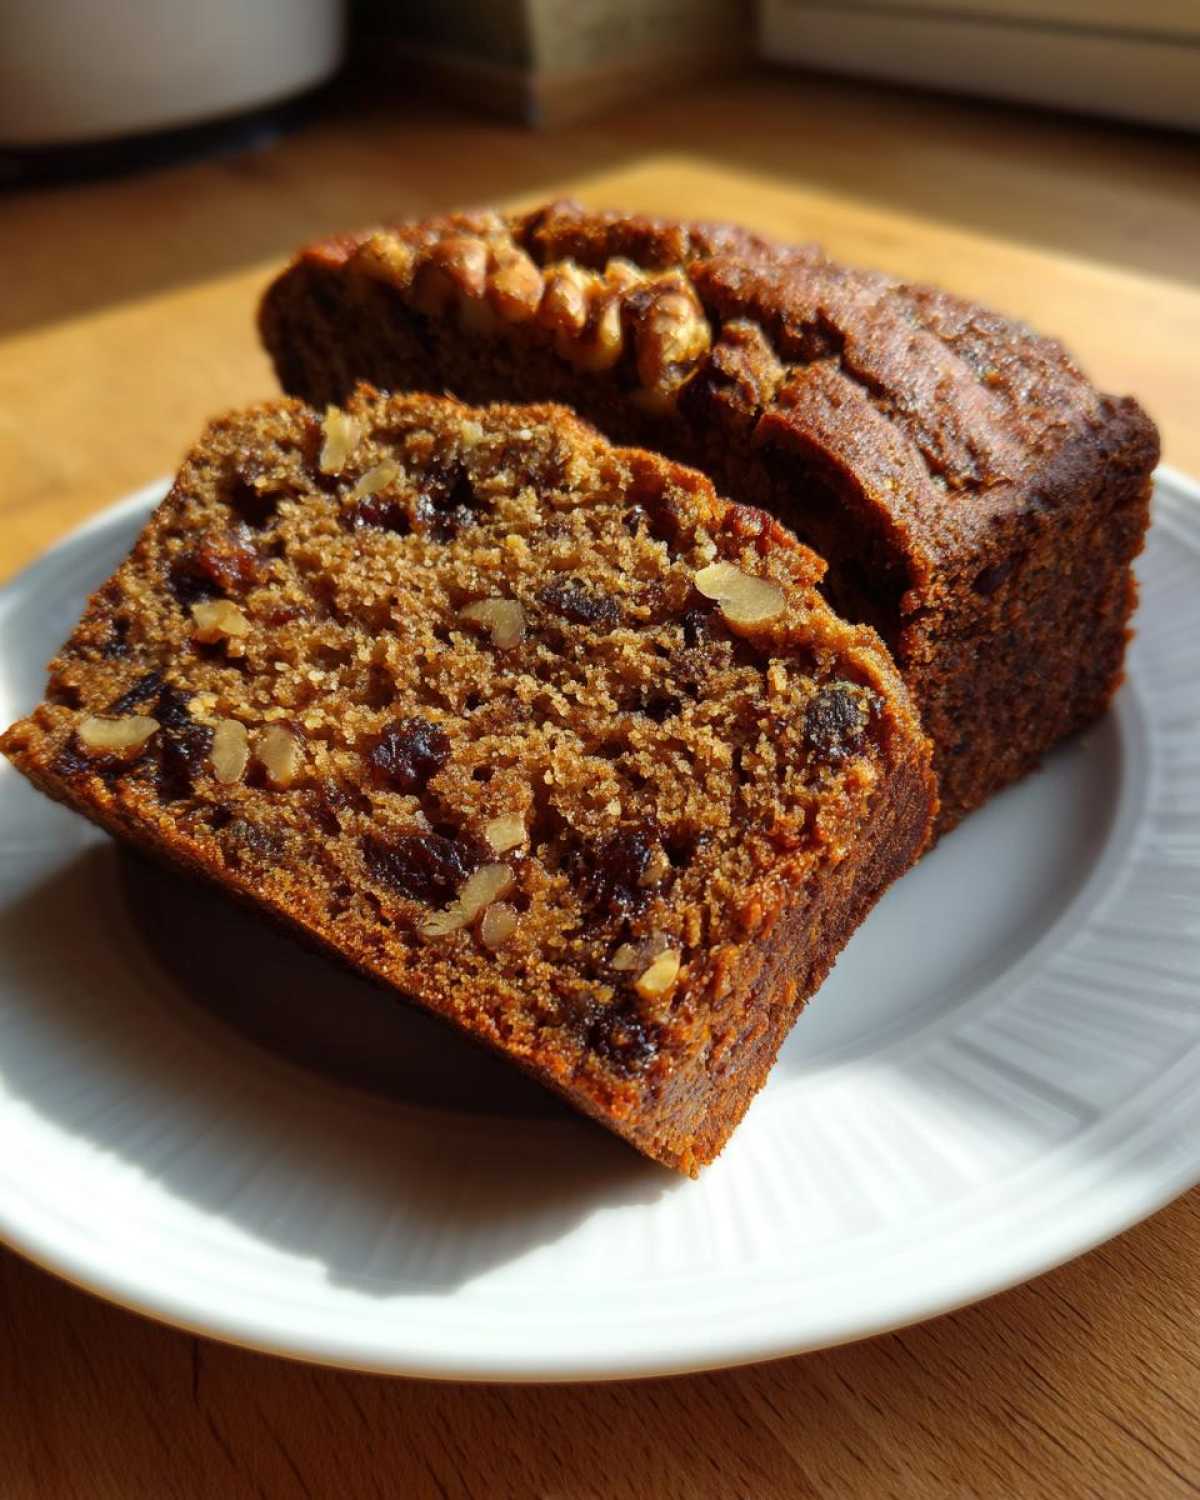
This is a step I learned the hard way: let the Classic Loaf Cake cool in the pan for a full 10 minutes after you pull it out. If you try to flip it right away, it might just crumble on you—we want a solid loaf! After those ten minutes, turn it out onto a wire rack to cool completely. That slow transition keeps everything stable.
Tips for Success When Making Date Nut Bread
Even though this is one of the most reliable Simple Baking Recipes I have, there are always little things you can do to make your Best Date Nut Loaf even more spectacular. Don’t worry if you’re new to quick breads; I’ve got a few pointers here that will make sure your loaf stays fluffy, fragrant, and wonderfully moist!
First, let’s revisit the soaking liquid. That boiling water and baking soda combo is essential, but if you want to deepen the flavor profile—especially if you’re serving this as a Holiday Fruit Bread—try swapping half of that boiling water for really strong, cooled, brewed coffee. Wow, does that bring out the richness of the dates! It doesn’t make the bread taste like coffee at all, promise. It just makes everything taste more… well, *date-y* and complex.
Another huge point for achieving that perfect texture, which is the main reason people love this date nut bread, is temperature control. Don’t try to rush the butter/sugar creaming, and don’t put the batter into an oven that hasn’t fully preheated. Quick breads demand consistency from the start. If you want to check out some other slightly more involved loaf cakes that still rely on great technique, take a peek at my recipe for lemon blueberry loaf cake!
And my final, non-negotiable tip: do not open the oven door once you hit the 40-minute mark! Peeking introduces a blast of cool air that can instantly deflate your loaf. You want that oven heat staying consistent so your nice, evenly mixed batter can rise beautifully without sinking in the middle.
Variations on the Traditional Date Nut Bread
You know, while this classic date nut bread is perfect as is—truly—sometimes you get that little itch to change things up a bit, right? I totally get it! Maybe you have a bunch of overripe bananas staring at you, or maybe you just want to sneak in a little extra spice for the holidays. Don’t fret; this base recipe is sturdy enough to handle a few fun swaps!
The most famous tweak I ever did was accidentally combining leftovers. That’s how I ended up with a fantastic Banana Date Nut Bread Variation! If you swap out about half a cup of that boiling water/date mixture for mashed, very ripe banana, it makes the resulting loaf even richer and more of a breakfast star. You might want to drop the sugar by just a touch if you do this, since the banana adds sweetness too.
If bananas aren’t your thing, we can always lean into the spice cabinet. This recipe already has hints of warming flavors, but if you want to boost that up into full-on Spiced Date Bread territory, add an extra half teaspoon of cinnamon and a tiny pinch of ground cloves along with your dry ingredients. It transforms the loaf into something stunningly fragrant, perfect for gifting during the cooler months! It’s a wonderful way to use this recipe as a base for a richer cinnamon swirl pumpkin bread style flavor profile, just using dates instead of pumpkin.
Another thing people often ask about is making this using maple syrup for a more natural sweetness. You absolutely can! Just replace the brown sugar with an equal amount of rich maple syrup, but you’ll need to reduce the boiling water slightly—maybe use just three-quarters of a cup instead of a full cup—to account for the liquid in the syrup. Watch your mixing, though; liquids are tricky in any Sweet Loaf Recipes!
Serving Suggestions for Your Sweet Loaf Recipes
Okay, so you finally pulled that gorgeous, deeply brown loaf out of the oven, let it cool just enough, and now you’re staring at it. What’s the *best* way to enjoy this date nut bread? My honest opinion? Don’t wait for it to cool completely! Seriously, serving this loaf warm is a game-changer. Wait about twenty minutes after it comes out so it holds its shape, then slice it up thickly.
Grab your softest butter—the kind that’s barely holding together on the counter—and slather it on. The warmth of the bread melts that butter right into all those little nooks and crannies. Oh, and if you want to get truly decadent, a schmear of plain cream cheese is divine. That slight tang cuts through the sweetness of the dates perfectly. You can see how much I love buttery baked goods in my buttery maple cornbread muffins recipe, too!
Because this is such a hearty, rich loaf, it makes an amazing foundation for any simple meal. I treat it like a proper Holiday Fruit Bread, even if it’s just a Tuesday afternoon. It pairs absolutely beautifully with a strong cup of coffee (maybe even that leftover brewed coffee we talked about using in the soak!). If you’re having brunch, set out a platter of room-temperature slices alongside fresh fruit and perhaps some scones. It’s wholesome, it feels traditional for any gathering, and it’s so easy to grab a slice when you need a little pick-me-up. Enjoy every bite!
Storage and Make Ahead Bread Instructions
One of the best secrets to loving this date nut bread even more is knowing that it’s a fantastic Make Ahead Bread! Unlike some other quick breads that turn dry almost instantly, this recipe is designed to stay moist and flavorful for days. Seriously, some people (me included!) think it tastes even better on day two because the spices have had a chance to really settle into the crumb.
If you’ve let your loaf cool completely, which you must do before wrapping it, you can store it at room temperature very easily. Just wrap that whole loaf super tightly—I mean plastic wrap pressed right against the surface—and then wrap it again in aluminum foil. This double-layer protection stops any air from getting in and making your lovely bread stale. It should keep beautifully like this for three, maybe four days on the counter! That’s great news if you bake it for a weekend brunch but don’t want to worry about it mid-week.
Now, if you’re baking for the future (which I always advise, because who doesn’t love finding a surprise loaf in the freezer?), freezing is the way to go. Once the bread is totally, 100% cool—and I mean room temp, no warmth left—slice it first before wrapping. This is a game-changer for busy mornings! Wrap the slices tightly in plastic wrap, then pop them into a freezer-safe zip-top bag or wrap the whole thing again in foil.
When you get the craving for your homemade date nut bread, just pull out the amount of slices you need. You can thaw them right on the counter for about an hour, or pop them straight into the toaster oven for a few minutes to warm them through. It’s almost like baking it fresh all over again! If you love having breakfast ready ahead of time, you should definitely check out my tips for preparing baked oatmeal cups for easy make-ahead mornings!
Frequently Asked Questions About Date Nut Bread
I get so many questions about this simple loaf, so I thought I’d gather up the ones I hear most often right here! It’s all about making sure you get that perfect, soft texture every single time you bake this date nut bread. We want everyone to experience the joys of a perfect slice of homemade goodness without any stress from the process!
Can I use whole wheat flour in this date nut bread recipe?
You absolutely can try swapping in some whole wheat flour if you want something a little more rustic or wholesome! I totally encourage experimenting with ingredients in your simple baking recipes. However, whole wheat absorbs much more moisture than regular all-purpose flour, and since this is a moisture-heavy recipe anyway, I strongly recommend substituting only half of the white flour for whole wheat. If you switch it all over, you risk making your date nut bread a little heavy or dry, and we certainly don’t want that!
What is the best way to ensure my date nut bread is not dry?
This is the number one question I get about any quick bread for breakfast! The secret here is twofold, and both steps are in the beginning. First, you must do the soaking! Pouring the boiling water over the dates and baking soda is non-negotiable; it rehydrates the fruit and gives a great little lift. Second, and this is crucial for any Sweet Loaf Recipes, remember what I said about mixing: stop blending the moment the last streak of flour disappears. Overmixing develops gluten, and gluten equals toughness, not moisture!
What kind of liquid should I use other than water for soaking the dates?
If you didn’t see it earlier, that strong brewed coffee suggestion is my secret weapon to boost the depth of flavor in this Holiday Fruit Bread! If you’re making this for a purely morning treat, maybe try using warm milk instead of water in the soak—but be careful, milk is a bit thicker, so blend it into the creamed butter mixture instead of pouring it over the dates. That substitution makes it closer to a traditional Nut and Date Cake Recipe!
Estimated Nutritional Data for This Wholesome Snack Bread
Now, I always tell people that when you’re deep into Comfort Food Baking like this amazingly rich date nut bread, you aren’t necessarily looking at the label! But I know some of you are curious about what you’re enjoying, especially if you’re making it a regular part of your routine, like a Wholesome Snack Bread or for a Brunch Quick Breads platter.
Please remember, these numbers are just very rough estimates based on the ingredients I listed above—especially if you use fancy Medjool dates or upgrade to pecans instead of walnuts. The final count can shift based on the brands you buy, the exact size of your eggs, or if you sneak in that banana variation we talked about! You can always check out my full site policies while you ponder the nutrition label!
Here is the estimated nutritional breakdown for just one slice of this Old-Fashioned Quick Bread:
- Serving Size: 1 slice
- Calories: 310
- Fat: 14g
- Total Carbohydrates: 45g
- Protein: 5g
See? It’s rich, satisfying, and tastes like your childhood. That little bit of richness comes from the butter and the natural sugars in the dates, which is exactly what makes this the Best Date Nut Loaf around. Go ahead, butter that warm slice!
PrintOld-Fashioned, Ultra-Moist Date Nut Bread Recipe
This recipe yields a classic, moist date nut bread perfect for snacking or serving warm with butter.
- Prep Time: 15 min
- Cook Time: 60 min
- Total Time: 75 min
- Yield: 1 loaf (about 10 servings)
- Category: Snack
- Method: Baking
- Cuisine: American
- Diet: Vegetarian
Ingredients
- 1 cup boiling water
- 1 teaspoon baking soda
- 1 cup packed pitted Medjool dates, chopped
- 1/2 cup (1 stick) unsalted butter, softened
- 1 cup packed light brown sugar
- 2 large eggs
- 1 teaspoon vanilla extract
- 1 3/4 cups all-purpose flour
- 1 teaspoon baking powder
- 1/2 teaspoon salt
- 1 cup chopped walnuts or pecans
Instructions
- Preheat your oven to 350 degrees F (175 degrees C). Grease and flour a 9×5 inch loaf pan.
- Pour the boiling water over the baking soda and chopped dates in a medium bowl. Let this mixture sit for 10 minutes.
- In a separate large bowl, cream together the softened butter and brown sugar until light and fluffy. Beat in the eggs one at a time, then stir in the vanilla extract.
- In a medium bowl, whisk together the flour, baking powder, and salt. Gradually add the dry ingredients to the wet ingredients, mixing until just combined. Do not overmix.
- Stir in the soaked date mixture and the chopped nuts until they are evenly distributed throughout the batter.
- Pour the batter into the prepared loaf pan.
- Bake for 55 to 65 minutes, or until a wooden skewer inserted into the center comes out clean.
- Let the bread cool in the pan for 10 minutes before turning it out onto a wire rack to cool completely.
Notes
- For extra moisture, you can substitute half of the boiling water with strong brewed coffee.
- This bread freezes well; wrap tightly in plastic wrap and foil once completely cool.
- Serve slices warm with softened butter or cream cheese.
Nutrition
- Serving Size: 1 slice
- Calories: 310
- Sugar: 30
- Sodium: 180
- Fat: 14
- Saturated Fat: 5
- Unsaturated Fat: 9
- Trans Fat: 0
- Carbohydrates: 45
- Fiber: 3
- Protein: 5
- Cholesterol: 55