

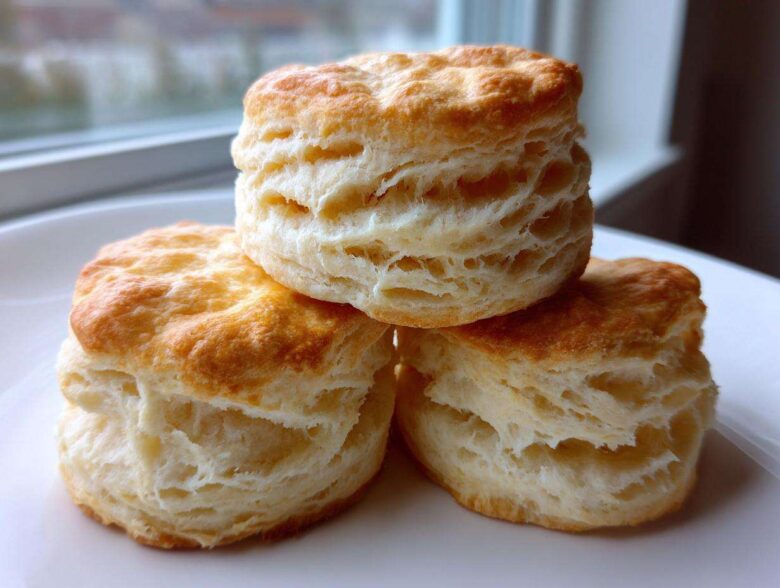
You know that feeling? The one when you bite into a biscuit and it just shatters into a million buttery, fluffy layers? Honestly, chasing that perfect, almost architectural height in a simple buttermilk biscuit sent me through batches of flat, dense hockey pucks early on. I thought it was luck, but it’s totally technique! This recipe fixed everything for me. I learned the hard way that temperature control is everything—if your butter isn’t ice cold, forget about those tender layers. Trust me, after years of tweaking, this from-scratch formula guarantees you’ll get those ultra flaky and wonderfully tender Southern biscuits every single time. Stop settling for just “okay” biscuits; we’re making them legendary. If you need a break from biscuits, check out these buttery dinner rolls, but hurry back!
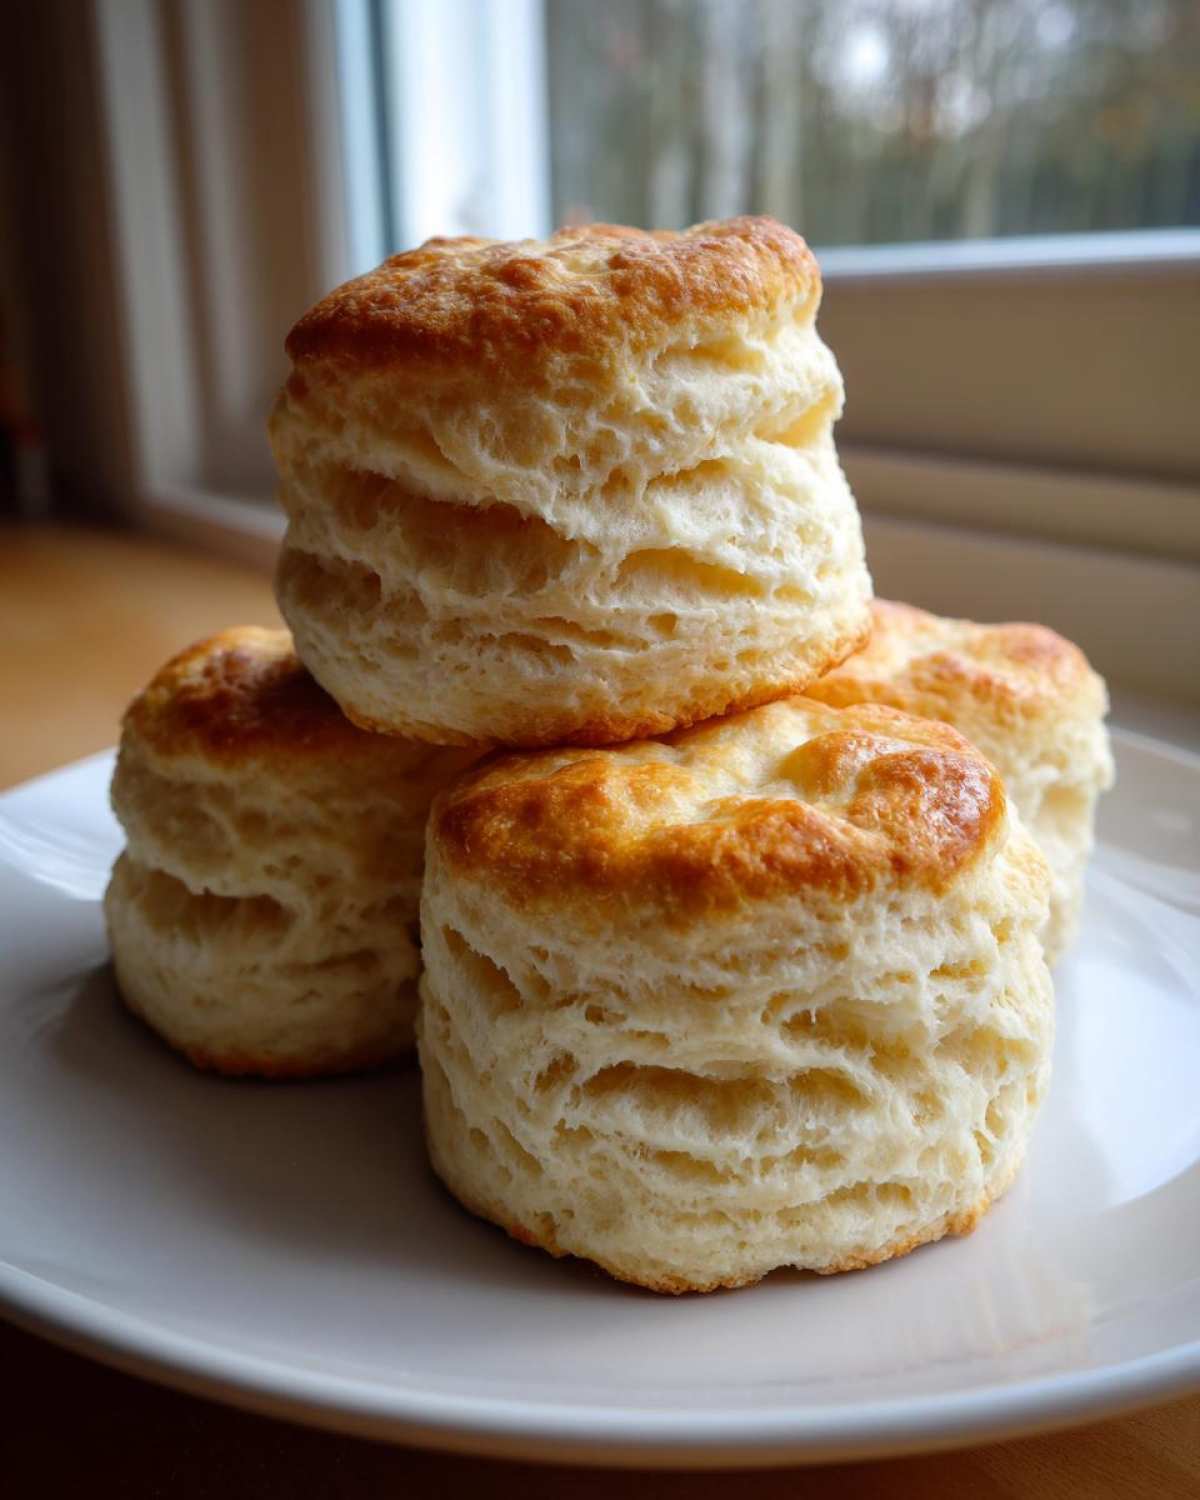
Why You Will Master These Buttermilk Biscuits
I promise, you are going to nail these biscuits because we focus on three simple concepts that guarantee success. Forget complicated techniques—this is all about cold, gentle handling!
- Flaky layers, stacked high!
- Unbelievable tenderness inside.
- That unmistakable, rich buttery flavor.
- They rise tall—guaranteed height every time.
That’s it! Just follow the folding and cutting rules we cover next, and these will be the best buttermilk biscuits you’ve ever made.
Essential Ingredients for Perfect Buttermilk Biscuits
When we talk about Homemade Buttermilk Biscuits, the ingredients aren’t complicated, but their temperature is absolutely non-negotiable! You need them perfectly chilly so they create steam pockets in the oven.
- 2 cups all-purpose flour
- 1 tablespoon baking powder
- 1 teaspoon baking soda
- 1 teaspoon salt
- 1/2 cup (1 stick) cold unsalted butter, cut into small cubes (I mean cube-sized, not soft!)
- 3/4 cup cold buttermilk, plus extra for brushing the tops
These measurements give you that incredible texture you look for in Classic Southern Cooking. If you are collecting ideas for your morning spread, take a peek at my favorite breakfast ideas!
How to Achieve Tall and Flaky Buttermilk Biscuits
This is where the magic—and the science—happens! Achieving those beautiful, tall buttermilk biscuits that look like they came straight from a Southern bakery depends entirely on how you treat the dough. Don’t rush these crucial steps, and remember the mantra: Cold, gentle, fold!
Preparing the Dry Mix and Butter
First off, make sure your butter is ridiculously cold. I mean, if you’re using a pastry blender, you want the butter pieces to stay defiantly cubical. Whisk your flour, baking powder, soda, and salt together gently in a big bowl. Now, add those icy butter cubes. You need to cut that butter in until the mixture looks like coarse sand, but you should still have visible chunks about the size of little frozen peas. If you don’t see those pea-sized pieces, the butter has melted, and you’ve lost your steam lift! This step is the backbone of all good, tender buttermilk biscuits.
Mixing and Creating Layers in the Buttermilk Biscuits Dough
Make a little volcano in the center of your flour-butter mix and pour in the cold buttermilk all at once. Now comes the hardest part: mixing minimally! Use a fork only until the dry bits disappear. Seriously, stop stirring when it still looks shaggy and messy—overmixing develops gluten, and gluten makes tough biscuits, not flaky ones. Once it’s just barely together, dump it onto a lightly floured surface. Pat it gently into a thick rectangle, about one inch deep. Now, this is my personal trick for extra height: fold it over itself like you’re folding a business letter—in thirds. Turn the dough 90 degrees, pat it down again to about 3/4 inch, and fold it again! That little bit of lamination creates those gorgeous separate layers when they bake. Check out some great baking techniques for biscuits if you want even more visual help!
Cutting and Baking for Maximum Rise
Once you’ve folded it twice, pat it to about 3/4 inch thick one last time. Grab your biscuit cutter—and here is a huge tip straight from the recipe notes: do not twist it as you press down! Press straight down, wiggle gently if you must, but twisting seals the edges shut, and that prevents a proper rise. If you want soft sides, place them close together on the sheet; if you prefer crispy edges so you can dip them in homemade gravy, space them an inch apart. Brush the tops lightly with a little more buttermilk right before sliding them into your 425°F oven. They only need about 12 to 15 minutes to turn that perfect golden brown and spring up beautifully.
Tips for the Best Homemade Buttermilk Biscuits
I can’t stress this enough: keeping things cold is the secret sauce for getting those ridiculously tall and flaky biscuits. Seriously, if you feel like your hands are warming up the dough too much, just pop the entire bowl of flour and butter into the freezer for about ten minutes before you add the milk. Work fast when you’re mixing—get that shaggy dough together and move straight to the folding step!
Handling the dough gently is just as important as the temperature. When you cut the biscuits, imagine you are tucking them into bed gently; you aren’t wrestling them! Minimal handling means tender results, which is exactly what we want instead of tougher, bread-like rolls. Sticking to these simple rules will elevate your from-scratch baking game instantly!
If you want to make your life easier next time you tackle this project, you might enjoy reading up on some general tips for from-scratch baking successes.
Ingredient Substitutions for Buttermilk Biscuits
Okay, so life happens, right? Maybe you ran out of buttermilk five minutes before you planned to bake your perfect buttermilk biscuits. Don’t panic and definitely don’t give up on baking! We always have backups, and I’ve tested these in a pinch.
The easiest swap for buttermilk is homemade, which is simple to whip up. Just take your regular milk—whole milk works best—and mix in one tablespoon of white vinegar or fresh lemon juice per cup of milk. Let that sit on the counter for five to ten minutes until it looks slightly curdled. That acidic tang mimics the real deal almost perfectly!
What about the butter? Butter is critical for those flaky layers, but if you’re in a bind, you can use shortening. Shortening has a higher melting point, which means it holds its shape in the hot dough slightly longer, leading to incredibly tall biscuits. However, you will trade a tiny bit of that rich, classic buttery flavor. I’ve also used chilled, solidified coconut oil successfully in a pinch, but again, the flavor profile shifts a little bit. Whatever you swap, make absolutely sure that substitute fat is pulled straight from the freezer or the coldest part of your fridge! That chill factor is what we are protecting above all else.
Serving Suggestions for Your Tender Buttermilk Biscuits
These buttermilk biscuits are genuinely a comfort food baking staple, so they scream for perfect partners! Let’s be real, the absolute classic Southern way is tearing one open, slathering it with butter, and drowning it in creamy sausage gravy. That’s non-negotiable on a Sunday morning. But if you’re feeling sweeter, a great homemade strawberry jam or apple butter is amazing.
They are also the perfect stand-in for dinner rolls, especially alongside something hearty like chili or stew. Seriously, use them to sop up every last bit of sauce! If you need a full Southern breakfast idea to go along with these beauties, you absolutely have to check out my recipe for a sausage potato breakfast hash—it turns a simple meal into a feast.
Storage and Reheating Your Buttermilk Biscuits
The worst tragedy in from scratch baking is a leftover biscuit that goes hard overnight! We put so much work into getting those tender layers; we can’t let them suffer being microwave-rubber the next day. Luckily, these homemade buttermilk biscuits are pretty resilient if you store them right.
For short-term storage—say, eating them up over two days—just keep them at room temperature. Don’t seal them in an airtight container right away! They need to breathe a little, or the condensation will make the bottoms soggy. Store them in a paper bag placed inside a loosely covered container. This lets the steam escape while keeping them somewhat fresh.
If you are keeping them longer than two days, the fridge is tempting, but honestly, it kind of dries them out quickly. I much prefer the freezer for long-term storage. Once the biscuits are completely cool, wrap them tightly in plastic wrap, then slide them into a zip-top freezer bag. They are good for about three months this way, and you will barely notice a texture difference when you reheat them properly.
Reheating is easy, but you have to respect the flakiness we worked so hard to achieve!
Reheating for Maximum Fluffiness
If you only have one or two biscuits, the microwave is fast, but oh boy, it turns them into little doorstops after about 20 seconds. If you absolutely must use the microwave, wrap the biscuit in a slightly damp paper towel before heating for 10 to 15 seconds max. That little bit of moisture helps them steam rather than fry in the microwave energy.
The oven is always the champion for reviving those beautiful, golden brown biscuits. Preheat your oven to about 350 degrees Fahrenheit. Place the biscuits directly on the rack or on a thin baking sheet. Give them five to seven minutes. That low heat warms the butter back up just slightly, and the residual moisture cooks perfectly, making them almost as good as fresh from the oven. They come out perfectly warm and tender every time!
Frequently Asked Questions About Buttermilk Biscuits
I get so many messages asking about biscuit troubles, and honestly, most of the time it comes down to just a couple of tiny missteps! Don’t feel bad if your first few batches weren’t feather-light—we’ve all been there staring at sad, flat discs. Let’s clear up the most common hiccups people have when trying to master these buttermilk biscuits.
Why are my homemade buttermilk biscuits not fluffy?
If your biscuits are coming out dense and flat, I can almost guarantee you did one of two things: you either mixed the dough way too long, or your butter wasn’t cold enough. Remember I said do not overmix? If you keep stirring once the buttermilk is in, you wake up those gluten strands in the flour, and BAM—you’ve got tough bread instead of fluffy clouds. Another huge culprit is warm butter. Warm butter melts right into the flour before it even hits the oven, meaning no pockets for that beautiful steam lift!
What is the secret to tall and flaky biscuits?
This is my favorite question because the answer is the coolest part of the whole recipe! The secret is twofold: super cold fat and the folding. You have to use butter that’s practically icy for those incredible flaky layers. Then, when you turn the dough over onto the counter and fold it like a letter—that’s called lamination. Every time you fold and pat, you are stacking up tiny, thin sheets of dough separated by cold butter. When those pockets of butter hit the high heat of the oven, they turn instantly to steam, forcing those layers apart. That folding action is the only way to get those majestic, towering tender buttermilk biscuits!
If you’re looking for more detailed explanations of how temperature affects your final result, you can dive into some advanced baking techniques for biscuits, but honestly, just keeping your ingredients frozen solid usually solves 90% of all flatness issues!
Nutritional Estimates for These Buttermilk Biscuits
I know that when we’re deep into comfort food baking, nutrition isn’t the first thing on our minds, but a little peek never hurt, right? These estimates are based on the recipe using standard pantry ingredients, but honestly, your results might wobble a tiny bit depending on the specific brand of butter or buttermilk you decide to use. Think of this as a fun ballpark figure!
Here’s what you’re looking at for one glorious, homemade biscuit:
- Serving Size: 1 biscuit
- Calories: 250
- Fat: 13g (with about 8g of that being saturated fat from that lovely butter!)
- Carbohydrates: 29g
- Protein: 5g
- Sugar: Just 1g (Keep up the good work!)
- Sodium: 450mg (Salt is flavor, folks!)
Remember, while these buttermilk biscuits are worth every single calorie, they are truly best enjoyed fresh and warm. Because we didn’t mess around with a ton of sugar, the flavor really comes from the fat and the buttermilk tang, which is exactly how great Southern biscuits should taste. If you’re curious about how these numbers stack up against other recipes in general, you might want to read my general site disclaimer, just so you know exactly where all these numbers come from!
PrintUltra Flaky and Tender Southern Buttermilk Biscuits
Follow these steps to make tall, flaky, and tender buttermilk biscuits from scratch with a rich, buttery flavor.
- Prep Time: 15 min
- Cook Time: 15 min
- Total Time: 30 min
- Yield: 8 biscuits
- Category: Breakfast
- Method: Baking
- Cuisine: American
- Diet: Vegetarian
Ingredients
- 2 cups all-purpose flour
- 1 tablespoon baking powder
- 1 teaspoon baking soda
- 1 teaspoon salt
- 1/2 cup (1 stick) cold unsalted butter, cut into small cubes
- 3/4 cup cold buttermilk, plus extra for brushing
Instructions
- In a large bowl, whisk together the flour, baking powder, baking soda, and salt.
- Add the cold butter cubes to the flour mixture. Use a pastry blender or your fingers to cut the butter into the flour until the mixture resembles coarse crumbs with some pea-sized pieces remaining.
- Make a well in the center of the dry ingredients and pour in the cold buttermilk. Mix gently with a fork until just combined. Do not overmix; the dough will be shaggy.
- Turn the dough out onto a lightly floured surface. Gently pat the dough into a rough rectangle about 1 inch thick.
- Fold the dough into thirds, like a letter. Turn the dough 90 degrees and gently pat it down again to about 3/4 inch thickness. This folding creates layers.
- Use a biscuit cutter (do not twist the cutter) to cut out rounds. Place the rounds close together on an ungreased baking sheet for softer sides, or farther apart for crispier sides.
- Brush the tops lightly with extra buttermilk.
- Bake in a preheated oven at 425 degrees Fahrenheit for 12 to 15 minutes, or until the biscuits are golden brown and have risen tall.
- Serve warm.
Notes
- Keep all ingredients, especially the butter and buttermilk, very cold for the flakiest results.
- Do not twist the biscuit cutter when cutting; pressing straight down helps the biscuits rise evenly.
- For extra height, stack the cut dough rounds on top of each other before baking.
Nutrition
- Serving Size: 1 biscuit
- Calories: 250
- Sugar: 1
- Sodium: 450
- Fat: 13
- Saturated Fat: 8
- Unsaturated Fat: 5
- Trans Fat: 0
- Carbohydrates: 29
- Fiber: 1
- Protein: 5
- Cholesterol: 30