

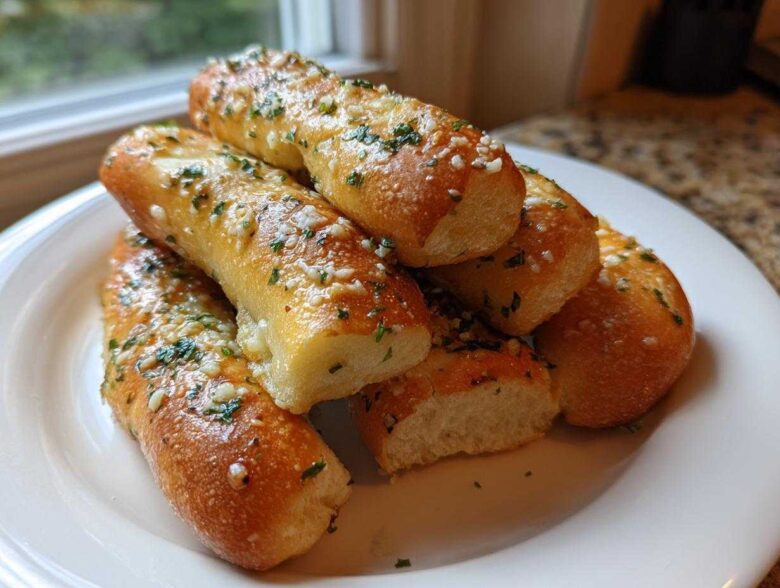
Oh, doesn’t that craving just hit you out of nowhere? You know the one—that deep, undeniable need for thick, warm, impossibly soft breadsticks, absolutely drenched in that savory garlic butter and coated in salty Parmesan. I’ve spent years trying to nail that specific, heavenly squishiness you usually only get at your favorite chain restaurant, and friends, I finally cracked the code!
This recipe truly is my Holy Grail because it delivers the ultimate soft, chewy Olive Garden Copycat breadsticks right here in my home kitchen. Forget those dry, crusty versions you sometimes end up with. After probably three dozen attempts—and I’m not even exaggerating—I developed this easy homemade dough recipe that guarantees that signature texture every single time. Seriously, once you smell that garlic butter mixture hitting these hot breadsticks, you’ll know happiness. Once you master this base dough, you’ll be asking, “Why did I ever wait so long to make homemade dough?” You can pair these beauties with my garlic parmesan spaghetti bake!
Why This Olive Garden Breadsticks Copycat Recipe Works
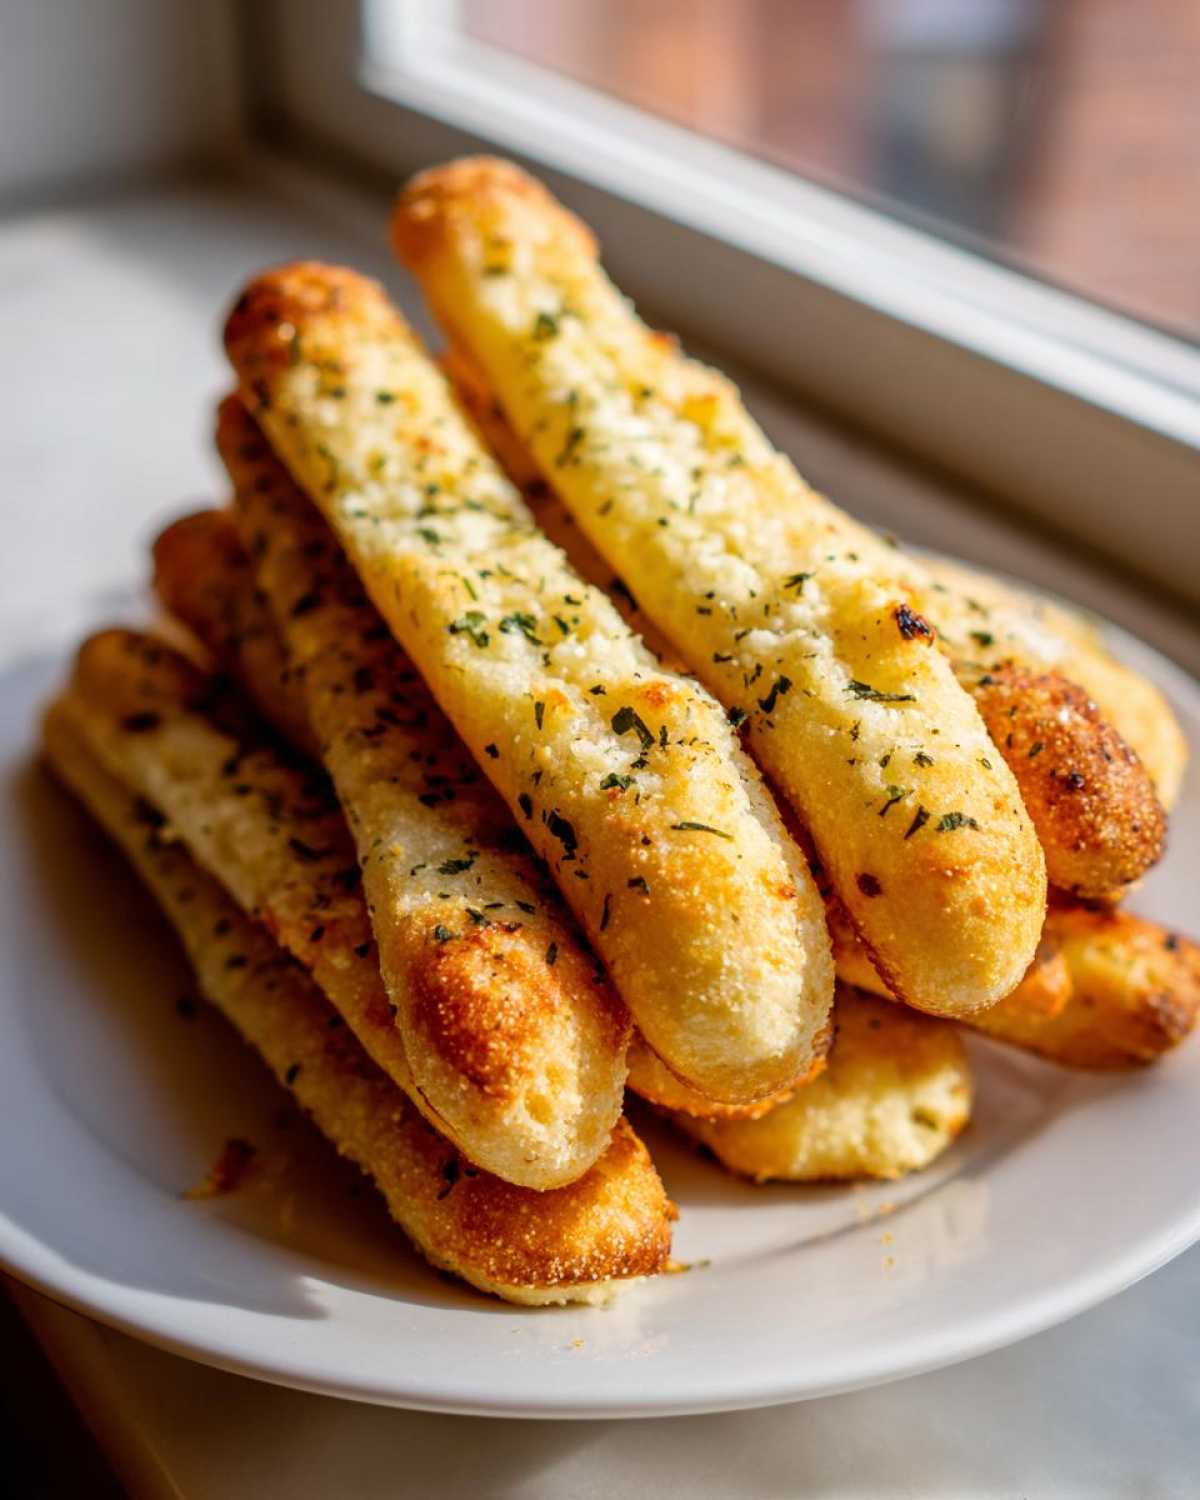
I know you’ve got other recipes calling your name, but stick with me here. What makes this particular Olive Garden breadsticks copycat recipe the winner? It’s all about delivering that unmistakable restaurant experience—that soft, slightly pillowy interior that pulls apart easily. Nobody wants dense, tough breadsticks after a long day, right? I tweaked my technique over and over to hit that sweet spot between chewy and fluffy. Trust me, these are worth the 20 minutes of actual work!
- We nail the quick 1-hour rise time, meaning you’re eating amazing breadsticks faster than delivery can get to your door.
- The texture is spot-on: soft centers with just enough chewiness that screams ‘restaurant style.’
- That garlic parmesan butter topping isn’t just slathered on; it soaks in completely, making every single bite rich and satisfying.
If you’re looking to upgrade your dipping game, check out my recipe for cheesy garlic breadsticks too!
Achieving Soft Breadsticks Texture
The secret to that incredible softness starts with the yeast, naturally. You have to make sure that water is *exactly* the right temperature—too hot and you kill the yeast, too cool and it wastes time. After mixing, don’t be shy with the kneading! You need to work that dough until it’s super elastic. That kneading develops the gluten structure just right, which is what locks in the air bubbles and keeps your final breadsticks light, not heavy.
The Signature Garlic Parmesan Breadsticks Topping
This topping is pure magic, honestly. We are melting butter, tossing in fresh garlic (none of that jarred paste business!), and parsley. The most crucial moment in the whole process is timing: the second those hot breadsticks come off the baking sheet, you need to brush them aggressively with that warm garlic butter. This allows the melted butter and garlic infusion to immediately soak deep into those fresh-baked breadsticks, getting them nice and savory.
Essential Ingredients for Homemade Breadsticks Recipe
Okay, let’s talk about what you need to gather on your counter before you even think about turning on the oven. When I say this is a homemade breadsticks recipe, I mean every single thing from scratch. Getting the right stuff here sets you up for success, especially with the dough. You absolutely need flour, water, yeast, and sugar to get that beautiful rise, but the butter situation is non-negotiable for flavor.
The butter is what makes them so rich and soft. Remember, we are aiming for that buttery breadsticks vibe, so don’t skimp! Also, don’t forget to chop your garlic yourself—that fresh minced flavor versus the jarred stuff is like comparing day and night in the final product. This isn’t hard; it’s just about having the right building blocks before we move on to the real fun with the buttery garlic naan pizza recipe!
Here is the list. Write it down on a sticky note right now so you don’t forget anything:
- You need 1 cup of warm water, and check that temp! It must be between 105 to 115°F—that’s the yeast’s happy place, seriously.
- Grab 2 1/4 teaspoons of active dry yeast; this is what gives us that nice, chewy rise.
- Just 1 tablespoon of granulated sugar to feed that yeast.
- For the dry stuff, measure out 2 1/2 cups of all-purpose flour, plus extra for dusting later when you’re kneading.
- Don’t forget 1 teaspoon of salt for flavor balance.
- We use 2 tablespoons of unsalted butter, totally melted, right into the main dough.
- For that glorious coating, get ready to melt another 1/4 cup of unsalted butter.
- You’ll need 2 cloves of garlic, and I mean minced—finely chopped!
- Toss in 1/2 teaspoon of dried parsley; it adds that necessary fleck of green color.
- Finally, 1/4 cup of grated Parmesan cheese for that salty, nutty finish!
Step-by-Step Instructions for Perfect Breadsticks
Alright, let’s get our flour dusted and our hands ready! Preparing these incredible breadsticks is totally manageable, even if you’ve never worked with yeast before. We are following the numbered sequence here so nothing gets missed. Just pay close attention to the timing because dough really does love warmth and patience. If you want the absolute best texture, I highly recommend checking the elasticity during kneading—if you gently pull a piece, it should stretch thin before tearing, which means your gluten is happy!
Making the Homemade Dough Recipe
This is where we start the magic. First, mix your warm water, yeast, and sugar together in a big bowl. Wait about five minutes until it gets nice and foamy on top; if it doesn’t foam, toss it and start over—your water was probably too cold or too hot. Next, mix in the flour, salt, and the first bit of melted butter until everything looks like a shaggy mass. Now comes the fun part: turn it out onto that lightly floured counter and knead it strong for a good 5 to 7 minutes. It should get smooth and springy. Once it’s ready, put it in a lightly oiled bowl, cover it up tightly, and let it rest in a warm spot for a full hour until it’s doubled. You can find some other fun things to bake while you wait from my quick bread recipe collection!
Shaping and Baking Your Breadsticks
Once that dough has ballooned up nicely, it’s time to get ready for the heat! Set your oven to 400°F right away and line a baking sheet with parchment paper—trust me, this saves cleanup! Gently punch the air out of the dough and divide it evenly into 12 pieces. Take each piece and roll it out long, aiming for about 8 to 10 inches. When you place them on the sheet, leave a little space between them! Space is your friend here; overcrowding means you steam your breadsticks instead of baking them golden brown. In about 10 to 12 minutes, they should look lightly golden. Pull them out!
Finishing with Garlic Parmesan Breadsticks Topping
You must move fast here; the topping needs warm breadsticks to properly absorb that flavor! While they were baking, you should have whisked together your reserved melted butter, the fresh minced garlic, and that dried parsley in a small bowl. As soon as those golden sticks leave the oven, grab a pastry brush and paint the tops lavishly with that incredible garlic butter mixture. Then, immediately sprinkle on that grated Parmesan cheese before the butter sets. That quick application is what locks in that perfect savory flavor!
Tips for Making Restaurant Style Breadsticks
I’ve got a few little secrets up my sleeve that I learned while trying to pass these off as take-out—they really elevate these from ‘good homemade’ to ‘wow, restaurant style’ breadsticks. These little nuances are what my testing process taught me that the recipe card didn’t explicitly list.
First, if you are worried about getting them perfectly soft, let them sit covered loosely with a clean kitchen towel for about five minutes immediately after brushing with butter. The trapped steam softens the exterior perfectly without making them collapse. It’s like letting them steam-finish themselves!
Second, let’s talk about making them ahead. This dough recipe is fantastic for planning! You can totally make the dough, put it in the lightly oiled, covered bowl, and tuck it into the fridge for up to 24 hours. When you are ready to bake, just pull it out, let it sit on the counter for about 30 minutes while it comes to room temperature, and then punch it down, shape it, enjoy the second rise, and bake! This is a game-changer for weeknight dinners.
Third, if you are really craving that cheese pull, don’t just stick to Parmesan on top. After you brush the garlic butter on, quickly sprinkle on some shredded low-moisture mozzarella cheese during the last minute of baking. Watch carefully! You just want it melted and bubbly, not browned. It adds that gooey factor that everyone loves. Thinking about dipping sauces? You have to try these with a warm bowl of marinara or maybe even a rich dip like the one I use for my homemade soft pretzels!
Variations for Cheesy Breadsticks and Other Flavors
Once you have this basic, perfect dough down, it’s time to play dress-up! That’s what I love most about this versatile recipe; it’s a blank canvas for salty, cheesy goodness. We already talked about mixing mozzarella into the topping, but let’s dive deeper into how you can customize these breadsticks to suit whatever you’re serving that night. You can swap out the topping completely for a total flavor shift!
If you want the ultimate indulgence, you have to try making proper cheesy breadsticks by mixing things up before the final bake. After you brush on the garlic butter, don’t just stop at the Parmesan! Sprinkle a generous layer of shredded mozzarella or even Monterey Jack right on top. Put them back in the oven for just one or two minutes—keep your eye glued to them! You want that cheese melted and slightly bubbly, not burnt. That creates a whole new level of ooey-gooey goodness.
Now, if you’re planning a full Italian theme dinner, you can easily turn these into more traditional Italian breadsticks. The base dough is exactly the same, but we change the butter sauce. Instead of relying just on garlic and Parmesan, try swapping out the parsley for a mix of dried oregano, basil, and maybe a pinch of red pepper flakes for some warmth. You could even whisk in a tiny bit of lemon zest into the warm butter for brightness, which pairs wonderfully with fresh pasta dishes like my pesto chicken stuffed garlic bread is a great complement.
Another fun idea is making sweet ones—yeah, I went there! If you skip the garlic and parsley in the topping, brush them instead with melted butter mixed with cinnamon sugar. Bake them until they are golden, brush them when hot, and they turn into amazing dessert sticks that are great dipped in chocolate sauce. It’s a totally different application, but it proves how reliable this soft dough recipe really is!
Serving Suggestions for Buttery Breadsticks
While these buttery breadsticks are truly a snack all on their own (seriously, I polish off three before dinner even starts), they really shine when paired with the right main course. They are the perfect dinner side dish bread—light enough that they don’t fill you up before the entrée arrives, but flavorful enough you don’t need to drown them in anything.
Naturally, any saucy Italian dish is a great match! Think big bowls of saucy spaghetti, lasagna, or anything that needs bread to swipe up every last drop clinging to the plate. They also make fantastic appetizer bread sticks for parties. If you are hosting, set out one bowl of marinara sauce and another bowl filled with something creamy, like a roasted red pepper dip. They are amazing dipped into my incredible creamy tomato basil gnocchi sauce!
Storage and Reheating Instructions for Soft Breadsticks
Now for the necessary evil: storing leftovers. If you were a better person than me, you’d have some left over! But since these breadsticks are so wonderfully soft, air is their enemy once they cool down. You’ve got to treat them right if you want them tasting like they just came out of the oven the next day. I always advise against storing them too airtight initially because that traps steam and makes the outside gummy.
Once they are completely cool, layer them in an airtight container, but put a piece of paper towel on the bottom and another one on top—that paper towel is going to wick away any lingering moisture that could turn your beautiful crust soggy over the next couple of days. They honestly stay great for about two days this way, but after that, they start losing their chew factor.
When you are ready to bring them back to life, skip the microwave if you value texture! Microwaves heat fast, but they turn bread rubbery shockingly quick. The best way to restore them is a short trip back into a hot oven. Preheat your oven to 350°F. Place the cooled breadsticks directly on a baking sheet—don’t freeze them first, just use the leftovers from the counter. Bake them for about 5 to 7 minutes maximum. That low heat gently brings the moisture back up and firms up the crust again without drying them out. It’s like giving them a fresh lease on life! If you’re doing prep work for a big holiday meal, you might want to check out my instructions on how to handle make-ahead dishes like my make ahead Thanksgiving stuffing muffins!
Frequently Asked Questions About Making Breadsticks
I get so many messages from folks asking for clarification on a few tricky spots when making the dough, especially if they are new to baking. That’s totally fine! Making great, soft breadsticks from scratch might seem intimidating, but once you get the dough right, the rest is just fun assembly. Here are the most common things I hear people wonder about when they attempt this Easy Breadsticks recipe. If you’re looking for other simple doughs, check out my recipe for fluffy no-knead dinner rolls!
Can I use pre-made pizza dough for these breadsticks?
Oh, that’s a question I hear all the time! If you’re truly in a pinch, yes, you *can* use store-bought pizza dough as a shortcut for making homemade pizza dough breadsticks. But I have to be honest; the results won’t be quite the same as using my scratch recipe. Store-bought dough is usually formulated differently—they often use lower quantities of fat or different flour blends to keep shelf stability high.
What does that mean for you? Well, your finished sticks might be chewier in a tougher way, and they definitely won’t soak up that garlicky butter quite as beautifully as the rich, tender dough we made here. For the true Olive Garden soft texture, scratch is the way to go, but if you need a quick appetizer, the pre-made stuff works in a pinch! Honestly, if you want super soft results, stick to my dedicated homemade dough recipe.
How long can I let the breadsticks dough rise?
The recipe calls for a quick, one-hour rise because we want that soft, tender texture. But life happens! If you need to delay dinner, you can absolutely let the dough rise longer, but you have to change your strategy slightly: cold fermentation is your friend. After you mix the dough (before the first rise), coat it lightly in oil, put it in a sealed bowl, and put it in the fridge. It can hang out there happily for up to 24 hours!
If you let it do a slow, cold rise, the flavor actually deepens a bit, which is a bonus. However, if you go this route, retrieve the bowl from the fridge about an hour before you plan to shape them. You need the dough to warm up a little so you can roll it out properly. Don’t worry about doing a second rise after shaping if you cold-fermented; just bake them right away after rolling for your easy breadsticks!
Estimated Nutritional Data for Garlic Breadsticks Recipe
Look, I’m a cook, not a nutritionist, so these are just my best *approximations* based on the ingredients, okay? When you’re making something this delicious and comforting, you’re not usually counting every calorie—you’re just enjoying that warm, buttery goodness! These numbers are based on dividing the recipe yield by 12 pieces, as written.
Please remember that since we are using real butter, fresh Parmesan, and maybe you use slightly more garlic than I do, your final count might sneak up a little. It’s all part of the joy of homemade food! If you’re looking for delicious sides that are easier on the macros, you should totally check out my lemon parmesan roasted broccoli recipe as a side dish idea!
Here’s what my calculations suggest for one glorious serving:
- Serving Size: 1 breadstick
- Calories: Roughly 185 per stick. Not bad for something this rich!
- Fat: Around 8.5g total fat (about 4.5g saturated). That’s that lovely butter doing its job!
- Carbohydrates: About 23g.
- Protein: Around 5g.
- Sugar: Keep it low, only about 1.5g.
- Sodium: About 280mg. That Parmesan adds up, so be mindful if you’re watching salt!
Honestly, these are appetizer portion sizes, so enjoy them warm, fresh from the oven, and don’t stress too much about the details. They are designed to be comforting dinner companions!
PrintSoft and Chewy Olive Garden Copycat Breadsticks with Garlic Parmesan Butter
Make restaurant-style soft and chewy breadsticks at home using this easy recipe, topped with a rich garlic parmesan butter coating.
- Prep Time: 20 min
- Cook Time: 12 min
- Total Time: 1 hour 32 min
- Yield: 12 breadsticks
- Category: Appetizer
- Method: Baking
- Cuisine: American
- Diet: Vegetarian
Ingredients
- 1 cup warm water (105-115°F)
- 2 1/4 teaspoons active dry yeast
- 1 tablespoon granulated sugar
- 2 1/2 cups all-purpose flour, plus more for dusting
- 1 teaspoon salt
- 2 tablespoons unsalted butter, melted
- 1/4 cup unsalted butter, melted (for topping)
- 2 cloves garlic, minced
- 1/2 teaspoon dried parsley
- 1/4 cup grated Parmesan cheese
Instructions
- In a large bowl, combine the warm water, yeast, and sugar. Let stand for 5 minutes until foamy.
- Add 2 1/2 cups of flour, salt, and 2 tablespoons of melted butter to the yeast mixture. Mix until a shaggy dough forms.
- Knead the dough on a lightly floured surface for 5 to 7 minutes until smooth and elastic.
- Place the dough in a lightly oiled bowl, turning to coat. Cover and let rise in a warm place for 1 hour, or until doubled in size.
- Preheat your oven to 400°F (200°C). Line a baking sheet with parchment paper.
- Punch down the risen dough. Divide it into 12 equal pieces. Roll each piece into a long, thin stick, about 8 to 10 inches long. Place sticks on the prepared baking sheet.
- Bake for 10 to 12 minutes, or until lightly golden brown.
- While the breadsticks bake, prepare the topping: In a small bowl, combine the 1/4 cup melted butter, minced garlic, and dried parsley.
- As soon as the breadsticks come out of the oven, brush them generously with the garlic butter mixture.
- Immediately sprinkle the tops with grated Parmesan cheese. Serve warm.
Notes
- For extra cheesy breadsticks, sprinkle mozzarella cheese over the buttered sticks during the last minute of baking.
- You can make the dough ahead of time and refrigerate it for up to 24 hours before the final rise.
- Ensure your water temperature is correct for the yeast to activate properly.
Nutrition
- Serving Size: 1 breadstick
- Calories: 185
- Sugar: 1.5
- Sodium: 280
- Fat: 8.5
- Saturated Fat: 4.5
- Unsaturated Fat: 4.0
- Trans Fat: 0.1
- Carbohydrates: 23
- Fiber: 1.2
- Protein: 5
- Cholesterol: 15