

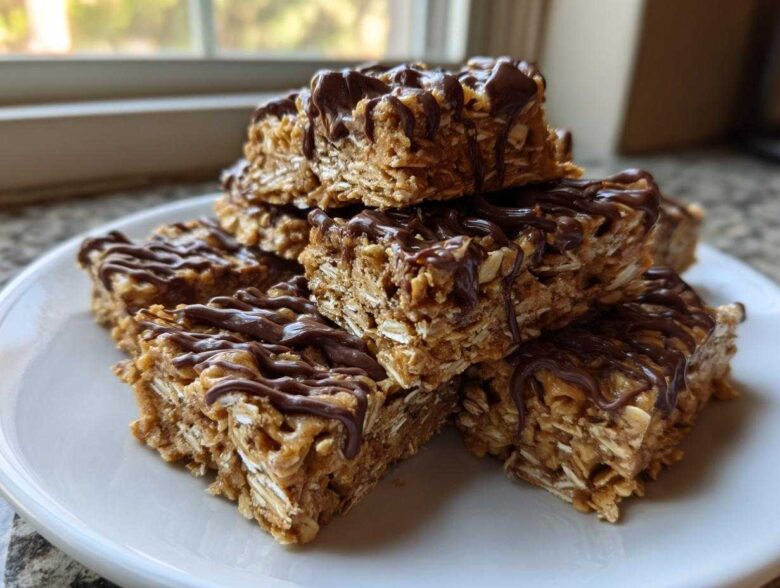
Okay, listen up, because I’m about to let you in on the secret to finally stopping that expensive habit of buying those sad, chalky bars at the checkout line. Seriously, they taste like cardboard! I swear I was spending a small fortune every week just trying to keep my energy up during those afternoon slumps. But then I cracked the code. These peanut butter bars aren’t just good; they are the absolute BEST homemade protein bars you will ever make because they use just five ingredients and require zero oven time. Mix, press, chill, done! That’s it. These no bake protein bars are chewy, satisfying, and taste like a decadent treat, not like something medicinal. If you loved my no-bake energy bites, you’re going to adore this next level snack. Trust me, once you’ve made a batch of these, you’ll never look back.
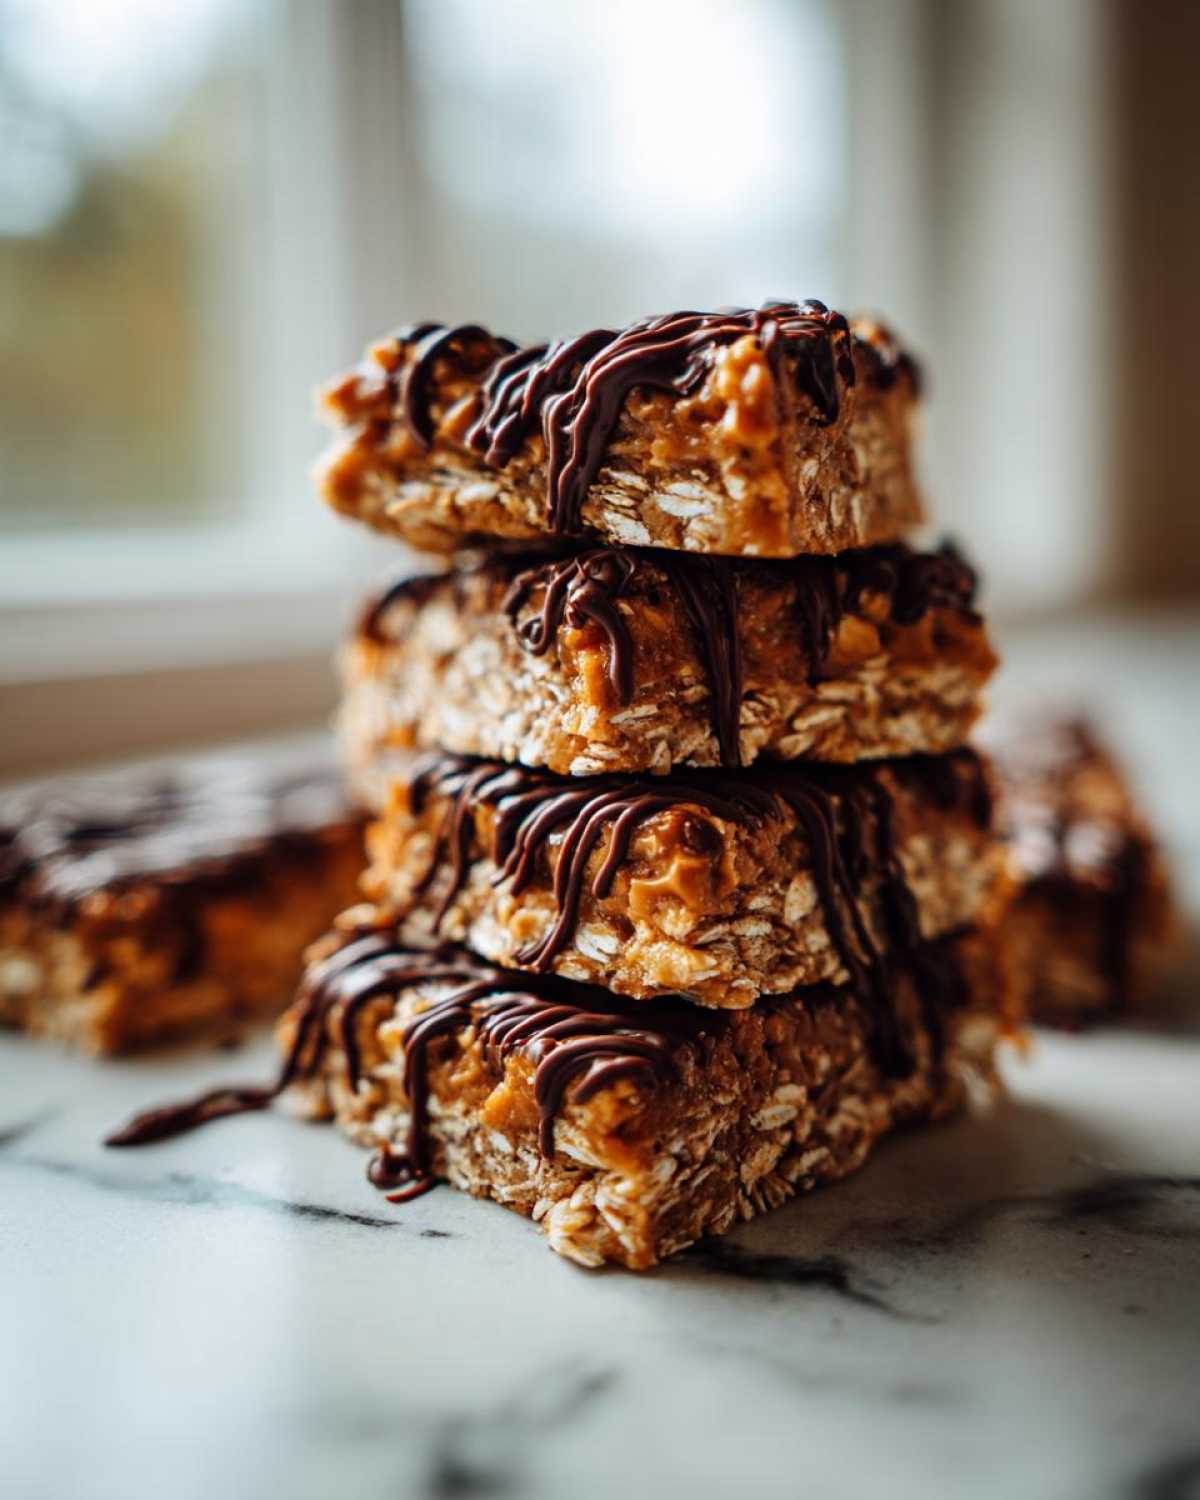
Why Our Easy No-Bake 5-Ingredient Peanut Butter Protein Bars Win
Listen, I’ve tried them all—the bars that promise flavor but deliver grit, and the ones that are so crumbly they shatter the second you look at them. These win, hands down. For me, success in snacking hinges on two things: taste and speed. These homemade protein bars nail both perfectly. If you enjoyed the sheer simplicity of my trail mix energy bites, you’ll see these bars follow that same philosophy!
You get unbelievably superior texture, massive savings over store-bought sizes, and the flavor—oh my goodness, the peanut butter and chocolate combo is incredible. Why ever buy them again?
Quick Prep for Busy Schedules
The active time here is almost zero. We are talking genuinely 10 minutes of mixing and pressing before these go into the fridge. If you are new to making things in the kitchen, these no bake protein bars are your absolute green light. They require no complex temperature control or worrying about whether the oven is hot enough. It’s just mixing and patience for the chill time!
Perfect for Meal Prep Bars
I usually make a batch of 10 on Sunday night, and they are gone by Wednesday afternoon! They are perfectly dense and hold their shape beautifully inside an airtight container in the fridge. Think of them not just as a snack, but as an essential part of your grab-and-go fueling strategy for the week. These meal prep bars never stick together if you use that parchment paper trick I’ll detail below.
The Essential Ingredients for Chewy Protein Bars
This is where the magic happens, and honestly, it’s so simple it feels like cheating. We are only dealing with five core players here, but you have to use the right ones if you want the best texture for your homemade protein bars. You’ll need 1 cup of rolled oats—not the instant kind, the hearty ones! Then comes the flavor bedrock: 1/2 cup of natural peanut butter. I insist on natural peanut butter because it doesn’t have those extra stabilizers that make store-bought bars either rock-hard or weirdly greasy. The natural version binds beautifully.
Next up is your protein source, 1/2 cup of vanilla or unflavored protein powder—this is really up to you, but stick to one that blends well. We need 1/4 cup of maple syrup or honey to bind everything up sweetly, and finally, 2 tablespoons of melted dark chocolate reserved for that beautiful drizzle on top. Honestly, that drizzle is what makes these feel like a real treat after a workout!
Ingredient Notes and Substitutions for Homemade Protein Bars
Don’t sweat it if you have allergies or dietary needs; these chewy protein bars are incredibly adaptable. If you need these to follow a strictly vegan protein bars recipe, just swap the honey for maple syrup—easy peasy!
For those who need it gluten-free, please just make sure your rolled oats are certified gluten-free; the rest of the recipe is naturally gluten free protein bars friendly. If peanuts just aren’t your thing, trying almond butter or sunflower seed butter works just as well for the binding agent. Just remember, whatever nut butter you choose needs to still be natural and drippy so it mixes properly into that thick dough!
Step-by-Step Instructions for No Bake Protein Bars
Okay, I know the instructions list can look intimidating, but seriously, this is so straightforward. When you get down to it, making these no bake protein bars is really just one big mixing bowl operation followed by physics (aka chilling!). The key here is making sure you get the right consistency before you even think about pressing them into the pan. I always grab my 8×8 pan and line it with parchment paper beforehand, making sure those ends hang over the sides like little handles—you’ll thank me later for easy removal! This simple method is why this is such an easy protein bar recipe to master.
Once the pan is ready, dump in your oats, protein powder, peanut butter, and syrup. You’ll want to mix this up really well. This is where you develop the structure for your high protein recipes.
Mixing and Forming the Protein Bar Base
Grab a sturdy spatula or even a wooden spoon—my hands usually get involved around here because I need to feel the texture! You’re mixing everything together until it forms what looks like a very thick, slightly crumbly dough. It should definitely hold its shape if you squeeze a handful. If, by chance, your peanut butter was a little stiff or your protein powder absorbed too much moisture, don’t panic! Just add water, one tiny teaspoon at a time, until it comes together. I mean it—one teaspoon! Too much liquid and you’ll end up with a sticky mess rather than a firm bar base.
When it’s uniform, transfer that thick mass into your prepared pan. Now, you need to press. Press hard! Use the back of a spoon or just the flat of your fingers to compact that mixture down as flat and dense as possible. This firm pressing is what ensures these don’t turn into crumbly powder when you slice them later on.
Chilling and Cutting Your Protein Bars for Beginners
Once that base is nice and flat, melt your chocolate carefully—you don’t want to scorch it! Drizzle it artfully across the top. Now comes the hardest part: waiting! These bars need at least a full hour in the refrigerator. Don’t try to rush this step by putting them in the freezer for 15 minutes; just let the fridge do its job so they firm up completely. This patience is crucial for any make ahead protein snacks.
When they are totally solid, use those parchment paper handles to lift the whole slab out onto a cutting board. This is so much easier than trying to pry them out of the edges. Then, just cut them evenly into 10 squares. Because they were chilled properly, your bars will slice clean, making these the perfect quick protein treats for protein bars for beginners!
Tips for Achieving the Best Tasting Protein Bars
Getting these to taste truly amazing—like something you’d pay a premium for—comes down to the details, not the difficulty. When I first made these protein bars, one batch came out a little dry because I used a vanilla whey isolate that was super absorbent. Big mistake! Since then, I’ve learned that the better quality your protein powder, the better they taste, plain and simple. I usually lean toward a blend or a whey concentrate because they keep the bars chewier.
Also, pay attention to that chocolate drizzle! You melt it in short bursts in the microwave. If you get impatient and heat it too fast, it seizes up and becomes grainy, which ruins that luxurious mouthful. Use short 30-second blasts and stir well between each one until it’s glossy and smooth. That finish makes all the difference between a ‘meh’ bar and the best tasting protein bars ever.
If your bars ever end up too crumbly (usually a sign of dry protein powder or old oats), here’s my trick: just put the whole slab back in the bowl after chilling, add one teaspoon of almond milk, and mush it up until it clumps again! Then press it back. It works like a charm! You can check out my chocolate peanut butter mug cake for another quick fix when you need that classic flavor!
Storage and Make Ahead Protein Snacks
The beauty of these peanut butter protein bars is how long they hang around—if you can stop yourself from eating them all in one sitting, that is! Because we didn’t bake these, they need to stay cool to keep that perfect, chewy texture. You absolutely must store them in an airtight container.
I find they are best kept right in the refrigerator. They stay firm and fresh for at least a week, easily! Pop them in a container, maybe layering with a little square of parchment paper between layers if you’re worried about sticking, and you’re set for a week of ready-to-go fuel. They are fantastic make ahead protein snacks!
If you wanted to keep them longer, you could try freezing them too, though I generally think they taste best when they’ve been recently made. For other easy grab-and-go ideas, you should definitely check out my recipe for make ahead mini omelette muffins!
Variations on Simple Homemade Snacks
Since we nailed the base recipe for these incredible protein bars, I always love playing around with what else I can toss into the mix. Half the fun of making simple homemade snacks is making them totally *yours*, right? You don’t have to stick strictly to the five core ingredients!
If you want to amp up the warmth, try adding 1/2 teaspoon of ground cinnamon or even a 1/4 teaspoon of pure vanilla extract right into your dough mixture before pressing. That little bit of warmth really makes the peanut butter sing. For texture, I sometimes add 1 tablespoon of flaxseed for an extra fiber boost, or maybe a sprinkle of those mini dark chocolate chips since we are already drizzling chocolate on top anyway!
These little additions turn them into completely new treats without adding any extra baking time. If you’re into more breakfast-style fuel, you should totally check out how I make my protein-packed overnight oats for another easy way to prep your mornings!
Frequently Asked Questions About Homemade Protein Bars
I know you probably have a few lingering questions, because when you’re swapping out expensive store-bought snacks for homemade protein bars, you want everything to be perfect! I’ve gathered the ones I get asked most often about texture, ingredients, and how to keep the sugar in check. I promise, once you get the hang of this easy protein bar recipe, you’ll nail it every time.
Can I make these vegan protein bars recipe?
Oh yes, absolutely! That’s one of the great things about keeping things simple. If you want to make sure your bars fit into a perfect vegan protein bars recipe, just make sure you are using maple syrup instead of honey in the binder mix. Honey isn’t vegan, but maple syrup works just as well to get that sticky sweetness we need. Everything else in the core five ingredients is usually plant-based or adjustable!
What protein powder works best for these quick protein treats?
This is a game-changer for texture! If you use a whey isolate, it tends to be super drying, which makes your quick protein treats come out a little too stiff. I usually suggest using a standard whey concentrate or even a good quality plant-based powder. If you use a plant powder—like pea protein—you might need to add that extra teaspoon of water I mentioned earlier because they drink up moisture like crazy! It’s all about finding that perfect balance so they aren’t crumbly.
For anyone concerned about the overall sweetness, remember that using a protein powder that is already flavored (like vanilla) lets you cut back slightly on sweetener if you’re aiming for low sugar protein bars. If you want more amazing recipe ideas like this, check out my oatmeal latte breakfast smoothie!
Estimated Nutritional Breakdown for These Protein Bars
Now, I always promise honesty here, so here’s the rundown on what these amazing protein bars will typically run you nutritionally per bar. Keep in mind that I used the standard ingredients listed, and if you swap out peanut butter for almond butter or use different protein powder brands, these numbers will shift a little. These estimates are based on a 10-bar yield.
- Calories: 220
- Protein: 15g
- Total Fat: 11g (with 3g being saturated)
- Total Carbohydrates: 22g
- Sugar: 9g
It’s a fantastic profile for a quick boost! But remember, this is just a starting point. If you need super low sugar protein bars, you might want to swap the maple syrup for an alternative liquid sweetener, which would absolutely change this chart! Always taste and adjust for your own goals!
Share Your Homemade Protein Bars Experience
Whew, that’s it! Now you have the blueprint for the most satisfying, easy protein bars you’ll ever make. I really, really hope you try this recipe before your next grocery store run. I want to know what you think! Did you use almond butter, or did you stick with peanut butter? Please leave me a comment below telling me how yours turned out and what kind of chocolate drizzle you used. I love seeing your takes on my favorite simple homemade snacks!
If you made a batch, snap a picture and tag me so I can see! Head over to the main blog page here for even more easy snacks!
PrintEasy No-Bake 5-Ingredient Peanut Butter Protein Bars
Make simple, chewy, high-protein bars at home with only five ingredients. These require no baking and are perfect for quick meal prep.
- Prep Time: 10 min
- Cook Time: 0 min
- Total Time: 70 min
- Yield: 10 bars
- Category: Snack
- Method: No-Bake
- Cuisine: American
- Diet: Vegetarian
Ingredients
- 1 cup rolled oats
- 1/2 cup natural peanut butter
- 1/2 cup vanilla or unflavored protein powder
- 1/4 cup maple syrup or honey
- 2 tablespoons melted dark chocolate (for drizzle)
Instructions
- Line an 8×8 inch baking pan with parchment paper, leaving an overhang on the sides for easy removal.
- In a medium bowl, combine the rolled oats, peanut butter, protein powder, and maple syrup.
- Mix the ingredients thoroughly until a thick, uniform dough forms. If the mixture is too dry, add one teaspoon of water at a time until it holds together.
- Press the mixture evenly into the prepared pan. Use the back of a spoon or your fingers to compact it firmly.
- Melt the dark chocolate in a microwave-safe bowl in 30-second intervals, stirring until smooth. Drizzle the melted chocolate over the top of the bars.
- Place the pan in the refrigerator for at least 1 hour, or until the bars are firm.
- Lift the bars out using the parchment paper overhang and cut them into 10 equal squares. Store them in an airtight container in the refrigerator.
Notes
- For a vegan option, use maple syrup instead of honey.
- If you need a gluten-free bar, use certified gluten-free rolled oats.
- You can substitute peanut butter with almond butter or sunflower seed butter for a different flavor.
Nutrition
- Serving Size: 1 bar
- Calories: 220
- Sugar: 9
- Sodium: 85
- Fat: 11
- Saturated Fat: 3
- Unsaturated Fat: 8
- Trans Fat: 0
- Carbohydrates: 22
- Fiber: 2
- Protein: 15
- Cholesterol: 0