

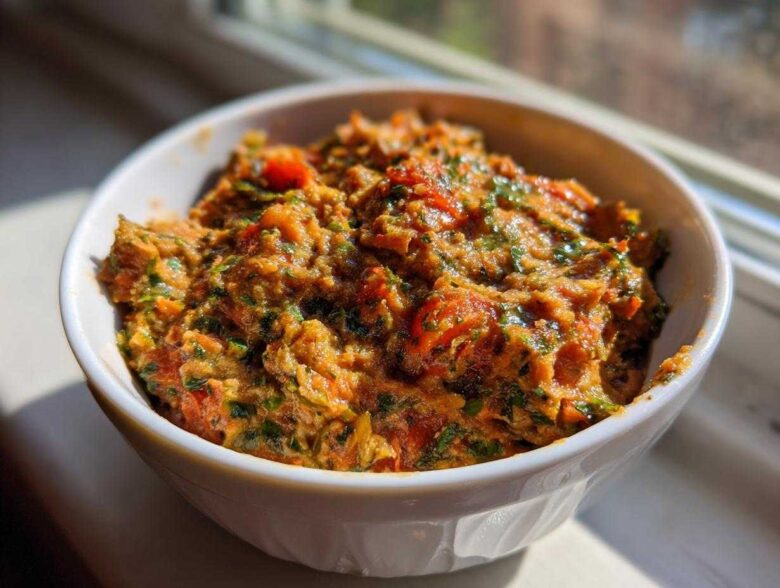
Oh, you know that feeling when you walk out to the garden in mid-July and realize you’ve got three zucchini, a pile of tomatoes that look suspiciously like they’re about to turn into soup on the vine, and an entire herb row gone wild? Well, I’ve totally been there! That’s when I pull out my secret weapon: this absolutely vibrant Roasted Garden Vegetable Spread.
Trust me when I say that roasting takes everything up about ten notches—it brings out this incredible smoky sweetness you just don’t get from raw veggies. It’s my go-to appetizer, sandwich booster, and the very best way I know how to preserve that summer bounty before it’s gone. I’ve been dealing with harvest overflow for years, and making a big batch of this spread keeps those amazing garden flavors around all week long.
Why This Roasted Garden Vegetable Spread is a Harvest Must-Make
When you’ve got a kitchen overflowing with garden goodies, you need a solution that’s fast, flavorful, and flexible. This spread checks all those boxes, transforming humble produce into something really special.
- It’s such a healthy garden harvest appetizer—packed with real vegetables and fresh herbs!
- You can use this as a fantastic vegetarian sandwich booster spread instead of relying on heavy mayo.
- The roasting step makes this delicious, giving you a deep, savory flavor profile. It’s just so good!
Quick Prep and Roasting for Deep Flavor
Honestly, you just chop it and toss it! The active prep time is next to nothing, maybe 15 minutes tops. But that roasting time? That’s where the magic happens. Roasting concentrates the natural sugars in those tomatoes and peppers. It means you get this unbelievably sweet and a little bit smoky base that you’d never achieve just by blending everything raw. It tastes like you spent hours cooking, but you didn’t!
The Best Way to Use Excess Zucchini and Tomatoes
If you’re wrestling with what to do with way too much zucchini and those last big tomato haul, this is your answer. This Garden Vegetable Spread is specifically designed to handle the volume that usually piles up on the counter. It stops food waste and gives you a genuinely impressive homemade vegetable dip recipe that everyone will ask you about.

Essential Ingredients for Your Garden Vegetable Spread
Okay, gathering your ingredients is half the battle. The beauty of this garden vegetable spread is that it relies heavily on what you probably already have sitting on your counter after a busy morning picking veggies. Don’t skimp on the quality here—freshness is everything when you’re making something this simple!
Vegetable Components and Roasting Fats
We need heft, color, and a little bit of aromatic punch. You’ll want two big tomatoes, halved—make sure they’re ripe! Then, chop up one medium zucchini and half a red bell pepper. I always throw in one small onion, quartered, and two whole cloves of garlic, skin on for roasting. Toss all that onto your sheet pan with just two tablespoons of good olive oil, salt, and black pepper. Keep it simple!
Binding Agents and Fresh Herbs for the Garden Vegetable Spread
This is where we move from roasted veggies to a proper dip. You have two routes here, depending on your goal. For the ultimate creamy texture, use half a cup of cream cheese. But if you’re aiming for a healthier, maybe vegan option, swap that out for half a cup of cannellini beans—they blend up surprisingly creamy! And please, for the love of flavor, use fresh herbs. About two tablespoons of chopped fresh basil and one tablespoon of parsley stirred in right at the end makes this garden vegetable spread sing.
Step-by-Step Instructions for the Roasted Garden Vegetable Spread
This is where we stop thinking about it and actually make the thing! Don’t you worry, this isn’t some overly complicated canning process. It’s mostly waiting time while the oven does the hard work for us. Following these steps exactly is what keeps this spread absolutely amazing and prevents it from turning into watery mush. It builds the authority of the recipe, you know?
Roasting the Garden Produce
First thing’s first: crank up that oven to 400°F (200°C). Get all those prepped veggies—tomatoes, zucchini, pepper, onion, and garlic—tossed right onto a sturdy baking sheet. Make sure they get a nice, even coat of that olive oil, plus the salt and pepper. We want them to roast for about 25 to 30 minutes. You’re looking for them to be soft, tender, and for those tomato edges to get just a little bit caramelized. Caramelization equals flavor, my friend!
Processing and Finishing the Garden Vegetable Spread
Once they’ve cooled just enough so you don’t burn your fingers, scoop everything right into your food processor. Now, this part is super important for that thick garden vegetable spread texture we want! You need to pulse it. Seriously, don’t let it run continuously, or you’ll end up with baby food. Just short bursts until it’s *mostly* smooth but you can still see some lovely bits of texture in there. Then, scrape it into a bowl and gently fold in those chopped fresh basil and parsley. Give it a final taste check before giving it a good hour in the fridge to let all those roasted flavors really get to know each other.
Tips for Success Making Your Garden Vegetable Spread
I’ve made this garden vegetable spread dozens of times, especially when the zucchini haul is overwhelming, and I’ve learned a few things the hard way! Mostly, success comes down to managing moisture—vegetables, especially fresh ones, hold so much water. We want flavor, not soup, right?
Achieving the Perfect Thick Garden Vegetable Spread Texture
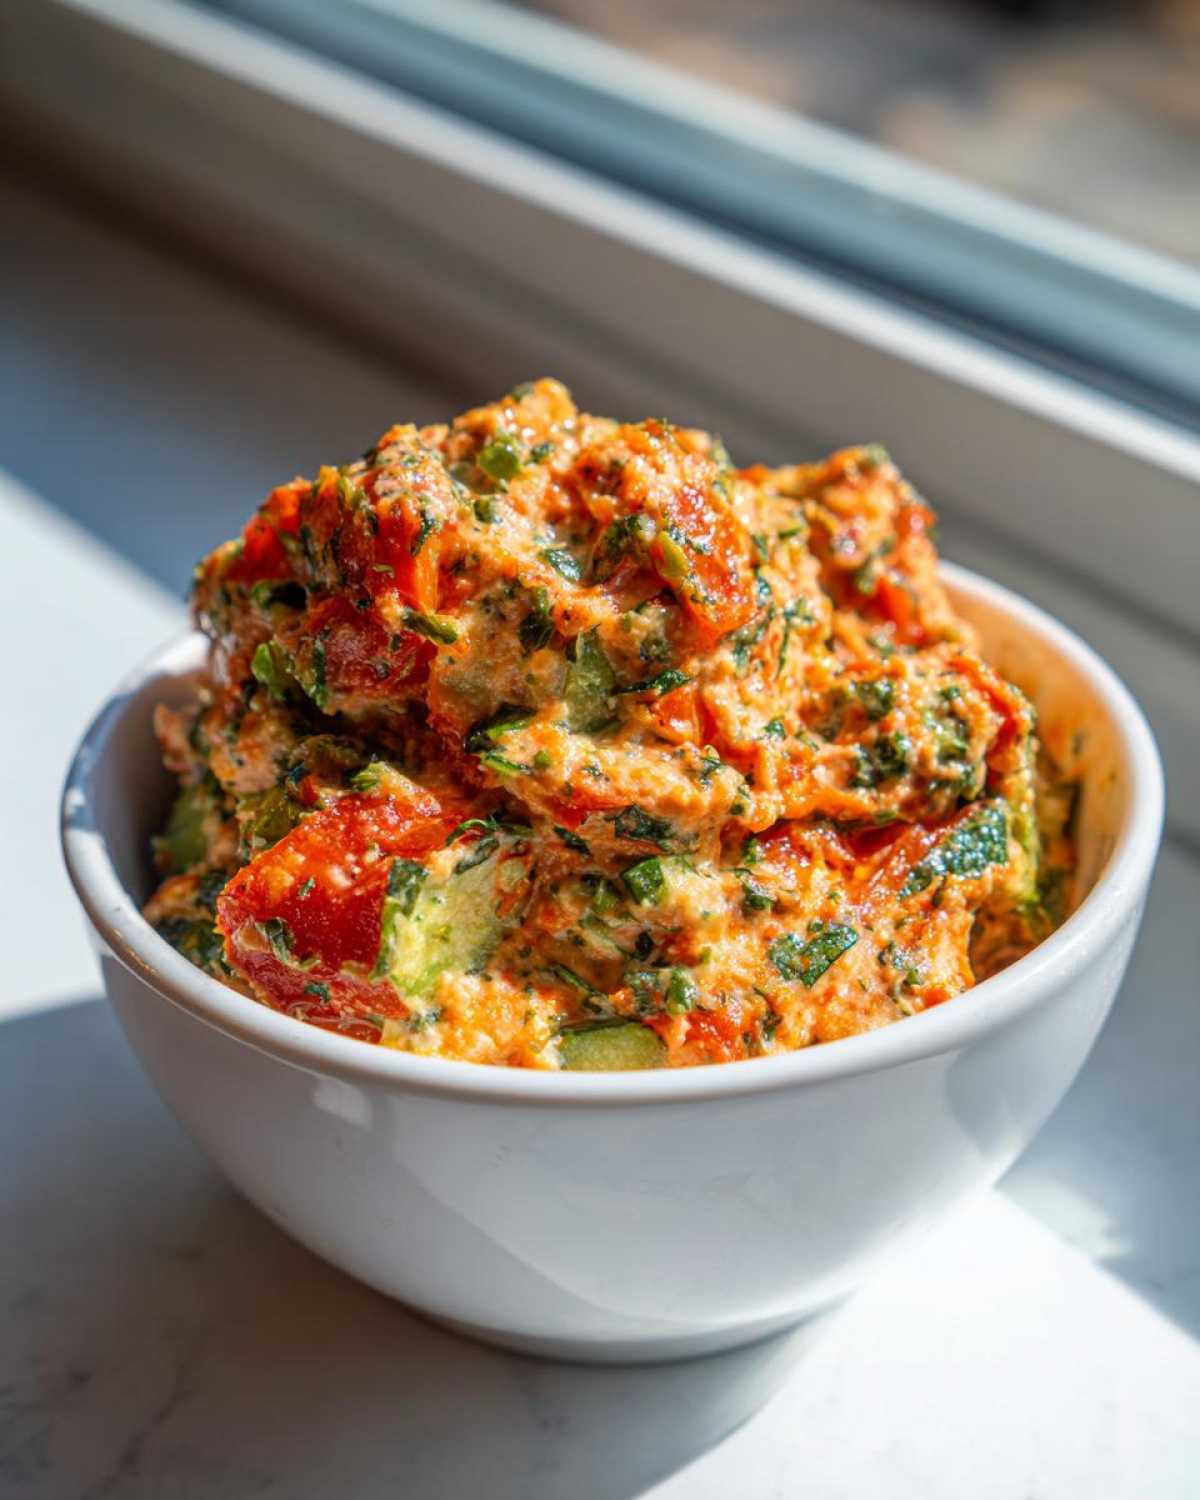
Here is my biggest pro-tip for a thick, dippable garden vegetable spread: if your roasted veggies look really wet after they cool down—and sometimes they do, depending on how juicy those tomatoes were—just give them a quick five-minute drain. You can dump them into a fine-mesh sieve before they go into the food processor. It seems like a small step, but it stops your final product from spreading out too much when you put it on a cracker.
Resting Time for Flavor Development
You absolutely have to resist the urge to eat this immediately! I know the herbs smell amazing right when you mix them in, but the real magic happens when this spread chills out. You really need to give it at least one full hour in the refrigerator before serving. That resting time is crucial; it lets all those smoky roasted notes mingle perfectly with the fresh basil and parsley. It’s worth the wait, I promise!
How to Serve Your Flavorful Garden Vegetable Spread
Now that you have this gorgeous, thick, smoky garden vegetable spread, the fun part begins: eating it! Don’t just let it sit in the fridge—this is too delicious to hide. It opens up so many possibilities beyond just serving it in a bowl. I love how versatile it is once you take the time to roast those veggies properly.
Using the Garden Vegetable Spread as an Easy Vegetable Relish for Sandwiches
Forget relying on plain old mayonnaise or mustard! This spread makes an amazing vegetarian sandwich booster spread. Just slather a thick layer on your bread before adding turkey, ham, or grilled halloumi. It adds moisture, a bright herb note, and that roasted depth—it instantly elevates a simple lunch into something much more gourmet. It really works wonders on leftover roast chicken sandwiches, too!
Appetizer Ideas: Zesty Garden Spread for Crackers
For parties or when friends drop by unannounced, this is my go-to appetizer. It quickly transforms into a zesty garden spread for crackers or even toasted baguette slices. If you’re doing a veggie platter, this works way better than a standard store-bought dip. I always serve it alongside some crisp cucumber slices or blanched asparagus, especially after grilling something else on the barbecue, because it pairs perfectly with those smoky char flavors.
Storage and Preserving Garden Vegetable Bounty
This Roasted Garden Vegetable Spread is fantastic because it’s built to last a little while, which is perfect when you’ve got a mountain of produce you need to deal with. Since we roast everything, the moisture content is much easier to manage than if we were using raw veggies!
You absolutely must keep this in an airtight container in the fridge. I always find that using a glass container works best—it doesn’t hold onto odors. If you’ve made a big batch to deal with that incredible harvest, you can count on this spread staying fresh and delicious for up to a full week. That’s a week of no-fuss amazing flavor!
If you’re worried about keeping it longer, you could technically freeze this, though I prefer it fresh. If you freeze it, make sure you put it in smaller portions so you can thaw just what you need. Plus, check out my recipe for moist date nut bread if you’re looking for another great, long-lasting homemade snack!
Ingredient Substitutions for Your Garden Vegetable Spread
One of the things I absolutely love about this recipe for a flavorful veggie spread is how forgiving it is. When you’re working with a truly garden vegetable spread, you sometimes run out of one specific herb or maybe you just can’t have dairy—no problem at all! My goal is always to make sure you can successfully use up your harvest, whatever your pantry looks like.
We talk about cream cheese, but I know many of you are looking for incredible vegetarian or even vegan alternatives. Don’t stress! This recipe handles swaps beautifully, which is why it’s so popular. If you’re making easy homemade breadsticks to go with this, you’ll want to make sure your dip base works for everyone!
Binding Agents: Vegan Swaps for the Garden Vegetable Spread
If you skip the cream cheese, you’re likely looking for a creamy texture. As I mentioned, cannellini beans are my number one substitute because they are mild and blend down until they are almost indistinguishable from cheese in texture. Another great option, if you have it handy, is firm silken tofu, which you’ll want to press lightly first. If you use tofu, you might need a tiny splash more olive oil or a little bit of lemon juice for brightness, as tofu is less fatty than cream cheese.
Herb Choices When You Run Low
Basil and parsley are the stars, but what if you used up all your basil in the last batch? You can absolutely swap those out! Dried herbs work in a pinch, but you need to adjust the amount—use about one-third of the fresh amount suggested. For example, if we used two tablespoons fresh, try just two teaspoons of dried basil. Dill adds a wonderful, zesty note that works really well with roasted zucchini, or you can even toss in some fresh oregano for a more rustic, Mediterranean feel to your garden vegetable spread.
Frequently Asked Questions About Homemade Vegetable Dip Recipes
I absolutely get it—when you’re trying out a new recipe, especially one that’s meant to use up a bunch of fresh ingredients, you always have some little nagging questions. I’ve pulled together the ones I hear most often about this dip. Hopefully, these clear things up so you can make the best homemade vegetable dip recipe ever!
Can I make this Garden Vegetable Spread without roasting the vegetables?
You certainly can! If you’re in a huge hurry and just want a quick, vibrant appetizer, you can skip the oven entirely. This creates what is essentially a very thick, rustic salsa or a **no-bake garden vegetable spread**. Just dice everything small and pulse it in the food processor with the binder and herbs. Now, be warned: it won’t have that deep, smoky sweetness that roasting gives it, but it will be super fresh and zesty!
How long does this spread last in the refrigerator?
That’s one of the best things about this recipe! Because we roast the vegetables first, we manage a lot of the initial moisture, which helps with keeping. Stored properly in a truly airtight container, this garden vegetable spread keeps beautifully in the fridge for up to one full week. That means you can make it on Sunday and still have it for sandwiches or dips the following weekend!
Can I use different vegetables in this savory vegetable topping recipe?
Absolutely! This is where you get really creative with your harvest. Think of this as a base recipe. Eggplant works wonderfully if you roast it until it’s almost collapsing, just like zucchini. You can add carrots, but maybe chop them a bit smaller since they take longer to roast than peppers. Any firm vegetable benefits from the roasting treatment first to get that amazing concentrated flavor for your **savory vegetable topping recipes**.
Estimated Nutritional Data for Garden Vegetable Spread
I know so many of you look beyond just taste when you’re feeding your family, especially when you’re trying to use up all those amazing veggies from your garden. Getting a handle on the nutrition of this homemade garden vegetable spread is super easy because the ingredients are so straightforward!
This data is based on a serving size of about two tablespoons, which is usually how much I slather on a cracker or use in a sandwich boost. But remember, since we’re using cream cheese and olive oil, the fat content will shift a little if you go heavy on the vegan bean option or vice versa. These are great ballpark figures to give you an idea of what you’re getting, though!
Here’s what the numbers generally look like for that standard serving of this delicious spread:
- Calories: Around 65 here. Not bad for something so flavorful!
- Total Fat: About 4 grams, which includes some of that healthy fat from my beloved olive oil.
- Saturated Fat: Right around 2 grams.
- Carbohydrates: Low, usually about 5 grams per serving.
- Protein: Around 2 grams, coming from the cream cheese or the beans.
- Fiber: A nice little boost of 1 gram, thanks to all those vegetables!
- Sodium: About 150 mg, which you can easily control by cutting back on the salt you add during the roasting phase.
It’s a fantastic, relatively low-calorie way to add a huge punch of flavor and vegetable goodness to any meal. Enjoy knowing you’re eating something wholesome made straight from your own back yard!
PrintRoasted Garden Vegetable and Herb Spread

A flavorful spread made from roasted garden vegetables like tomatoes, zucchini, and peppers, combined with fresh herbs and a binding agent.
- Prep Time: 15 min
- Cook Time: 30 min
- Total Time: 45 min
- Yield: About 1.5 cups
- Category: Appetizer
- Method: Roasting and Blending
- Cuisine: Modern American
- Diet: Vegetarian
Ingredients
- 2 large tomatoes, halved
- 1 medium zucchini, chopped
- 1 red bell pepper, seeded and chopped
- 1 small onion, quartered
- 2 cloves garlic, peeled
- 2 tablespoons olive oil
- 1/2 teaspoon salt
- 1/4 teaspoon black pepper
- 1/2 cup cream cheese (or cannellini beans for vegan option)
- 2 tablespoons fresh basil, chopped
- 1 tablespoon fresh parsley, chopped
Instructions
- Preheat your oven to 400°F (200°C).
- Toss the tomatoes, zucchini, bell pepper, onion, and garlic with olive oil, salt, and pepper on a baking sheet.
- Roast for 25 to 30 minutes, or until the vegetables are soft and slightly caramelized. Let them cool slightly.
- Transfer the roasted vegetables and garlic to a food processor.
- Add the cream cheese (or beans) and pulse until the mixture is mostly smooth but still has some texture. Do not over-process.
- Scrape the mixture into a bowl. Stir in the fresh basil and parsley.
- Taste and adjust salt and pepper if needed.
- Transfer the spread to an airtight container. Refrigerate for at least 1 hour before serving to allow flavors to meld.
Notes
- For a thicker spread, drain excess liquid from the roasted vegetables before processing.
- This spread keeps well in the refrigerator for up to one week.
- Serve this spread with crackers, use it as a sandwich base, or serve it alongside grilled chicken or fish.
Nutrition
- Serving Size: 2 tablespoons
- Calories: 65
- Sugar: 3
- Sodium: 150
- Fat: 4
- Saturated Fat: 2
- Unsaturated Fat: 2
- Trans Fat: 0
- Carbohydrates: 5
- Fiber: 1
- Protein: 2
- Cholesterol: 8