

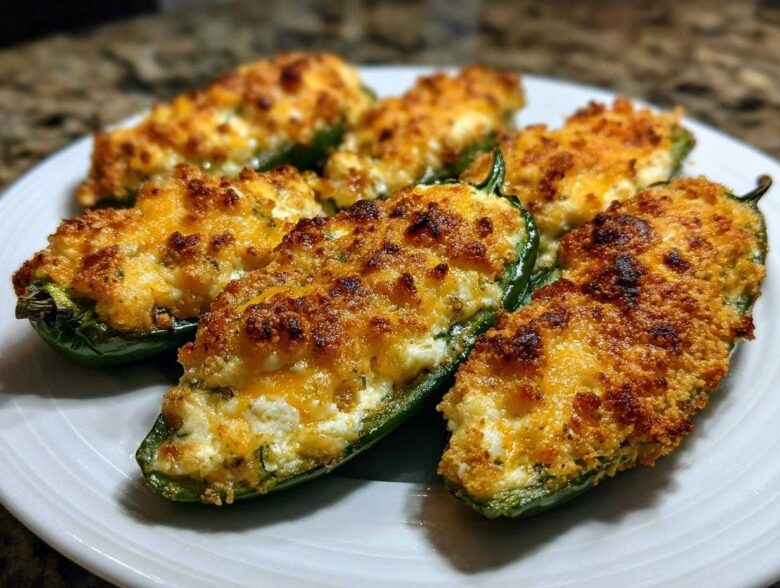
If you’re hosting game day or just have one of those random Tuesday cravings for something spicy and cheesy, you know what you need: the absolute perfect finger food. Forget those soggy, frustrating, fried monsters! I’m talking about the kind of appetizer that disappears before you even sit down to watch the game. That’s why my recipe for **jalapeño poppers** is my go-to secret weapon. Seriously, these are my famous easy baked jalapeño poppers, and they skip the entire, messy deep-frying ordeal. I remember the first time I brought these to a potluck—people thought they were from a fancy caterer! They couldn’t believe how simple they were, and how perfectly balanced the heat was against that creamy filling.
Why You Will Love These Easy Baked Jalapeño Poppers
I know you want appetizers that wow without making you spend an hour scrubbing oil out of the kitchen. That’s exactly what these give you! They are game-day heroes, honestly.
- No deep fryer needed! We bake them, so cleanup is a snap.
- You control the fire! Take out the white stuff for mild flavor or leave a bit in for a serious kick.
- Supreme creaminess—that blend of cream cheese and sharp cheddar just melts beautifully.
- They handle temperature well, so they stay good even if the party runs long. Check out my Buffalo Chicken Dip if you need another crowd-pleaser!
Essential Ingredients for Perfect Jalapeño Poppers
Okay, let’s talk about what you need to grab at the store. The ingredients list is super short, which is why ingredient quality really matters when you’re making these poppers! You want the best flavor from these few components, trust me.
Here’s what you need floating around in my kitchen when I whip these up:
- 12 large jalapeño peppers (Look for ones that are thick-walled—they hold the stuffing better!)
- 8 ounces cream cheese, softened (It has to be soft, or you’ll be fighting it when you mix!)
- 1 cup shredded sharp cheddar cheese (Sharp gives you that necessary tang against the heat.)
- 1 teaspoon garlic powder
- 1/2 teaspoon onion powder
- 1/4 teaspoon salt
- 1 large egg, lightly beaten
- 1/2 cup panko breadcrumbs (Panko is non-negotiable for that crunch!)
- Cooking spray (Don’t skip this; it helps the bottom get golden.)
Ingredient Notes and Substitution Tips for Jalapeño Poppers
Since there aren’t a ton of components, how you treat them makes all the difference in achieving really great cream cheese stuffed jalapeños. First, that cream cheese absolutely needs to come out early! I mean, *hours* early if your kitchen is cold. Stirring rock-hard cheese just isn’t fun, and you risk tearing the pepper halves.
If you want to play around, I sometimes use Colby Jack instead of cheddar, but make sure it’s got some punch. Speaking of playing around, if you want to get fancy and turn these into bacon wrapped poppers—which is a great idea—swap out half of that panko breadcrumb coating for crumbled, cooked bacon bits. You’ll want to secure the bacon around the pepper before baking, maybe with a toothpick, though those tend to get messy when you bake them. For this baked version, I usually just mix the bacon bits right into the cheese filling for an easier time!
And listen, if you’re worried about the heat from the peppers, please grab some food-grade gloves. Seriously, don’t rub your eye after handling these things! That capsaicin oil sticks around longer than you think.
Step-by-Step Instructions for Baked Jalapeño Poppers
Alright, let’s get these babies ready for the oven! Because we’re baking, this whole process moves really fast compared to trying to deep fry. My total active time for these jalapeño poppers is less than 20 minutes, which is why I love them for last-minute appetizer emergencies.
First things first: Preheat your oven to 400 degrees Fahrenheit. I use a standard baking sheet, but you absolutely MUST line it with parchment paper. Trust me on this one—it keeps the cheese from sticking, and it means you don’t have to scrub caramelized cheddar off your pan later! Then, just give that parchment a little spritz of cooking spray.
Controlling the Heat: Preparing the Peppers
This is where you decide how much fire you want in your spread. Grab your gloves—seriously, don’t skip them! Slice all 12 peppers right down the middle, lengthwise. Now, take a small spoon or a paring knife and scoop everything out of the center. I mean *everything*—the seeds and, most importantly, those stringy white bits, that’s where ALL the heat lives. If you are brave, leave a tiny bit of that white membrane clinging to the sides, maybe just for show, but if you want a really mild, cheesy bite, scrape it perfectly clean.
Mixing the Cream Cheese Stuffed Jalapeños Filling
While you were busy carving out peppers, your cream cheese should have softened perfectly. Dump that softened cream cheese into a bowl with your shredded cheddar, the garlic powder, onion powder, and that salt. Use a fork or a sturdy spatula and mix it until it’s perfectly uniform. You want zero streaks of white cheese showing against yellow cheese; it should look like one cohesive, creamy dream filling. Don’t over-mix, just combine it well!
Coating and Baking Your Jalapeño Poppers
Time to stuff! Spoon that cheesy mixture generously into each jalapeño half, mounding it up a little since the cheese melts down when it bakes. Now for the coating: have your beaten egg in one shallow dish and your panko breadcrumbs in another. Dip just the top, cheesy side of the popper lightly into the egg bath, and then press that side firmly into the panko. You are only coating the cheese topping, not the pepper skin!
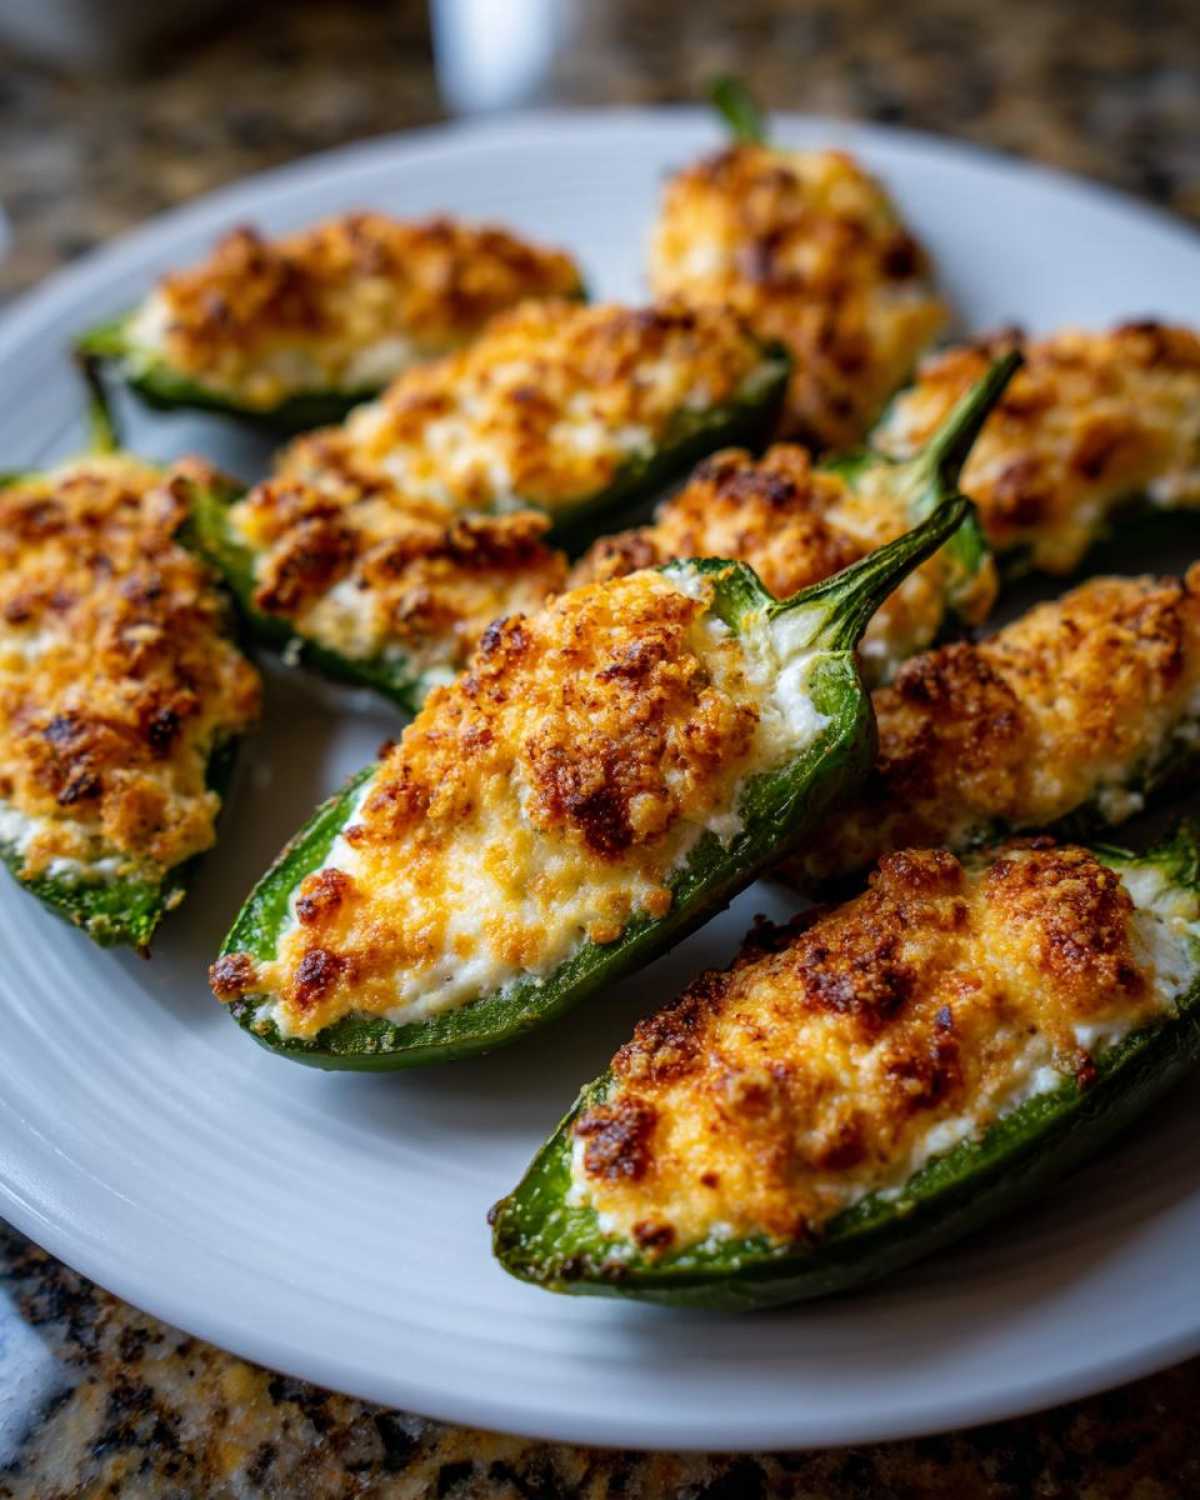
Place them cheese-side UP on your lined baking sheet. Pop them in that 400-degree oven for about 18 to 20 minutes. You’re looking for the pepper skin to be tender when you poke it, and the panko topping should be beautifully golden brown. They look amazing right then! Check out my ideas for bacon wrapped versions if you want to up the ante next time!
Tips for Making the Best Cream Cheese Stuffed Jalapeños
You’ve got the recipe down, but the difference between good poppers and *amazing* poppers is always in the details, right? I’ve learned a few tricks over the years that take these from decent to legendary status for game day. My biggest tip? Don’t overstuff them!
When you mound the cheese too high, it has nowhere to go but down into the baking sheet, and that’s when you get the sticky cleanup I warned you about. Keep the filling nice and level with the rim of the pepper boat. Also, make sure your panko topping only kisses the cheese. If the breadcrumbs soak up too much moisture from the egg wash too early, they just steam instead of crisping up!
And remember that bacon idea? If you want to go the full bacon wrapped popper route next time, I highly recommend cooking the bacon until it’s almost crispy first, then wrapping it *around* the pepper before baking. It keeps the bacon from getting soggy while it cooks through. You can find a fun recipe for that over here!
Variations: Beyond Classic Jalapeño Poppers
So, you’ve mastered the baked version—awesome! But that’s just the starting point, my friend. Once you nail the balance of heat and cheese, you want to start twisting things up a bit. These jalapeño poppers are begging to be customized based on whatever I have hiding in the fridge.
The most obvious change, which everyone asks about, is how to transition into bacon wrapped poppers. Honestly, it takes more effort in the oven, but the smoky flavor is worth it! When you wrap them, skip the Panko topping for that batch; the bacon acts as its own crust. You’ll need to bake those a bit longer, maybe 25 minutes, to make sure the bacon renders properly and crisps up.
If you don’t want to mess with bacon, you can always modify the filling for a different flavor profile. I love adding finely minced green onions or maybe a touch of smoked paprika to the cream cheese base for depth. Sometimes, instead of plain cheddar, I’ll grate some pepper jack in there if I want a creamier heat source that melts beautifully. If you’re looking for something truly wild next, you have to check out my recipe for Firecracker Jalapeño Poppers!
Serving Suggestions for Spicy Appetizer Poppers
Okay, your spicy appetizer poppers are out of the oven, bubbling, golden, and smelling absolutely divine. Now what? You can’t just eat them straight off the tray, you need the perfect partners to balance that glorious heat!
My rule for anything spicy is you need something cooling and creamy to cut through the spice. If you don’t offer a cooling dip, people tend to grab the next one too quickly, and you want them to savor these beauties!
My absolute favorite pairing is either good old-fashioned sour cream or a zesty homemade ranch dressing. Nothing beats dipping that crunchy, cheesy bite into something cold. If you haven’t made my ranch from scratch, you are missing out! It’s lightyears ahead of anything bottled, and you can find the simple recipe here—it uses fresh herbs and really makes a difference!
For something a little different, try a sweet element. A small bowl of apricot jam or pepper jelly served alongside works miracles! The sweetness clashes just enough with the savory cheese and the pepper’s low burn, making the whole experience more complex. Just place a dollop on the side of the serving platter, and watch them disappear even faster than usual!
Storage and Reheating Baked Jalapeño Poppers
Listen, I know these amazing jalapeño poppers tend to vanish when you put them out, but sometimes, just sometimes, there are a few little cheesy boats left over. That’s the best kind of leftover, because you get to enjoy them all over again tomorrow!
If you’ve got extras, you need to cool them completely before you store them. Don’t seal them up hot; you’ll get steam and sogginess instantly. Once they are room temperature, pop them into an airtight container. I usually layer them between some paper towels—just a couple of sheets—to absorb any lingering moisture. In the fridge, they keep just fine for three, maybe four days maximum.
Now, when it comes to reheating, this is critical: we do *not* use the microwave unless we absolutely must! Microwaving these crispy little guys turns that beautiful Panko crust into soggy sadness. You want to preserve that crunch we worked so hard for!
My favorite way to revive them is in a toaster oven or a regular oven set to about 350 degrees Fahrenheit. Lay them out on a small baking sheet—maybe even line it with foil for easy cleanup—and let them warm up for about 8 to 10 minutes. They heat all the way through, the cheese gets creamy soft again, and the coating crisp right back up. It’s like magic!
If you happen to have an air fryer (which I’m obsessed with, by the way), even better! That’s my second-best choice. Just 350 degrees for about 4 minutes, shaking the basket once halfway through. They come out crisper than the oven method, honestly. Pop them in and you’ve got yourself a fast, spicy snack without turning on the whole oven!
Frequently Asked Questions About Jalapeño Poppers
Whenever I post pictures of these beauties online, I always get the same few questions popping up! It’s great, though, because it means everyone wants to make the perfect batch of jalapeño poppers. I thought I’d gather the most common ones right here so you can bake with confidence!
Can I make these jalapeño poppers ahead of time?
Oh, absolutely, that’s one of the best things about these! If you have a big party coming up, you can totally prep these early. Slice and clean all your peppers, mix up that incredible cheese filling, and stuff them completely. Once they are stuffed, put them on your parchment-lined, sprayed baking sheet, cover them loosely with plastic wrap, and pop them into the fridge. They’ll be good like that for up to 24 hours.
The only thing you *have* to do right before baking is the egg wash and the Panko dipping. If you try to coat them too early, the breadcrumbs will get damp and won’t be as crispy. If you’re planning ahead, just keep the Panko coating separate until you’re ready to bake. Want something less fussy? You could transition the leftovers into a fantastic Jalapeño Popper Dip!
What is the best way to avoid spicy residue when handling peppers?
I cannot stress this enough: wear gloves! If you don’t want your fingers burning for hours or accidentally transferring that heat while you’re cutting veggies for dinner later, get yourself a box of disposable kitchen gloves. That’s the real Pro Tip for handling any spicy pepper!
For the peppers themselves, once you’ve sliced them open, wash the inside part immediately in running water before you even touch the seeds. Then, once you’re done scraping everything out, take off the gloves and wash your hands, knife, and cutting board really well with soap and hot water. That double-wash system works every single time for me!
Can I use fresh breadcrumbs instead of Panko for these jalapeño poppers?
You certainly can, but you’ll get a different final look and texture, so you have to know what you are signing up for! Panko breadcrumbs are Japanese-style flakes—they are lighter, airier, and larger than standard dried breadcrumbs. That’s why they absorb less oil and get so wonderfully crisp when baked. They give you that satisfying, crunchy shell that contrasts so perfectly with the soft filling.
If you use plain, finely ground fresh or dried breadcrumbs, the coating will be much denser and absorb more moisture from the egg wash. This results in a slightly chewier, less crunchy exterior when baked. For these baked jalapeño poppers, I always prefer the Panko crunch, but if that’s all you have, go for it! Just be aware it won’t be quite the same texture!
Estimated Nutritional Data for Jalapeño Poppers
Okay, so everyone wants to know what they’re diving into when they grab one of my famous jalapeño poppers. While I’m all about flavor first, tracking the numbers helps calm the nerves when you’ve already eaten three! Remember, this is just a general guideline, kind of like a friendly estimate.
Since we’re baking them and keeping things relatively controlled, they are way friendlier than anything dunked in a deep fryer. Here are the general estimates based on the recipe above, serving size being two little cheesy bites:
- Calories: 120
- Fat: 10g (10g of that is Saturated Fat, the good stuff from the cheese and butter!)
- Cholesterol: 30mg
- Sodium: 210mg (This is why you taste before you add extra salt!)
- Carbohydrates: 4g
- Protein: 5g
- Sugar: Just 1g! See? Not bad at all for a party snack!
I always like to throw in a quick note here because I’m not a registered dietitian, obviously! These numbers are based on the exact amounts I used—standard cream cheese, sharp cheddar, and Panko breadcrumbs. If you decide to go heavy on the cheese or decide to make those wonderful bacon wrapped poppers I mentioned earlier, those numbers are definitely going to shift around a little bit. For my friends who like to check the fine print, you can always review my general guidelines over on my site disclaimer page!
PrintEasy Baked Jalapeño Poppers
Make simple, cheesy jalapeño poppers baked until golden brown. Control the heat by removing seeds and veins before stuffing with a cream cheese mixture.
- Prep Time: 20 min
- Cook Time: 20 min
- Total Time: 40 min
- Yield: 24 pieces
- Category: Appetizer
- Method: Baking
- Cuisine: American
- Diet: Vegetarian
Ingredients
- 12 large jalapeño peppers
- 8 ounces cream cheese, softened
- 1 cup shredded sharp cheddar cheese
- 1 teaspoon garlic powder
- 1/2 teaspoon onion powder
- 1/4 teaspoon salt
- 1 large egg, lightly beaten
- 1/2 cup panko breadcrumbs
- Cooking spray
Instructions
- Preheat your oven to 400 degrees Fahrenheit. Line a baking sheet with parchment paper and lightly coat with cooking spray.
- Slice the jalapeños in half lengthwise. Use a small spoon or knife to carefully remove the seeds and white membranes. Wear gloves if you have sensitive skin.
- In a medium bowl, combine the softened cream cheese, cheddar cheese, garlic powder, onion powder, and salt. Mix until fully combined.
- Spoon the cheese mixture evenly into each jalapeño half, mounding it slightly.
- In a shallow dish, lightly beat the egg. In another shallow dish, place the panko breadcrumbs.
- Dip the top (cheese side) of each stuffed pepper lightly into the egg, then press gently into the breadcrumbs to coat the cheese surface.
- Place the poppers, cheese-side up, on the prepared baking sheet.
- Bake for 18 to 20 minutes, or until the peppers are tender and the cheese topping is melted and lightly golden.
- Let cool for a few minutes before serving.
Notes
- Wear gloves when handling jalapeños to prevent skin irritation from the capsaicin.
- For less heat, remove all white membrane from the inside of the pepper. For more heat, leave some membrane intact.
- You can substitute bacon bits for half of the breadcrumbs for added flavor.
Nutrition
- Serving Size: 2 poppers
- Calories: 120
- Sugar: 1
- Sodium: 210
- Fat: 10
- Saturated Fat: 6
- Unsaturated Fat: 4
- Trans Fat: 0
- Carbohydrates: 4
- Fiber: 0
- Protein: 5
- Cholesterol: 30