

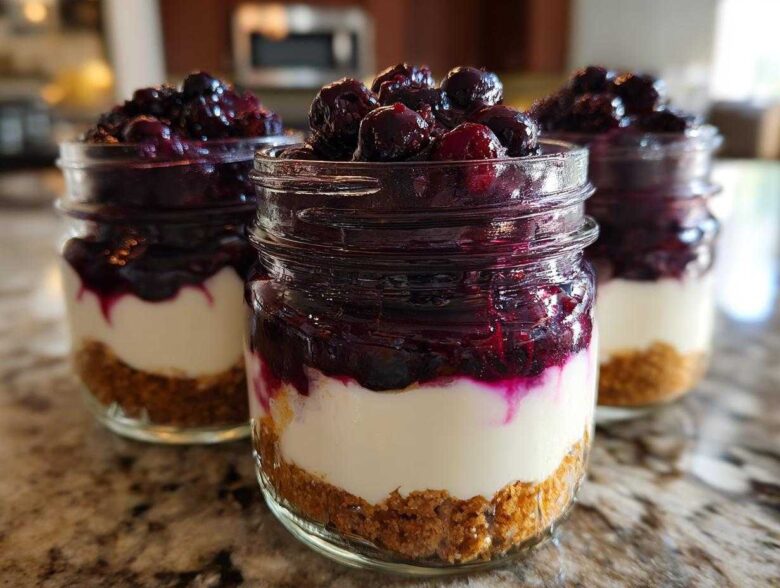
Listen, sometimes I just need dessert, but I don’t want to deal with slicing a whole cake or waiting for something to bake, especially when the weather gets hot! That’s why I’m obsessed with these Lemon Blueberry Cheesecake Jars. They are absolutely darling, portion-controlled perfection, and honestly, they look way harder to make than they actually are. We’re talking creamy, tangy lemon filling, a simple crumb base, and that bright, sweet blueberry topping—all layered beautifully in a little jar. Trust me, if you’re heading to a picnic or just need a quick, elegant treat to keep in the fridge, this no-bake recipe is your new summer secret weapon. They’re so easy, you won’t believe it!
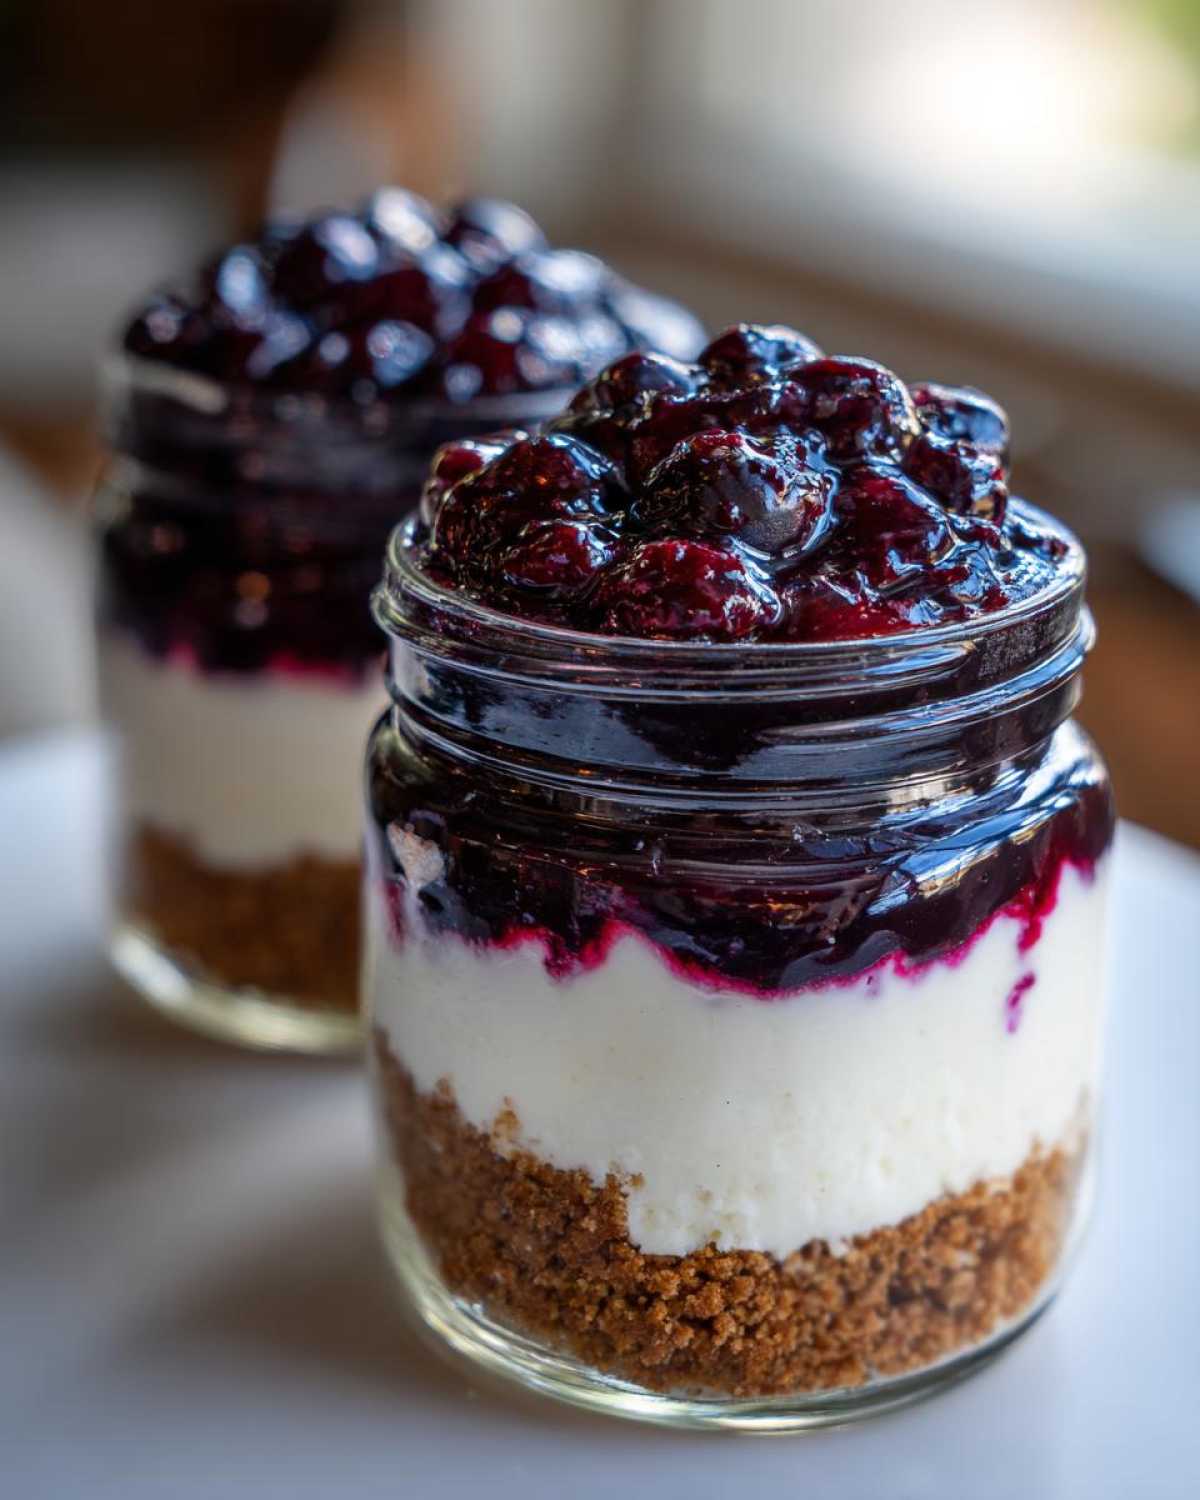
Why You Will Love These Lemon Blueberry Cheesecake Jars
Honestly, these aren’t just desserts; they are little containers of happy sunshine. I keep finding myself craving them all the time. If you’re on the fence, let me give you the quick rundown on why I think these little gems are superior:
- They are the ultimate easy layered desserts. Seriously, no fancy piping skills required—just spooning!
- Since they are already portion controlled, you save yourself the headache of cutting a creamy cake perfectly. Hello, perfect servings every time!
- Zero oven time means they stay wonderfully no bake cheesecake jars creamy and are perfect for hot days when you just can’t turn the stove on.
- They travel like a dream. If you need amazing Individual dessert jars for a picnic, these are sealed and ready to go.
- The bright, intense lemon flavor wakes up your tastebuds; it’s not dull or overly sweet.
- You can totally make these the day before you need them, and honestly, they taste even better the second day when everything has settled.
Essential Ingredients for Perfect Lemon Blueberry Cheesecake Jars
Okay, let’s talk about what you actually need to make these Lemon Blueberry Cheesecake Jars shine! Because this is a no-bake situation, the quality really matters since there’s no oven to mask any funky flavors. I’ve listed out the exact things you’ll need below, and I swear, having everything ready to go before you start mixing is half the battle won.
- Graham Cracker Crumbs: I always use about 1 1/2 cups for the crust for four jars, but you might need a touch more depending on how thick you like that base layer!
- Melted Unsalted Butter: Right around 1/4 cup binds those crumbs together so they hold tight at the bottom of the jar.
- Cream Cheese: You need 16 ounces, and this is important – they absolutely must be softened to room temperature. I mean soft! If it’s cold, you’ll get lumps, and nobody wants a lumpy no bake cheesecake filling.
- Powdered Sugar: About 1 cup. Make sure it’s sifted if you tend to have lumps in your sugar bag.
- Heavy Whipping Cream: Half a cup, chilled, because we need to whip this up into stiff peaks to keep the filling light.
- Fresh Lemon Juice: Don’t reach for that bottle! You need 1/4 cup of fresh, tart juice.
- Lemon Zest: Just one teaspoon, but wow, this is where the bright flavor comes from. Use a microplane if you have one; don’t get the white pith!
- Fresh Blueberries: We need 1 cup of beautiful, ripe berries for that topping.
- Granulated Sugar: 2 tablespoons just for sweetening the fruit topping slightly.
- Cornstarch: A tiny teaspoon mixed with water to thicken up those beautiful blueberries just enough.
Ingredient Notes and Substitutions for Your Lemon Blueberry Cheesecake Jars
Since we are keeping these as Lemon Blueberry Cheesecake Jars and they are no-bake, I wanted to share a couple of things I’ve learned over the years about swapping stuff around. If you’re looking for variations, this is where you can play!
For the crust, if you don’t have graham crackers, vanilla wafers are divine—they offer a richer, buttery texture. Even crushed shortbread cookies work wonders if you happen to have some lying around. Just watch the salt content if you use salty cookies!
When it comes to that rich filling, if you absolutely must substitute the heavy cream—maybe you’re making these for someone who can’t handle too much dairy—you can sometimes get away with using a good quality, stabilized whipped topping. But I’m warning you, it won’t have the exact same gorgeous texture as using real, homemade whipped cream folded in gently. Seriously, the heavy cream is what makes these no bake cheesecake jars feel luxurious.
And one last thing about the lemon: taste your lemons before you juice them! Some lemons are way more tart than others. If yours seem super mild, maybe grate a little extra zest, but be careful not to overdo the juice, or your delicious cheesecake mix might get too thin before chilling!
Step-by-Step Instructions for No Bake Cheesecake Jars
Alright, this is where the magic really happens! We’re moving fast here, which is why I always tell people to have their ingredients measured out first. Mixing everything in stages like this keeps the texture perfect, which is crucial for these No bake energy bites style crusts and fluffy toppings.
Preparing the Graham Cracker Crust Layer in the Lemon Blueberry Cheesecake Jars
We start the whole process by sorting out the base for our lovely Mason jar cheesecakes. It’s super simple, but chilling time here prevents it from turning mushy when we add the wet filling!
- Take your graham cracker crumbs and toss them with the melted butter until everything looks nice and damp, like wet sand.
- Now, grab your four cute little jars. You want to press about 2 tablespoons of that crumb mixture right into the bottom of each jar. Use the back of a spoon or maybe the bottom of a small glass to press it down firmly so it sets nicely.
- Tuck those jars into the fridge—just 10 minutes of chilling time is plenty—while you get the creamy part ready. That quick chill locks everything in place!
Creating the Creamy Lemon Cheesecake Filling for Your Individual Dessert Jars
This next part is where we build the luxurious center of our Individual dessert jars. Remember, the secret to that light, cloud-like texture is gentleness!
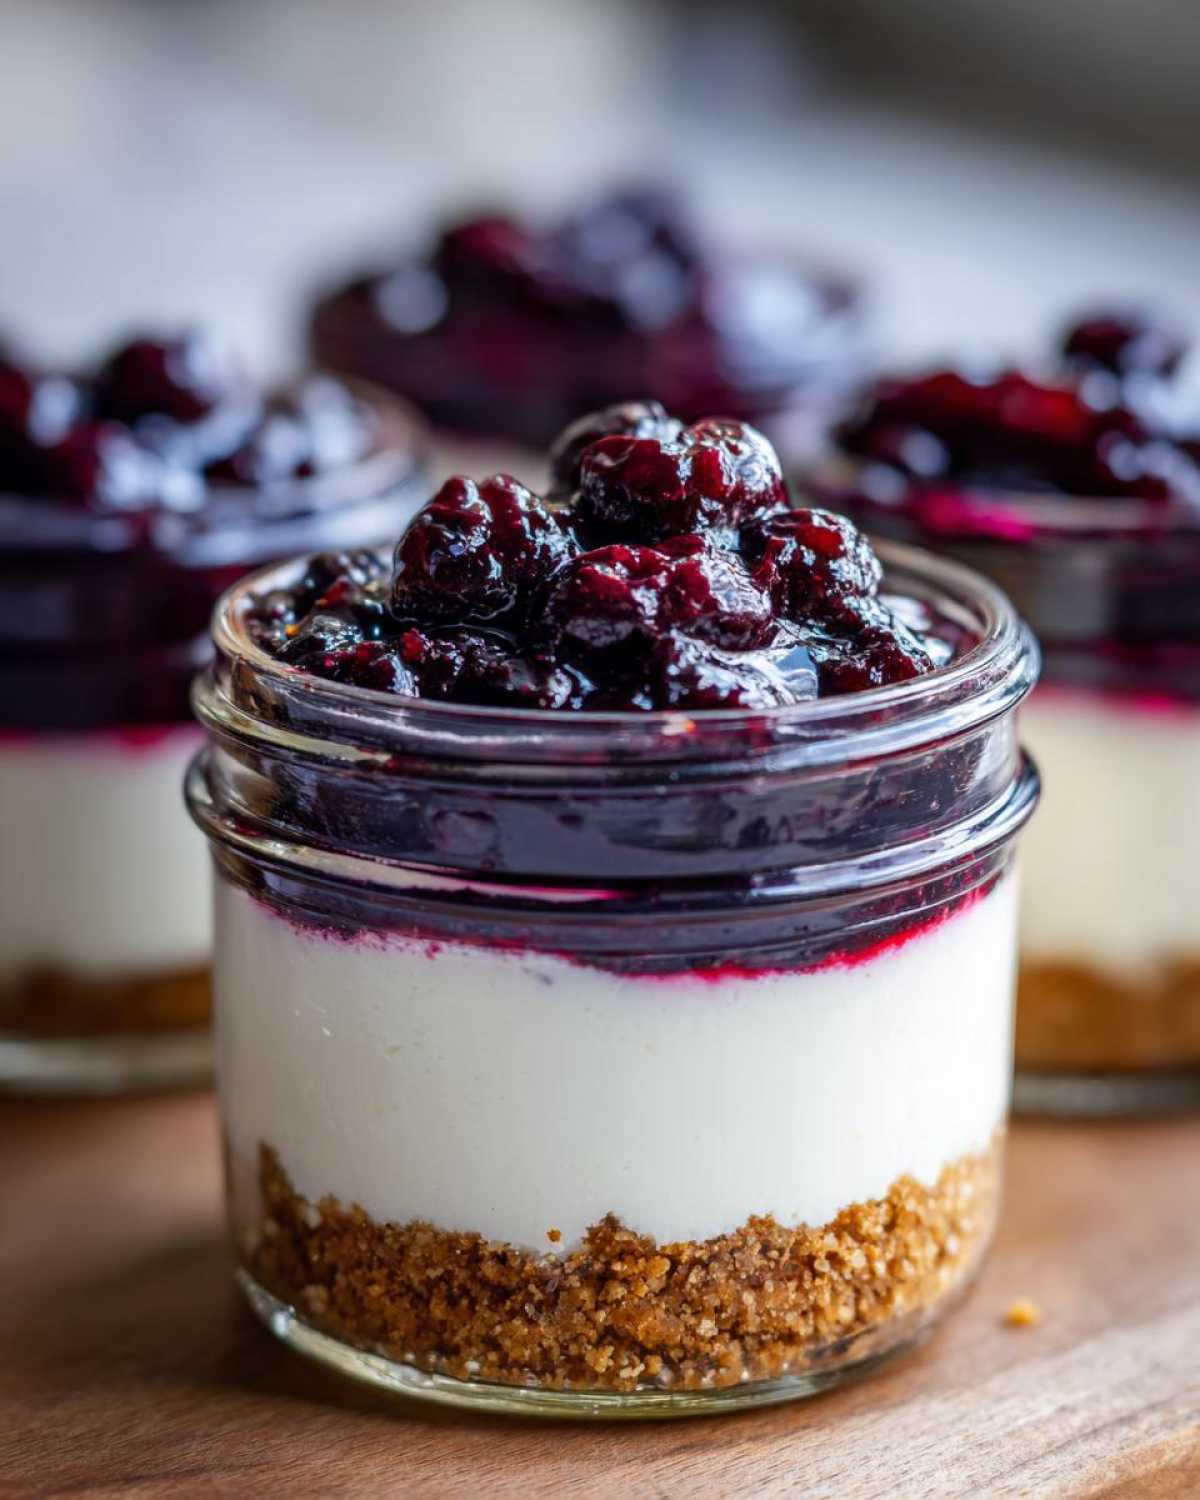
- Get that softened cream cheese into a big bowl. Beat it until it’s gloriously smooth; you don’t want even a tiny lump hiding in there. Trust me on this!
- Slowly incorporate that powdered sugar until everything is well mixed.
- In a separate, very clean bowl, whip up your heavy cream until you get soft peaks. This is key for making it feel airy, not dense like brick cement.
- Now, the crucial step: gently fold that whipped cream into the cream cheese mixture. I mean gently. You’re just trying to combine them, not deflate all those beautiful air bubbles we just worked to create.
- Finally, stir in your fresh lemon juice and zest until it’s just combined. Stop mixing the second it looks incorporated!
Assembling and Chilling the Lemon Blueberry Cheesecake Jars
We’re almost there! Time to put the whole puzzle together inside those beautiful Lemon Blueberry Cheesecake Jars. Remember, the blueberry topping needs to be cool before it hits the lemon filling, or you’ll just have a soupy mess.
- Take those chilled crust jars out. Spoon or pipe that wonderful lemon filling right over the crust layer. You want to fill them about two-thirds of the way up. Pop them back in the fridge while you tackle the fruit layer.
- For the blueberry topping, grab a small saucepan. Mix in your berries, the 2 tablespoons of granulated sugar, the cornstarch, and the water.
- Cook this mixture over medium heat. Keep stirring occasionally until you see it start to thicken up a bit—this usually only takes about 5 to 7 minutes. The berries will soften beautifully.
- Crucial step alert! Take the topping off the heat and let it cool completely. If you put warm topping on cold cheesecake filling, you melt the filling, and that’s just sad.
- Once that blueberry topping is nice and cool, spoon an even layer right over the top of the cheesecake filling in each jar.
- Cover them up! They need to chill for a minimum of 4 hours, but honestly, overnight those flavors really marry together, and the filling sets up perfectly firm.
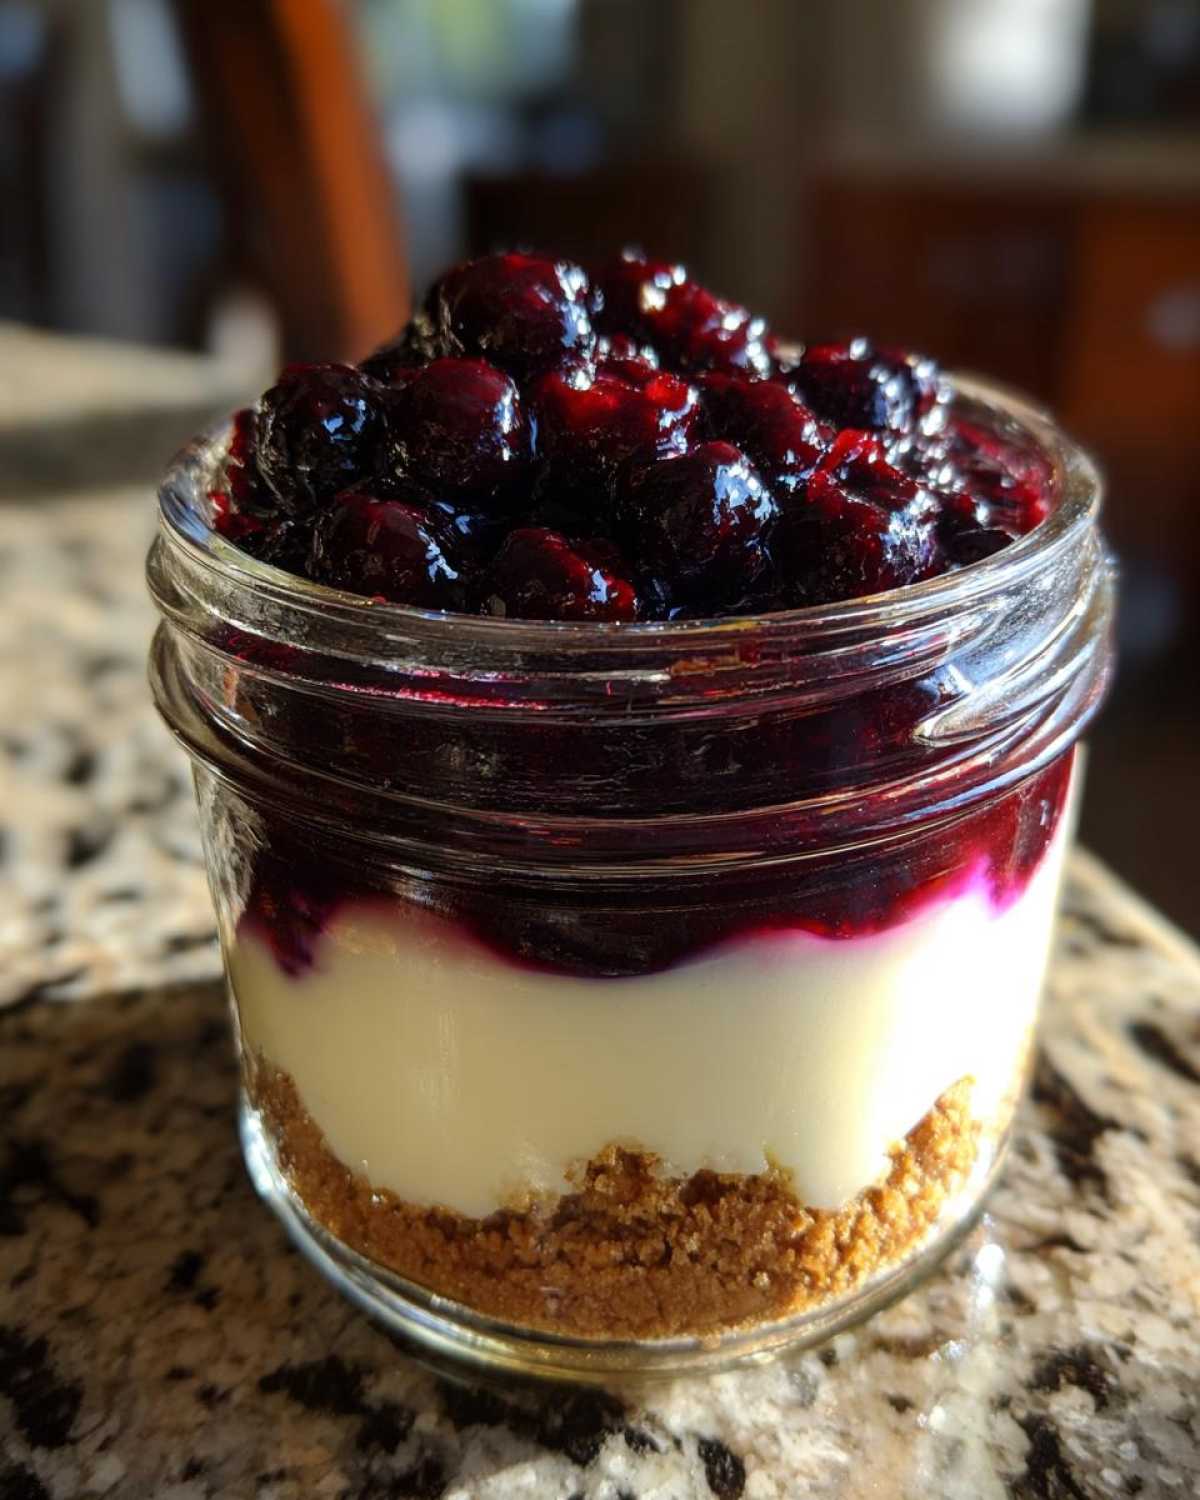
Tips for Success Making Your Lemon Blueberry Cheesecake Jars
Listen, even though these Lemon Blueberry Cheesecake Jars are no-bake, a few little tricks make the difference between good and *unforgettable*. I always lean on the notes my little recipe card gives me, but I’ve picked up a few personal habits along the way, too. You want that filling silky smooth and that topping glossy, right?
First off, those notes mention making the blueberry topping ahead of time—and please, do that if you can! If you make the topping the day before, just store it covered in the fridge. It cools down faster when you’re ready to assemble, and that means you’re not waiting around for everything to be perfectly chilled before layering.
Also, remember my advice about using fresh lemons? That really can’t be overstated for these Lemon Blueberry Cheesecake Jars. The zest from those bright yellow beauties has so much more intense oil and fragrance than older ones. You’ll get that wonderful, sharp citrus punch that cuts perfectly through the sweetness of the cream cheese.
Now, for my personal addition for presentation: piping the filling! If you want those beautiful, clean layers, don’t just spoon the filling in. Use a large piping bag fitted with a round tip (or just snip the corner off a sturdy Ziploc bag if you don’t have a bag handy). Piping the filling gives you such a clean edge right above the crumb line. It makes these Individual dessert jars look like they came straight from a fancy bakery display.
Lastly, don’t skimp on the chilling time! The recipe says 4 hours minimum, but if you can manage an overnight chill, do it. The texture on these Portion controlled cheesecake cups firms up beautifully, making them sturdy enough to handle even a bumpy ride if you take them outside.
Make Ahead & Storage for These No Bake Cheesecake Jars
One of the best things about these Make ahead desserts in a jar is that they are practically begging you to prepare them early! This is why they are my go-to for everything from backyard BBQs to packing up for a weekend trip. When you’re dealing with Picnic desserts no bake, advance planning is your best friend.
You can absolutely make the blueberry topping completely ahead of time. As I mentioned before, let it cool fully, then pop it into an airtight container in the fridge. It will thicken up even more as it chills, which is perfect. Then, you just have to worry about assembling the whole thing when you have a spare 20 minutes.
For the full assembly of the Lemon Blueberry Cheesecake Jars, I usually aim to get them layered and ready the day before we plan to eat them. The recipe calls for at least 4 hours of chilling time so the cream cheese mixture can set up firm, but honestly, 6 to 8 hours is even better. This gives the lemon flavor time to really deepen and meld with that sweet blueberry layer. If you wait until the last second, you might end up with a slightly softer filling, though it will still taste amazing!
When it comes to storage, keep those lids tight! If you’re planning to keep them refrigerated for just a day or two, the standard lid on the mason jar works perfectly fine. However, if you’re making these as future Picnic desserts no bake and want them to last longer, you have a couple of great options.
For up to 4 days, they keep beautifully in the fridge if you seal them well. If you want to freeze them—and yes, you can freeze no bake cheesecake jars!—you need to skip adding the blueberry topping first. Freeze the crust and the lemon filling layers only. When you’re ready to serve, thaw them overnight in the fridge, and then top them with that lovely, freshly made blueberry sauce. If you try to freeze them with the topping already on, that fruit layer might get a bit watery upon thawing. Trust me on separating the layers for freezing; it maintains the integrity of that creamy filling for the best possible experience!
Variations on Lemon Blueberry Cheesecake Jars
While I truly believe this exact recipe for Lemon Blueberry Cheesecake Jars hits that perfect sweet spot—bright citrus meeting sweet berries—I know we home cooks love to tinker, right? It’s fun to personalize things! The beauty of these is they are so versatile because we aren’t involving the oven, so we can swap out bases and toppings easily to keep them fresh.
If you happen to be someone who isn’t crazy about blueberries, or maybe they just aren’t in season, don’t worry! You can absolutely swap them out for other fantastic fruits. My immediate go-to switch is raspberries. I have a whole recipe for lemon raspberry cheesecake cups that uses the exact same methodology, just swapping that fruit topping. Raspberries give you a tarter bite that pairs just as wonderfully with that creamy lemon base.
You could easily use blackberries or even sliced, macerated strawberries if you have a huge haul from a summer patch. The key thing is that whatever fruit you choose, you treat it the same way: cook it down briefly with a tiny bit of sugar and cornstarch to make sure it’s thick enough to sit nicely on top without immediately sinking into the cheesecake layer. That topping needs that slight viscosity!
Speaking of the filling itself, if you find the lemon flavor just a *touch* too sharp on its own—maybe your lemons were incredibly strong that day—you can easily mellow it out by adding a splash of vanilla extract. Just half a teaspoon folded in during the last bit of mixing will give the Lemon Blueberry Cheesecake Jars filling a gorgeous depth. It adds this lovely, background warmth that makes the whole thing taste richer without taking away that essential citrus punch.
And finally, let’s talk about the bottom layer for a second. We love graham crackers, but sometimes I just don’t have them on hand. Don’t panic! You can totally use crushed vanilla wafers for a different flavor profile—they offer a softer, almost buttery sweetness that contrasts really nicely with the tart filling. Or, if you are feeling extra decadent, crushed gingersnap cookies make these Individual dessert jars spicy and amazing! Just treat them like the graham crumbs: mix with melted butter and press firmly into the bottom of your jar. Easy swaps mean you can make these anytime!
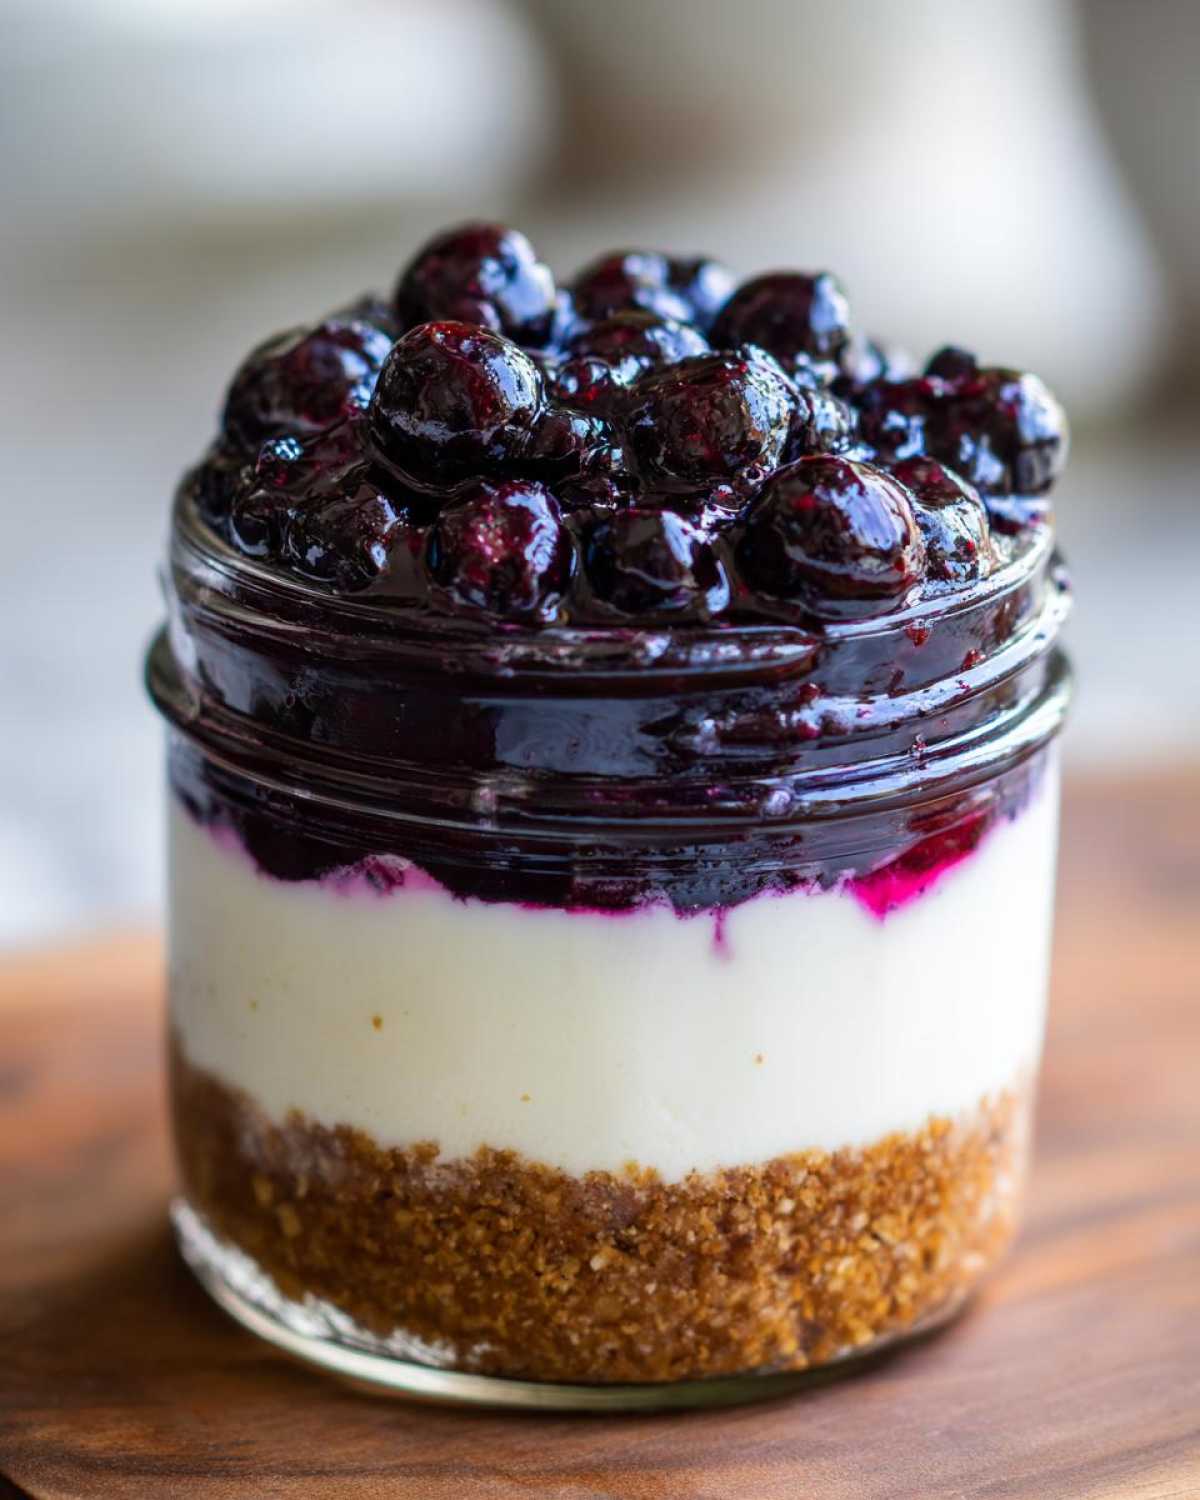
Serving Suggestions for Single Serve Desserts
So, you’ve got your beautiful Lemon Blueberry Cheesecake Jars chilling perfectly, ready to pull out for dessert. Now what? While honestly, these are phenomenal just eaten straight out of the jar with a spoon, sometimes you want that little extra *something* to elevate the moment, especially if you’re serving them to guests who maybe aren’t used to eating cake right out of a canning jar!
Because these are so bright and tart, they pair wonderfully with something warm and slightly bitter to balance that creaminess. A strong cup of French press coffee right after dinner is my absolute favorite pairing. The dark, robust flavor of the coffee is just the perfect counterpoint to that sweet, zesty lemon. Seriously, try it—it’s like a sophisticated little after-dinner moment in a cup.
If you’re serving these in the afternoon or for a light summer lunch, you want to keep the accompanying flavors equally light! I often put these Individual dessert jars out alongside a big, fresh fruit platter—nothing fancy, maybe some sliced melon or a bowl of perfectly ripe strawberries. It just reinforces that fresh summer vibe we went for with the blueberry topping.
Presentation is everything, even in a jar! Before you carry them to the table, take a second to add a little garnish. A single, vibrant mint sprig stuck right into the blueberry topping looks incredible. It adds a pop of green color that just screams ‘freshly made.’ It takes zero effort, but people always comment on it!
If you’re making these for a party buffet, skip the plates entirely! Just set them out on a nice wooden board with a small bowl of toasted slivered almonds nearby. People can sprinkle a few nuts on top right before digging in for an extra crunch. These Lemon Blueberry Cheesecake Jars are crowd-pleasers exactly as they are, but those tiny steps make them feel extra special!
Frequently Asked Questions About Lemon Blueberry Cheesecake Jars
I knew you’d have questions! When you make something as delicious and cute as these Lemon Blueberry Cheesecake Jars, people naturally want to know all the little details on swapping things out or storing them. I’ve gathered up the most common things I get asked about when people try this famous no-bake recipe for the first time. Don’t worry, these Mason jar cheesecakes are super forgiving!
Can I use frozen blueberries instead of fresh for the topping?
Oh, that’s a great question, especially if you’re making these off-season. Yes, you absolutely can use frozen blueberries, but you need to treat them slightly differently! If you use them frozen, you won’t need to add any extra water to the saucepan because they release tons of liquid as they thaw and cook down. I usually skip the added water entirely and might even let them thaw for about 10 minutes on the counter first. Just be aware that the final topping might be a little runnier than the one made with fresh berries, so let it cook down an extra minute or two just to be sure that cornstarch really does its job.
How long do these Lemon Blueberry Cheesecake Jars last in the fridge?
This is the fantastic part about making any Portion controlled cheesecake! Because everything is sealed away in those little jars, they stay so fresh. I always give them a 4-hour minimum chill time before serving, but for the best flavor marriage, I love them best when they’ve chilled for a full 24 hours. Stored tightly covered in the refrigerator, these Lemon Blueberry Cheesecake Jars will stay perfectly delicious and firm for up to 4 days. After day 4, the crust starts to soften up a bit too much for my liking, so aim to eat them within that window for peak experience!
Is there a way to make these citrus dessert jars lighter on calories?
I totally get wanting to enjoy these amazing Citrus dessert jars without feeling too guilty! You have a couple of good options here without sacrificing too much of that creamy texture. First, you can use light or Neufchâtel cream cheese instead of the full-fat block. It mixes up almost exactly the same! Second, you can certainly reduce the amount of powdered sugar slightly, maybe by down to 3/4 cup instead of a full cup. Another trick that works for these Lemon Blueberry Cheesecake Jars—though it impacts the texture a bit—is swapping out some of that heavy cream for Greek yogurt. If you do this, substitute half the heavy cream with plain Greek yogurt; this cuts down on fat and adds a slight tang, which frankly, I kinda love in a no bake cheesecake jar!
Nutritional Estimates for This Creamy Lemon Dessert
Now, I always tell people not to stress too much about the numbers when you’re making something this good, even if they are Portion controlled cheesecake servings. That said, it’s helpful to have a general idea of what you’re digging into since we are using full-fat cream cheese and butter.
These estimates are based on splitting all the ingredients perfectly across the four jars using standard measurements. You know how it goes in home cooking—if you use a bit more butter on your crust or a little extra topping, the macros might shift slightly. Consider these a fantastic guideline for your amazing Lemon Blueberry Cheesecake Jars!
- Serving Size: 1 jar
- Calories: 450
- Sugar: 35g
- Sodium: 210mg
- Fat: 30g
- Saturated Fat: 18g
- Unsaturated Fat: 12g
- Trans Fat: 0g
- Carbohydrates: 40g
- Fiber: 2g
- Protein: 8g
- Cholesterol: 95mg
See? Totally manageable for a treat! These creamy lemon desserts are worth every single spoonful. Eat with joy!
PrintNo-Bake Lemon Blueberry Cheesecake Jars
Prepare individual servings of creamy lemon cheesecake layered with a fresh blueberry topping in convenient jars.
- Prep Time: 25 min
- Cook Time: 7 min
- Total Time: 32 min
- Yield: 4 servings
- Category: Dessert
- Method: No Bake
- Cuisine: American
- Diet: Vegetarian
Ingredients
- 1 1/2 cups graham cracker crumbs
- 1/4 cup melted unsalted butter
- 16 ounces cream cheese, softened
- 1 cup powdered sugar
- 1/2 cup heavy whipping cream
- 1/4 cup fresh lemon juice
- 1 teaspoon lemon zest
- 1 cup fresh blueberries
- 2 tablespoons granulated sugar (for topping)
- 1 teaspoon cornstarch (for topping)
- 1 tablespoon water (for topping)
Instructions
- Combine graham cracker crumbs and melted butter. Press 2 tablespoons of the mixture into the bottom of four 8-ounce mason jars. Chill for 10 minutes.
- In a large bowl, beat the softened cream cheese until smooth. Gradually beat in the powdered sugar.
- In a separate bowl, whip the heavy cream until soft peaks form. Gently fold the whipped cream into the cream cheese mixture.
- Stir in the lemon juice and lemon zest until just combined.
- Spoon or pipe the cheesecake filling over the crust layer in each jar, filling them about two-thirds full. Return jars to the refrigerator while preparing the topping.
- For the blueberry topping, combine blueberries, granulated sugar, cornstarch, and water in a small saucepan.
- Cook over medium heat, stirring occasionally, until the mixture thickens slightly and the berries soften, about 5 to 7 minutes. Remove from heat and let cool completely.
- Once the topping is cool, spoon an even layer over the cheesecake filling in each jar.
- Chill the jars for at least 4 hours, or until firm, before serving.
Notes
- You can substitute vanilla wafers or shortbread cookies for the graham crackers if desired.
- Make the blueberry topping a day ahead for faster assembly.
- Use fresh, bright yellow lemons for the best zest and juice flavor.
Nutrition
- Serving Size: 1 jar
- Calories: 450
- Sugar: 35
- Sodium: 210
- Fat: 30
- Saturated Fat: 18
- Unsaturated Fat: 12
- Trans Fat: 0
- Carbohydrates: 40
- Fiber: 2
- Protein: 8
- Cholesterol: 95