

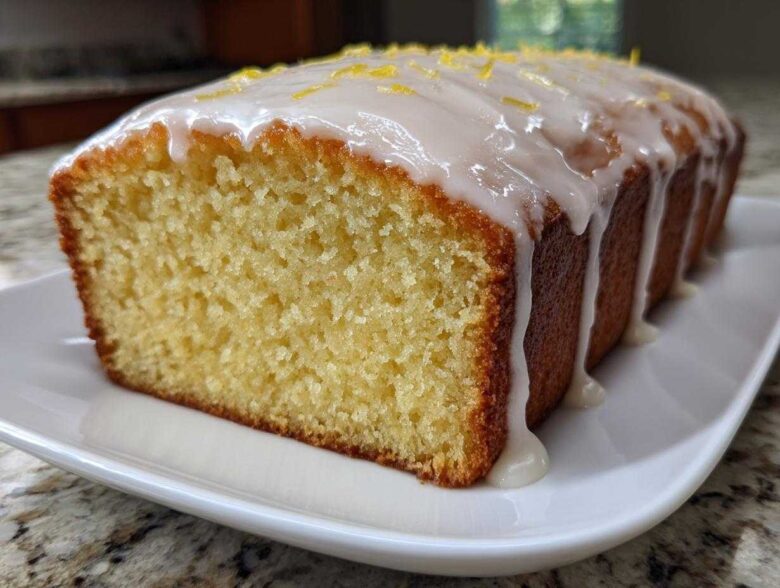
There is just nothing better than that first slice of truly perfect Lemon Loaf. I mean, the kind that makes you close your eyes? It has to be incredibly moist, shatteringly tender, and practically swimming in a bright, sugary drizzle. Forget those dry, sad versions you sometimes find; after years of testing and a few spectacular baking fails, I finally cracked the code for the ultimate, bakery-quality Lemon Loaf Cake.
This isn’t just another recipe; this is *the* one. We’re hitting that perfect balance of sweet and tart, and honestly, the simple act of rubbing lemon zest into the sugar gets me every single time. Trust me on this one—once you try this method, you’ll never go back to just dumping everything into a bowl! It’s the best, most reliable recipe I have, and I can’t wait for you to try it. If you love this approach, you should definitely check out my moist lemon pound cake too!
Why This Lemon Loaf Recipe Delivers the Best Results
When you’re aiming for that top-tier, bakery-style experience at home, it’s all about technique, not just ingredients. This specific method guarantees you get a tender crumb that stays soft for days. We skip the shortcuts because when it comes to flavor and texture, shortcuts just don’t pay off!
Here’s why you’ll love making this recipe—it’s fool-proof!
- It holds moisture brilliantly, meaning zero dry edges.
- The texture is fine and even, never crumbly or heavy.
- We maximize lemon impact without needing any artificial flavorings.
- It stays fresh longer, so you can bake it once and enjoy it all week!
If you’re serious about baking perfect quick breads, you need a reliable, repeatable result, and this Moist Lemon Loaf Recipe provides it every single time. Before you start mixing, take a peek at my lemon raspberry loaf variation for a fruity twist!
Achieving a Perfectly Moist Lemon Loaf
Moisture starts before the oven, honestly. The first huge secret is rubbing the lemon zest directly into the granulated sugar with your fingertips. This gentle friction releases those powerful oils right into the crystals, essentially perfuming every single grain of sugar. You’ll know you’ve done it right when your sugar bowl actually smells brightly lemony! Also, please don’t you dare overmix once the flour goes in! Stop stirring the second you see no more white streaks. That’s how you end up with a tough loaf instead of the tender crumb this Moist Lemon Loaf Recipe promises.
Intense Flavor: The Secret to Zesty Lemon Loaf Baking
I tried adding lemon extract once, thinking it would save time. Big mistake! Extracts are flat compared to the real deal. For this loaf, you absolutely need fresh lemons—not just for the juice, but for the zest. That bright, almost floral note that defines great baking comes straight from those tiny yellow shavings. Bottled juice is fine if you must, but the zest needs to be fresh for truly Zesty Lemon Loaf Baking. My goal here is a flavor punch that makes you pucker just a tiny bit before the sweet glaze balances it perfectly. That’s the goal!
Gathering Ingredients for Your From Scratch Lemon Loaf
Okay, now that we know *why* this recipe is going to work so well, let’s get organized! Nothing ruins baking momentum like scrambling for an ingredient halfway through. This list is straightforward, but the details matter—especially making sure that butter is properly softened!
When you grab your fresh lemons, remember what I said: we need maximum zest impact for that truly From Scratch Lemon Loaf flavor. If you need ideas for using up leftover lemons, maybe give my lemon garlic roasted potatoes a try sometime!
Ingredients for the Lemon Loaf Cake Batter
Make sure everything is measured out before you turn on the mixer!
- 1 3/4 cups all-purpose flour
- 1 1/2 teaspoons baking powder
- 1/2 teaspoon salt
- 1 cup granulated sugar
- Zest of 2 large lemons (don’t skip this!)
- 2 large eggs
- 1/2 cup unsalted butter, softened just right
- 1/2 cup whole milk
- 1/4 cup fresh lemon juice
- 1 teaspoon vanilla extract
Ingredients for the Perfect Lemon Glaze for Loaf
The glaze is simple but powerful. I usually start with two tablespoons of juice and taste as I go, depending on how tart my lemons were that day.
- 1 cup powdered sugar
- 2-3 tablespoons fresh lemon juice (adjust this!)
Step-by-Step Instructions for the Best Lemon Loaf Cake
This is where the magic happens! Don’t rush these steps, especially the creaming part, and you’ll have the lightest, fluffiest cake. If you’re looking for a deep dive on technique, check out my main guide on How to Make Lemon Loaf for more inspiration.
Preparing the Pan and Dry Ingredients
First things first: turn your oven on to 350°F (175°C). You need it nice and hot! Prep your standard 9×5 inch loaf pan—grease it, then dust it with a little flour so nothing sticks. Now for the flavor bomb: put the sugar in a big bowl and toss in all that glorious lemon zest. Mash them together with your hands until that sugar turns yellow and smells amazing. This action pushes the oils right out of the peel, which is critical for the flavor build!

Mixing the Batter: Avoiding Overmixing for a Tender Lemon Loaf
Next, beat that softened butter right into your lemon sugar until it looks pale and fluffy—this takes about three minutes and incorporates air. Add your eggs one at a time, making sure each one is fully incorporated before adding the next. In a separate small spot, briefly whisk your milk, lemon juice, and vanilla together. Now, alternate adding the dry ingredients (flour mix) and the wet ingredients (milk mix) to the butter mixture, always starting and ending with the dry part. Mix it gently! The moment you don’t see any more dry flour streaks, stop stirring. Seriously, stop! Overmixing at this stage equals a tough loaf.
Baking and Cooling the Loaf
Scrape that beautiful batter into your prepared pan and smooth the top. Pop it into the oven for 50 to 60 minutes. Around the 50-minute mark, start testing with a wooden skewer right in the center. When it comes out clean, you’re done! This is key to avoiding dry edges. Let the loaf hang out in the pan for 15 minutes—no longer—so it firms up slightly. After that small rest, flip it out gently onto a wire rack to cool down completely before you even think about glazing it. Patience pays off here!
Creating the Sweet Lemon Drizzle Bread Glaze
I swear, sometimes the glaze is my favorite part. A good lemon loaf isn’t truly finished until it has that thick, opaque drizzle running down the cracks. This part is so fast, but it needs your full attention for just sixty seconds to get the consistency exactly right. We want something that sets up nicely but still has that beautiful, slightly tart bite against the sweetness of the cake.
Once your loaf is totally cool—and I mean totally cool, otherwise the glaze melts right off—it’s time to mix this up. It’s incredibly simple. I usually blend the powdered sugar and the lemon juice right in a small bowl with a fork until it’s perfectly smooth. If the glaze looks too watery and runs right off the back of the fork, add a spoonful more powdered sugar. If it’s so thick you can barely stir it, add a tiny splash—seriously, just a few drops—of extra lemon juice.
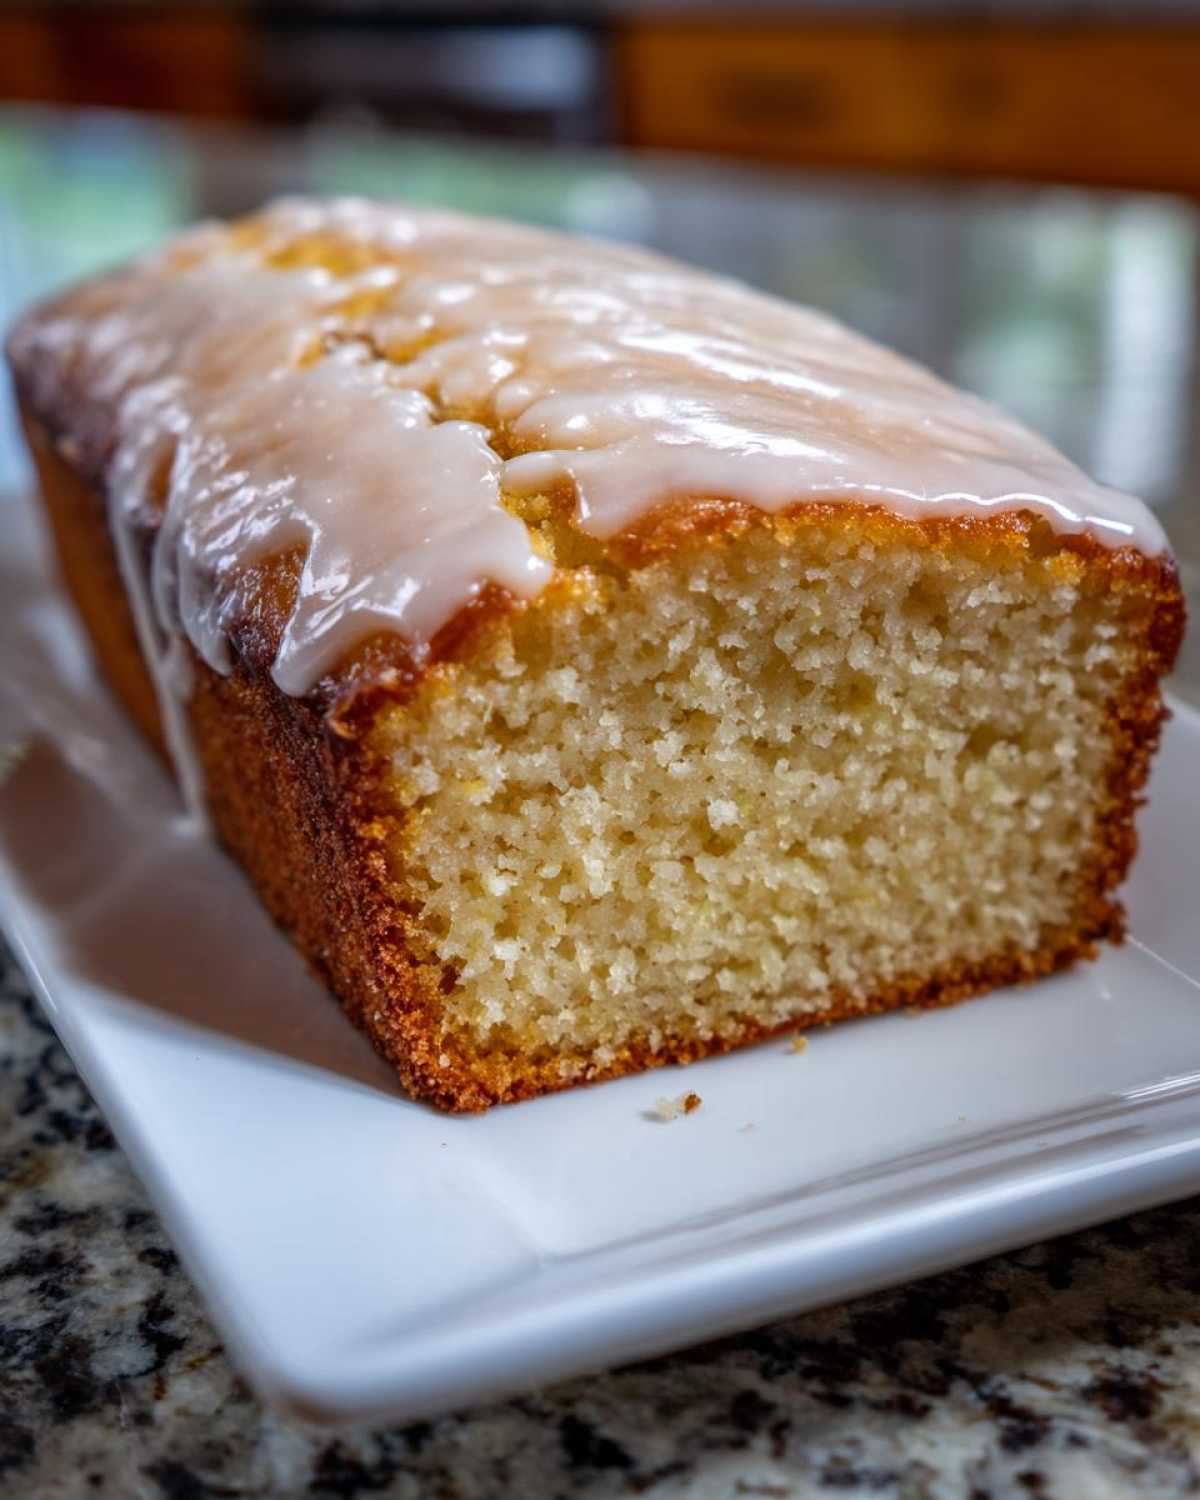
You are aiming for that perfect ribbon consistency so you get that classic, crinkly finish you see in bakeries. Don’t worry about perfection; some natural puddles are just part of the charm of a homemade Sweet Lemon Glazed Bread! Drizzle it generously over the top and then try your best to walk away for about thirty minutes to let it set up before slicing!
If you need a fallback for a lighter topping, sometimes I’ll just poke a few holes in the warm loaf and pour some of the lemon juice mix right over it—that soaks deep into the cake rather than just sitting on top. But for looks and that extra sugar hit, the official glaze wins every time! Speaking of other classics, if you ever need a frosting fix, my vanilla buttercream frosting is a winner.
Tips for a Bakery Style Lemon Loaf
Listen, wanting that perfect Bakery Style Lemon Loaf is admirable, but sometimes the oven has different plans, right? I’ve learned a few things over the years to make sure the loaf comes out looking respectable and tasting absolutely divine, even if the bake gods aren’t smiling on me.
We rely on a few key takeaways from the main recipe, but here are some extra tricks I use when I’m trying to impress people!
- Always use room temperature ingredients for the batter—it blends so much smoother!
- Don’t be afraid to use a bit of residual heat to help the glaze set perfectly.
- If you want that classic cracked top, make sure your oven is fully preheated, and try *not* to open the door during the first 40 minutes of baking.
- Proper wrapping is essential for keeping that moisture locked in after cooling!
This advice helps keep the integrity of the cake high, even when I’m rushing. If my cookies are struggling, I usually switch gears to this loaf recipe because it’s so much more forgiving! For more general baking wisdom, take a look at my thoughts on best soft chewy chocolate chip cookies.
Troubleshooting Common Lemon Loaf Issues
Every baker deals with issues, so let’s talk about what to do when things go slightly sideways. The most common issues are a sunken center or a loaf that comes out too dry.
If your loaf looks done but you are worried about dryness, that’s why we check early! Don’t wait until 60 minutes if the skewer comes out clean at 50 minutes. Pull it then! That little bit of extra baking time is what turns moist into crumbly. If you pull it out and it still looks wet in the middle, cover the top loosely with foil—this protects the crust from burning while the center finishes up. It’s a balancing act, honestly.
If your loaf sinks dramatically in the middle after cooling? That usually means one of two things: either not enough fat or leavening agent, *or* you opened the oven door too early and let all that lovely heat escape. We learned from the recipe notes that checking too early—or pulling it too soon—is the enemy of a perfect rise. Stick to checking around the 50-minute mark, trust your ingredients, and you should be fine!
Storage and Reheating Instructions for Your Lemon Loaf
I always hope everyone wants seconds immediately, but let’s be real—sometimes you can’t devour the entire loaf in one sitting (though I certainly try!). Storing this Lemon Loaf correctly is crucial because that perfect moisture we worked so hard to achieve can disappear if you aren’t careful about the wrapping.
The good news is that this cake freezes beautifully, unlike some lighter sponges. But for daily snacking, room temperature is best. If you’re keeping it on the counter, you must wrap it tightly. I actually prefer to wrap slices individually in plastic wrap and then put those wrapped slices into a large zip-top bag. This traps the moisture right against the crumb and keeps that beautiful glaze from getting sticky on everything else.
Based on my experience and the notes, it lasts up to three days stored this way at room temperature. If you need to keep it longer, wrap the entire, uncut loaf tightly in plastic wrap, then wrap it again in foil before tucking it into the freezer. It freezes well for about a month! When you decide to thaw it out, just let it sit on the counter, still wrapped, for a few hours. It thaws beautifully with almost no change to the texture.
If you happen to store it a bit too long and it seems just a touch dry, don’t panic! A quick reheat of a slice in the microwave for 10 seconds—or even better, a quick toast—revives it wonderfully. If you’re looking for other great textures, you have to see how I keep my moist date nut bread fresh!
Variations on the Classic Lemon Loaf
While this recipe is my absolute favorite—the quintessential, bright, zesty masterpiece—sometimes you just need a little tweak, right? That’s the joy of baking from scratch! You can keep the incredible moist base we developed but easily swap in some extra textures or flavors to keep things interesting. I promise, the structure will hold up beautifully with these small changes.
My family always demands poppy seeds because that tiny crunch adds so much excitement to every bite of Lemon Loaf with Poppy Seeds. But feel free to get creative with other additions too!
Adding Texture with Poppy Seeds
If you want to instantly elevate this into something that screams ‘gourmet bakery’ without much effort, poppy seeds are your answer. They don’t alter the moisture content much, but they give you that wonderful little textural surprise. You’ll want about two tablespoons of poppy seeds.
Here’s the professional trick, though: Never toss dry poppy seeds directly into the batter! They tend to clump up or just sink straight to the bottom of the pan. Instead, toss those two tablespoons of seeds with about one teaspoon of flour first—just enough to coat them slightly. Then, fold them gently into the finished batter right before you pour it into the pan. This keeps them suspended evenly throughout your beautiful loaf.
Swapping Citrus Notes
If you run out of lemons or just want a change of pace, this recipe is very friendly to other citrus fruits. Oranges are a fantastic partner to lemon; you can substitute the zest of one lemon for the zest of one orange, if you like. The orange keeps things bright but adds a warmer, sweeter undertone that’s just lovely.
For an extra zing, try substituting half of the lemon juice (about two tablespoons) in the batter and the glaze with fresh lime juice. Lime and lemon are best friends, and this combination is fantastic for a “key lime” twist on our traditional loaf. Remember, use fresh juice here too—we are sticking to quality flavoring!
If you’re looking for another flavor profile using similar techniques, you absolutely have to try my lemon raspberry loaf cake recipe. It uses the same logic for moisture but brings in that gorgeous tart berry flavor!
Frequently Asked Questions About Making Lemon Loaf
I know that even with the best recipe, sometimes you have nagging little questions before you start, or maybe you run into an unexpected issue while baking! That’s totally normal. I’ve gathered some of the most common things folks ask me about making this classic Lemon Loaf so you can bake with total confidence. If you’re looking for even more basic instructions, check out my guide on Easy Lemon Drizzle Bread!
Can I substitute the butter in this Lemon Loaf Recipe?
Oh, I get this one a lot! Butter is my preference because it adds a richness and helps structure the cake crumb in a way that oil just can’t replicate. Remember how we talked about rubbing the zest into the sugar? That only works perfectly with softened butter. If you absolutely must swap it for an oil—like vegetable or canola—you can generally substitute it 1:1, but the texture will be slightly different. It often results in a loaf that feels a bit more oily or less structurally tender. For the very best results, stick to the soft butter!
What is the best pan size for this Lemon Loaf?
For this exact recipe yield, I found the standard 9×5 inch loaf pan to be perfect. That depth allows the heat to penetrate correctly, giving you that lovely dome shape and ensuring the edges don’t overbake while the center cooks through. The baking time listed (50 to 60 minutes) is based on that size. Now, if you want to turn it into an Easy Lemon Drizzle Bread served individually, you can absolutely divide this into a 12-cup muffin tin! Just watch them closely, because they bake much faster—usually done in about 20 to 25 minutes. You really have to keep an eye on those!
Can I use bottled lemon juice instead of fresh?
You certainly *can*, but be warned: the flavor won’t be nearly as bright or vibrant! I highly recommend fresh juice for both the batter and the glaze. Bottled juice often has less intense acidity, and that sharp “zing” is what cuts through the sugar and makes this such a craveable cake. If you only have bottled juice, you might want to ramp up the amount of fresh lemon *zest* you use in the batter to try and compensate for the flatter juice flavor.
How do I ensure my glaze isn’t too thin or too thick?
This is purely preference, but the key is gradual addition! When mixing the powdered sugar and lemon juice, always start with less liquid than you think you need. You can always thin a glaze out, but if you make it too thin chasing that perfect drizzle consistency, you’ll end up with a clear, sugary coating instead of an opaque white one. Start with two tablespoons of juice for a cup of sugar, whisk it well, and only add more juice one tiny teaspoon at a time until it drizzles beautifully but still holds its shape slightly on the cooling loaf. That way you get that picture-perfect look for your Sweet Lemon Glazed Bread.
Nutritional Information Estimate for This Lemon Loaf Cake
Okay, so while my priority is always making sure this Lemon Loaf tastes like pure sunshine, I know some of you are curious about the numbers behind the sweetness. I took the liberty of running the primary ingredients through a calculator to give you a general idea of what a standard slice contains.
But here’s my honest disclaimer before you dive in: these are just estimates! How much butter you use, which brand of flour, or how much glaze *actually* ends up on the final product will change these numbers slightly. Think of this as a helpful guide rather than strict science!
These totals are based on dividing the entire recipe evenly into 10 servings.
- Serving Size: 1 slice
- Calories: 310
- Sugar: 35g (Yes, it’s a treat, but that’s where the flavor comes from!)
- Fat: 14g
- Saturated Fat: 8g
- Carbohydrates: 44g
- Protein: 4g
- Cholesterol: 55mg
- Sodium: 180mg
It’s important to remember that we are making a moist, rich cake here, not a diet snack. Enjoy that perfect slice! If you’re looking for something slightly lighter next time you bake, maybe try swapping in some of the whole-wheat options in my lemon pound cake post!
PrintClassic Moist Lemon Loaf with Zesty Glaze

A reliable recipe for a tender, moist lemon loaf cake featuring intense lemon flavor from fresh zest and a bright, sweet lemon drizzle.
- Prep Time: 15 min
- Cook Time: 55 min
- Total Time: 70 min
- Yield: 1 loaf (about 10 servings)
- Category: Dessert
- Method: Baking
- Cuisine: American
- Diet: Vegetarian
Ingredients
- 1 3/4 cups all-purpose flour
- 1 1/2 teaspoons baking powder
- 1/2 teaspoon salt
- 1 cup granulated sugar
- Zest of 2 large lemons
- 2 large eggs
- 1/2 cup unsalted butter, softened
- 1/2 cup whole milk
- 1/4 cup fresh lemon juice
- 1 teaspoon vanilla extract
- For the Glaze: 1 cup powdered sugar
- For the Glaze: 2-3 tablespoons fresh lemon juice
Instructions
- Preheat your oven to 350°F (175°C). Grease and flour a standard 9×5 inch loaf pan.
- In a medium bowl, whisk together the flour, baking powder, and salt. Set aside.
- In a large bowl, rub the lemon zest into the granulated sugar with your fingers until the sugar is fragrant and moist.
- Add the softened butter to the lemon sugar and beat with an electric mixer until light and fluffy, about 3 minutes.
- Beat in the eggs one at a time, mixing well after each addition.
- In a small bowl, whisk together the milk, lemon juice, and vanilla extract.
- Alternately add the dry ingredients and the wet ingredients to the butter mixture, beginning and ending with the dry ingredients. Mix only until just combined; do not overmix.
- Pour the batter into the prepared loaf pan.
- Bake for 50 to 60 minutes, or until a wooden skewer inserted into the center comes out clean.
- Let the loaf cool in the pan for 15 minutes before inverting it onto a wire rack to cool completely.
- While the loaf cools, prepare the glaze: Whisk the powdered sugar and lemon juice together until smooth. Add more juice slowly if the glaze is too thick, or more sugar if it is too thin.
- Drizzle the glaze evenly over the cooled loaf. Allow the glaze to set before slicing and serving.
Notes
- For an extra moist crumb, do not overbake. Check for doneness at 50 minutes.
- If you prefer a stronger lemon flavor in the cake itself, add 1 teaspoon of lemon extract along with the vanilla.
- Store leftover loaf tightly wrapped at room temperature for up to 3 days.
Nutrition
- Serving Size: 1 slice
- Calories: 310
- Sugar: 35g
- Sodium: 180mg
- Fat: 14g
- Saturated Fat: 8g
- Unsaturated Fat: 6g
- Trans Fat: 0.3g
- Carbohydrates: 44g
- Fiber: 1g
- Protein: 4g
- Cholesterol: 55mg