

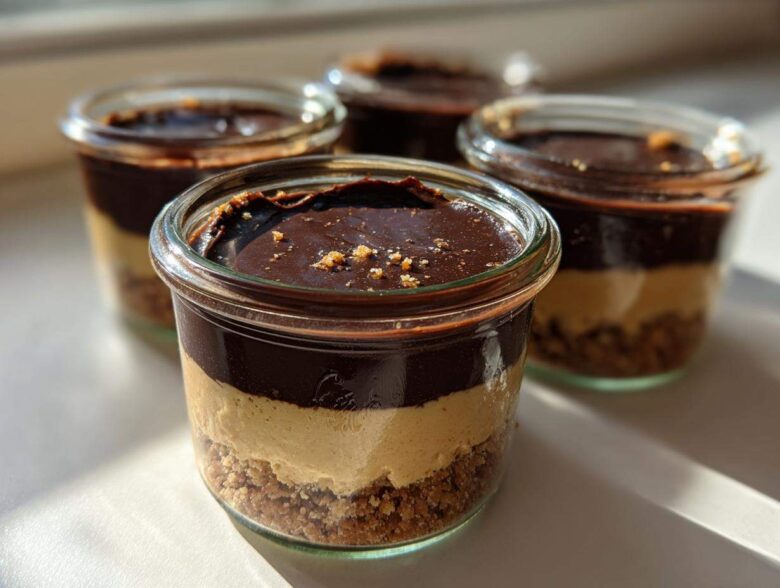
Oh my gosh, are you having one of those nights where you just need something totally decadent but the thought of turning on the oven makes you break out in a cold sweat? Trust me, I know that feeling! When the chocolate and peanut butter craving hits hard, I skip the oven entirely. My absolute favorite save-the-day dessert? These amazing No-Bake Chocolate Peanut Butter Pie Jars.
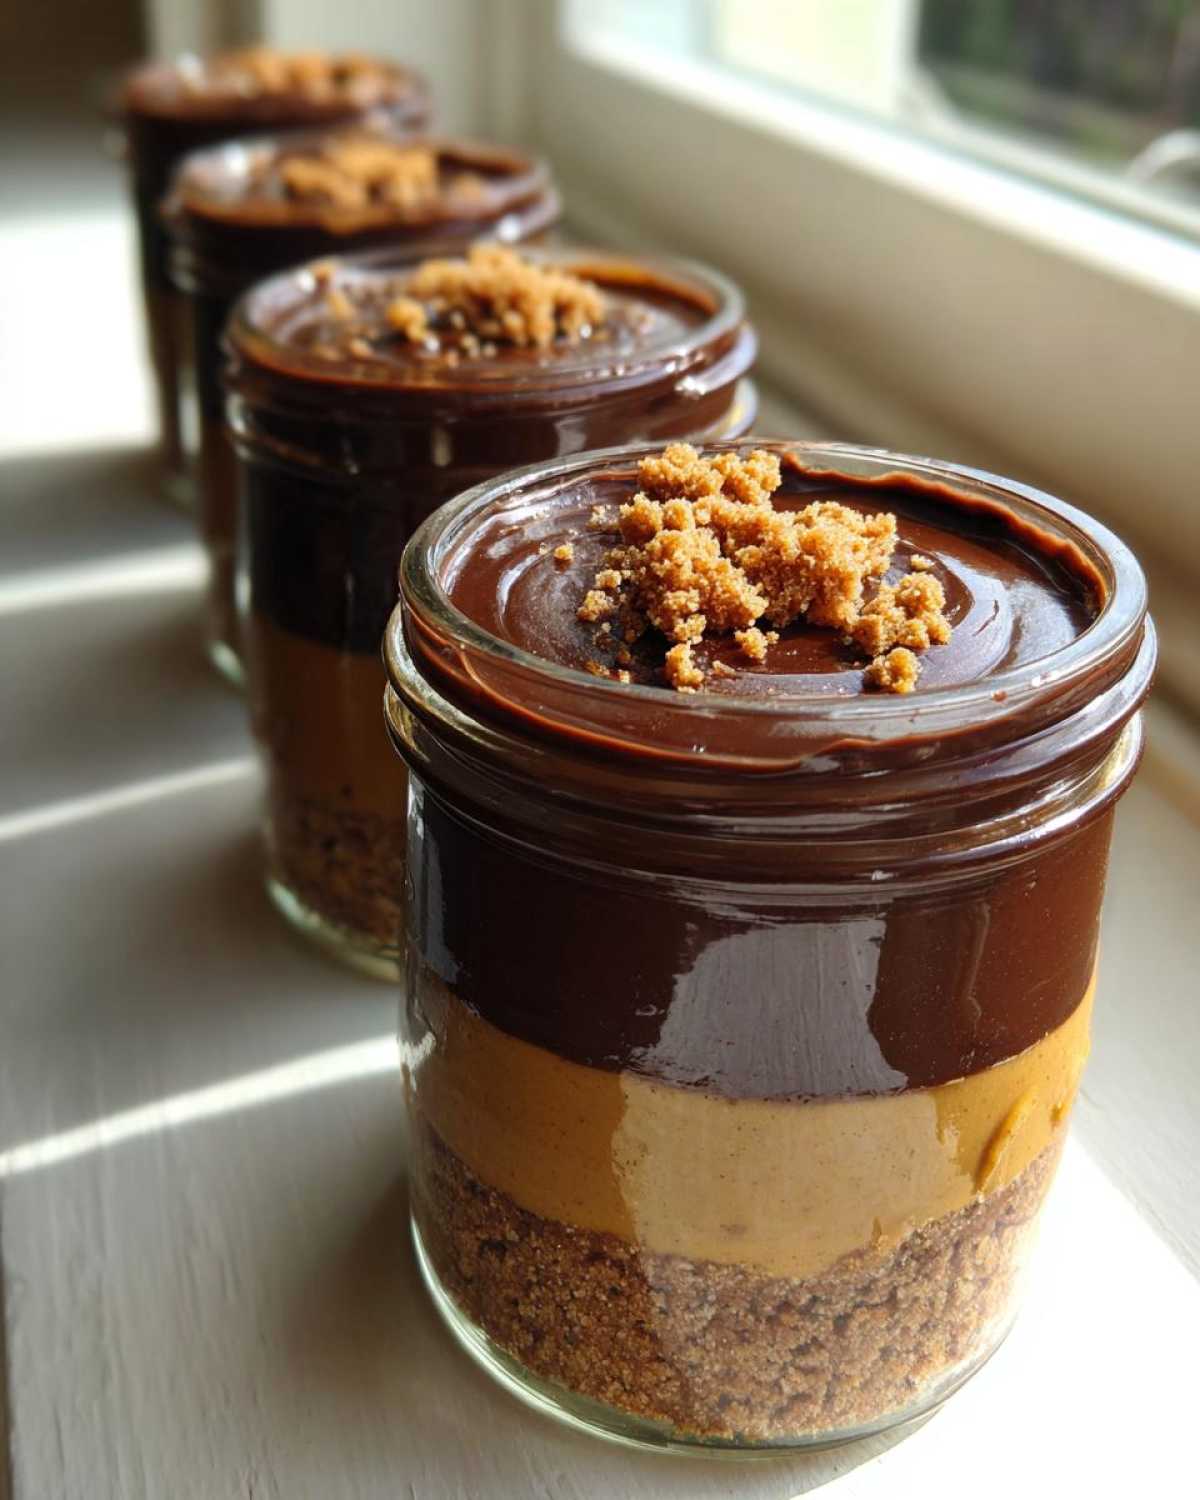
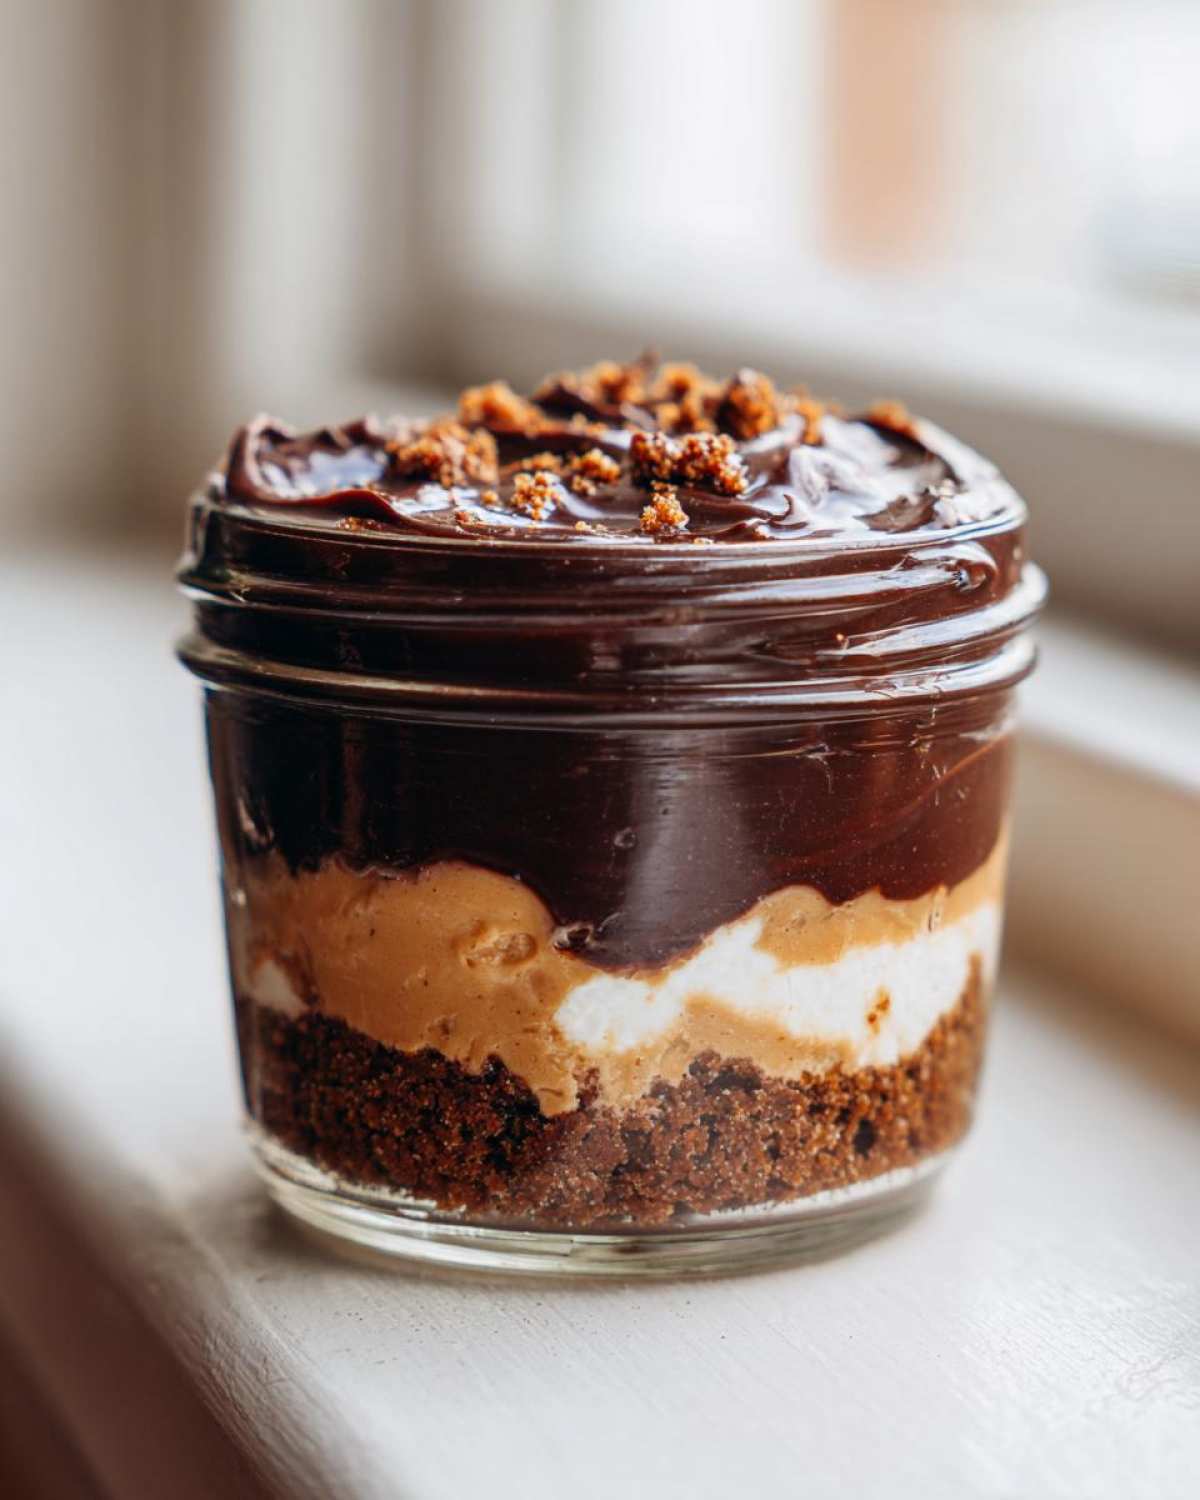
Seriously, these are magic in a jar. We’re talking about perfectly portioned, rich, creamy layers of crushed graham cracker crust, smooth peanut butter fluff, and a luxurious chocolate topping. I keep the ingredients on hand all the time because they come together so fast, and they are my go-to for unexpected guests, or honestly, just me on a Tuesday. You should totally check out my no-bake chocolate peanut butter lasagna recipe if you want to try a full pan version later!
They look fancy, they taste like pure indulgence, and the cleanup is practically nonexistent. I recently made a batch for a neighbor who had a rough week, and they were raving about how perfectly layered and satisfying each single serving was. If you want the ultimate, fuss-free, double-chocolate peanut butter hit, you have come to the right place. Get ready for the best No-Bake Chocolate Peanut Butter Pie Jars you’ve ever scooped!
Why You Will Love These No-Bake Chocolate Peanut Butter Pie Jars
Honestly, what’s not to love? These little jars solve so many dessert dilemmas. Forget scrubbing a sticky pie plate later! Here are the top reasons I think you need to make these immediately:
- Zero Oven Time: This is huge for me in the summer! You get all the decadence of a heavy pie without heating up the whole kitchen.
- Perfect Portion Controlled No Bake Treat: Everyone gets their own serving, beautifully layered. No messy slicing needed, which keeps the layers looking pristine until the last minute.
- Ultimate Make Ahead Jar Desserts: I often make these the day before a gathering, and they just taste better after a long chill. They are perfect set-it-and-forget-it party food.
- Texture Heaven: You get that salty, crunchy graham crack underneath, followed by the impossibly smooth peanut butter filling, topped with silky chocolate. It’s a flavor and texture party in every spoonful.
- Quick Assembly: Even with the chilling time, the actual hands-on time is super fast—maybe 20 minutes tops to build all four jars!
They satisfy that huge chocolate-peanut butter craving without any fuss, which is why they’ve become a staple around my house.
Gathering Ingredients for Your No-Bake Chocolate Peanut Butter Pie Jars
Okay, let’s get down to business! Since we aren’t baking anything, the quality of your ingredients really shines through here, especially in that filling. I always make sure my cream cheese is totally softened—take it out like an hour before you start! Nobody wants lumpy peanut butter filling, trust me. For that smooth texture, always use full-fat cream cheese; the low-fat stuff just doesn’t whip up nearly as luscious, and we need this pie to be decadent! You can find some other great peanut butter treats right over here at my easy peanut butter cookie recipe, but for these jars, you need these specific items.
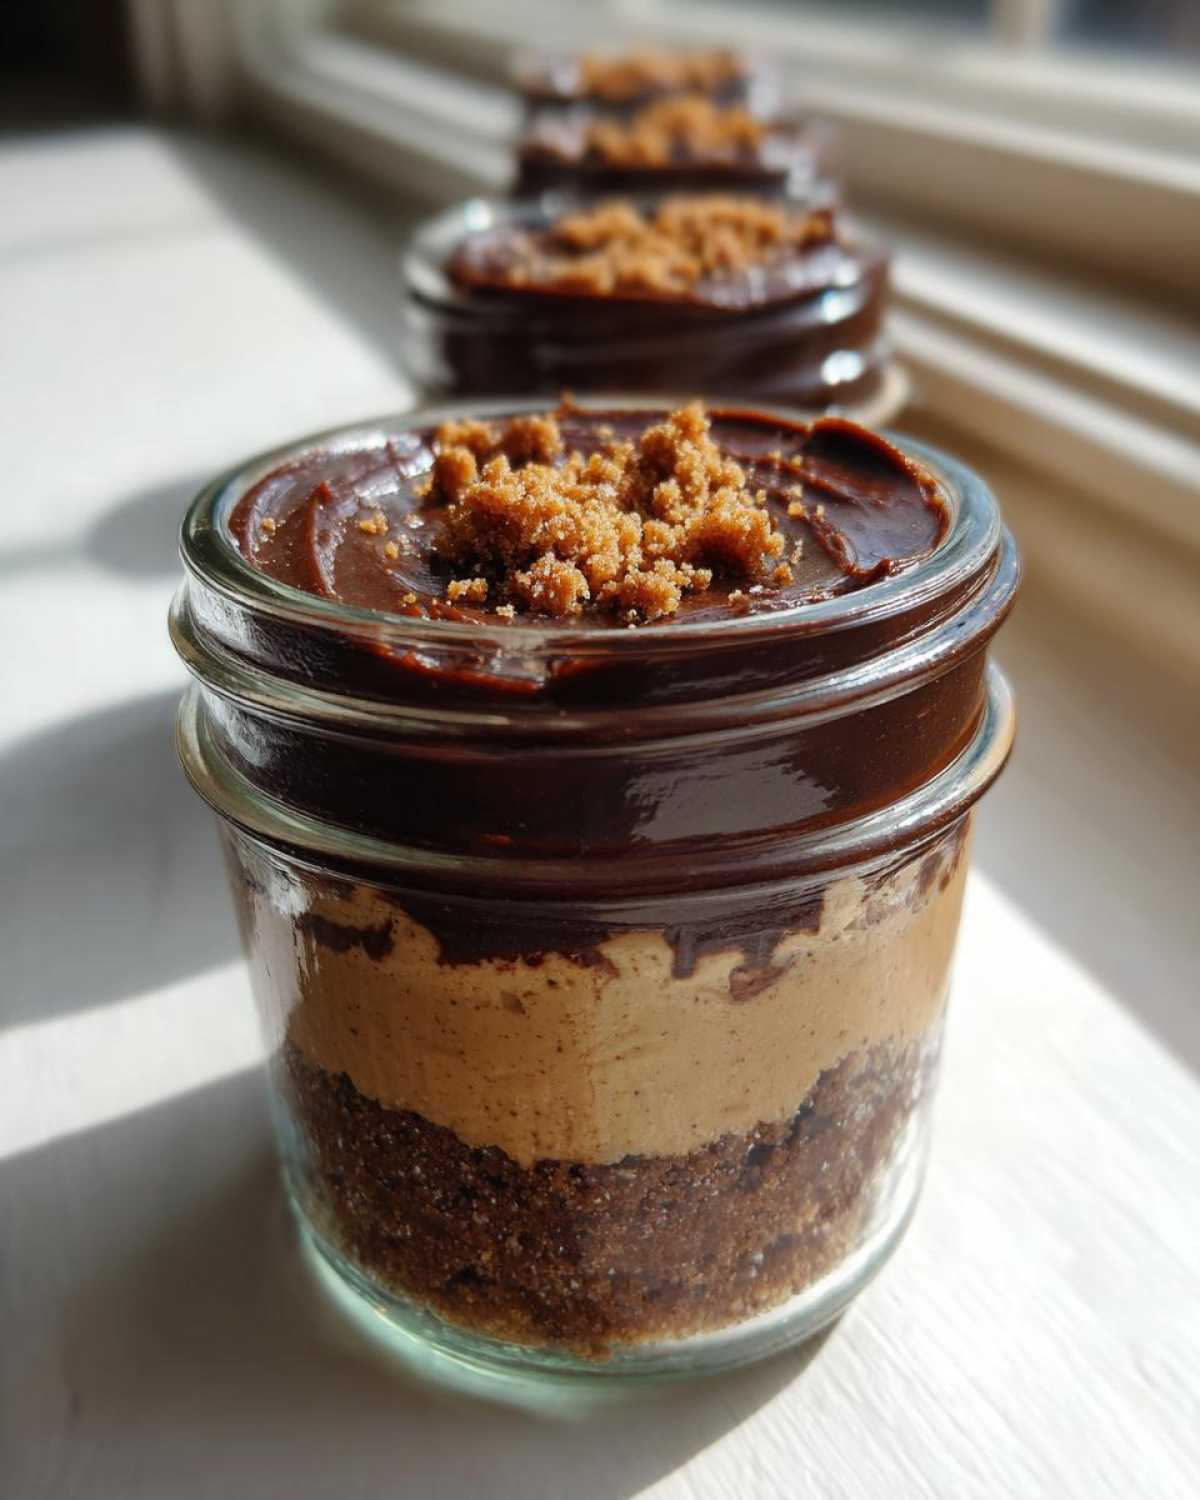
Don’t be shy with the chocolate chips, either! I usually use Ghirardelli or Hershey’s because they melt so beautifully smooth when hit with hot cream.
For the Graham Cracker Crust
- 1 1/2 cups graham cracker crumbs (about 1 sleeve crushed up, but measure after crushing!)
- 1/4 cup melted unsalted butter
For the Creamy Peanut Butter Filling
- 1 cup creamy peanut butter (Jif or Skippy works perfectly here—don’t get the natural kind unless you love stirring in sugar!)
- 8 ounces cream cheese, softened
- 1 cup powdered sugar (sifted is best!)
- 1/2 cup heavy whipping cream
- 1 teaspoon vanilla extract
For the Rich Chocolate Topping and Garnish
- 1 cup semi-sweet chocolate chips
- 1/2 cup heavy whipping cream (for ganache)
- Whipped cream, for topping (from a can or freshly whipped)
- Peanut butter chips, for garnish (optional, but so cute!)
Expert Tips for Perfect Layered Chocolate Peanut Butter Jars
Listen, anyone can dump stuff into a jar, but if you want those perfectly defined layers that scream “I actually tried hard on this!”—even though you didn’t—you need a few little tricks up your sleeve. These tips are crucial for achieving that stunning look in your Layered Chocolate Peanut Butter Jars.
First, temperature control is your best friend. When you make that peanut butter layer, you need everything cold before you put the next layer down. If the crust isn’t chilled for those ten minutes, the peanut butter filling warms it up, and it just sorta melts together into a murky brown mess instead of keeping that nice defined line. Don’t skip the chill before the first layer goes in!
Next up is getting that amazing, Creamy Peanut Butter Filling consistency. You absolutely need the cream cheese to be room temperature, otherwise, you’ll end up fighting lumps the whole time. I use my hand mixer on medium-high, but I stop the second it’s combined and fluffy. Over-beating can sometimes incorporate too much air into fillings meant to be dense, and we want a sturdy layer that can hold up the chocolate on top!
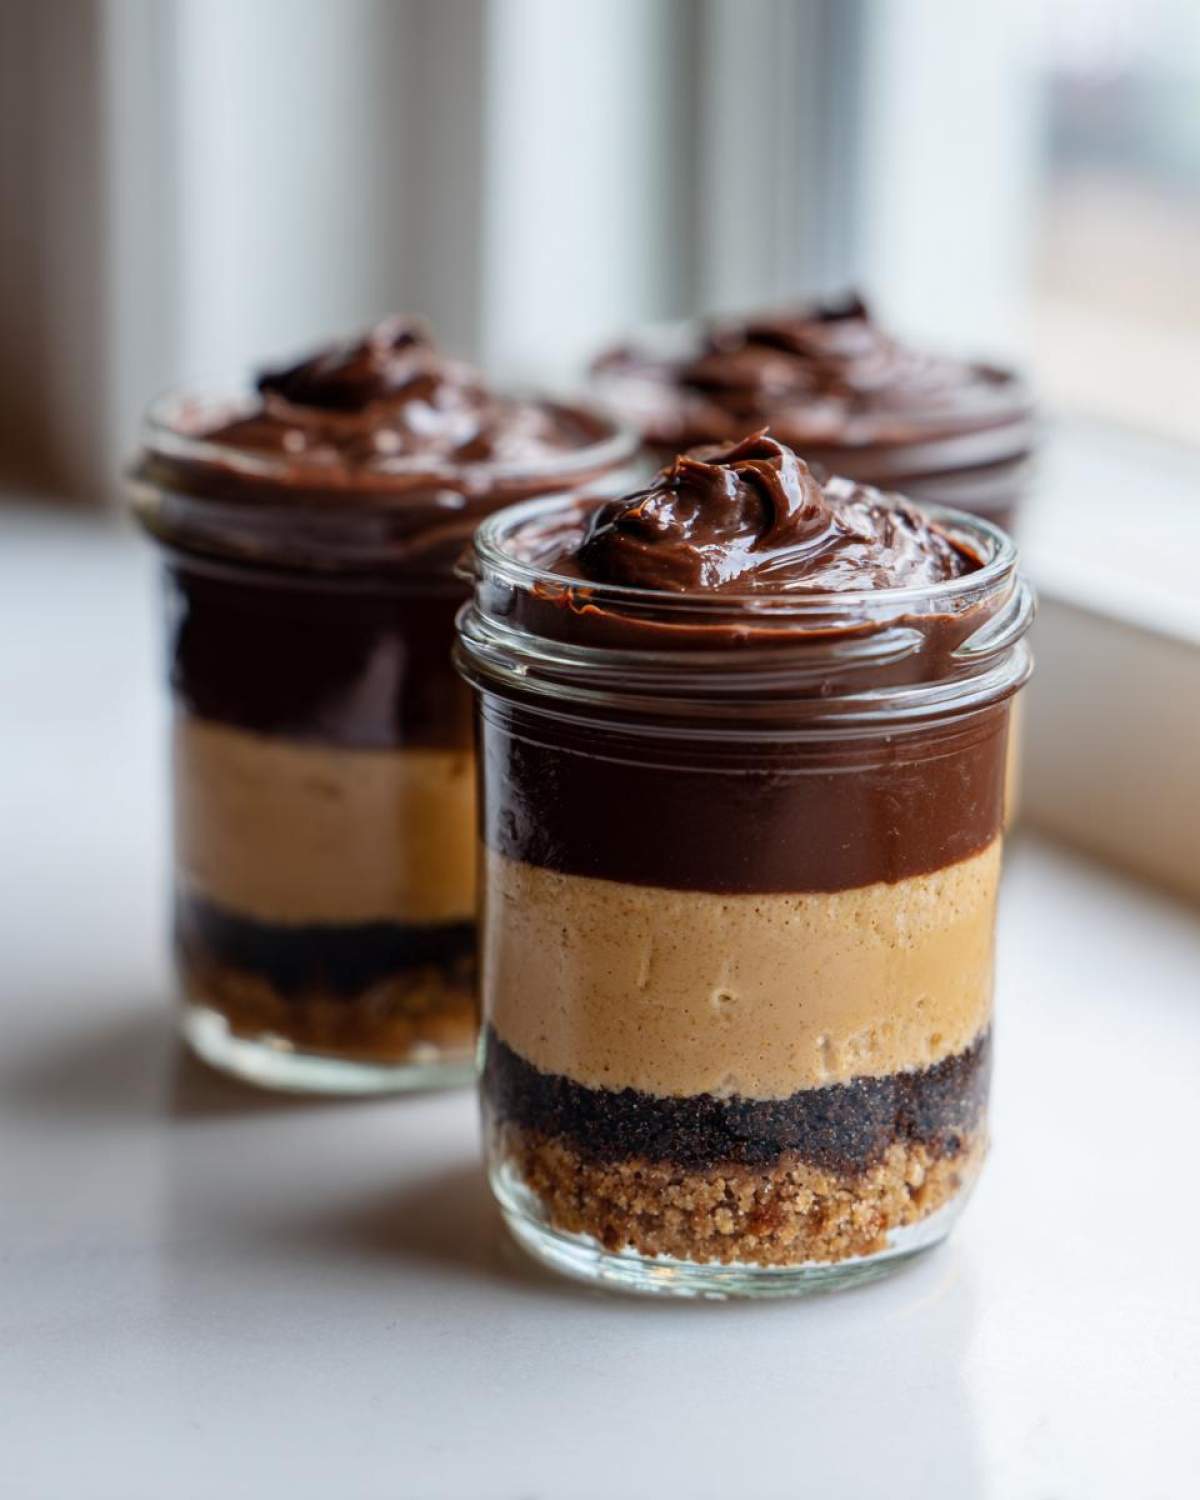
When you are moving between layers, make your life easier and use a piping bag for both the peanut butter and the chocolate. Sure, you can use a spoon, but a piping bag lets you start filling from the center and move outwards slowly. This prevents scraping the sides of the jar, which is the number one cause of smudged, uneven lines! Plus, if you’re making these for a party, piping is way faster than spooning carefully.
Finally, for the chocolate topping—this is where most people mess up. When you make that ganache, it’s supposed to be slightly runny at first. You MUST let it cool down for about 15 minutes on the counter before spooning it over the peanut butter layer. If it’s too hot, it will melt the beautiful peanut butter layer underneath. If you wait too long, it gets hard to spread evenly. After 15 minutes, it usually has that perfect, thick, slightly tacky texture that settles down beautifully. Don’t forget to check out my secret for making the best soft, chewy chocolate chip cookies—it’s all about knowing when to stop mixing!
Step-by-Step Instructions for No-Bake Chocolate Peanut Butter Pie Jars
Alright, this is where the magic really happens! Putting together these No-Bake Chocolate Peanut Butter Pie Jars is like building a delicious, edible skyscraper, one layer at a time. Don’t worry if you’re not a Martha Stewart; the key here is just following the order and letting the fridge do the heavy lifting. If you need an extra reference on technique for layered desserts, my guide to my no-bake Oreo pie goes into more detail about getting those layers sharp!
Preparing the No Bake Dessert in a Jar Crust Layer
First thing’s first—the base! You’re going to grab your graham cracker crumbs and that melted butter. Just toss them together in a small bowl and mix it up until it feels like wet sand. Now, you need four small jars ready to go. Drop about two heavy tablespoons of that buttery crumb mixture into the bottom of each jar. Use the back of a spoon or the bottom of a shot glass to press it down firmly until you have a nice, compact crust layer. This pressing step is vital for making sure it doesn’t just turn slushy when the filling goes on top. Once they are packed tight, rush them into the fridge—that ten minutes of chilling time is non-negotiable!
Creating the Creamy Peanut Butter Filling for Your Individual Peanut Butter Pies
While those cuties are chilling, let’s make the star of the show! Get your mixer out. You want that softened cream cheese, peanut butter, powdered sugar, the first half cup of heavy cream, and vanilla extract all together in one big bowl. Beat this mixture until it’s perfectly homogenous—smooth, light, and totally dreamy. Now, take those crusts out of the fridge. You need to divide half of this glorious peanut butter fluff evenly between the four jars, layering it right on top of the chilled crust. Don’t worry about making it perfect yet; we just want the bulk of it down. Back into the cold they go!
Making the Chocolate Ganache for Your No-Bake Chocolate Peanut Butter Pie Jars
This part is super satisfying! You’re making a quick ganache—it sounds fancy, but it’s so easy. Put your chocolate chips in a heatproof bowl. Heat up the remaining half cup of heavy cream on the stovetop until it’s just starting to bubble around the edges—you don’t want a rolling boil! Pour that hot cream right over those chips. Let it sit, and I mean sit, for five whole minutes without touching it. Patience! After the waiting game, whisk it gently until it’s one smooth, gorgeous chocolate pool. Crucially, let this ganache sit on the counter for about 15 minutes until it thickens up a bit; we don’t want it runny! Then, carefully spoon or pipe the thickened chocolate layer over the peanut butter layer in your No-Bake Chocolate Peanut Butter Pie Jars. That’s it for the main layers! Just a quick dollop of whipped cream and a few peanut butter chips on top, and they need at least two hours in the fridge to firmly set up before you can dig in.
Making Ahead and Storing Your No-Bake Chocolate Peanut Butter Pie Jars
One of the absolute best features of these make ahead jar desserts is how fantastic they are for prepping in advance. If you’re throwing a party, you can seriously assemble these entirely the day before, seal the lids on tight, and just let them hang out in the fridge. They keep beautifully, too!
Now, the peanut butter filling firms up nicely the longer they chill, which is great. My notes say they hold up really well for about three days in the refrigerator, which is incredible for something this rich. Just remember, if you top them with canned whipped cream before you store them, that cream might start weeping a little after day one. For the prettiest presentation, I usually just store the finished, un-topped jars, and add that fresh dollop of whipped cream and those little peanut butter chips right before I serve them!
Variations for Your Chocolate Peanut Butter Jar Recipe
Part of the fun of a great foundational recipe, even one as perfect as these Chocolate Peanut Butter Jar Recipes, is playing around with it, right? Once you master the basic layers—crust, peanut butter filling, chocolate topping—the sky’s the limit! I have a few little tweaks I use depending on what I have lying around or what mood I’m in.
First off, let’s talk crust. My grandma always said a crust should offer some textural contrast. If you get bored of graham crackers (which, how??), try swapping them out! My favorite alternative is Oreos, which I mentioned in the notes. Just scrape out the white filling first unless you want to make it super sweet. Crushed chocolate wafers work great too, especially if you want a deeper chocolate intensity throughout the whole thing.
If you are a die-hard coffee fan like me, you have to try adding espresso powder to the chocolate layer! I mentioned how good my chocolate chip pumpkin bars are, and that tiny hint of coffee just deepens the chocolate flavor immensely without making it taste like a mocha. Just mix about half a teaspoon of instant espresso powder right into your chocolate chips before you pour the hot cream over them. It wakes everything up!
For an extra textural pop in the peanut butter layer, sometimes I’ll gently fold in some chopped peanuts or those miniature peanut butter chips right before I layer it in the jar. You have to be very gentle so you don’t deflate the air you just whipped into it. It adds a little unexpected crunch that’s delicious!
And hey, if you’re feeling festive or want to use it as a dipping sauce for fruit, you can always use a mix of milk, semi-sweet, and dark chocolate chips for the ganache layer—just adjust the heavy cream slightly because different ratios of cocoa solids require different amounts of liquid to melt down smoothly!
Common Questions About Easy No Bake Jars
I get so many messages about these Easy No Bake Jars, which tells me everyone loves a quick win in the kitchen! People always ask the same few things, so let me tackle the big ones here. If you’re working with these Single Serving Peanut Butter Desserts for the first time, these answers should help you nail it!
Can I skip the initial chilling time for the crust?
Oh, please don’t! Seriously, skipping that short 10-minute chill for the crust is betting against yourself. Remember, that crust is held together with melted butter—if you put room temperature or slightly warm peanut butter filling on top of warm butter, the butter melts, the crumbs turn soggy, and you end up with sad, soupy layers instead of a nice, firm base for your No Bake Dessert in a Jar. Just pop them in the fridge while you mix the filling—patience pays off here!
I only have natural peanut butter; can this recipe still work?
That’s a great question, and here’s the honest truth: it’s tricky. Natural peanut butter is delicious, but because it separates, it doesn’t have the same stable fat content as the heavily stabilized commercial brands. If you use it, you’ll definitely need to whip in extra powdered sugar to compensate for the lost structure and sweetness, and you might want to add an extra ounce of cream cheese to keep those Individual Peanut Butter Pies creamy instead of grainy. For the best, most reliable texture, I really stick to the conventional brands for this specific recipe.
How can I make these jars vegan or dairy-free?
Okay, this requires a bit more commitment, but absolutely doable for amazing Quick Chocolate Desserts! You’ll need dairy-free graham crackers or use your favorite vegan cookie crumbs, and use coconut oil instead of butter for the crust binder. For the filling, swap the cream cheese for a block-style vegan cream cheese, use a good quality vegan butter stick instead of heavy cream in the filling, and use coconut cream (the thick part from a can of full-fat coconut milk chilled overnight) for whipping in the filling and for the chocolate ganache. It totally works, but it doesn’t taste exactly the same as the original rich version, just so you know!
Can I use different cookies instead of graham crackers for the base?
Yes, and this is one of my favorite swaps for these No-Bake Chocolate Peanut Butter Pie Jars! If you prefer something richer, use chocolate wafer cookies or Oreos—just make sure you scrape out the white filling if you use Oreos, unless you want a blindingly sweet layer. You’ll use the same amount of crumbs and melted butter. I find that using chocolate cookies makes the whole dessert feel even more indulgent, hitting that sweet spot for Single Serving Peanut Butter Desserts!
If you end up making a successful batch using one of these tweaks, I want to see it! You can always connect with me over on my social channels, or if you have a major technical question that this coverage didn’t answer, feel free to reach out via my contact page here!
Estimated Nutritional Overview for No Bake Dessert in a Jar
Just a quick heads-up before we move on! Since we aren’t baking, this recipe is fast, but goodness gracious, it is rich! This table breaks down my best estimate for the calories and macros in one of these gorgeous jars. Keep in mind that topping options (like using canned whipped cream versus homemade) can change these numbers slightly. As always with my recipes, these are estimates, and the exact numbers will depend on the brands of peanut butter and chocolate you decide to use for your No Bake Dessert in a Jar.
| Nutrient | Amount Per Serving |
|---|---|
| Calories | 650 |
| Sugar | 55g |
| Fat | 45g |
| Protein | 15g |
| Sodium | 350mg |
| Carbohydrates | 58g |
Share Your No-Bake Chocolate Peanut Butter Pie Jars Creations
I really hope you’re running to your pantry right now to pull out those graham crackers! These jars are designed to be gorgeous, easy, and super indulgent, and I absolutely love seeing the beautiful layers you all create at home. When you make these Easy No Bake Jars, snap a picture!
Tag me on social media; it honestly makes my day to see your beautiful presentations. If something went perfectly, or heck, if you had a little kitchen mishap you want to share, drop a rating on the recipe card below too! Your feedback helps everyone know how amazing these No-Bake Chocolate Peanut Butter Pie Jars truly are!
Estimated Nutritional Overview for No Bake Dessert in a Jar
Just a quick heads-up before we move on! Since we aren’t baking, this recipe is fast, but goodness gracious, it is rich! This table breaks down my best estimate for the calories and macros in one of these gorgeous jars. Keep in mind that topping options (like using canned whipped cream versus homemade) can change these numbers slightly. As always with my recipes, these are estimates, and the exact numbers will depend on the brands of peanut butter and chocolate you decide to use for your No Bake Dessert in a Jar.
| Nutrient | Amount Per Serving |
|---|---|
| Calories | 650 |
| Sugar | 55g |
| Fat | 45g |
| Protein | 15g |
| Sodium | 350mg |
| Carbohydrates | 58g |
Share Your No-Bake Chocolate Peanut Butter Pie Jars Creations
I really hope you’re running to your pantry right now to pull out those graham crackers! These jars are designed to be gorgeous, easy, and super indulgent, and I absolutely love seeing the beautiful layers you all create at home. When you make these Easy No Bake Jars, snap a picture!
Tag me on social media; it honestly makes my day to see your beautiful presentations. If something went perfectly, or heck, if you had a little kitchen mishap you want to share, drop a rating on the recipe card below too! Your feedback helps everyone know how amazing these No-Bake Chocolate Peanut Butter Pie Jars truly are! If you need to get in touch with a specific question, you can always reach out through my contact page!
PrintNo-Bake Chocolate Peanut Butter Pie Jars
Make individual servings of rich, creamy chocolate and peanut butter pie layered in jars without using your oven.
- Prep Time: 25 min
- Cook Time: 0 min
- Total Time: 25 min
- Yield: 4 servings
- Category: Dessert
- Method: No Bake
- Cuisine: American
- Diet: Vegetarian
Ingredients
- 1 1/2 cups graham cracker crumbs
- 1/4 cup melted unsalted butter
- 1 cup creamy peanut butter
- 8 ounces cream cheese, softened
- 1 cup powdered sugar
- 1/2 cup heavy whipping cream
- 1 teaspoon vanilla extract
- 1 cup semi-sweet chocolate chips
- 1/2 cup heavy whipping cream (for ganache)
- Whipped cream, for topping
- Peanut butter chips, for garnish
Instructions
- Mix graham cracker crumbs and melted butter until combined. Press 2 tablespoons of the mixture into the bottom of four small jars to form the crust layer. Chill for 10 minutes.
- In a large bowl, beat the peanut butter, softened cream cheese, powdered sugar, 1/2 cup heavy whipping cream, and vanilla extract until smooth and creamy.
- Spoon or pipe half of the peanut butter mixture evenly over the chilled crusts in the jars. Return jars to the refrigerator.
- Place chocolate chips in a heatproof bowl. Heat the remaining 1/2 cup heavy whipping cream until just simmering. Pour hot cream over the chocolate chips. Let stand for 5 minutes, then whisk until smooth to create a ganache.
- Let the ganache cool slightly until it thickens to a spreadable consistency. Spoon or pipe the chocolate layer over the peanut butter layer in the jars.
- Top each jar with a dollop of whipped cream and a few peanut butter chips. Chill for at least 2 hours before serving.
Notes
- You can substitute chocolate wafers or Oreo crumbs for the graham crackers in the crust.
- For easier layering, place the fillings into piping bags fitted with large round tips.
- These jars keep well in the refrigerator for up to three days.
Nutrition
- Serving Size: 1 jar
- Calories: 650
- Sugar: 55
- Sodium: 350
- Fat: 45
- Saturated Fat: 18
- Unsaturated Fat: 27
- Trans Fat: 0
- Carbohydrates: 58
- Fiber: 3
- Protein: 15
- Cholesterol: 75