

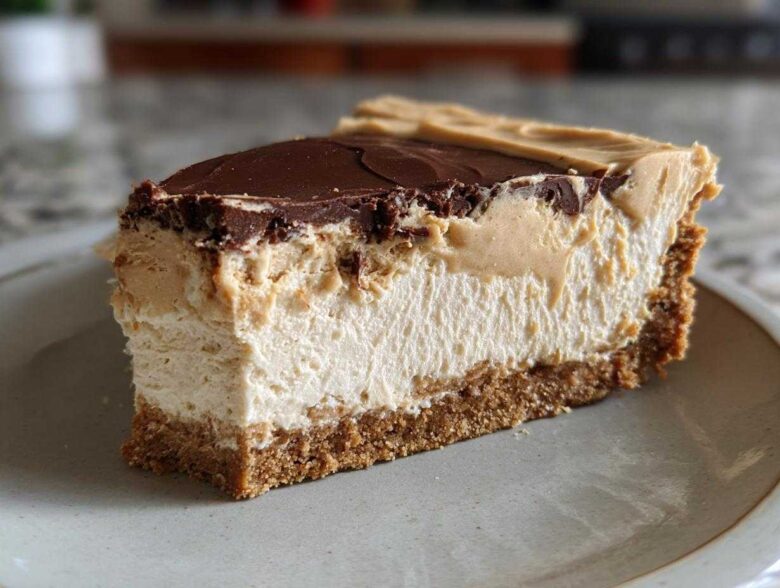
Are you having one of those days in the kitchen where you know you need to bring something amazing to the table, but you’ve run out of time, energy, or oven space? Trust me, Hannah and I have been there a thousand times! That’s why this Easy No-Bake Creamy Peanut Butter Pie isn’t just a recipe; it’s a lifesaver. Seriously, you get that spectacular, rich, indulgent dessert feeling—the kind that makes people ask for seconds immediately—and you don’t even have to turn on the oven. We’ve perfected the balance of sweet, salty, and smooth in this particular crowd pleaser dessert. It sets up beautifully in the fridge, and honestly, the ease of this peanut butter pie means we make it way more often than we should! If you want more simple ideas just like this, check out the other wonderful things we share over at our main blog right here: our kitchen adventures.
Why This No Bake Peanut Butter Pie Recipe is Your New Favorite
When I think about what makes a dessert truly shine at a gathering, it’s not about fancy techniques. It’s about flavor that hits you right in the sweet spot, fast! This No Bake Peanut Butter Pie is our go-to for that reason. You’re looking at about 20 minutes of actual hands-on time. Twenty minutes! Then, the fridge handles the rest of the heavy lifting. Don’t bother preheating anything; this is the very best quick peanut butter dessert you can make when company shows up unexpectedly.
The Perfect Creamy Peanut Butter Pie Filling
The filling is pure magic—it’s so rich, thick, and unbelievably decadent. We managed to capture that deep, slightly salty peanut butter flavor that makes this an indulgent peanut butter dessert competitor, all without ever putting it near an oven temperature. It truly is the definition of a dream for anyone who loves creamy peanut butter pie. The texture is spot-on: light enough to feel airy, but sturdy enough to slice cleanly.
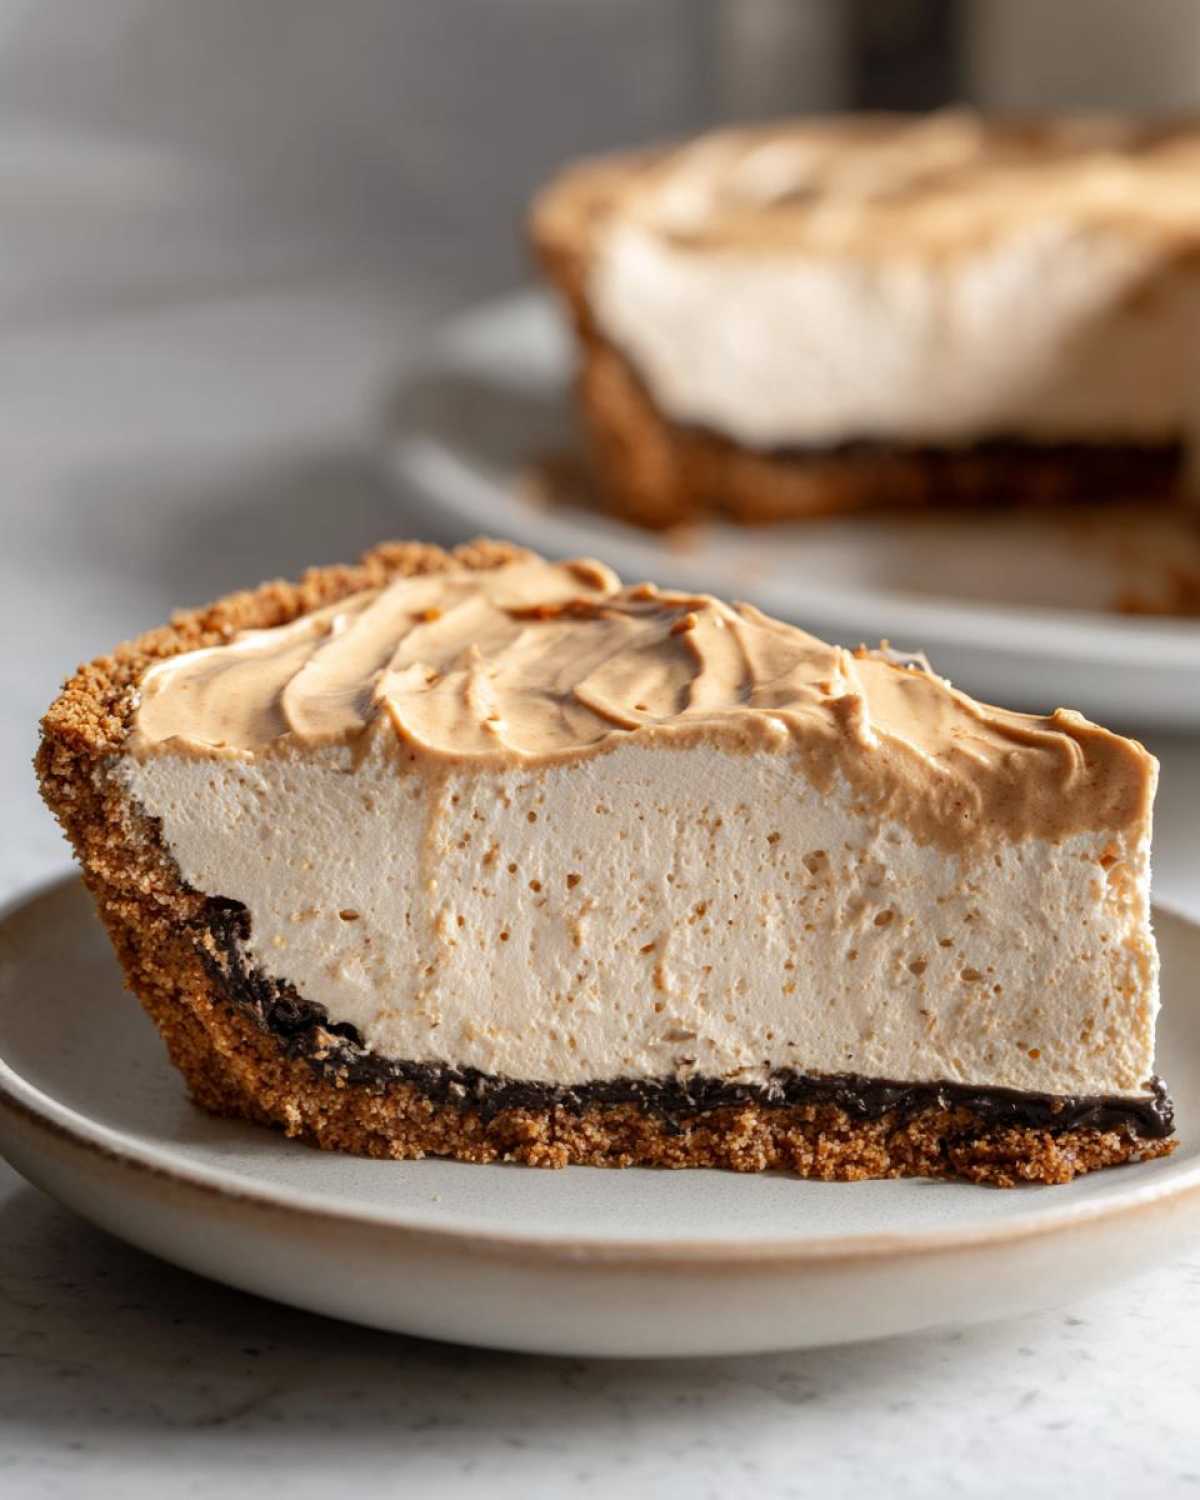
Simple Graham Cracker Crust Pie Assembly
Honestly, the crust is almost an afterthought because it’s so easy. You just mix those buttery crumbs, press them down, and straight into the freezer they go! That simplicity is what makes this fit perfectly into our busy weeknights, yet it’s sturdy enough to be a star at any holiday table. It makes for the fastest, most satisfying Graham Cracker Crust Pie ever. If you need another super simple bread companion for dipping into things, check out how we handle homemade soft naan!
Ingredients for Your Easy Peanut Butter Pie Recipe
This is where the magic happens without any actual baking, which means we have to be extra careful with our measurements so that this Easy Peanut Butter Pie Recipe sets perfectly. Don’t stress about fancy ingredients, though; this is made from simple pantry staples most of the time. Just make sure everything is at the right temperature, especially the cream cheese!
Crust Components
The base needs to hold everything together firmly, so we treat the crust ingredients right. We start with graham cracker crumbs, but honestly, if you want to swap those out for crushed Oreos (check the notes for how!), you absolutely can. The key here is the melted butter—it binds everything together so beautifully before we chill it.
- 1 1/2 cups graham cracker crumbs
- 1/2 cup unsalted butter, melted
- 1/4 cup granulated sugar
Creamy Peanut Butter Pie Filling Ingredients
This is the heart of the operation. See how we list the cream cheese as *softened*? That is vital! If your cream cheese is cold, you will end up with lumps, and nobody wants a lumpy Peanut Butter Cream Pie filling. Also, make sure your whipped topping is thawed, but still cold—this helps it hold the air when we fold it in later. If you’re looking for ideas on frosting for other cakes, Hannah shares some great tips on vanilla buttercream frosting!
- 1 (8 ounce) package cream cheese, softened
- 1 cup creamy peanut butter
- 1 cup powdered sugar
- 1 teaspoon vanilla extract
- 1 (12 ounce) container frozen whipped topping, thawed
And for the topping—because we deserve a little extra something on top of this rich treat—we just use a little more peanut butter and some chocolate chips if we’re going all out.
- 1/2 cup creamy peanut butter, for topping
- 1/4 cup chocolate chips, for garnish (optional)
How to Prepare This Crowd Pleaser Dessert: Step-by-Step Instructions
Okay, let’s get this Sweet and Salty Pie put together! Even though this is a super fast recipe, timing is everything when you’re building layers that need to set up perfectly in the fridge. You’ll see that freezing the crust first really helps everything go smoothly. Before we even get started, here’s a crucial tip from our kitchen: make sure that cream cheese for the filling is truly at room temperature. It sounds small, but Elias insists that soft cheese beats cold cheese every time for the smoothest base—no one wants to struggle beating lumps out of their filling!
Creating the Graham Cracker Crust
First things first, the foundation. Get a medium bowl and mix those graham cracker crumbs right along with the sugar and the melted butter we talked about. You need to mix it until every single crumb looks evenly moistened, almost like wet sand. Scoop that mixture right into your 9-inch pie plate. Now, here’s where you put some muscle into it! Press it down firmly across the entire bottom and run your fingers up the sides to form a nice edge. Don’t be shy; a tight crust means a clean slice later. Pop that plate straight into the freezer while we get the creamy filling going.
Mixing the Rich Dessert Pie Filling
Grab your nice big mixing bowl. We tackle this in stages to keep everything ultra-creamy. Start by beating that softened cream cheese until it’s just completely smooth; it should have no resistance at all. Next, slowly beat in the main cup of peanut butter and the powdered sugar until that mixture is fully combined and looking rich. Then, stir in the vanilla extract. Now for the delicate part: the whipped topping. You need to gently *fold* this in, not beat it in! Use a spatula and a light hand until you just don’t see those white streaks anymore. Over-mixing here will deflate all the air we just built in, and we want this to be a light filling, not a dense block!
Chilling and Finishing the Peanut Butter Pie
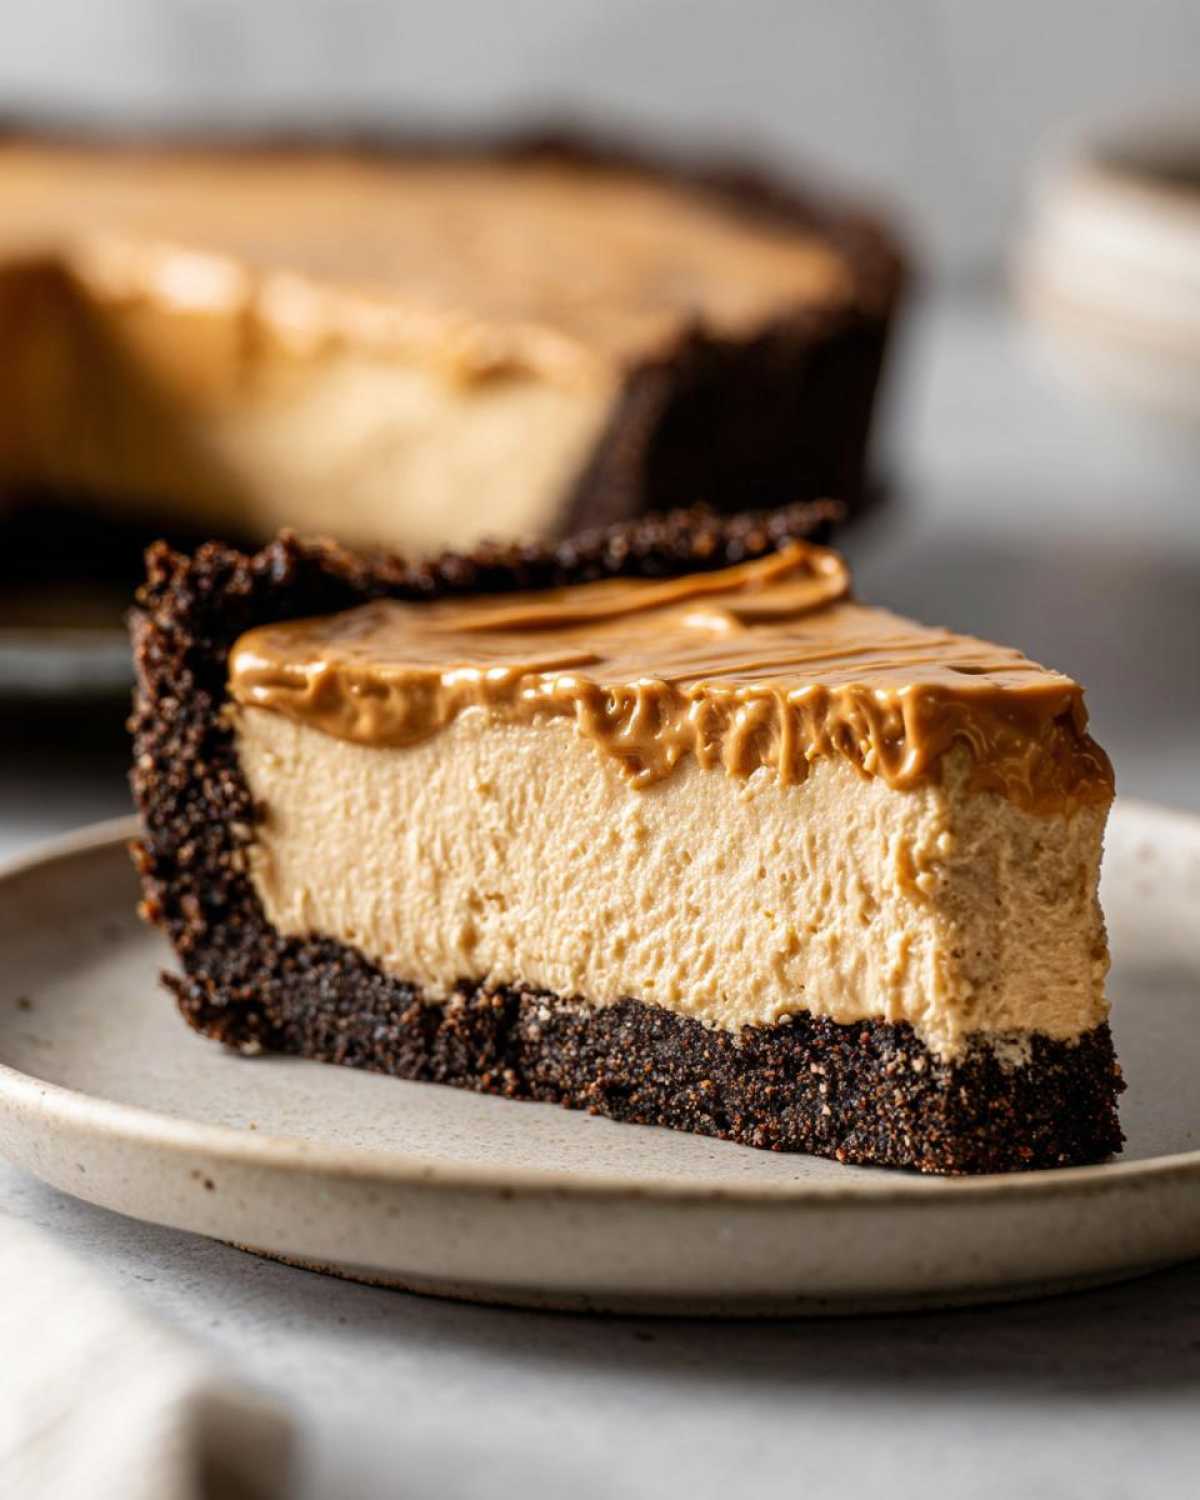
Once the filling is mixed, pull that chilled crust out of the freezer. Spoon the filling into the crust and use a spatula to make the top nice and level. This is important: time is your silent partner now. Cover it loosely with plastic wrap and let it chill in the refrigerator for a minimum of four hours. Honestly, if you can manage it, letting this sit overnight makes it even better! When it’s time to serve this Peanut Butter Pie, take the reserved 1/2 cup of peanut butter and soften it just a touch (maybe 15 seconds in the microwave stops it from tearing the filling). Gently spread that over the top. If you’re feeling extra festive, drizzle some melted chocolate on top. That finishes the look for this incredible make ahead dessert! If you want to see how others make their incredible peanut butter desserts, check out this amazing recipe from a friend.
If you need other fantastic recipes that save you time in the kitchen, we’ve got tons of ideas over at our favorite make-ahead egg bake!
Tips for the Best Peanut Butter Pie
You know, Hannah and I spend a lot of time talking about why some simple recipes still fail people, and it almost always comes down to the ingredients or a tiny technique we skipped. Since this peanut butter pie relies entirely on the chilling process to firm up, ingredient quality really matters! We want you to have the absolute best result, so here are a few things we learned the hard way when perfecting this creamy delight.
Hannah always stresses this part: if you want that super smooth, luscious mouthfeel we keep talking about, you need to stick to specific choices. If you’re using your favorite old fashioned peanut butter pie recipe as inspiration but want the no-bake version, these tips are your secret weapon!
Ingredient Notes and Substitutions for Your Peanut Butter Pie
Let’s talk peanut butter first. For this recipe, where the goal is max creaminess, only use standard commercial creamy peanut butter (like Jif or Skippy). Why? Because the natural style, the kind where the oil separates? That oil doesn’t integrate into the filling the same way, and it can make your pie weep or not set up quite as firmly. If you must use natural, mix the oil back in really well before measuring, but expect it to take longer to firm up in the fridge.
Now, ready for a substitution tip? If you aren’t a graham cracker fan, or if you just ran out mid-recipe, you can absolutely make a switch. Remember that substitution note we put in the recipe details? If you crush about 24 Oreos super fine and use the same amount of melted butter, you get this wonderful chocolatey base that tastes amazing against the salty filling. It’s another great crowd pleaser dessert option!
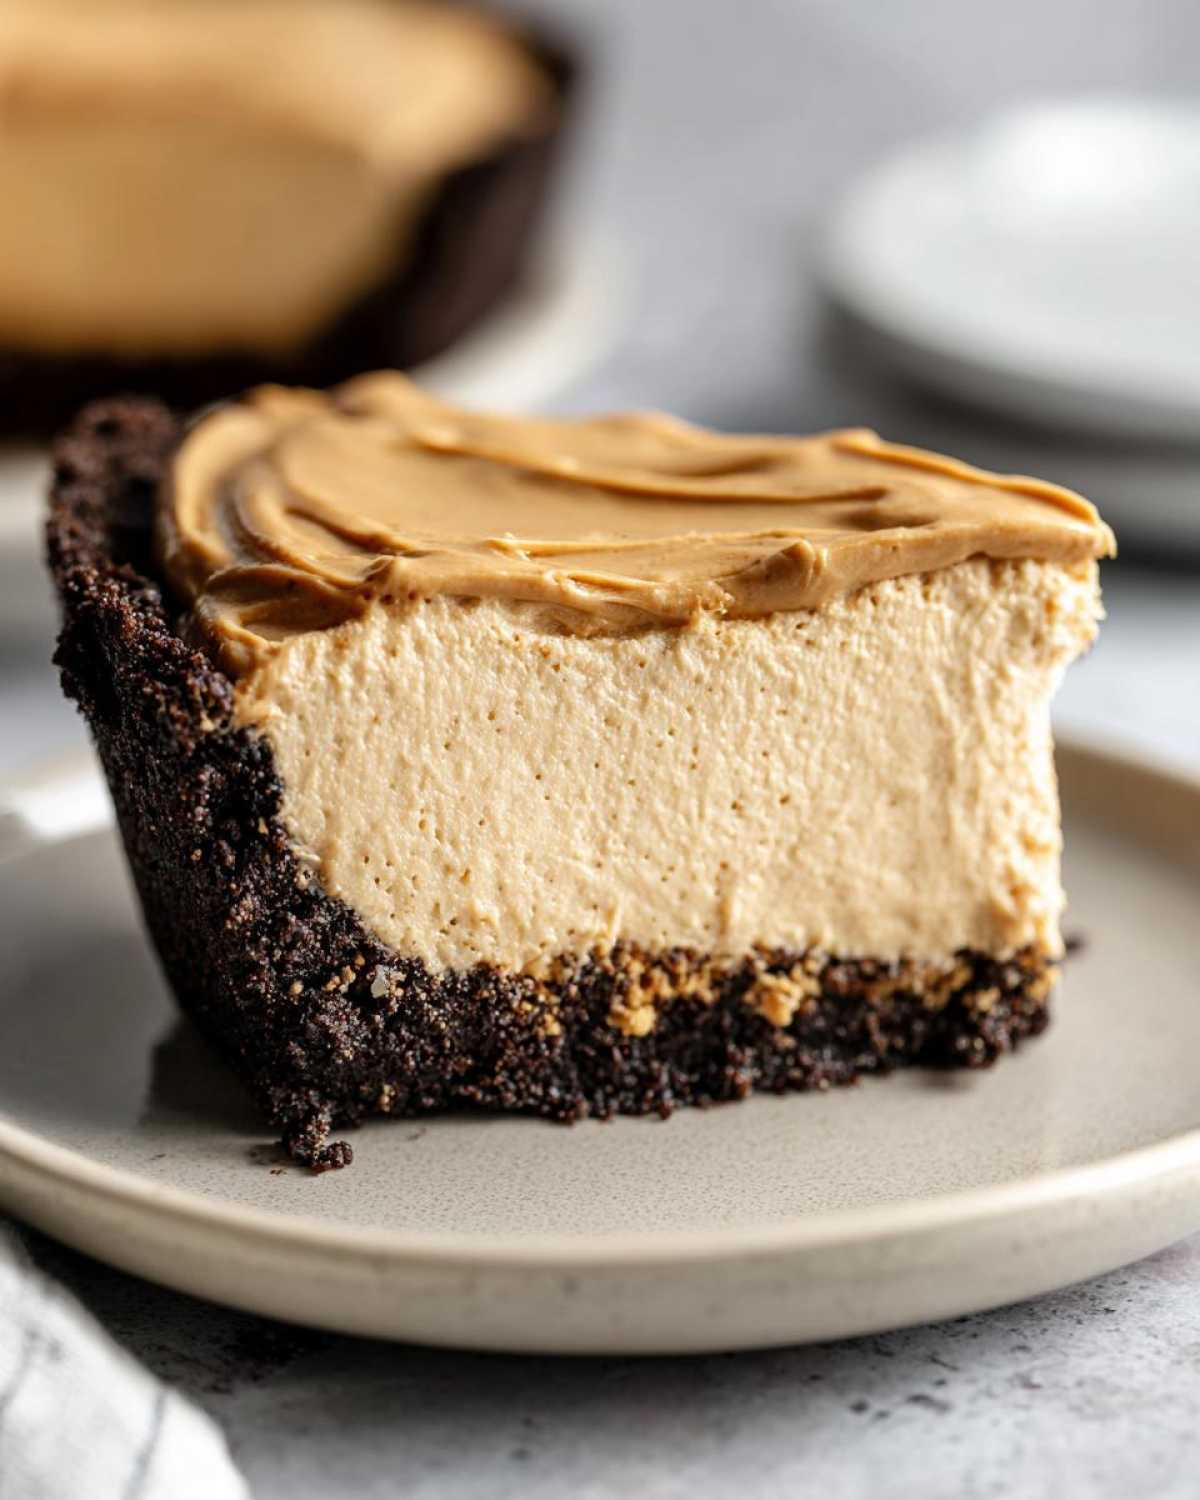
Also, a quick note on the whipped topping: make absolutely sure it’s thawed but still cold when you fold it in. If it gets warm, it deflates instantly. We actually keep the container in the fridge while we’re mixing the other ingredients just to make sure we maintain that airy structure. It’s these tiny details that turn a good pie into the best peanut butter pie ever. Hey, if you’re looking for another easy, fluffy thing to make, you absolutely must try Hannah’s light and fluffy pancakes!
If you want to see how someone else tackles the crust, check out this great guide over at The Baker Mama for their approach to this amazing no bake peanut butter pie.
Serving Suggestions for This Sweet and Salty Pie
Now that you have this absolute dream of a Sweet and Salty Pie sitting perfectly firm in the fridge, you might be wondering how to serve it up. Since this pie is wonderfully rich—I mean, really decadent—I never feel like it needs a heavy, sugary partner. We like to let the peanut butter shine on its own, but a little contrast on the plate is always lovely.
One of my favorite ways, especially if we’ve served this after a heavy meal like Thanksgiving dinner, is with something bright and tart. A small scattering of fresh raspberries or blackberries around the slice cuts through the richness beautifully. The tartness really wakes up your palate! It’s just a little flourish, nothing complicated.
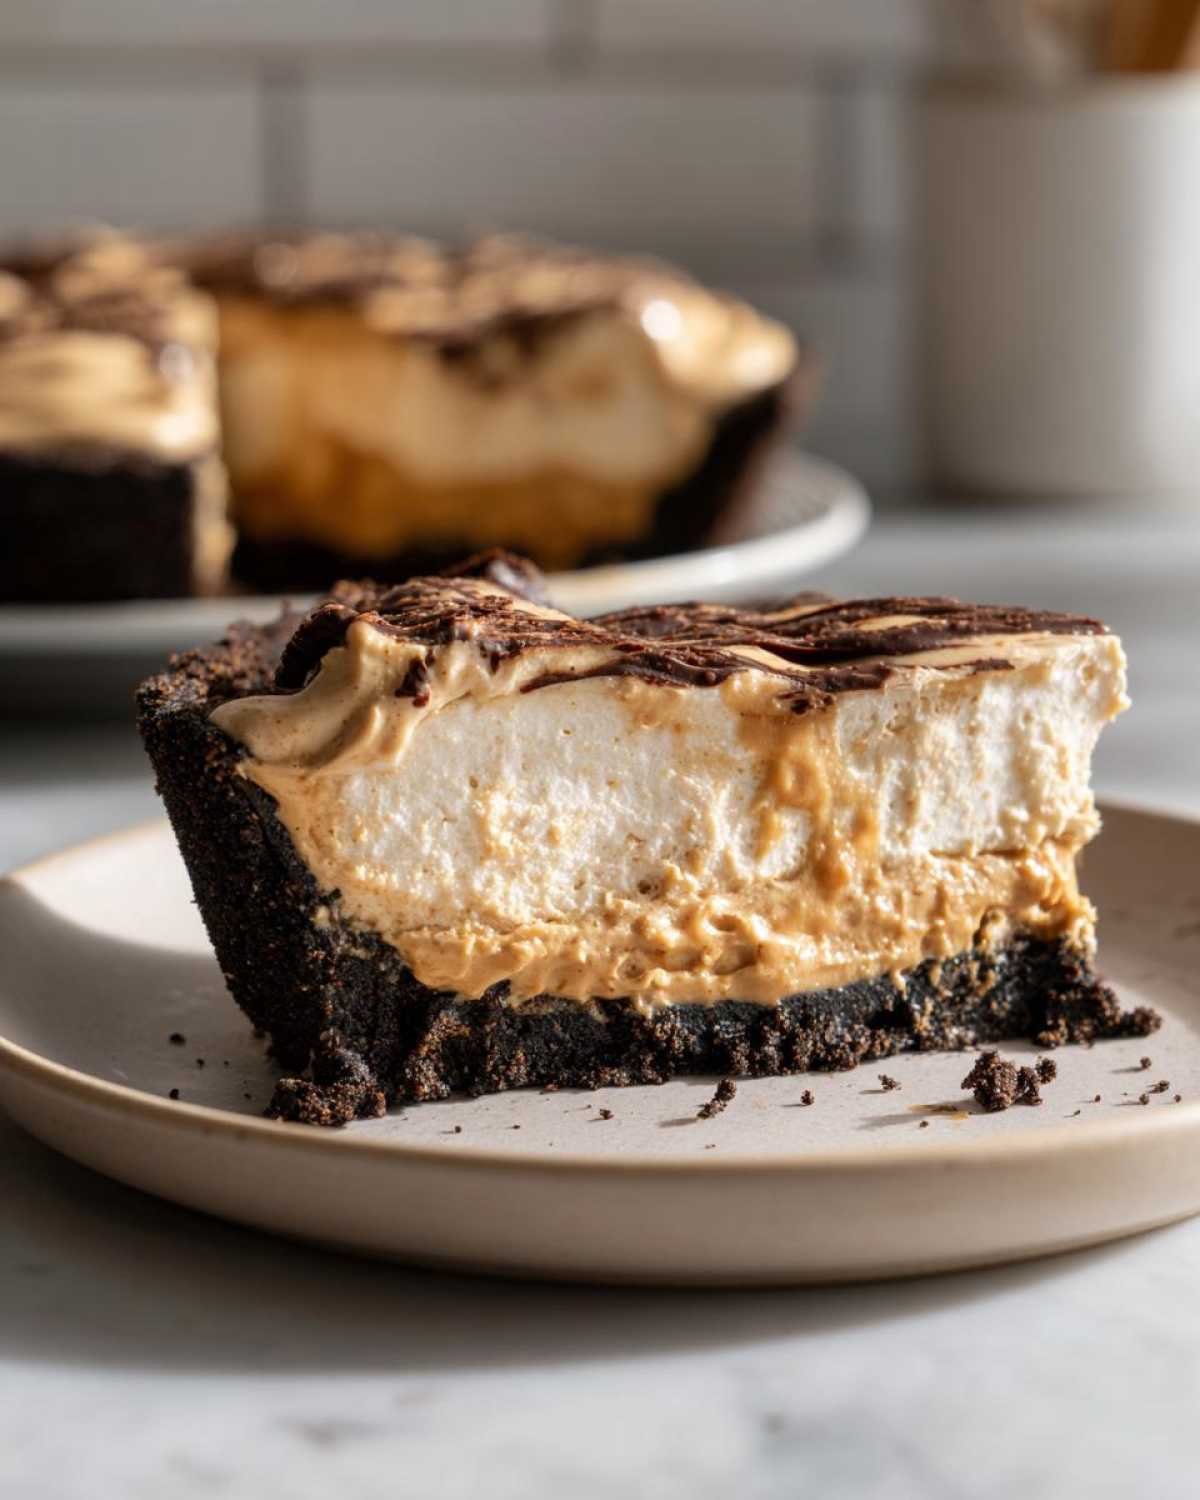
For coffee lovers, this pie is non-negotiable alongside a strong cup of coffee. A dark roast or even a slightly bitter espresso drink balances the sweetness so perfectly. It turns a simple slice into a proper adult treat. We often make a big pot of coffee brewing while this rests in the fridge so it’s ready the second the timer buzzes!
If the kids are around, they just want it as is, maybe with a tiny mound of extra whipped cream—but honestly, the chocolate topping is usually enough fanfare for them. Remember, we’re aiming for that flavor vista experience, and sometimes, that means keeping the supporting cast light so the star of the show, the Peanut Butter Pie, gets all the applause.
If you’re looking for another dish that balances savory and sweet wonderfully, you should check out the simple technique for our garlic butter roasted carrots. They are surprisingly addictive!
Storage & Reheating Instructions for Leftover Peanut Butter Pie
The best part about a No Bake Peanut Butter Pie is that it’s designed to be a make ahead dessert! Winning! Since this pie relies on chill time to get that signature firm texture, putting leftovers away means tomorrow’s dessert is already handled. We usually have zero leftovers, but when we do, Elias is the self-appointed guardian of the fridge space!
First thing’s first: you absolutely cannot reheat this pie. Since the filling is based on cream cheese and thawed whipped topping, heat will turn it into a melted, soupy mess instantly. This is a cold weather treat, meant to be served straight from the cold!
How Long Does Peanut Butter Pie Last in the Fridge?
This Creamy Peanut Butter Pie lasts beautifully in the refrigerator. Because the ingredients are rich and dairy-based (even though we don’t bake the cream cheese), you want to keep it covered tightly. I usually use plastic wrap pressed right against the surface of the pie to stop any fridge odors from getting in, then cover the whole dish with foil or a tight lid.
If you’ve kept it covered well, it should taste fresh and hold its shape perfectly for four days. Seriously, four days of easy dessert! The crust might get ever-so-slightly softer on day three or four, but the filling stays wonderfully rich and satisfying. We’ve never pushed it past five days, mainly because it gets eaten before then.
Can You Freeze This No Oven Dessert?
Yes, you can freeze it, but you have to be prepared for a slight texture change when it thaws. If you know you won’t get through it in four days, wrapping it up tightly before freezing is a great idea. Wrap the whole pie—crust and topping included—in a couple of layers of plastic wrap, and then wrap it again in aluminum foil. This double layer helps prevent freezer burn.
When you’re ready to enjoy it, pull it out of the freezer and let it thaw slowly in the refrigerator overnight, so ideally 8 to 12 hours. When it comes out, it will be perfectly fine! It might release a tiny bit of moisture as it fully thaws, which is why we suggest covering the top when it’s chilling in the fridge anyway. It’s a fantastic way to have a quick peanut butter dessert ready for an unexpected party!
If you’re planning ahead for big meals and need more fantastic make-ahead recipes, check out the instructions for our hearty vegetable beef soup—it freezes like a dream too!
Frequently Asked Questions About Making Peanut Butter Pie
We get so many lovely questions about this Peanut Butter Pie recipe after people try it! It’s usually because it’s so easy, people wonder if they missed a step or if they can customize it. Hannah and I tried to cover everything in the steps, but it seems a few things always pop up. Here are the most common questions folks ask about making this incredible, indulgent peanut butter dessert.
Can I use crunchy peanut butter instead of creamy for this pie?
Oh, that’s a classic debate! For this specific recipe, where the goal is that ultra-smooth, melt-in-your-mouth experience we designed, I strongly recommend sticking to creamy peanut butter for the filling. Crunchy peanut butter will certainly work—it’s your *you do you* kitchen!—but it will interrupt that beautiful, smooth mouthfeel we’re aiming for in this Creamy Peanut Butter Pie. It’s perfect for the crust garnish, though, so that’s a nice way to sneak some crunch in!
How long does this pie actually take to set up?
It does take a little patience, which is the only non-quick part of this Quick Peanut Butter Dessert! The recipe calls for a minimum of four hours in the refrigerator. That four hours is non-negotiable if you want those clean, beautiful slices. In my experience, if you can manage to let it chill overnight (like we often do since it’s a great make ahead dessert recipe), it sets even firmer and tastes richer the next day.
Can I skip using the graham cracker crust and just use a plain pie shell?
You absolutely could, but honestly, it wouldn’t be the same! The buttery, slightly sweet crunch of the graham cracker crust is designed to balance the richness of the peanut butter filling so perfectly. If you want to try a different base, like the Oreo crust mentioned in the notes, go for it! But a pre-baked pastry crust tends to get soggy when you put this rich, wet filling inside because it’s not baked to set the starch.
Is this truly the Best Peanut Butter Pie for a crowd?
If you’re hosting, yes, 100%! This recipe is designed to be made in a standard 9-inch pie dish, which serves 8 people easily. Because it’s no-bake, you can finish it the day before your party, meaning one less thing to worry about when you are prepping food. It’s always the first dessert to disappear whenever we bring it to a neighborhood gathering. If you want another amazing dessert idea that’s great for sharing, you’ve got to try our easy chocolate chip pumpkin bars!
If you are looking for more ideas on how to make other baked goods without turning on the oven, take a peek at what our friends are doing over at Five Recipes—they have some great inspiration!
Estimated Nutritional Data for This Rich Dessert Pie
I always feel a little nervous putting numbers up here, because, let’s be honest, when you’re making something this satisfying and deeply flavorful, you aren’t exactly whipping out the calculator to count every little gram of happiness! This is meant to be a treat, right? A truly deserved indulgence!
These figures are our best estimate based on standard recipe measurements and ingredient brands for one slice serving of this Rich Dessert Pie. So, please take them as a general guideline, not gospel. If you use a different brand of peanut butter or the full amount of chocolate drizzle, the numbers will shift a bit. Enjoy it guilt-free, because you deserve this slice!
- Serving Size: 1 slice
- Calories: around 450
- Fat: about 30g (remember, some of that is the wonderful peanut butter!)
- Carbohydrates: around 40g
- Sugar: roughly 35g
- Protein: about 9g
The beauty of this cold, no-bake peanut butter pie is that it’s a full-stop dessert—you don’t need much else alongside it! If you are looking for something zesty and savory to counterbalance all that sweet richness, perhaps you could try our recipe for crispy potato tacos later in the week? They are surprisingly addictive!
Share Your Flavor Vista Experience
Well, there you have it! Our favorite, no-fuss, truly spectacular Peanut Butter Pie recipe. Hannah and I feel like we’ve shared a little piece of our kitchen with you today, and honestly, that’s the best feeling in the world. Cooking is about sharing, right?
Now that you’ve made this wonderful, creamy creation, we absolutely want to hear all about it! Please, don’t be shy. Did you stick to the graham cracker crust, or did you sneak in those Oreos? Did the kids devour it in seconds? Drop a rating down below with stars so others know how much you loved this easy peanut butter pie recipe.
Even better, if you snap a photo of your finished pie—especially if you got a perfect wedge out—tag us on social media! We love seeing how you put your own spin on our recipes as you find your own “flavor vista.” It genuinely makes us smile to think of all the sweet, salty moments this pie is going to create in your homes.
If you have any burning questions that we missed in the FAQ section, or if you just want to say hello, head over to our contact page, and we’ll chat soon! We’re always working on new ways to make simple meals feel celebratory, so check back often, or if you’re feeling adventurous, see what we’re up to on our contact page—we love hearing from you!
PrintEasy No-Bake Creamy Peanut Butter Pie
You will love this simple, rich, and creamy no-bake peanut butter pie. It uses a buttery graham cracker crust and sets up perfectly in the refrigerator, making it a fantastic, quick dessert for any gathering.
- Prep Time: 20 min
- Cook Time: 0 min
- Total Time: 4 hr 20 min
- Yield: 8 servings
- Category: Dessert
- Method: No-Bake
- Cuisine: American
- Diet: Vegetarian
Ingredients
- 1 1/2 cups graham cracker crumbs
- 1/2 cup unsalted butter, melted
- 1/4 cup granulated sugar
- 1 (8 ounce) package cream cheese, softened
- 1 cup creamy peanut butter
- 1 cup powdered sugar
- 1 teaspoon vanilla extract
- 1 (12 ounce) container frozen whipped topping, thawed
- 1/2 cup creamy peanut butter, for topping
- 1/4 cup chocolate chips, for garnish (optional)
Instructions
- Prepare the crust: Mix graham cracker crumbs, melted butter, and 1/4 cup granulated sugar in a medium bowl until evenly moistened. Press the mixture firmly into the bottom and up the sides of a 9-inch pie plate. Place the crust in the freezer while you prepare the filling.
- Make the filling base: In a large bowl, beat the softened cream cheese until smooth. Add 1 cup of creamy peanut butter and 1 cup of powdered sugar. Beat until fully combined and creamy. Mix in the vanilla extract.
- Fold in whipped topping: Gently fold in the thawed whipped topping until no streaks remain. Do not overmix; you want to keep the filling light.
- Assemble the pie: Spoon the peanut butter filling evenly into the chilled graham cracker crust. Smooth the top with a spatula.
- Chill: Cover the pie loosely with plastic wrap and refrigerate for at least 4 hours, or until the filling is firm. This chilling time is crucial for the best texture.
- Garnish and serve: Before serving, spread the remaining 1/2 cup of creamy peanut butter lightly over the top of the pie. If desired, drizzle with melted chocolate or top with chopped peanut butter cups. Slice and serve cold.
Notes
- For an even richer flavor, you can substitute half of the creamy peanut butter in the filling with peanut butter powder.
- If you prefer an Oreo crust, replace the graham cracker crumbs with finely crushed Oreo cookies (about 24 cookies) and use the same amount of melted butter.
- This **make ahead dessert** tastes best when allowed to chill for the full 4 hours or even overnight.
Nutrition
- Serving Size: 1 slice
- Calories: 450
- Sugar: 35g
- Sodium: 280mg
- Fat: 30g
- Saturated Fat: 10g
- Unsaturated Fat: 20g
- Trans Fat: 0g
- Carbohydrates: 40g
- Fiber: 2g
- Protein: 9g
- Cholesterol: 35mg