

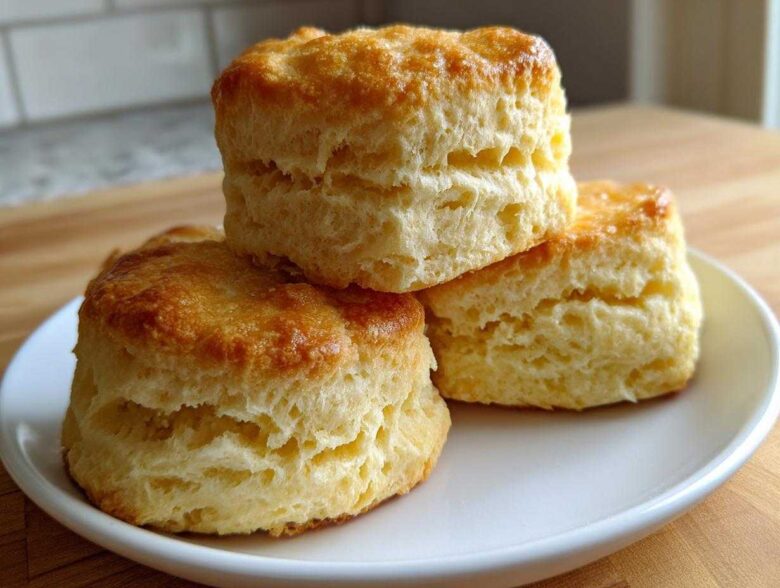
Oh, there is just nothing better than the smell of fresh-baked scones filling your kitchen! Seriously, forget store-bought rubbish; when you make them yourself, the whole house just feels happier. Now, I’ve botched batches, trust me—those flat, tough discs that could double as hockey pucks? I’ve been there. But I finally cracked the code. This isn’t just any recipe; this is my absolute blueprint for achieving impossibly tall, fluffy buttermilk scones that are light and tender all the way through, even the next day. It all comes down to treating your ingredients like they’re made of spun glass, especially keeping everything icy cold. Once you master that chill factor, you’ll never look back! If you love this kind of flaky magic, you should also check out my method for perfect flaky buttermilk biscuits.
Why This Is The Best Scones Recipe for Tall, Fluffy Results
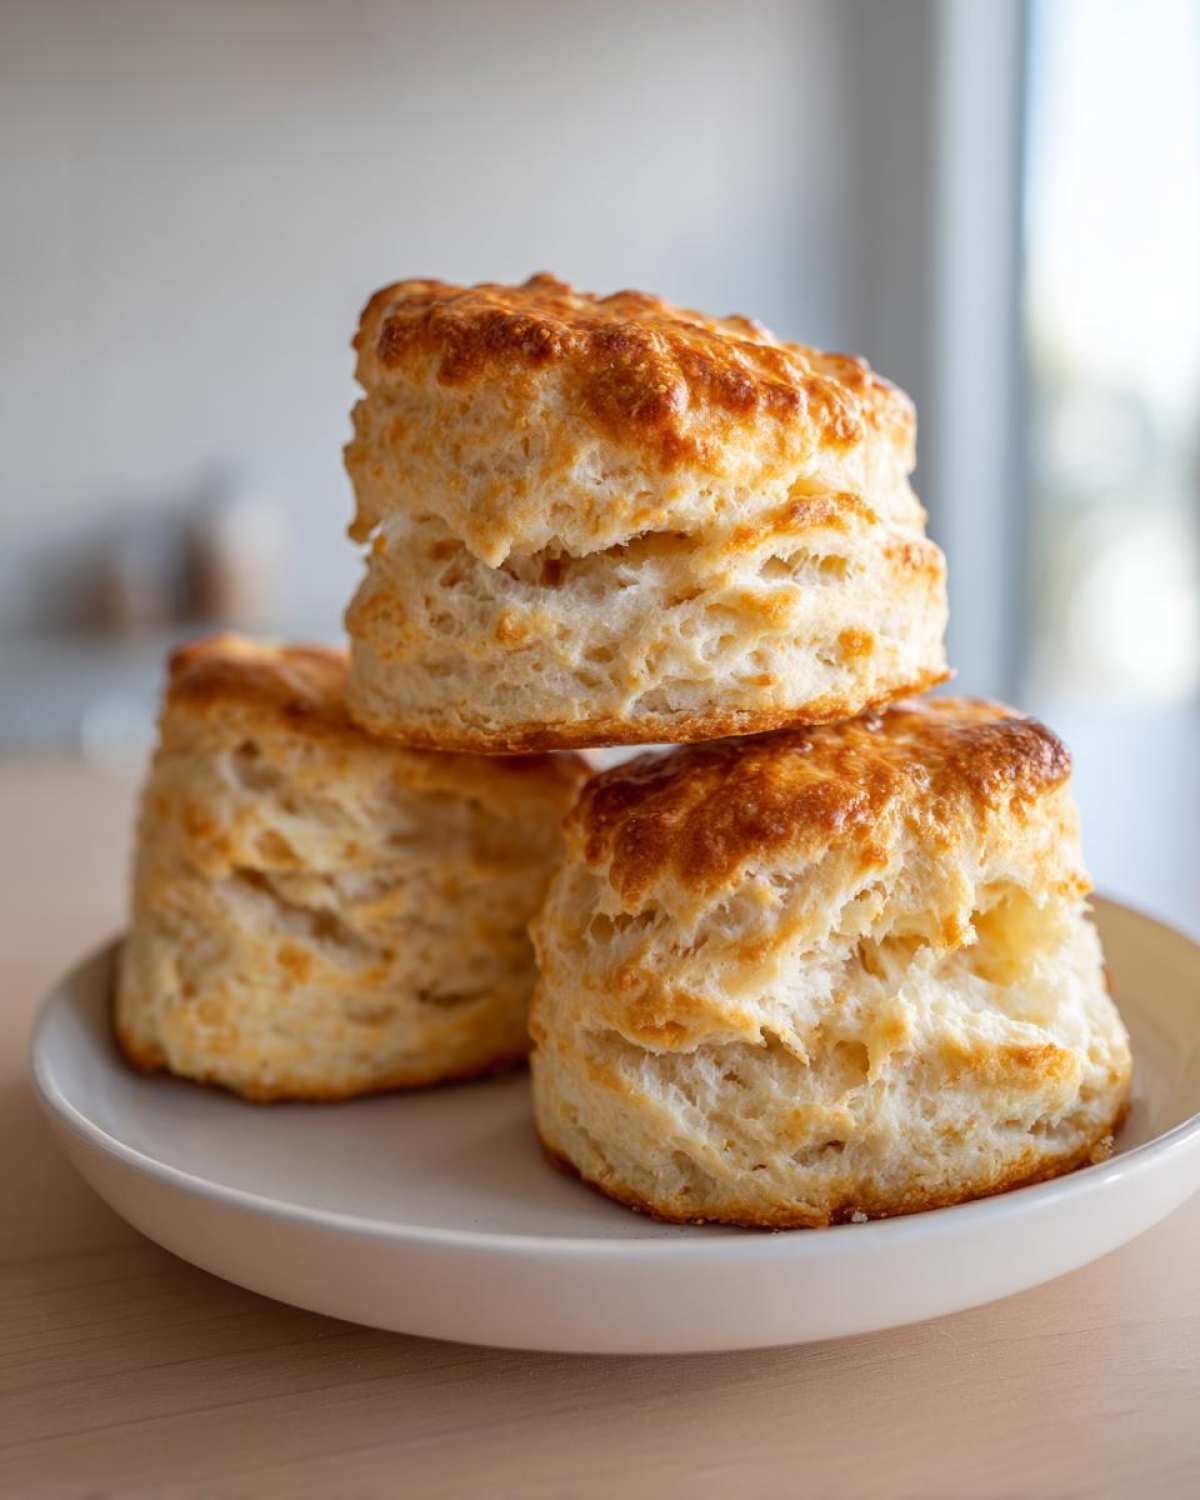
I’ve tried everything over the years, and I can confidently tell you this is the best scones recipe out there if you crave that glorious, towering height you usually only get at fancy tea rooms. The texture of these fluffy buttermilk scones is what sets them apart; they aren’t dense or cakey. That perfect tenderness comes down to two things you absolutely cannot skip: using ingredients ice-cold and touching the dough as little as humanly possible. We’re aiming for flaky layers, not kneaded bread, and these simple techniques guarantee success every single time you bake.
Achieving Tall Bakery Style Scones: The Science of Cold
When people ask me the secret to those gorgeous, tall bakery style scones, I just point to the butter. If that butter melts before it hits the hot oven, you’ve lost the battle! We cube the butter tiny and make sure it’s straight from the fridge, or even slightly chilled after cubing. When that cold butter hits the heat, it melts fast, creating little pockets of steam. That steam is literally what pushes your scone up, up, up, giving you that amazing vertical lift and keeping the final texture wonderfully light. The same goes for the buttermilk—it needs to be just as cold!
Want more quick tips on getting things right in the kitchen? You might want to check out my guide on no-bake energy bites for fast snacks!
Ingredients for Perfect Fluffy Buttermilk Scones
Okay, let’s talk groceries. Because this recipe is so simple, every single ingredient plays a huge role! You only need a handful of things for these scones, but you must respect the temperature of two items! Keep that butter cut up and straight out of the freezer—seriously—and your buttermilk needs to be Arctic cold. Trust me on this one; cold hands, cold ingredients, that’s how we win the height game!
- 2 cups all-purpose flour
- 1/4 cup granulated sugar
- 1 tablespoon baking powder
- 1/2 teaspoon salt
- 6 tablespoons cold unsalted butter, cut into small cubes
- 3/4 cup cold buttermilk
- 1 large egg, lightly beaten (for egg wash)
- 1 tablespoon milk (for egg wash)
How to Make Perfect Scones: Step-by-Step Instructions
Making amazing scones is less about having a fancy gadget and more about knowing when to stop mixing! We’re going to follow these steps exactly, and I promise you’ll get bakery results. First things first: get that oven screaming hot to 425°F (220°C) and line your tray right away. Once the dry stuff is whisked, we cut in that ice-cold butter. That’s when the magic starts to happen, turning into those little coarse crumbs we talk about. Then, just a quick pour of buttermilk and a gentle mix!
The Crumbly Light Scones Technique: Mixing and Shaping
When you add the buttermilk, grab a fork and mix lightly until everything is just barely holding hands—you need to see flour streaks! This is critical for crumbly light scones. Turn this messy dough pile onto your counter, and here’s my biggest rule: do NOT knead it like bread. Just use your hands to gently pat it into a thick disc or rectangle, about 3/4 of an inch thick. If you start pressing and folding too much, you develop gluten, and suddenly, your fluffy scone turns into a chew toy. We don’t want that!
After patting, cut right through it into wedges or circles. Don’t twist your cutter if you use one; you want those sides straight up and down to encourage vertical rise. If they look a little sad, pop the tray into the fridge for 10 minutes before brushing them with your egg wash.
Baking Your Scones for Maximum Height
That quick chill time—that’s my little secret for extra lift! Once they are chilled, brush the tops gently with your egg and milk wash. This gives you that lovely, deep golden color that just screams ‘perfectly baked.’ Pop them into that super hot oven for about 12 to 15 short minutes. You’re looking for golden brown tops and centers that are cooked through. You can peek around the 12-minute mark—if you test them with a toothpick, it should come out clean. Then, transfer them right away to a wire rack so the bottoms don’t get soggy while they cool down a bit before serving.
If you’re looking for more guidance on making incredible baked goods, you might find my general guide on how to make perfect scones really helpful!
Tips for Success: Ensuring Your Scones Are Never Dry
I know the fear—you spend all that time making beautiful mounds of dough, and they bake up hard as rocks! That’s why I call this my no fail scone recipe; it’s all about avoiding dryness. The main culprit is always heat management. Stick to the instructions: keep your butter cubed and rock-hard, and make sure that buttermilk is straight from the fridge, not softened on the counter. If your kitchen is super warm, chill that dough again after cutting it before it even hits the oven. These simple steps stop the dough from absorbing too much flour before it has a chance to puff up.
Another sneaky dryness tip is the glaze. If you decide to add one, only drizzle it over scones that have cooled down completely, or it’ll just melt right off and soak in unevenly. For extra insurance, you can always peek at my no-fail scone recipe guide for more make-ahead tips!
Variations: Flavoring Your Classic Scones
This buttermilk base is so sturdy and delicious, it’s the perfect canvas for going wild with flavors! Once you’ve whisked your dry ingredients (flour, sugar, etc.), that’s when you toss in the fun stuff. You can turn these into fantastic seasonal treats easily. Think about making lovely cranberry orange scones by adding zest from one orange and about half a cup of dried cranberries—toss them with a tiny bit of flour first so they don’t sink to the bottom! If you love nutty flavors, this template is perfect for a maple pecan scones recipe; just skip the citrus and fold in toasted pecans and a tablespoon of maple extract with your buttermilk.
We can easily make white chocolate raspberry scones, too! Just replace the sugar with a bit more, since the berries are tart, and fold in those ingredients along with the butter. These scones are so adaptable, you’ll have enough ideas for the whole year!
Glazes and Toppings for Your Scones
Once these warm delights are totally cool, a tiny drizzle takes them over the top. Forget that watery icing; we want a proper glaze! Just whisk one cup of powdered sugar with about two tablespoons of liquid—milk or even cream works—until it’s thick enough to slowly drip off your whisk. I encourage everyone to try a bright lemon glaze by swapping the milk for fresh lemon juice. It cuts through the richness perfectly!
If you need inspiration for another citrus bake, you must look at my lemon blueberry bread recipe!
Serving Suggestions for Scones for Afternoon Tea
When is the best time to eat one of these beautiful, tall scones? Obviously, for any kind of brunch, but they truly shine when you’re hosting an afternoon tea gathering. Presentation matters! Try to serve them while they are still slightly warm—just pull them apart, don’t slice them, as that keeps that flaky interior intact. The classic way is definitely the best way when it comes to pairings.
You absolutely *must* have clotted cream if you can find it; it’s richer than whipped cream. Then, load up on preserves! Strawberry jam is traditional, but if you want to be a bit different, try a rich blackberry jam. I often use my homemade blackberry jam crumble bars recipe ingredients to top them. It makes for such a gorgeous display!
Storage and Reheating Instructions for Homemade Scones
So, what happens if you actually have leftover scones? (I rarely do, but in theory!) You want to keep them fresh because eating a day-old dry scone is just sad. Store them airtight at room temperature. Do NOT put them in the fridge unless you plan on having them for more than three days, because the cold air dries them out faster.
If they’ve sat out for a day or two, don’t worry! You can revive that fluffy texture easily. Pop them in a toaster oven or a regular oven at about 325°F for just 5 minutes. That little blast of dry heat melts the butter just enough inside to bring back that fresh-from-the-oven tenderness. A quick microwave zap works in a pinch if you need it fast, but beware—it can make them a little chewy if you overheat them!
Frequently Asked Questions About Making Scones
Can I use regular milk instead of buttermilk in these scones?
That’s a great question, because sometimes you just don’t have buttermilk on hand! You absolutely can substitute it if you’re in a pinch for these scones. Just take regular milk, pour about a tablespoon of white vinegar or lemon juice into a measuring cup, fill it up to the 3/4 cup line with milk, and let it sit for about five minutes. It’ll curdle a little bit, and that’s what you want! However, I have to warn you, true buttermilk has a bit more body and acid, so your resulting texture might be just slightly less tender than if you used the real thing. It’s a totally acceptable swap, though!
What is the best way to cut the butter for fluffy scones?
If you want those fluffy buttermilk scones to rise high, you must take the butter prep seriously! We keep it frozen or very, very cold. I cube it into pieces no bigger than a small pea—maybe even a little smaller if your hands run warm. Then, you use your fingers or a pastry blender to smash that cold butter into the dry mix. Your goal isn’t to disappear the butter; it’s to coat those cold pieces of fat with flour. When you see that coarse, crumbly mixture with visible little bits of butter scattered everywhere, you stop. That’s the key to getting those beautiful separation layers as they bake!
Can I make these scones ahead of time?
You have a couple of good options here! If you’re making the dough and just want to save time the next morning, go ahead and cut the dough shapes, put them on your baking sheet, cover it tightly with plastic wrap, and pop the whole tray into the fridge for up to 24 hours. Just remember to give them that extra 10-minute chill when you take them out before baking! If you need to make them even further ahead, you can freeze the unbaked, cut scones on a tray, then transfer them to a freezer bag. Bake them straight from frozen—you might need about 5 extra minutes in the oven. If you want to save the baked ones, just store them airtight at room temperature, and make sure to reheat them for that perfect texture!
Need some more baking inspiration for your breakfast rotation? Check out my full index of breakfast recipes!
Estimated Nutritional Data for These Scones
When you’re baking something this delicious, you know nutrition probably isn’t the top priority, but I always like to give you a general idea of what’s in these amazing scones! Please remember, this is only an estimate. Because we use good quality butter and flour, the numbers might shift around a little depending on the exact brands of buttermilk or sugar you choose. If you ever want the fine print on my overall ingredient sourcing, take a quick peek at my site disclaimer!
But here are the rough numbers for one perfectly tall, buttery scone:
- Serving Size: 1 scone
- Calories: 240
- Sugar: 6g
- Sodium: 250mg
- Fat: 11g (including 7g saturated)
They still pack a nice protein punch too, usually around 6 grams! I always try to eat mine with a lighter topping, like maybe just a smear of lemon curd instead of super heavy cream, just to keep that calorie count happy.
PrintPerfect Fluffy Buttermilk Scones

A straightforward recipe for classic buttermilk scones that results in a tall, tender crumb. Follow the cold ingredient and folding techniques for bakery-style results.
- Prep Time: 15 min
- Cook Time: 15 min
- Total Time: 30 min
- Yield: 8 servings
- Category: Breakfast
- Method: Baking
- Cuisine: British
- Diet: Vegetarian
Ingredients
- 2 cups all-purpose flour
- 1/4 cup granulated sugar
- 1 tablespoon baking powder
- 1/2 teaspoon salt
- 6 tablespoons cold unsalted butter, cut into small cubes
- 3/4 cup cold buttermilk
- 1 large egg, lightly beaten (for egg wash)
- 1 tablespoon milk (for egg wash)
Instructions
- Preheat your oven to 425°F (220°C). Line a baking sheet with parchment paper.
- In a large bowl, whisk together the flour, sugar, baking powder, and salt.
- Add the cold butter cubes to the dry ingredients. Use your fingertips or a pastry blender to cut the butter into the flour until the mixture resembles coarse crumbs with some pea-sized pieces remaining. This step is key for flakiness.
- Make a well in the center of the flour mixture and pour in the cold buttermilk.
- Use a fork to mix the ingredients just until they come together into a shaggy dough. Do not overmix. Overmixing develops gluten and makes scones tough.
- Turn the dough out onto a lightly floured surface. Gently pat the dough into a 3/4-inch thick circle or rectangle.
- Cut the dough into 8 wedges or use a round cutter to cut out shapes. Place the scones onto the prepared baking sheet, ensuring they are touching slightly if you prefer softer sides.
- In a small bowl, whisk the egg and milk together for the egg wash. Brush the tops of the scones lightly with the wash.
- Bake for 12 to 15 minutes, or until the tops are golden brown and a toothpick inserted into the center comes out clean.
- Transfer the scones to a wire rack to cool slightly before serving.
Notes
- Keep all ingredients, especially the butter and buttermilk, very cold. This creates steam pockets during baking, resulting in taller scones.
- For extra height, chill the cut scones on the baking sheet for 10 minutes before placing them in the hot oven.
- If you want a glaze, mix 1 cup powdered sugar with 2 tablespoons milk or lemon juice until smooth, then drizzle over cooled scones.
Nutrition
- Serving Size: 1 scone
- Calories: 240
- Sugar: 6
- Sodium: 250
- Fat: 11
- Saturated Fat: 7
- Unsaturated Fat: 4
- Trans Fat: 0
- Carbohydrates: 32
- Fiber: 1
- Protein: 6
- Cholesterol: 45