

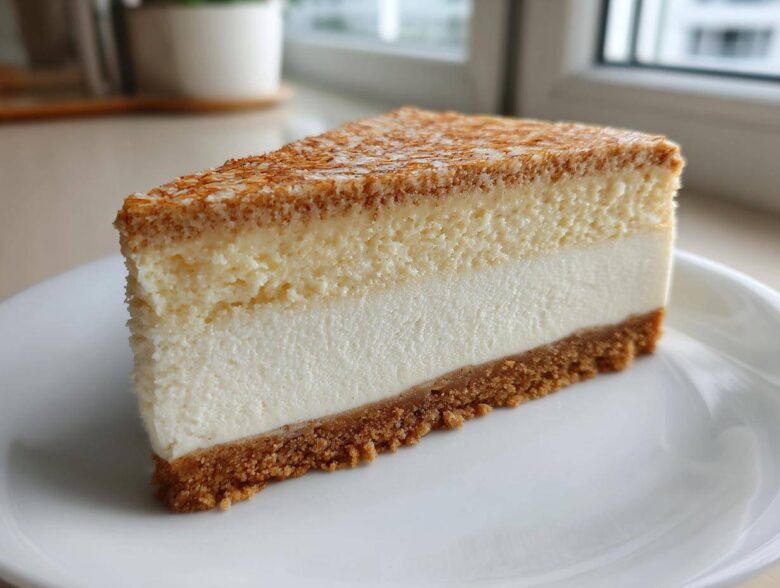
You know that feeling? You’ve crushed your workout, you’ve nailed your macros for the day, and then BAM—the craving hits for something truly decadent. Usually, that means shelving my dessert dreams until tomorrow. But not anymore! Hannah and I have worked so hard to crack the code on a dessert that’s genuinely satisfying and actually helps us hit our goals. Meet the Ultimate Healthy Baked Protein Cheesecake.
This is not some sad, chalky imitation, trust me! I’m Elias, and honestly, if I can eat this and still stay on track, anyone can. This recipe shows you exactly how the magic happens, delivering an incredible flavor profile while keeping that essential high Protein Cheesecake content locked in. It’s the best of both worlds, ready for you to try right now. If you want to know a little more about our story and how we approach food in our kitchen, you can always check out our About Us page.
Why This Baked Protein Cheesecake Is Your New Favorite Healthy Cheesecake Dessert
When we talk about the best versions of any recipe, we have to focus on what makes it work, right? This isn’t just about cutting calories; it’s about building flavor and texture while sticking to our goals. That’s why we went with a Protein Cheesecake that is baked—it gives you that rich mouthfeel you just can’t get in a no-bake recipe without adding tons of stabilizers.
Here’s why this recipe truly shines and fits right into a healthy eating schedule:
- It has the classic, rich ‘cheesecake’ flavor you dream about.
- It’s sturdy enough for slicing and prepping ahead for the week.
- It keeps sugar and fat way lower than the bakery versions you see everywhere.
We’re proud of this one, and it’s linked in our site disclaimer because we really want you to feel good about what you’re eating!
Macro Friendly Cheesecake Profile
Seriously, look at those numbers! Traditional cheesecake is usually a fat and sugar bomb, making it tough to fit into your daily totals. Our version flips the script. We’re clocking in at only 4 grams of sugar and 8 grams of fat, but here’s the kicker: we get about 35 glorious grams of protein per slice. That means you can satisfy that intense sweet craving and still feel great about hitting your fitness objectives for the day. It supports your gains instead of ruining them!
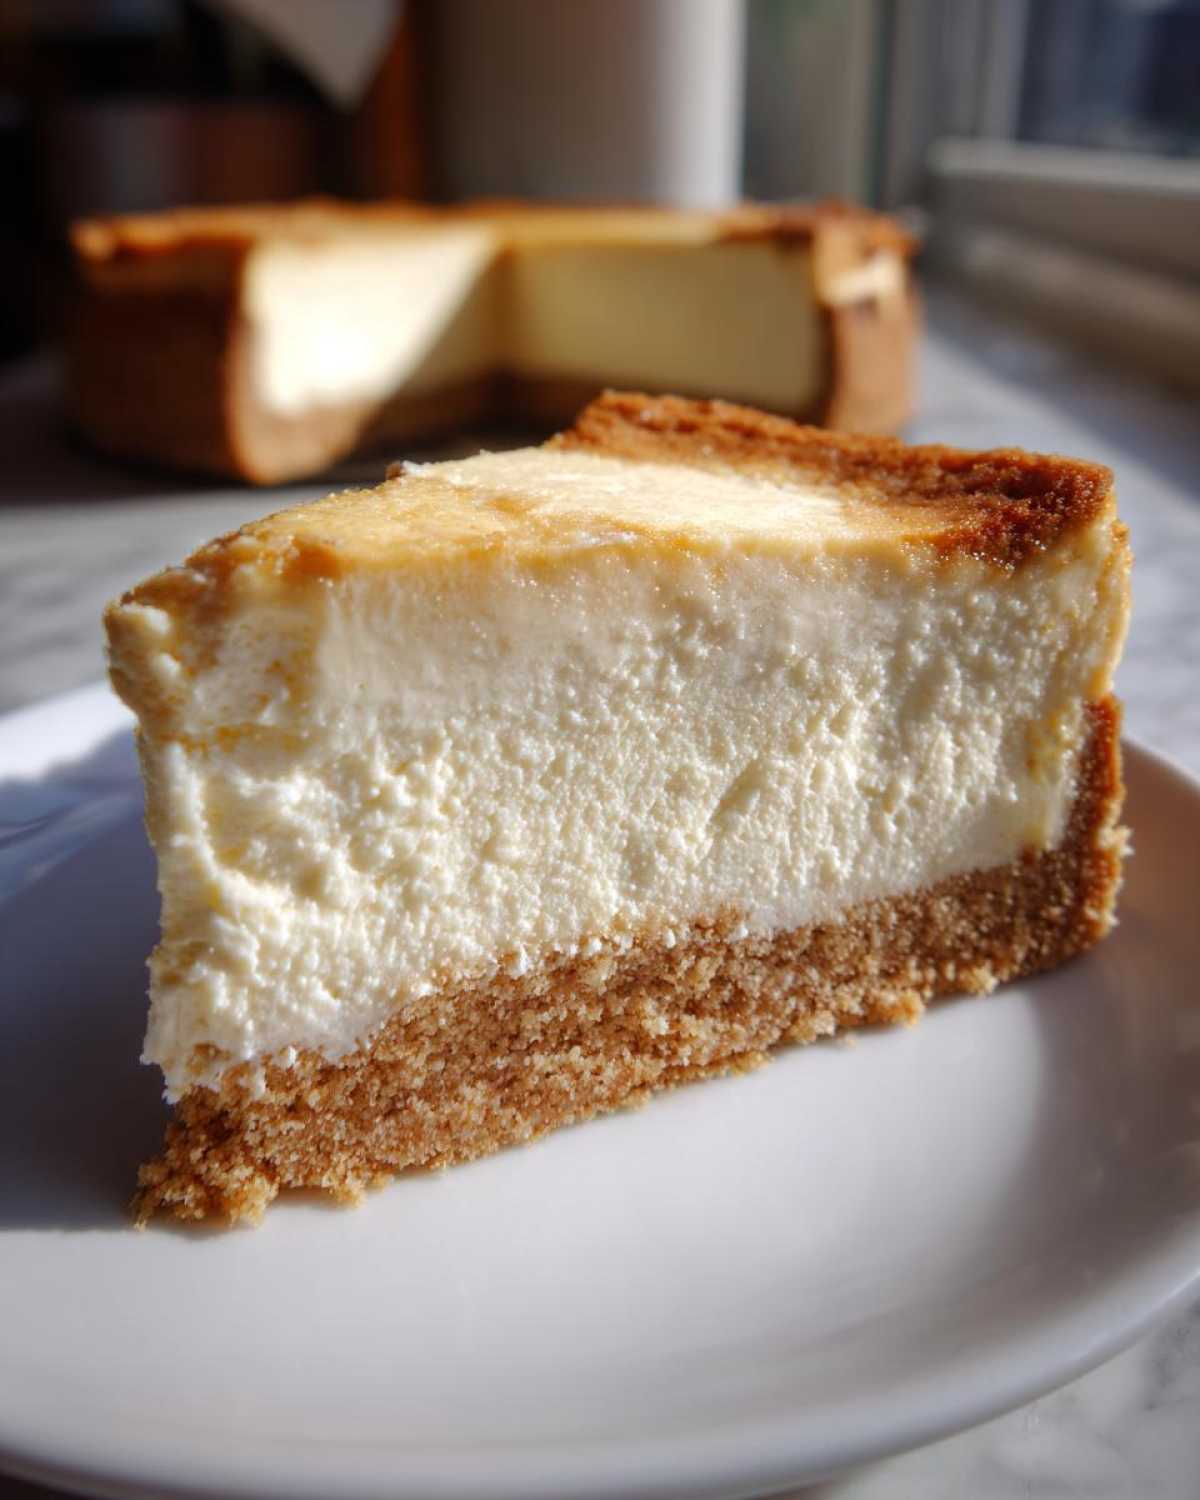
Achieving the Creamy Protein Dessert Texture
This is where people usually get nervous when baking with protein powder. They picture something gritty or dry. Not happening here! The secret to getting that wonderfully creamy protein dessert texture relies entirely on what we use to replace some of that heavy cream cheese. The combination of well-drained, blended cottage cheese and non-fat Greek yogurt creates a smooth, luscious base. When you follow the blending instructions for this Protein Cheesecake, the texture is unbelievably velvety—just like the real deal, only better for your goals!
Gathering Ingredients for Your Ultimate Baked Protein Cheesecake
Okay, let’s talk supplies. You know I love a recipe that uses simple things, but for this Protein Cheesecake to turn out perfectly—especially with those high protein counts—we need to be precise about what goes into the basket. Don’t substitute the major dairy items, or you risk ending up with something… well, not cheesecake-y! We’re keeping this recipe to one main section of ingredients since the crust is simple, but pay close attention to the dairy preparation notes below.
Crust Components
We’re keeping the crust light, but it still needs that nice baked crunch to hold up everything rich that comes next. Here’s what you need for the bottom layer:
- 1 1/2 cups graham cracker crumbs (or grab your favorite gluten-free alternative if you need it!)
- 1/4 cup melted light butter or coconut oil—your choice, just make sure it’s liquid!
- 1 teaspoon zero-calorie sweetener
High Protein Cheesecake Filling Base
This is where the magic happens for all that incredible protein! Getting these dairy items ready is the most important groundwork for your wonderful Protein Cheesecake.
- 16 ounces low-fat cottage cheese, and this is critical—it must be drained well! Seriously, press the excess liquid out.
- 1 cup plain non-fat Greek yogurt—again, use the good, thick stuff!
- 1/2 cup vanilla whey protein powder (Vanilla works best as a neutral base.)
- 1/2 cup granulated sugar substitute (Erythritol or a monk fruit blend works beautifully here.)
- 1 teaspoon vanilla extract
- 1/4 teaspoon salt
- 3 large eggs
If you’re looking for other ways to work cottage cheese into your baking routine without the hassle of baking, I have a fun little recipe for Cottage Cheese Microwave Brownies that might catch your eye!
How to Prepare the Baked Protein Cheesecake Step-by-Step
If you follow the ingredient list carefully, the actual assembly of this Protein Cheesecake is wonderfully straightforward! Baking it right, however, is what separates a great dessert from a legendary one. Hannah always says I fuss too much with the cooling part, but trust me—that step saves you from the dreaded cracked top!
Preparing the Crust and Preheating
First things first, get your oven warmed up to 325°F (160°C). You’ll want to lightly grease a 9-inch springform pan—that’s the pan with the removable side, which makes serving so much cleaner! In a small bowl, mix your graham cracker crumbs, 1/4 cup of melted butter (or coconut oil), and that tiny bit of sweetener we listed. Press that mixture down really firmly into the bottom of your prepared pan. Then, pop that crust in the oven for just 8 minutes. You just want it set. Hang tight there for those 8 minutes, then take it out to cool off a little while you tackle the filling.
Creating the Smooth Cottage Cheese Cheesecake Filling
This is the non-negotiable part if you want that silky texture every time. Grab your food processor or a really mean high-powered blender. We need those 16 ounces of drained cottage cheese right in there along with your Greek yogurt, vanilla extract, and salt. You have to blend this until it is completely smooth. I mean it—stop, scrape down the sides, and blend some more until you see no graininess whatsoever. Lumps here mean lumpy cheesecake later, and we are aiming for pure creaminess!
Once it looks like smooth spun silk, add your protein powder and your sugar substitute. Blend just until those powders disappear into the mix. Now, add your three eggs one at a time. Blend briefly after each egg—just long enough to incorporate it. As soon as the last egg is mixed in, stop! Overmixing those eggs introduces air, and air is the enemy of a crack-free cheesecake.
Baking and Slow Cooling the Protein Cheesecake
Pour that beautiful filling right over your slightly cooled crust. Time to bake! Put it in for 45 to 55 minutes. You’re looking for the edges to look set when you gently shake the pan, but you should see a little wobble right in the very center. That slight jiggle means it’s perfect!
And here is my main tip for keeping your Protein Cheesecake top pristine: Don’t take it out yet! Turn the oven off completely. Prop the door open just a crack—you can use a wooden spoon handle to hold it slightly ajar. Let the cheesecake cool slowly inside the turned-off oven for a full hour. This slow transition keeps the temperature from dropping too fast, which is what causes those sad, telltale cracks. After that hour, move it out to a wire rack to cool completely before it heads into the fridge for its long chill. If you’re looking for other great recipes built around using high-protein dairy, check out my tips on High-Protein Waffles!
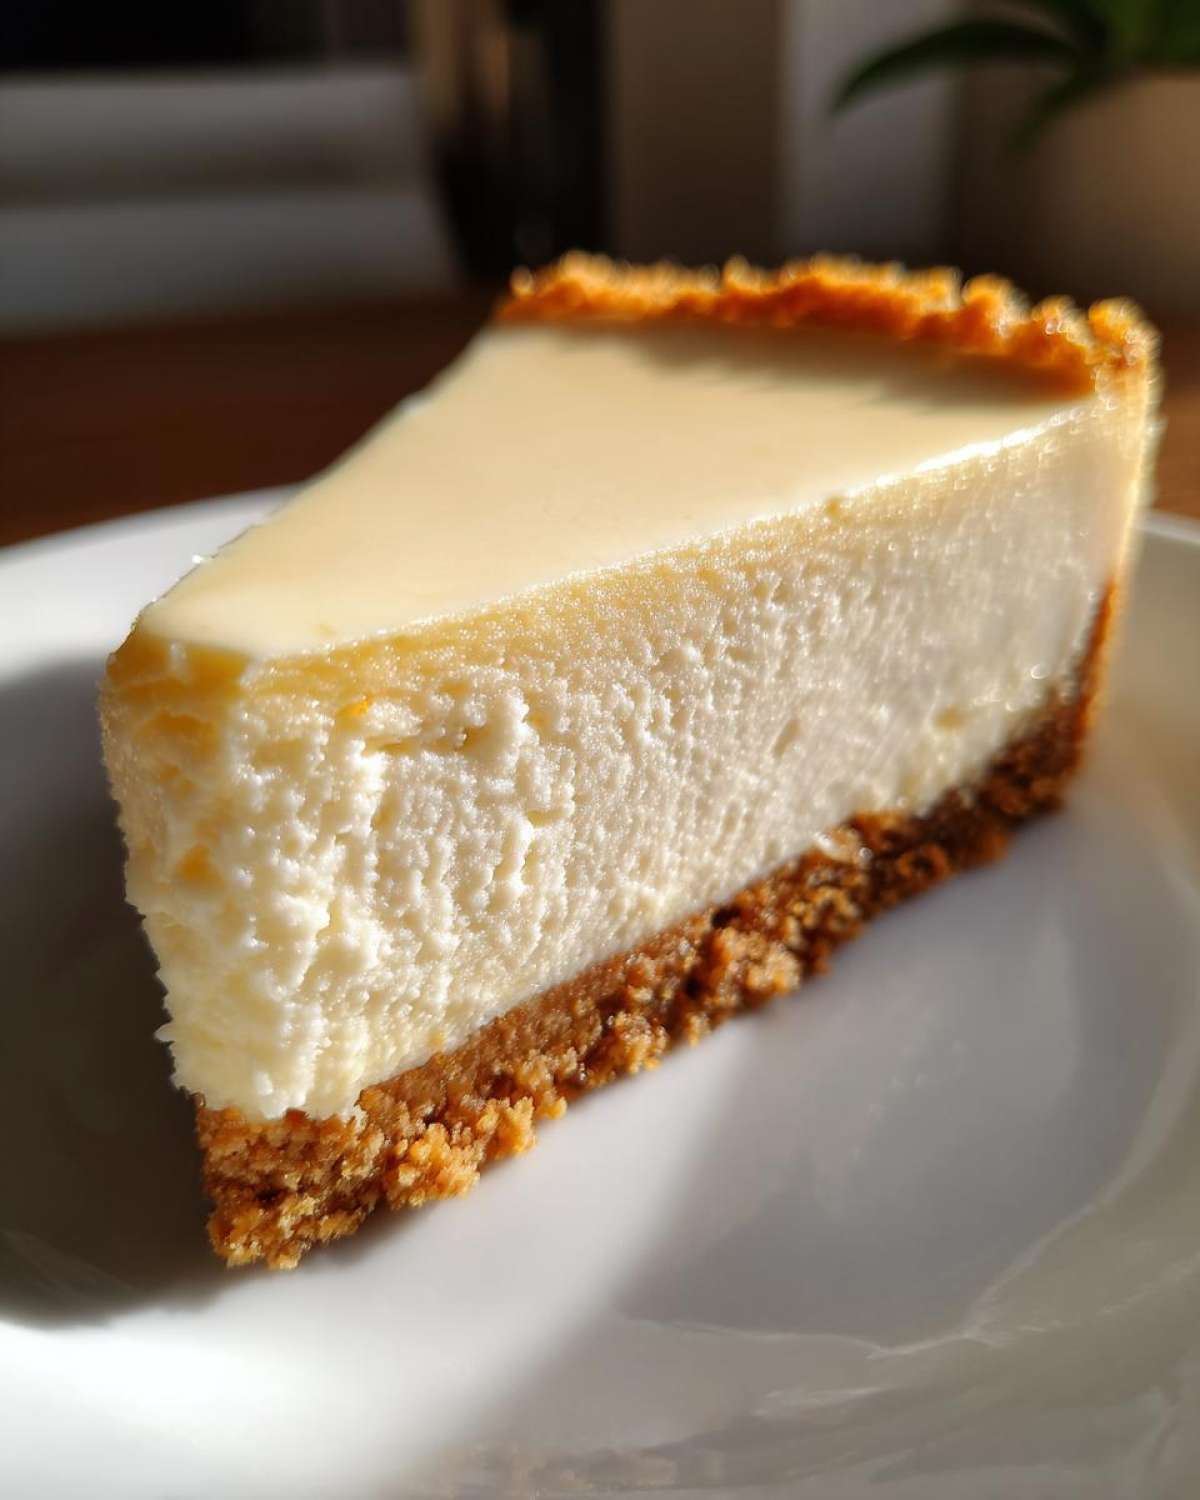
Tips for the Best Macro Friendly Cheesecake Results
I know we covered the recipe steps, but sometimes, knowing the little tricks makes a huge difference between a “good” result and a “wow, I can’t believe this is healthy” result. I’ve learned so much experimenting with this perfect Protein Cheesecake, especially trying to get that bakery-level smoothness.
The notes section from the original recipe card—the one that Hannah nearly threw out because it had a faint coffee stain on the corner—gave us a few golden rules that I always stick to now. Let’s go over the key things that guarantee success.
Ingredient Preparation for Creamy Protein Dessert
If you skip this, you risk your whole batch! We talked about the cottage cheese needing to be drained well, and I really can’t stress that enough. If your cottage cheese is hanging out in watery liquid, that liquid has nowhere to go but into your baking batter. It loosens everything up and messes with the structure we are trying so hard to nail down.
My absolute favorite way to guarantee it’s dry enough is to put that drained cottage cheese between a few sturdy layers of paper towels right on a plate. Then, I gently press down on it with the bottom of a measuring cup for a minute or two. It sounds fussy, but pulling that moisture out means you get a pure, thick base for your creamy protein dessert. It works like a charm every single time! If you need more ideas for using those high-protein egg cups, check out my recipe for Cottage Cheese Egg Cups with Spinach and Feta.
The Essential Overnight Chill for Perfect Protein Cheesecake
You’ve baked it, you’ve slowly cooled it in the oven—don’t rush to eat it now! This next step is crucial for structural integrity and amazing flavor. You must chill this cheesecake for a minimum of 6 hours, but honestly, overnight is where it transforms.
Why the wait? As the cheesecake chills, the protein powder absorbs remaining moisture, firming up the texture beautifully, and the subtle sweetness of the erythritol/monk fruit really mellows into the background, letting the vanilla and dairy flavors shine. If you cut it early, it might still be a little too soft and floppy. Patience rewards you with a slice that holds its shape perfectly for meal prep or serving.
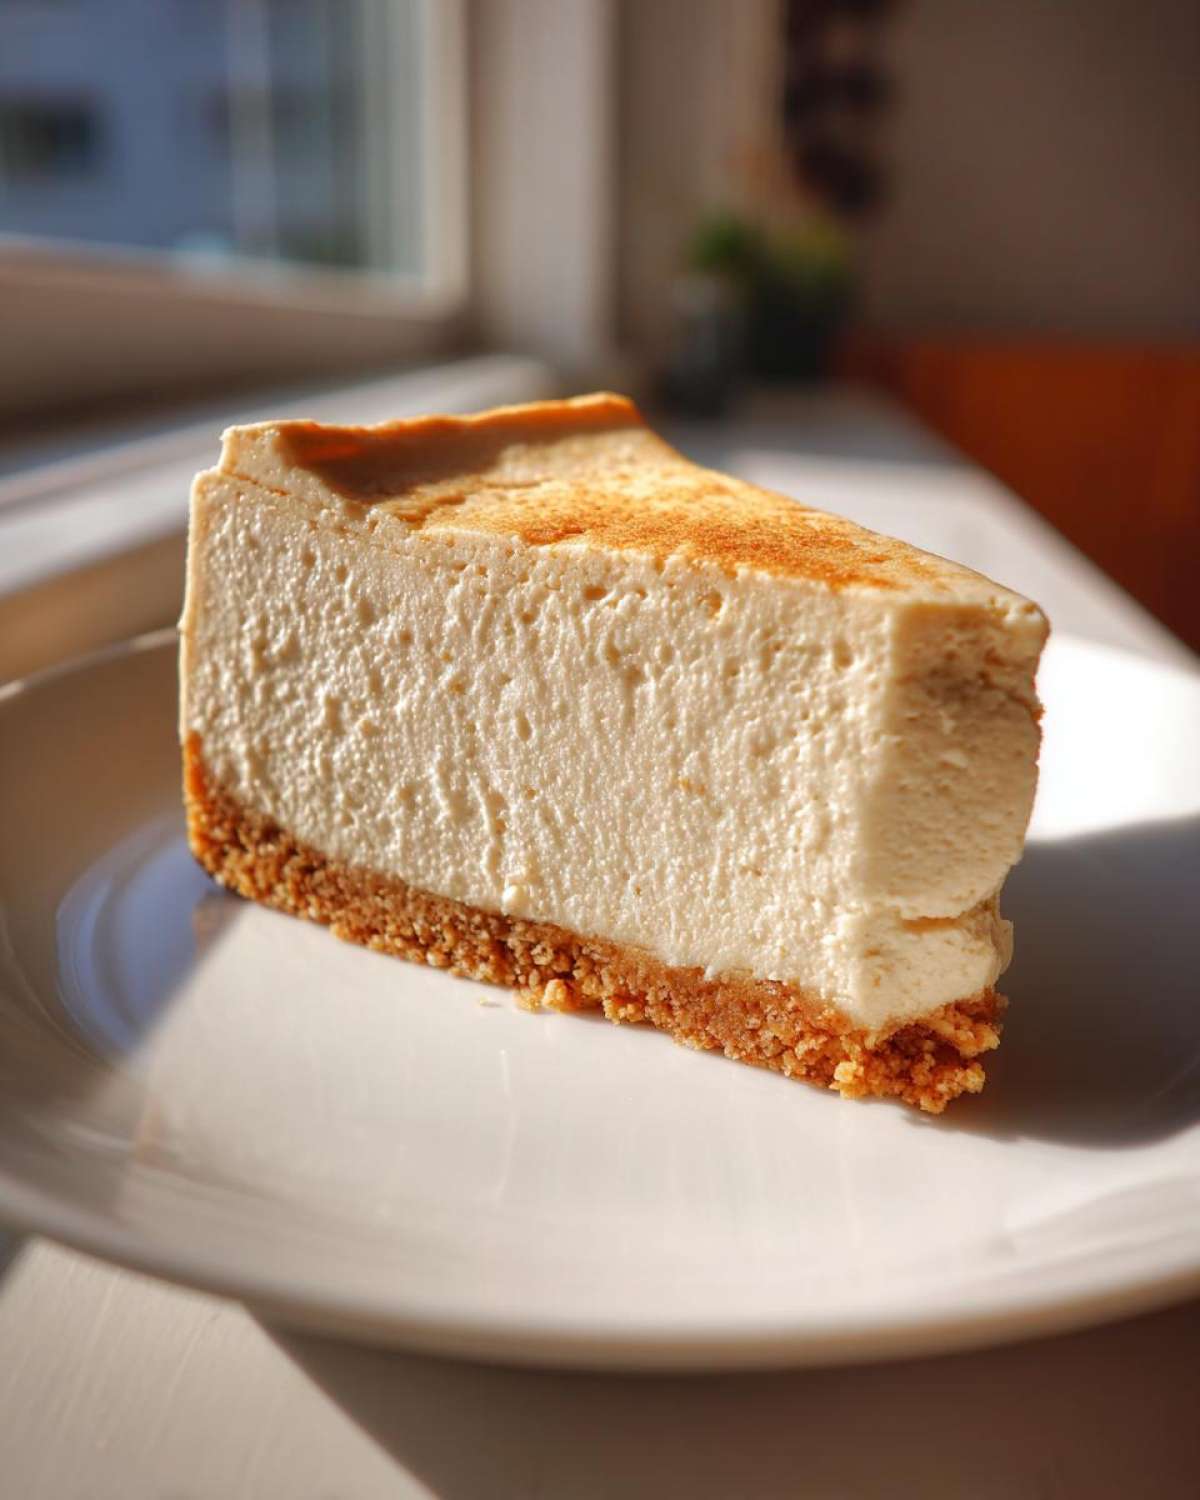
Variations: From Baked Protein Cheesecake to Easy Cheesecake Jars
I absolutely love that you’re thinking beyond just the baked version! While this baked Protein Cheesecake is my current favorite for that rich, familiar texture, sometimes you just don’t want to turn on the oven, or maybe you need something super portable. The beauty of using cottage cheese and Greek yogurt as our base is that this recipe format is incredibly adaptable. We can pivot easily!
Making a No Bake Protein Cheesecake Version
If you are reading this on a scorching summer day, I totally get it—the oven is a definite no-go. Luckily, because we’ve already gotten the base mixture so smooth and rich (remember that crucial blending step?), turning this into a no-bake version is super simple. You skip all the baking, turning off the oven, and slow cooling nonsense.
Instead of baking it for 45 minutes, just pour that filling right into your prepared crust and move it immediately into the refrigerator. You’ll need to let it chill for at least 4 hours, but honestly, giving it 6 hours will ensure it sets up perfectly firm. It gives you a lighter, fluffier texture that is just as satisfying.
Portion Control: Mini Protein Cheesecakes or Jars
Sometimes, the hardest part about a great dessert is knowing when to stop eating it! That’s where portion control saves the day. If you look around at others making similar treats, you’ll see tons of ideas for Mini Protein Cheesecakes or those fun Easy Cheesecake Jars. They are brilliant for grab-and-go snacks or making sure you only have one serving after dinner.
To use this recipe for minis, you can either use a muffin tin lined with cupcake liners or layer the mixture directly into small mason jars. The baking time will drop significantly—usually around 20 minutes for minis. If you’re looking for other amazing low-prep, high-protein desserts, you can check out ideas like the one over at Galley Bites about how they prep their High Protein Cheesecake versions!
If you’re a fan of no-bake options in general—especially those layered beauties—I have a great recipe for a No-Bake Creamy Oreo Pie that shares a similar quick-prep vibe!
Serving Suggestions for Your Guilt Free Cheesecake Treat
Now that you have this incredible, guilt-free cheesecake cooling perfectly, we have to talk about the finishing touches! Since the base of this Guilt Free Cheesecake Treat is already so focused on keeping things macro friendly, the toppings need to follow suit. You definitely don’t want to ruin those amazing numbers we worked so hard for with a mountain of sugary sauce, right?
Honestly, my favorite way to serve this Greek Yogurt Dessert is incredibly simple. A light dusting of powdered sweetener or a few fresh berries is usually all it needs. The texture is so creamy from the cottage cheese and yogurt mixture that it stands up beautifully on its own. But if you want to dress it up without adding guilt, try one of these complementary ideas:
- Fresh Berry Compote: Lightly simmer a cup of mixed berries (strawberries, raspberries, or blueberries) with a tablespoon of water and a dash of zero-calorie sweetener. That slight tartness cuts through the richness perfectly!
- Lemon Zest Swirl: Grate some fresh lemon zest right over the top just before slicing. It adds brightness and an aroma that makes the whole dessert feel lighter.
- Nutty Crunch: A sprinkle of chopped pecans or walnuts adds great texture contrast. Just watch the serving size if you’re tracking fats closely!
If you’re obsessed with baking high-protein things, make sure you check out our recipe for Blueberry Protein Muffins—they make a fantastic breakfast option when you need that post-workout protein boost!
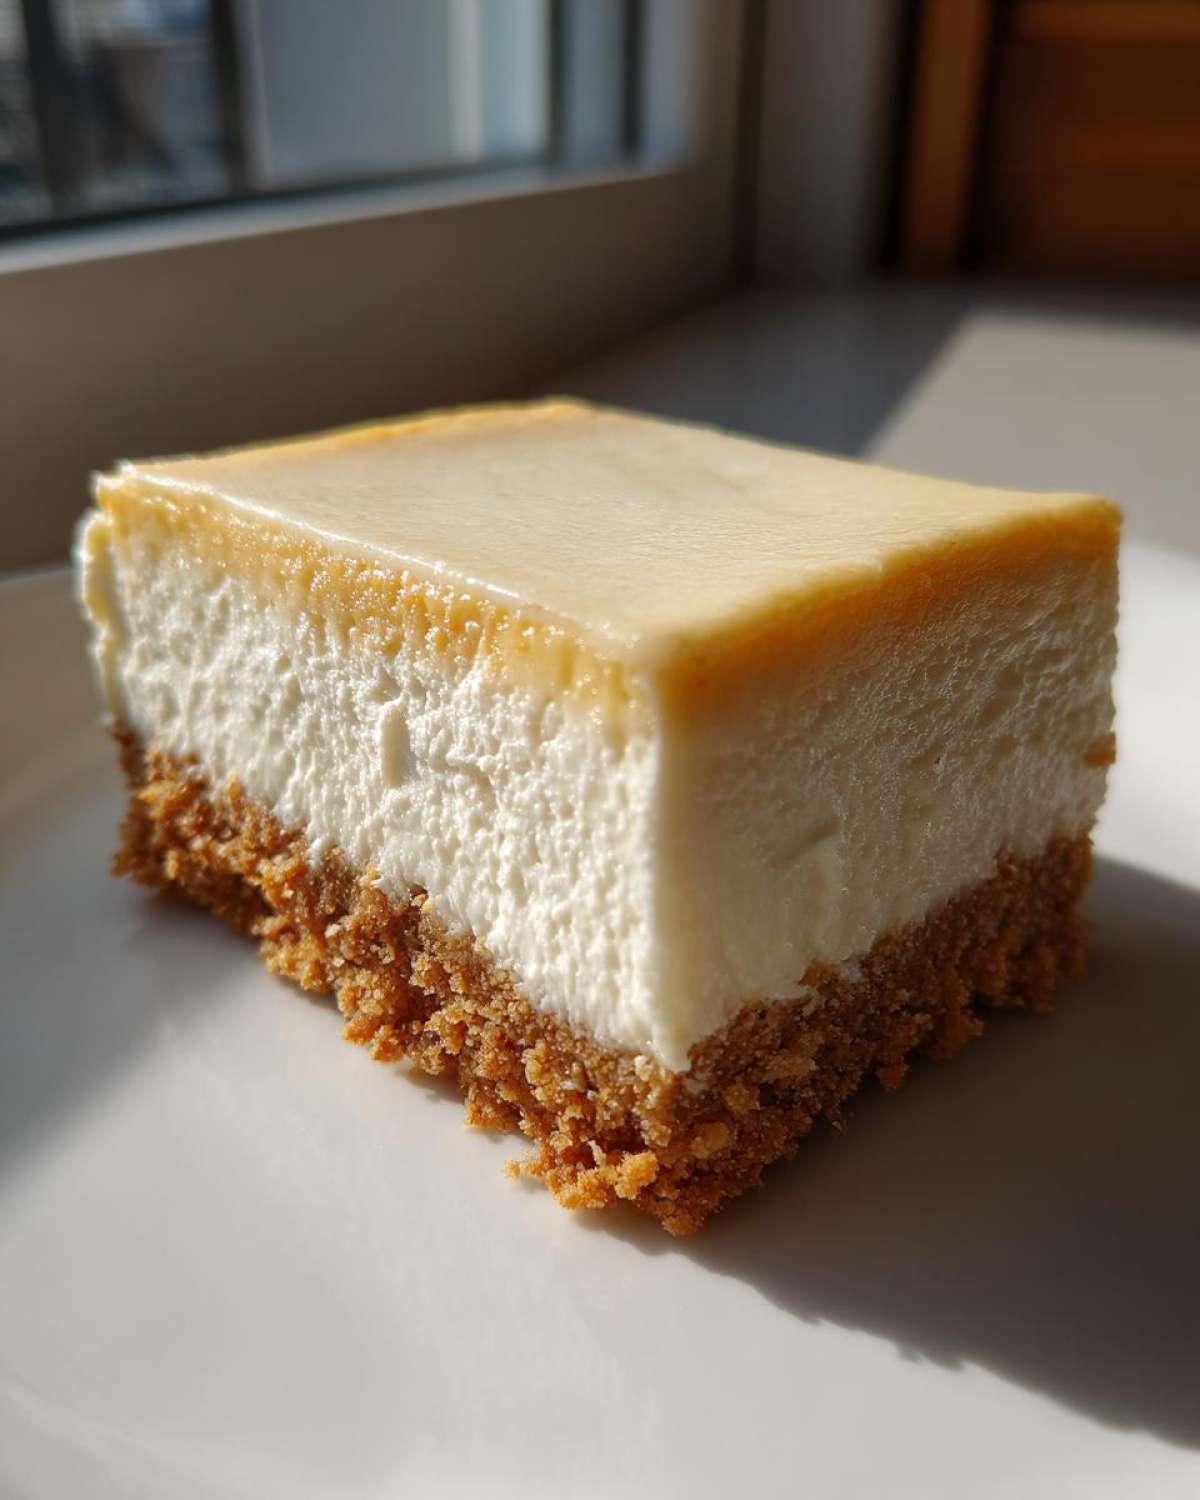
Storage and Protein Dessert Meal Prep Guidelines
One of the major reasons I love this whole Protein Cheesecake concept is how perfectly it lends itself to planning ahead. Who wants to bake a dessert only to have it disappear in one night? Not me! This recipe is fantastic for both storing leftovers safely and for setting yourself up for success when it comes to your Protein Dessert Meal Prep for the week.
Because we used a baked method and kept the fat content quite low compared to heavy cream cheese versions, this cheesecake is incredibly stable in the fridge. After that essential overnight chill, it firms up beautifully, making it easy to cut clean squares that hold their shape.
Here is the lowdown on how Hannah and I handle storage. When you’re ready to eat a slice, just pull it out of the fridge about 15 minutes before. That slight warming takes away the refrigerator chill and lets the creamy texture really come back to life.
- Refrigeration Time: Keep the cheesecake tightly covered in the springform pan or transferred to an airtight container. It stays primo and safe in the fridge for up to 4 or 5 days. I’ve honestly never had it last longer than that because we eat it too fast!
- Freezing Tip: If you need it to last longer, you absolutely can freeze it! Slice it first, then wrap each individual slice tightly in plastic wrap, followed by a layer of foil. It freezes well for up to two months. When thawing, move the slice from the freezer to the fridge overnight for the best texture restoration.
- Meal Planning Bonus: Since this is so macro-friendly, I often cut the entire 10-serving cake into 12 or even 14 smaller portions when prepping. That way, I get a super satisfying boost of protein without touching my usual dessert macro budget for the day. It’s perfect for grabbing straight out of the fridge when that midday craving hits.
Speaking of making things ahead of time, if you need a great savory plan for the mornings, you’ve got to try my recipe for Easy Make-Ahead Egg Bakes—that’s another staple in our weekly routine!
Frequently Asked Questions About Protein Cheesecake
I always love hearing what you all want to know after you’ve made something! Hannah says I spend too much time answering comments, but hey, this is our little community, and I want everyone who tries this Protein Cheesecake to succeed. Here are a few questions we get asked all the time about this recipe, just to make sure things are crystal clear before you dive in!
Can I substitute the protein powder flavor in this Protein Cheesecake Recipe?
Great question! We settled on vanilla whey powder because it’s so neutral; it lets the subtle sweetness of the carrots (if you added any!) and the dairy shine through perfectly. If you want to try chocolate protein powder instead, you absolutely can! Chocolate pairs beautifully with that crust flavor. Just be aware that chocolate powder tends to absorb a little more moisture, so you might end up with a slightly less creamy texture, or it could set up a bit firmer. If you notice it seems slightly dry after baking, just add a tiny splash of unsweetened almond milk during that main blending step. If you use unflavored, you definitely won’t have any issues with flavor clash, but you might want to bump up your vanilla extract to a teaspoon and a half!
Is this recipe truly Low Calorie Cheesecake?
When you compare it to what you pay $8 for at a bakery, yes, absolutely! Remember the nutrition breakdown we shared? We are clocking in at only 240 calories per slice, and that’s for a generously sized piece that packs 35 grams of protein! Traditional cheesecakes often run 450-600 calories a slice with half the protein. So, I wouldn’t call it “zero calorie,” because that would be dishonest! But compared to the standard, this is definitely a fantastic Low Calorie Cheesecake option that lets you enjoy dessert without derailing your entire day’s intake. It’s real satisfaction for a fraction of the cost and macros!
What is the best way to ensure a perfectly smooth Cottage Cheese Cheesecake Recipe?
Ah, the smooth factor! This is my hill to die on, folks. If you leave coarse little bits of cottage cheese in there, you’ll end up with a grainy texture, and that ruins the whole experience. You need to treat the cottage cheese and Greek yogurt mixture like a science experiment—it needs to become liquid silk! Use the food processor or a high-speed blender, and blend it, blend it, blend it until there are absolutely no visual lumps left. Stop the machine, scrape down every side, and blend again. Then, and only then, do you start adding the protein powder and the eggs. Keeping that dairy base completely pure before adding the eggs is the key to a silky finish in this Cottage Cheese Cheesecake Recipe!
If you want to explore more of our favorite healthy baking projects, head over to the main Flavor Vista Blog for more inspiration. And if you see something awesome that someone else has made using this recipe, like the one I saw on The Big Man’s World about their own Protein Cheesecake, send me the link! I love seeing your adaptations.
Nutritional Estimates for This Light Cheesecake Recipe
I always want to be super transparent about the numbers. Remember, these estimates are based exactly on the ingredients listed—if you use a different brand of protein powder or a different sweetener blend, the numbers will shift slightly. But for reference, here is what you can generally expect from one slice of this Light Cheesecake Recipe (based on 10 servings):
- Calories: About 240 per slice
- Protein: A whopping 35 grams!
- Fat: Around 8 grams
- Carbohydrates: Approximately 18 grams
See? That 35 grams of protein really makes this dessert work hard for you! It’s a perfect post-dinner, macro-friendly win.
Share Your Satisfying Protein Snax Creation
That’s it—you are now officially equipped to make what I honestly believe is the best high-protein cheesecake out there. I truly hope this becomes a staple for you whenever you need a Satisfying Protein Snax that feels totally indulgent. Hannah and I live for community feedback, so please, if you make this, let us know how it went!
If you loved this recipe, please drop a rating below using the five stars—it helps us know what kind of content you want to see more of here at Flavor Vista. If you have any weird leftover questions about draining cottage cheese or the slow cool-down process, don’t hesitate to drop them in the comments, or you can always reach out directly through our Contact page. Happy baking, everyone!
Nutritional Estimates for This Light Cheesecake Recipe
I always want to be super transparent about the numbers. Remember, these estimates are based exactly on the ingredients listed—if you use a different brand of protein powder or a different sweetener blend, the numbers will shift slightly. But for reference, here is what you can generally expect from one slice of this Light Cheesecake Recipe (based on 10 servings):
- Calories: About 240 per slice
- Protein: A whopping 35 grams!
- Fat: Around 8 grams
- Carbohydrates: Approximately 18 grams
See? That 35 grams of protein really makes this dessert work hard for you! It’s a perfect post-dinner, macro-friendly win.
Share Your Satisfying Protein Snax Creation
That’s it—you are now officially equipped to make what I honestly believe is the best high-protein cheesecake out there. I truly hope this becomes a staple for you whenever you need a Satisfying Protein Snax that feels totally indulgent. Hannah and I live for community feedback, so please, if you make this, let us know how it went!
If you loved this recipe, please drop a rating below using the five stars—it helps us know what kind of content you want to see more of here at Flavor Vista. If you have any weird leftover questions about draining cottage cheese or the slow cool-down process, don’t hesitate to drop them in the comments, or you can always reach out directly through our Contact page. Happy baking, everyone!
PrintUltimate Healthy Baked Protein Cheesecake (35g Protein Per Slice)
You want a dessert that tastes indulgent but supports your fitness goals. This baked protein cheesecake uses cottage cheese and Greek yogurt to achieve a creamy texture while delivering a high amount of protein per serving. It is a macro friendly cheesecake that fits into a healthy eating plan.
- Prep Time: 20 min
- Cook Time: 50 min
- Total Time: 7 hours 10 min
- Yield: 10 servings
- Category: Dessert
- Method: Baking
- Cuisine: American
- Diet: Low Fat
Ingredients
- 1 1/2 cups graham cracker crumbs (or gluten free alternative)
- 1/4 cup melted light butter or coconut oil
- 1 teaspoon zero-calorie sweetener
- 16 ounces low-fat cottage cheese, drained well
- 1 cup plain non-fat Greek yogurt
- 1/2 cup vanilla whey protein powder
- 1/2 cup granulated sugar substitute (erythritol or monk fruit blend)
- 1 teaspoon vanilla extract
- 1/4 teaspoon salt
- 3 large eggs
Instructions
- Preheat your oven to 325°F (160°C). Lightly grease a 9-inch springform pan.
- Prepare the crust: In a small bowl, mix the graham cracker crumbs, melted butter, and 1 teaspoon of sweetener. Press this mixture firmly into the bottom of the prepared springform pan. Bake the crust for 8 minutes, then remove and let it cool slightly.
- Prepare the filling: Place the drained cottage cheese, Greek yogurt, vanilla extract, and salt into a food processor or high-powered blender. Blend until completely smooth, scraping down the sides as needed. You must eliminate all lumps for a creamy texture.
- Add the protein powder and sugar substitute to the smooth cheese mixture. Blend until just combined.
- Add the eggs one at a time, blending briefly after each addition until they are incorporated. Do not overmix once the eggs are added.
- Pour the filling over the cooled crust in the springform pan.
- Bake for 45 to 55 minutes. The edges should look set, but the center should still have a slight jiggle.
- Turn off the oven, crack the door open slightly, and let the cheesecake cool inside the oven for 1 hour. This slow cooling prevents cracking.
- Remove the cheesecake from the oven and let it cool completely on a wire rack.
- Chill the protein cheesecake in the refrigerator for at least 6 hours, or preferably overnight, before slicing and serving.
Notes
- For the creamiest result, make sure your cottage cheese is well-drained before blending. Pressing it between paper towels works well.
- If you prefer a no-bake version, chill the filling mixture for at least 4 hours instead of baking.
- This recipe yields about 10 servings, providing approximately 35g of protein per slice when using standard whey protein.
Nutrition
- Serving Size: 1 slice
- Calories: 240
- Sugar: 4
- Sodium: 280
- Fat: 8
- Saturated Fat: 4
- Unsaturated Fat: 4
- Trans Fat: 0
- Carbohydrates: 18
- Fiber: 1
- Protein: 35
- Cholesterol: 85