

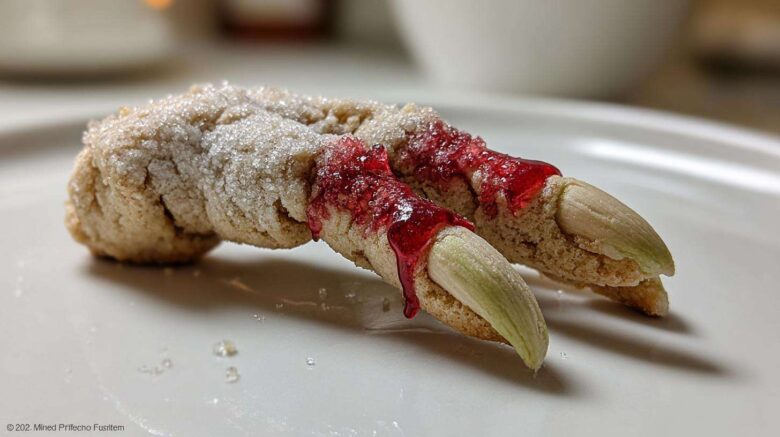
Hey there, fellow food adventurers! As autumn leaves start to fall, my mind always drifts to one thing: Halloween! There’s something so magical about this time of year. It brings back memories of crisp air and cozy nights. Hannah and I just love getting into the spirit. We always look for fun ways to make our kitchen a little spookier. One year, we got this idea to make something truly eerie. We wanted a treat that would make people gasp, then grab another one. That’s how we stumbled upon our absolute favorite Halloween delight: Witch Finger Cookies.
These aren’t just any cookies. They’re creepy, they’re kooky, and they are so much fun to make. Every time I bring a plate of these out, I see the wide eyes and hear the excited squeals. It’s truly a sight to behold. Imagine a cookie that looks like it just crawled out of a haunted house. Yet, it melts perfectly in your mouth. That’s the magic of these treats. They perfectly capture the playful spirit of Halloween. They’re a staple for our annual spooky feast.
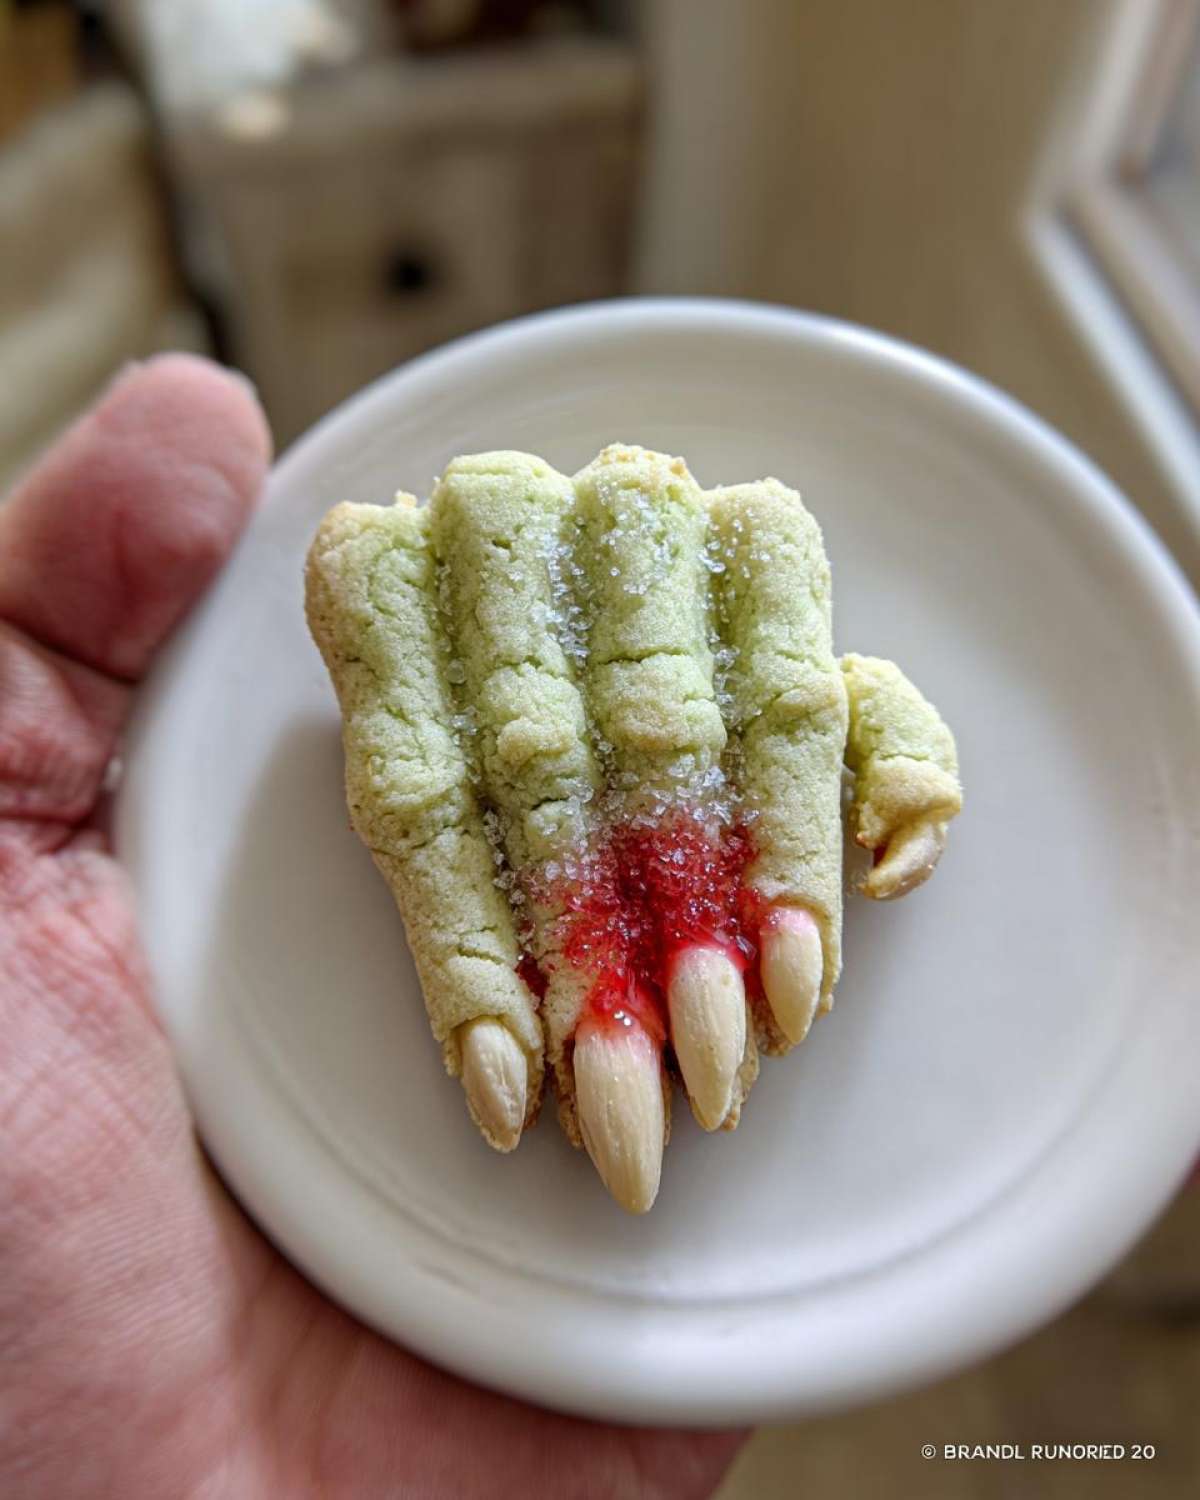
Why You’ll Love These Spooky Witch Finger Cookies
I promise, these aren’t just for looks. These witch finger cookies are a total showstopper! They’re super easy to make, even for beginners. Plus, they bring so much fun to any Halloween gathering. You’ll love how they:
- Look incredibly spooky and realistic.
- Are surprisingly simple to bake.
- Taste buttery and delicious.
- Become the talk of your party.
- Make Halloween baking a blast.
The Magic Behind Our Witch Finger Cookies
What makes our witch finger cookies so special? It’s simple. We focus on a perfect balance. They’re soft, chewy, and hold their eerie shape. This recipe uses basic ingredients. It gives you reliable results every time. It’s all about making cooking joyful.
Essential Ingredients for Witch Finger Cookies
To whip up these wonderfully creepy witch finger cookies, you’ll need just a few key things. I always make sure I have these on hand. You’ll need one cup of softened unsalted butter. Also, grab one cup of powdered sugar. Don’t forget one large egg and a teaspoon of vanilla extract. A half teaspoon of almond extract adds a special touch. You’ll also need two and a half cups of all-purpose flour. One teaspoon of baking powder and a half teaspoon of salt are essential. For that eerie green glow, green food coloring is optional. Whole blanched almonds are for the fingernails. Red gel food coloring or edible red glitter gel can create a cool ‘blood’ effect.
Gathering Your Supplies for Perfect Witch Finger Cookies
For the best witch finger cookies, quality matters. I always reach for good butter; it makes a difference. Fresh eggs are a must for baking. Finding blanched almonds is easy at most grocery stores. If you want truly vibrant green cookies, invest in gel food coloring. It gives a brighter, more even color than liquid drops. These small choices add up to perfect results.
How to Make Eerie Witch Finger Cookies
Now, let’s get to the fun part: making these spooky witch finger cookies! First, grab a large bowl. Cream together your softened butter and powdered sugar. Beat them until they’re light and fluffy. Next, mix in the egg, vanilla, and almond extracts. Make sure they are well combined. In a separate bowl, whisk your flour, baking powder, and salt. Then, slowly add these dry ingredients to the wet ones. Mix until just combined. If you want green witch finger cookies, now’s the time. Add your green food coloring. Mix until you get that perfect eerie shade. I love a subtle, sickly green. It really adds to the creepy vibe. Divide the dough into four equal parts. Wrap each in plastic wrap. Pop them in the fridge for 30 minutes. This chilling step is super important. It stops your witch finger cookies from spreading too much. It keeps their spooky shape. While the dough chills, preheat your oven to 325°F (160°C). Line your baking sheets with parchment paper. This makes cleanup a breeze. Now you’re ready for the magic!
Crafting the Spooky Shape of Your Witch Finger Cookies
Working with one dough portion at a time is best. Roll a small piece into a 4-inch long finger shape. Think about a real finger. Gently pinch and indent the dough in two spots. This creates the knuckles. It makes your witch finger cookies look so realistic. Press a blanched almond onto one end. This is your “fingernail.” Make sure it’s secure. You want consistent sizes. This helps them bake evenly. Repeat until all your dough is used. Place them on your prepared baking sheets. Leave about an inch between each one. They need room to breathe.
Baking and Finishing Your Witch Finger Cookies
Now, it’s time to bake your witch finger cookies. Slide them into your preheated oven. Bake for 12 to 15 minutes. Look for lightly golden edges. This means they are done. Take them out of the oven. Let them cool completely on a wire rack. This is important for crispness. Once cool, you can add the final creepy touch. Dab a little red gel food coloring. Put it under the almond “fingernail.” This creates a gory “blood” effect. It makes them extra spooky.
Tips for Terrifyingly Good Witch Finger Cookies
I’ve learned a few tricks over the years. These make my witch finger cookies truly terrifyingly good. Always chill your dough! This is a non-negotiable step. It stops them from spreading. Your fingers will keep their creepy, distinct shape. Before baking, use a knife to score lines on the “knuckles.” This adds amazing detail. It makes them look even more realistic. When adding green food coloring, start small. You can always add more. A little goes a long way. You want an eerie, muted green. Not a vibrant, cheerful one. For the “blood,” a tiny dot is perfect. Less is often more for that chilling effect.
Storing Your Spooky Witch Finger Cookies
Once your witch finger cookies are baked and cooled, proper storage is key. You want to keep them fresh and delicious. Store them in an airtight container. They will last at room temperature for up to 3-4 days. For longer storage, you can freeze them. Wrap them tightly in plastic wrap first. Then place them in a freezer-safe bag. They’ll stay good for up to 2 months. Just thaw them at room temperature when you’re ready. They’ll be just as creepy and tasty!
Frequently Asked Questions About Witch Finger Cookies
I often get questions about these witch finger cookies. It’s great to hear so many of you are trying them! Here are some common questions. I hope these answers help you create the best spooky treats. Baking should always be fun. Don’t hesitate to experiment with these eerie delights. You’ll love sharing them!
Can I Prepare Witch Finger Cookies in Advance?
Yes, absolutely! You can make the dough for these witch finger cookies ahead of time. It can chill in the fridge for up to two days. This makes Halloween baking so much easier. You can also bake the cookies fully. Store them in an airtight container. They’ll be fresh for days.
What Can I Use Instead of Almonds for Witch Finger Cookies?
If you can’t use almonds, no worries! You have options for your witch finger cookies. Try pressing a red M&M or a small piece of red licorice onto the end. You could also use a pumpkin seed. Just make sure it looks like a spooky nail!
Why Are My Witch Finger Cookies Spreading?
If your witch finger cookies are spreading, the dough might be too warm. Make sure to chill the dough for at least 30 minutes. This helps them hold their shape. Also, ensure your butter isn’t too soft. A little extra flour can sometimes help too.
Estimated Nutritional Information for Witch Finger Cookies
I know many of you like to keep an eye on nutrition. The figures I share for these witch finger cookies are just estimates. They can change quite a bit! The exact values depend on your specific ingredients. Different brands have different nutritional profiles. So, please use these as a general guide. They are not precise calculations. Enjoy your spooky treats responsibly!
Share Your Spooky Witch Finger Cookies!
I absolutely love seeing your kitchen creations! If you whip up these witch finger cookies, please share them. Tag us on social media using #FlavorVista. Your photos inspire Hannah and me so much. We can’t wait to see your spooky results. Plus, leaving a comment or rating helps others. It builds our wonderful community. Happy baking, friends!
PrintHorrifyingly Delicious Witch Finger Cookies: 1 Easy Recipe

These witch finger cookies are a spooky and delicious treat for Halloween. They are eerily shaped like fingers, complete with an almond ‘fingernail’, making them a perfect addition to your Halloween dessert table.
- Prep Time: 45 minutes
- Cook Time: 15 minutes
- Total Time: 1 hour
- Yield: About 3 dozen cookies
- Category: Dessert
- Method: Baking
- Cuisine: American
Ingredients
- 1 cup (2 sticks) unsalted butter, softened
- 1 cup powdered sugar
- 1 large egg
- 1 teaspoon vanilla extract
- 1/2 teaspoon almond extract
- 2 1/2 cups all-purpose flour
- 1 teaspoon baking powder
- 1/2 teaspoon salt
- Green food coloring (optional)
- Whole blanched almonds (for fingernails)
- Red gel food coloring or edible red glitter gel (for ‘blood’ effect, optional)
Instructions
- In a large bowl, cream together the softened butter and powdered sugar until light and fluffy.
- Beat in the egg, vanilla extract, and almond extract until well combined.
- In a separate bowl, whisk together the flour, baking powder, and salt.
- Gradually add the dry ingredients to the wet ingredients, mixing until just combined. If using, add green food coloring at this stage until you reach your desired shade.
- Divide the dough into four equal portions, wrap each in plastic wrap, and chill in the refrigerator for 30 minutes.
- Preheat your oven to 325°F (160°C). Line baking sheets with parchment paper.
- Working with one portion of dough at a time, roll a small piece into a 4-inch long finger shape. Make knuckles by gently pinching and indenting the dough in two places.
- Press a blanched almond onto one end of each ‘finger’ to create a fingernail.
- Arrange the cookies on the prepared baking sheets, leaving about 1 inch between them.
- Bake for 12-15 minutes, or until the edges are lightly golden.
- Remove from the oven and let cool completely on a wire rack.
- Once cool, if desired, dab a small amount of red gel food coloring or edible red glitter gel under the almond ‘fingernail’ for a creepy ‘blood’ effect.
Notes
- Chilling the dough helps prevent the cookies from spreading too much during baking.
- You can make these cookies ahead of time and store them in an airtight container at room temperature for up to 3-4 days.
- For extra creepiness, you can score lines on the ‘knuckles’ with a knife before baking.
Nutrition
- Serving Size: 1 cookie
- Calories: 120
- Sugar: 8g
- Sodium: 60mg
- Fat: 7g
- Saturated Fat: 4g
- Unsaturated Fat: 3g
- Trans Fat: 0g
- Carbohydrates: 13g
- Fiber: 0.5g
- Protein: 1g
- Cholesterol: 25mg