

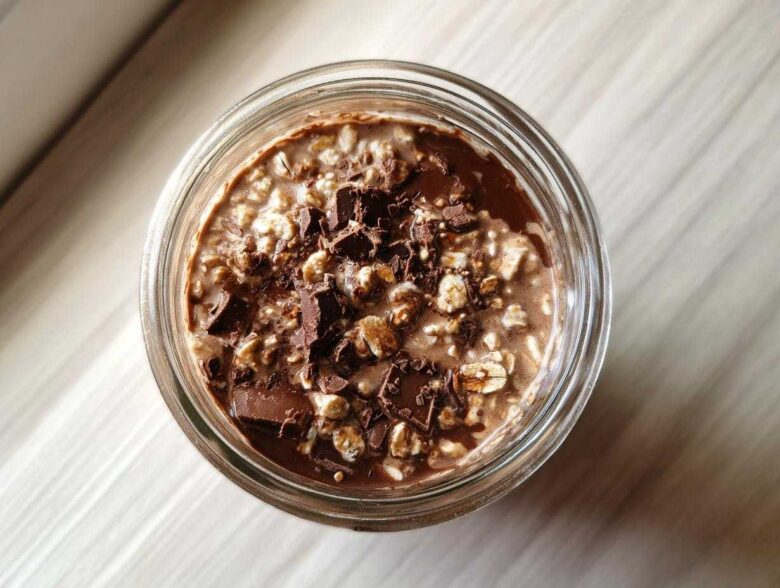
Ugh, mornings, right? Between hitting snooze three times and realizing I actually need to feed myself before running out the door, who has time for a real breakfast? I’ve spent years perfecting my make ahead breakfasts, and I finally locked down the absolute best solution for chocolate cravings: the ultimate **chocolate overnight oats**. Seriously, this recipe tastes like you stole a brownie from dessert, but it’s packed with good stuff we need to start the day. They are so easy!
Why This is the Ultimate Chocolate Overnight Oats Recipe
Look, there are a million ways to soak oats, but this one is different. This isn’t just oatmeal; it’s my signature answer to mornings when I desperately need a win. The flavor payoff when you pull this jar out of the fridge is huge—it tastes like a decadent treat, but it’s actually one of the best healthy breakfast recipes out there. It’s my go-to for that quick grab and go meal when I haven’t got two minutes to spare.
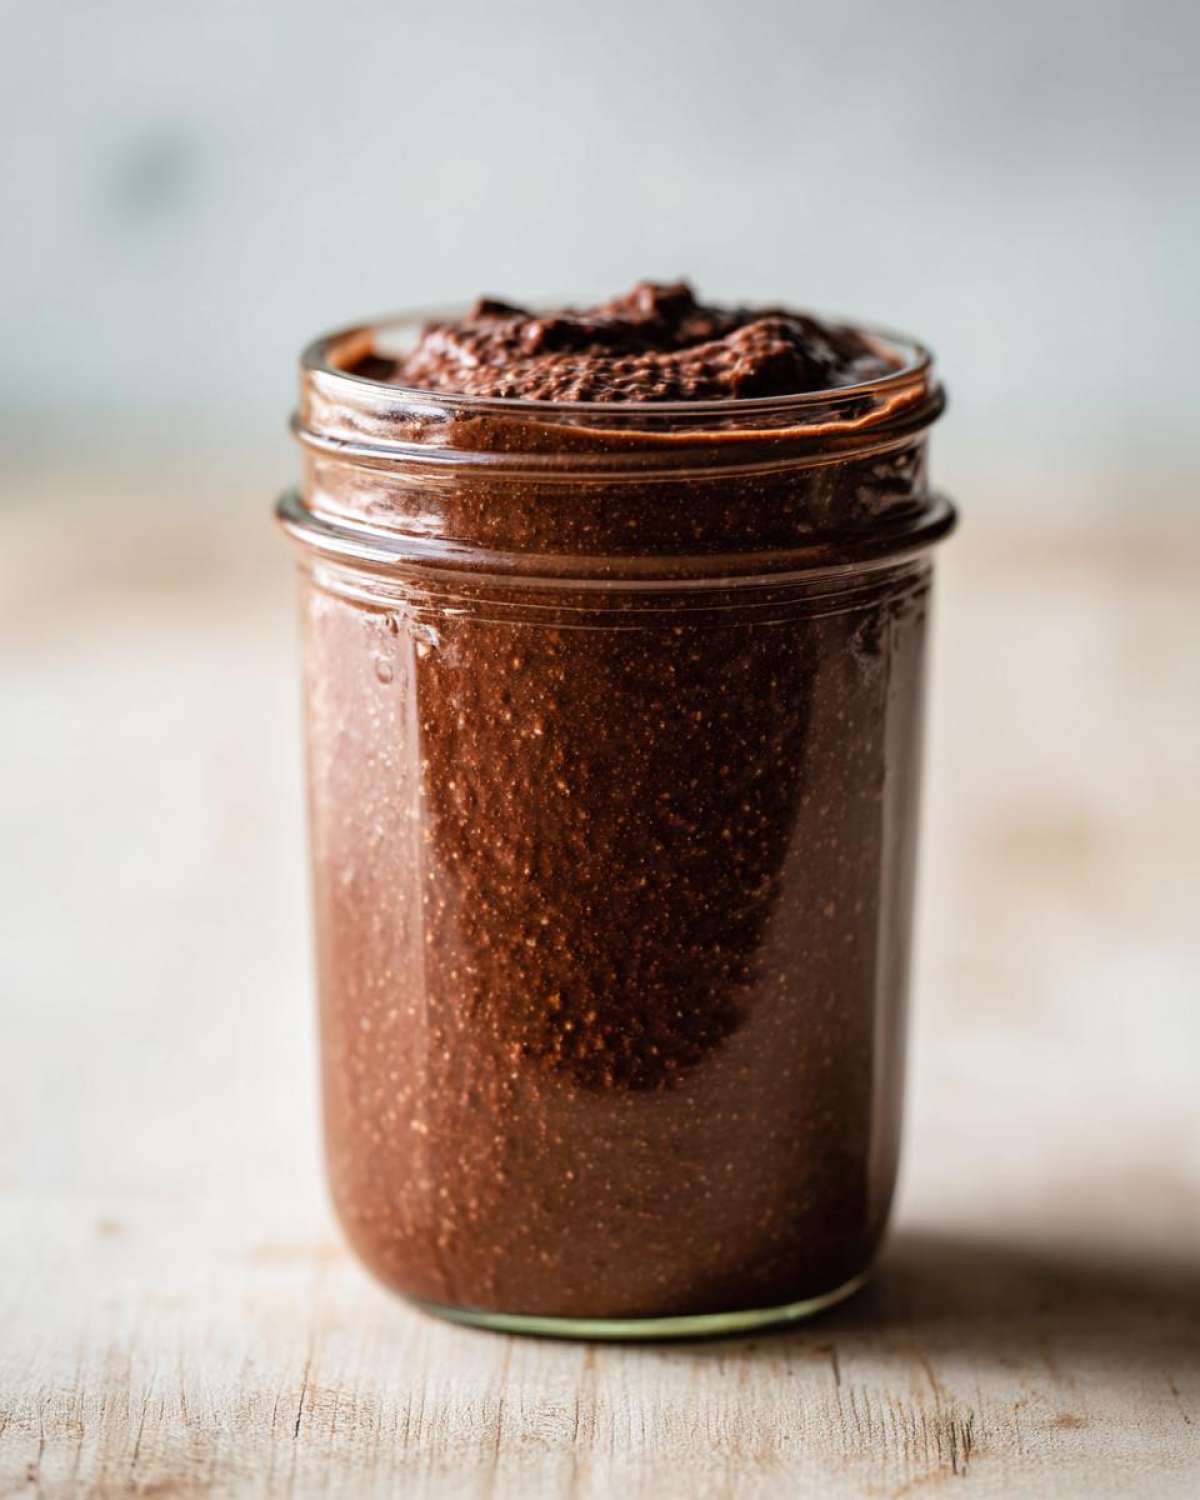
Perfect Texture for Creamy Overnight Oats Every Time
The absolute biggest thing I hear about overnight oats is that people end up with soup or sludge. Not here! Trust me, the ratios I use—especially that tablespoon of chia seeds—are magic. They absorb exactly the right amount of liquid overnight, setting up without the gummy texture you hate. This is how you achieve truly creamy overnight oats that feel satisfying.
Making Healthy Breakfast Recipes Simple
I love complication sometimes, but breakfast can’t be complicated. This recipe uses six basic pantry items, which means less shopping and less measuring before bed. It’s a true make ahead breakfast champion. You spend five minutes putting it together, and bam—you’ve instantly solved tomorrow morning’s hunger pangs. It’s minimal effort for maximum deliciousness, which is always the goal for me!
Ingredients for Your Ultimate Chocolate Overnight Oats
Okay, this is the part where you gather your crew! The best part about making these chocolate overnight oats is how short the ingredient list is. When I’m making my weekly meal prep oatmeal batch, I just line up these jars and toss everything in. Remember, the precision here is what guarantees that perfect texture we talked about!
- 1/2 cup rolled oats – Don’t use instant! Rolled oats have the structure we need.
- 1 tablespoon chia seeds – These are our thickeners!
- 1 tablespoon unsweetened cocoa powder – Make sure it’s unsweetened for that deep chocolate flavor.
- 1 tablespoon maple syrup or sweetener of choice – Maple syrup adds such a nice background note.
- 1 cup milk (dairy or non-dairy for vegan option) – Milk amount controls creaminess!
- 1/4 teaspoon vanilla extract – Don’t skip this; it bumps up the chocolate flavor.
- Pinch of salt – Yes, salt! It balances the sweetness, seriously.
Ingredient Notes and Substitution Guidance
While the core recipe is fantastic as written, I know everyone keeps a different pantry. Cacao powder vs. cocoa powder? Cocoa is usually easier to find and mixes quicker, but cacao gives you a slightly stronger, earthier flavor if you have it on hand. Both work great for these oatmeal recipes.
When it comes to milk for your chocolate overnight oats, I usually grab unsweetened almond milk because it’s thinner and keeps the calories down, but oat milk makes them unbelievably luxurious and creamy. If you use really thick milk, like canned coconut milk, you’ll need to add an extra splash of water or milk, otherwise, they might get too stiff!
How to Prepare Perfect Chocolate Overnight Oats
This is the best part because it takes maybe five minutes total! Remember, these are the no cook breakfast ideas that save your life when the alarm goes off too early. You don’t need any fancy equipment, just a jar—I love using wide-mouth Mason jars—or any small container that has a lid that seals tight. Safety warning: make sure your lid is secure, or you’ll find chocolate milk spills in your fridge drawer!
First, we combine all the dry stuff. Throw the rolled oats, the chia seeds, that beautiful cocoa powder, and the pinch of salt right into your jar. I like adding the maple syrup next, just drizzling it over the top of the dry ingredients before the liquid goes in.
Next comes the milk and vanilla extract. Now here’s the crucial step for perfect chocolate overnight oats: you have to mix! If you just stir lightly, you’ll find dry pockets of cocoa powder stuck at the bottom later on, and nobody wants a clumpy surprise.
- In a jar or container with a lid, combine the rolled oats, chia seeds, cocoa powder, maple syrup, vanilla extract, and salt.
- Pour in the milk.
- Stir all ingredients well until the cocoa powder is fully mixed in and there are no clumps.
- Seal the container and refrigerate for at least 4 hours, or preferably overnight.
- In the morning, stir the oats. If the mixture is too thick, add a splash more milk.
- Serve cold directly from the jar.
You absolutely must let these chill. Four hours is technically enough time for the chia seeds to do their job, but for the best texture—where everything melds into that perfect, pudding-like consistency—you really need to let it go overnight. That’s when you truly get that decadent experience!
Tips for Mixing Your Chocolate Overnight Oats
I learned a trick years ago when I kept fighting with those cocoa powder clumps. Instead of just using a spoon, grab a tiny little whisk if you have one—one of those mini bartender whisks works wonders! If you don’t have one, just vigorously stir the dry ingredients first, then add a splash of milk, whisk that into a thick slurry until smooth, and *then* add the rest of the milk. This little move almost guarantees smooth, uniform chocolate overnight oats and means you get that gorgeous, even color!
Also, don’t just shake the jar if you’re going to use a lid. Shaking can sometimes incorporate too much air or break down the oats too much. A firm, deliberate stir from the bottom up is what gives you that beautiful creamy overnight oats layer without turning it into foam.
Variations: Making Brownie Batter Oats and High Protein Oats
Okay, once you have the base recipe down, the fun part is customizing! Since we are talking about chocolate overnight oats, we have to talk about making them extra indulgent or extra powerful for gym days. People are always asking me how to get that intense rich flavor, and that’s where the brownie version comes in. It’s a fantastic way to scratch that itch for breakfast dessert recipes!
To get that deep, fudgy flavor that truly tastes like brownie batter oats, you have two main options. You can increase the cocoa powder by half a teaspoon—just make sure you mix it really well, or you’ll get dry clumps! My favorite trick, though, is melting just one tiny square of good quality dark chocolate (like 70%+) and stirring that in with the milk before you combine it all. It adds a layer of richness that cocoa powder alone just can’t hit. Seriously, try it!
If you’re trying to bulk up your morning routine, this recipe is already great, but adding protein powder is a game-changer for me, especially on days when I’m rushing to the gym. I follow the note in the recipe and add about one scoop of vanilla or chocolate protein powder right in with the dry ingredients when mixing everything the night before. Vanilla powder works surprisingly well because it brightens the chocolate!
Creating Dairy Free Overnight Oats
Making this recipe a totally dairy free overnight oats masterpiece is super simple, thankfully! The base recipe already works beautifully with a non-dairy swap. You can use almond, soy, oat, or cashew milk. However, I have two strong pieces of advice here.
First, if you use a very thin milk like standard almond milk, you might want to reduce the final milk amount to 1 1/4 cups total the night before, or bump up your chia seeds by just a tiny bit (say, to 1 1/4 tablespoons). Dairy milk has natural fats and proteins that help thicken things up, so thinner milks sometimes need a little extra help from those seeds to guarantee that perfect, creamy overnight oats texture by morning.
Second, if you want the absolute creamiest vegan chocolate breakfast experience, oat milk is your best friend! It brings its own natural creaminess without adding unnecessary fats, making it perfect for anyone seeking genuinely delicious dairy free overnight oats that don’t taste watered down. Plus, it works amazing mixed into that chocolate peanut butter mug cake I make sometimes!
Serving Suggestions and Toppings for Your Breakfast Dessert Recipes
You’ve chilled your chocolate overnight oats, and now comes the best part—making them look like the gorgeous, decadent treat they actually are! Since these are so rich, they definitely satisfy those cravings you get for breakfast dessert recipes. You can keep it simple, or you can really go wild. It all depends on what mood you’re in when you pull that jar out of the fridge!
For a really satisfying crunch, I always recommend toasted nuts. Pecans and walnuts are my favorites because their bitterness cuts through the sweetness of the maple syrup perfectly. Toasting them for just five minutes in a dry pan really wakes up their natural oils, making them taste richer.
Fruit is a must if you wake up feeling slightly virtuous! Raspberries are incredible here, as their tartness cuts straight through the intense chocolate flavor. Sliced bananas are the classic pairing, of course, but try freezing sliced bananas ahead of time—they act like little mini-ice cream chunks when they thaw slightly on top of the cold oats.
Now, my personal favorite way to serve these—and this is for those truly special mornings where I feel like I deserve something extra—is the “Double Chocolate Peanut Butter Bomb.” I stir in a spoonful of creamy peanut butter right into the oats when I take them out. Then, I top it with a drizzle of melted dark chocolate (not too much, just a zigzag!). It takes about 30 extra seconds, but it elevates these chocolate overnight oats straight to five-star status. If you want even more peanut butter goodness, check out my chocolate peanut butter mug cake—it’s fantastic, but obviously requires an oven!
Honestly, don’t be afraid to layer those toppings. Make sure you add them right before eating, though, so things like granola stay crunchy and don’t get soggy in the refrigerated mix underneath!
Storage and Make Ahead Breakfast Tips
The beauty of these chocolate overnight oats is that they are designed to be patient! This is what makes them the ultimate answer to busy mornings and the cornerstone of great meal prep oatmeal planning.
When I make a big batch, I usually aim to eat them within three days, max. They are perfectly fine on day one and two, becoming incredibly rich and pudding-like by day two. By day four, the oats and chia seeds have absorbed almost all the free liquid, and while they are still safe to eat, the texture starts to get a little dense for my liking. If you want them softer later in the week, just add a tablespoon or two of extra milk when you stir them in the morning.
My biggest rule for keeping them fresh? Keep those toppings separate! This is crucial if you want that satisfying texture after a few days of refrigeration. If you load your granola or fresh fruit onto the jar the minute you make it, by day three, that granola is going to be soft and sad. Soggy granola is a tragedy, trust me.
So, my recommendation is this: Mix up your mason jars filled with the base oats and cocoa mixture, seal them tight, and stash them away. Then, keep your toppings in small, separate containers—maybe pop your berries in a small Tupperware and keep your nuts in a tiny baggie. When you pull out your jar in the morning, you get that fresh texture on top while still enjoying the convenience of your make ahead breakfast underneath.
If you find yourself with way too many jars and know you won’t eat them all within three days, you can actually freeze them! Yes, you can freeze chocolate overnight oats! Just make sure you use a sturdy, freezer-safe jar, and only fill it about three-quarters full, because the liquid will expand when it freezes. I usually use this strategy for my freezer breakfast burritos days as well—prep it, freeze it, grab it!
When you pull a frozen jar out, let it thaw overnight in the fridge. You might need to stir in a tiny splash of milk or water in the morning to get the consistency back where you like it, but they taste almost brand new. It really is the ultimate quick grab and go meal solution!
Frequently Asked Questions About No Cook Breakfast Ideas
I’ve tried to cover everything, but I know you folks always have a few more burning questions when it comes to mastering these no cook breakfast ideas. Here are the common things I get asked about my chocolate overnight oats all the time!
Can I eat these chocolate overnight oats warm?
That’s a funny question for me, since these are designed to be the ultimate cold, quick grab and go meal! However, if you really aren’t a fan of cold food in the morning, you totally can heat them up. Just transfer the oats into a microwave-safe bowl—not the Mason jar if it’s thin glass—and microwave for about 45 seconds to a minute. Be careful stirring; they can get really hot fast. It tastes much more like a traditional oatmeal, but sadly, you lose that thick, pudding-like density that makes them so great!
What is the best type of oat to use for creamy overnight oats?
This is perhaps the most important question for texture! You MUST use “rolled oats,” sometimes called old-fashioned oats. These oats with chia seeds need that structure to hold up overnight. Do not use instant oats! Instant oats break down way too fast and turn into a gummy, unpleasant paste—basically baby food. Steel-cut oats won’t work either because they require cooking and will remain hard and chewy unless you soak them for nearly two days straight. Stick to good old rolled oats for that perfect creamy overnight oats result.
How do I make this recipe even higher in protein?
Since so many of you want these to count as a proper meal replacement, bumping up the protein is easy! As I mentioned in the variations section, the simplest route is adding about one scoop of your favorite protein powder right into the dry ingredients the night before. I often use a whey isolate or a plant-based blend. If you skip that, another fantastic trick for high protein oats is swapping out half of your milk for Greek yogurt—that instantly adds a huge protein punch and makes them super thick!
Are these okay for kids? My kids love chocolate breakfast foods!
Absolutely! These are fantastic for kids because they are so sweet tasting! If you are making these for younger children, I highly recommend using honey or maple syrup for sweetness, but possibly reducing the amount slightly, as the intense cocoa flavor can sometimes seem very strong to little palates. They also look fun served in little cups with lids! They are definitely one of my favorite ways to make a kid friendly chocolate breakfast that I know is packed with fiber from those oats and seeds.
Estimated Nutritional Data for Chocolate Overnight Oats
Now, I know some of you are whipping these up as a super healthy breakfast recipe, and tracking macros is your thing! So, here is the technical breakdown. This data is based on using standard rolled oats, unsweetened almond milk, and pure maple syrup for the sweetener. You know us home cooks—we never measure *too* perfectly, so take these numbers as a really good guideline rather than gospel!
- Serving Size: 1 jar
- Calories: Approximately 350 calories
- Protein: Around 14 grams (Great for staying full!)
- Carbohydrates: Roughly 60 grams
- Fiber: About 10 grams (Hello, digestive health!)
- Total Fat: Approximately 8 grams
- Sugar: About 15 grams (Mostly natural sugars from the maple syrup)
Remember, this is just the baseline for this truly easy overnight oats recipe. If you swap out the almond milk for richer dairy milk or use a dollop of peanut butter on top—which, let’s be honest, I usually do—those numbers are going to go up! If you add protein powder for those higher protein days, you’ll see the protein jump significantly. This is just a snapshot to show you that even though these taste like a decadent healthy breakfast, they aren’t weighing you down.
The goal here is always fuel for the day, and knowing what’s in your quick grab and go meal makes it so much better. Because we didn’t cook these, they keep all the amazing fiber and nutrients locked in, which is another win for this no cook breakfast idea!
Share Your Experience Making This Breakfast Dessert
Alright, I’ve given you all my secrets for making the most glorious, decadent, yet healthy dose of chocolate overnight oats. Now it’s your turn to jump into the action! This recipe is meant to be easy, fun, and customized, so I want to hear what you did to yours.
Did you go wild with the toppings? Were you brave and added that touch of melted dark chocolate for the true brownie batter oats experience? Or maybe you stuck to the basics? Let me know what your favorite topping combination is in the comments below. Seeing how you all finish off your bowls really keeps me excited about testing out new variations!
Seriously, drop a star rating for the recipe right here—it helps me know if I succeeded in making the perfect make ahead breakfast for you. And if you snap a picture before you devour it (which I know is hard to resist!), tag me on social media! Use the hashtag #FlavorVistaOats so I can swoon over your beautiful jars of ready-to-eat goodness.
If you have any last-minute questions that popped up while you were prepping your breakfast dessert recipes, don’t keep them to yourself! Head over to my contact page and send me a message. Happy mixing, and enjoy conquering those busy mornings!
PrintUltimate Healthy Chocolate Overnight Oats
Prepare this simple, make-ahead chocolate overnight oats recipe for a quick, decadent, and healthy breakfast ready when you wake up.
- Prep Time: 5 min
- Cook Time: 0 min
- Total Time: 5 min plus chilling time
- Yield: 1 serving
- Category: Breakfast
- Method: No Cook
- Cuisine: American
- Diet: Vegetarian
Ingredients
- 1/2 cup rolled oats
- 1 tablespoon chia seeds
- 1 tablespoon unsweetened cocoa powder
- 1 tablespoon maple syrup or sweetener of choice
- 1 cup milk (dairy or non-dairy for vegan option)
- 1/4 teaspoon vanilla extract
- Pinch of salt
Instructions
- In a jar or container with a lid, combine the rolled oats, chia seeds, cocoa powder, maple syrup, vanilla extract, and salt.
- Pour in the milk.
- Stir all ingredients well until the cocoa powder is fully mixed in and there are no clumps.
- Seal the container and refrigerate for at least 4 hours, or preferably overnight.
- In the morning, stir the oats. If the mixture is too thick, add a splash more milk.
- Serve cold directly from the jar.
Notes
- For a high-protein version, add 1 scoop of chocolate or vanilla protein powder with the dry ingredients.
- Top with fresh berries, sliced banana, or a spoonful of peanut butter before serving.
- If you prefer a thinner consistency, increase the milk amount to 1 1/4 cups.
Nutrition
- Serving Size: 1 jar
- Calories: 350
- Sugar: 15
- Sodium: 120
- Fat: 8
- Saturated Fat: 1.5
- Unsaturated Fat: 6.5
- Trans Fat: 0
- Carbohydrates: 60
- Fiber: 10
- Protein: 14
- Cholesterol: 5