

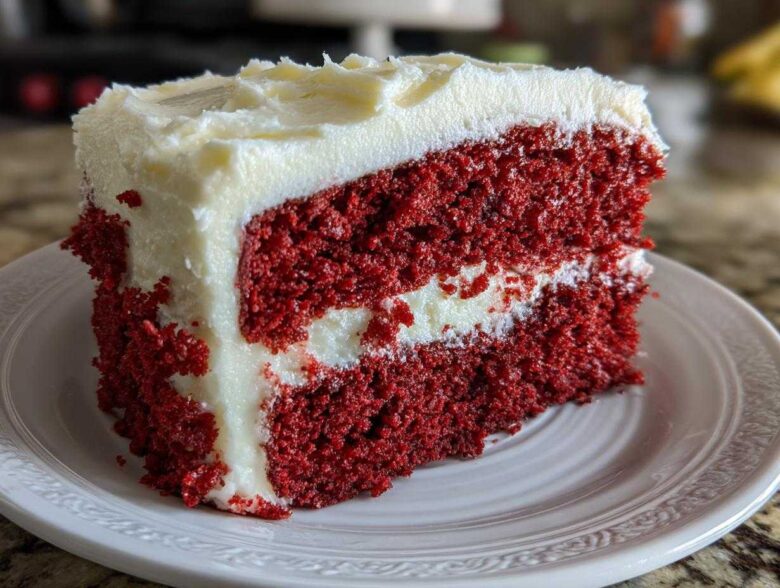
There’s just something about an authentic Southern red velvet cake that feels like a celebration, isn’t there? When Elias and I decided to nail down our version, we knew we had to respect tradition while still making it accessible for home bakers like us. We worked through so many messy batches to get this right!
I’m so excited to finally share what we landed on: The Best Southern Style Moist Red Velvet Cake from Scratch with Classic Cream Cheese Frosting. This isn’t just a pretty dessert; it has the perfect tender crumb and that slight tang that makes a real red velvet cake so addictive. Honestly, since mastering the balance of buttermilk and cocoa, this recipe has become our go-to showstopper for every birthday and holiday.
You deserve a cake this tender and beautiful. We put everything we learned about balance into this recipe, and trust me, it’s worth every whisk! If you love fluffy breakfast classics, you might also want to check out our guide to fluffy old-fashioned buttermilk pancakes while you’re here!
Why This Is the Best Moist Red Velvet Cake Recipe (E-E-A-T Focus)
When you’re going to spend time baking a showstopper, you need the science to back up the results, right? Elias and I obsessed over this to make sure we weren’t just making a slightly tinted chocolate cake. This is where the authentic Southern red velvet tradition really shines through.
The secret to why this is truly the moist red velvet cake recipe you need lies in two places: the buttermilk/vinegar reaction and the careful way we handle the cocoa. That slight acidity breaks down the proteins just enough during baking to give you that incredibly soft crumb. You’ll never get this tenderness any other way. If you love that buttery, tangy goodness, you should definitely check out how we make our moist Southern buttermilk cornbread—it uses similar principles!
We also tried to keep the cocoa subtle because the flavor should complement the vanilla and the tang, not dominate it. It’s about balance, which is why we’ve gotten such fantastic results every time we bake it.
Achieving That Signature Soft Homemade Cake Texture
Texture is everything in a good layer cake. We chose oil for the primary fat here because it keeps the cake much softer at room temperature than sticking only to butter. Buttermilk is non-negotiable because, when combined with the baking soda, it creates lovely little bubbles that balloon out when baking, ensuring the interior stays wonderfully light and open. Don’t skimp on room temperature ingredients; that helps everything emulsify beautifully for that soft homemade cake feel.
Tips for a Vibrant Red Velvet Cake Color Tutorial
Okay, let’s talk color, because if it isn’t vibrant, it just feels wrong! Liquid food coloring tends to dilute the batter and doesn’t give you that true, striking look. For a genuine, vibrant red velvet cake effect, you absolutely must use a high-quality gel food coloring.
Start with one tablespoon, mix it in well, and then check your batter. You can always add more, but trust me, a strong gel gives you maximum color pay-off without affecting the delicate chemistry we just talked about. You’ll be amazed at the deep color!
Ingredients for Your Red Velvet Layer Cake from Scratch
Getting the ingredient list right is the first step to making a perfect red velvet cake from scratch. Trust me, Elias always reminds me that gathering everything first—what we call mise en place—keeps me calm when I start mixing!
We’ve broken this down into two manageable lists. Pay close attention to temperature requirements, especially for the frosting, because that makes or breaks having the best cream cheese frosting recipe!
For the Fluffy Red Velvet Cake Layers
- 2 1/2 cups all-purpose flour
- 1 1/2 cups granulated sugar
- 1 teaspoon baking soda
- 1 teaspoon cocoa powder
- 1 teaspoon salt
- 2 large eggs (Make sure these are room temperature!)
- 1 cup vegetable oil
- 1 cup buttermilk (Room temp is best for that fluffy red velvet cake lift!)
- 1 teaspoon white vinegar
- 1 teaspoon vanilla extract
- 1 to 2 tablespoons red food coloring (for vibrant red velvet cake)
For the Best Cream Cheese Frosting Recipe
- 8 ounces cream cheese, softened (This MUST be soft, or your frosting will get lumpy!)
- 1/2 cup (1 stick) unsalted butter, softened
- 4 cups powdered sugar, sifted (Sifting is crucial to avoid little sugar rocks!)
- 1 teaspoon vanilla extract
If you want to try making your own tang to replace the buttermilk, check out our guide on making things like the absolute best cream cheese frosting—it covers the science behind getting great texture there too!
How to Prepare the Easiest Red Velvet Cake
I promised you an easy red velvet cake, and that’s exactly what this method delivers! You start by getting your oven ready—preheat to 350°F (175°C) and you’ll want to grease and flour those two 9-inch round pans now. We don’t want any sticking drama later!
This recipe is built for speed if you follow the mixing order. If you’re looking for more quick wins in the kitchen, check out our compilation of easy baking recipes for inspiration!
Mixing the Red Velvet Cake Batter
First things first: whisk all your dry ingredients—flour, sugar, baking soda, that small bit of cocoa powder, and salt—in a big bowl. This ensures you don’t end up with pockets of soda, which affects the texture of our cocoa powder cake. In a separate bowl, whisk your wet stuff: eggs, oil, buttermilk, vinegar, vanilla, and the red coloring. When you mix the reds, make sure it’s deeply colored!
Now, pour the wet into the dry. Mix it slowly, just until you see no more flour streaks. Seriously, stop mixing the second it comes together! Overmixing is the enemy of a soft homemade cake, and we worked hard to avoid that dense texture.
Baking and Cooling the Red Velvet Cake Layers
Divide that gorgeous red batter evenly between your prepared pans. Bake for about 30 to 35 minutes. How do you know they’re done? Stick a wooden pick right in the center—it should come out clean or with just a few moist crumbs. This timing is key, so keep an eye on them!
Once they are out, you need patience! Let the cakes relax in the pans for about 10 minutes. Then, very carefully, flip them onto a wire rack to finish cooling completely. Do not even think about frosting until they are totally cool. That’s a rookie mistake that leads to a melted mess!
Assembling the Red Velvet Layer Cake with Frosting
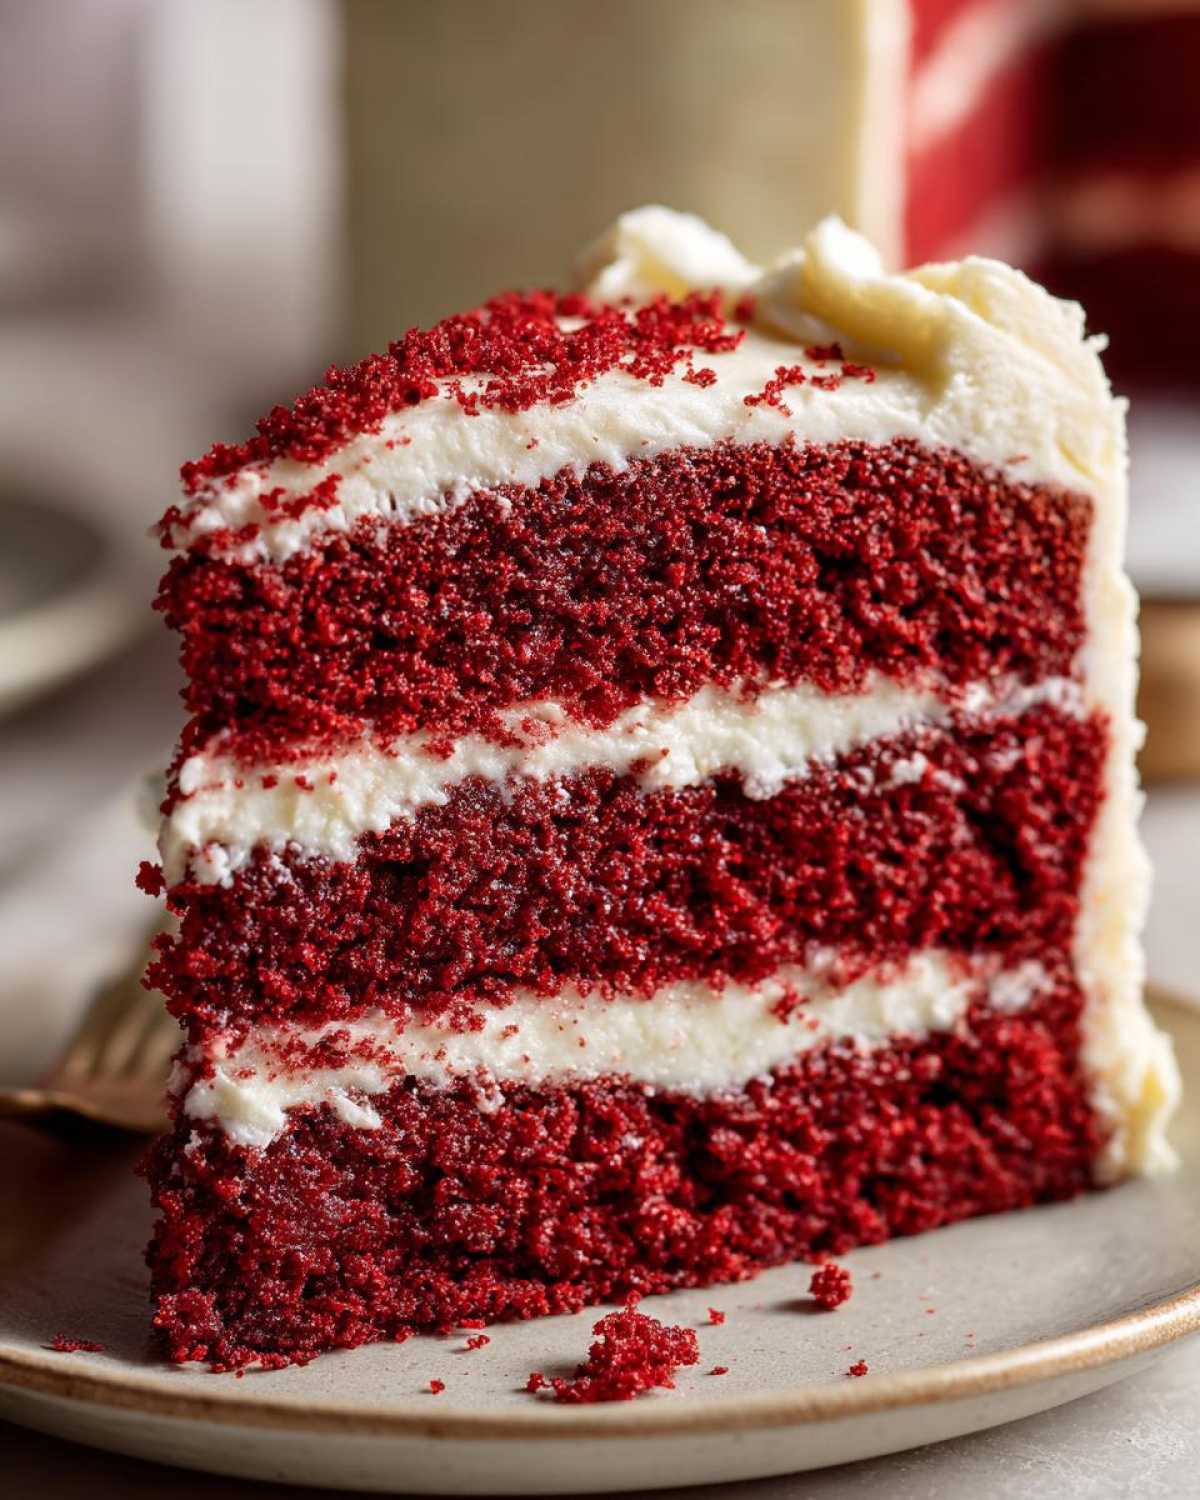
While the cakes cool, whip up that fantastic cream cheese frosting. The goal here is light and fluffy! Once your layers are completely cool, place the first one down. Spread about one-third of your frosting right across the top of the first layer. This bit of frosting acts as the perfect binding layer.
Carefully set the second layer on top. Then, grab the rest of that heavenly cream cheese frosting and use an offset spatula to cover the top and sides of your beautiful red velvet layer cake. Slice it thick and enjoy!
Ingredient Notes and Substitutions for Your Red Velvet Cake
I know sometimes you look at a recipe and think, “I’m missing that one weird ingredient!” For this red velvet cake, we’ve got two key items that really define that authentic Southern flavor, so I wanted to chat about them quickly.
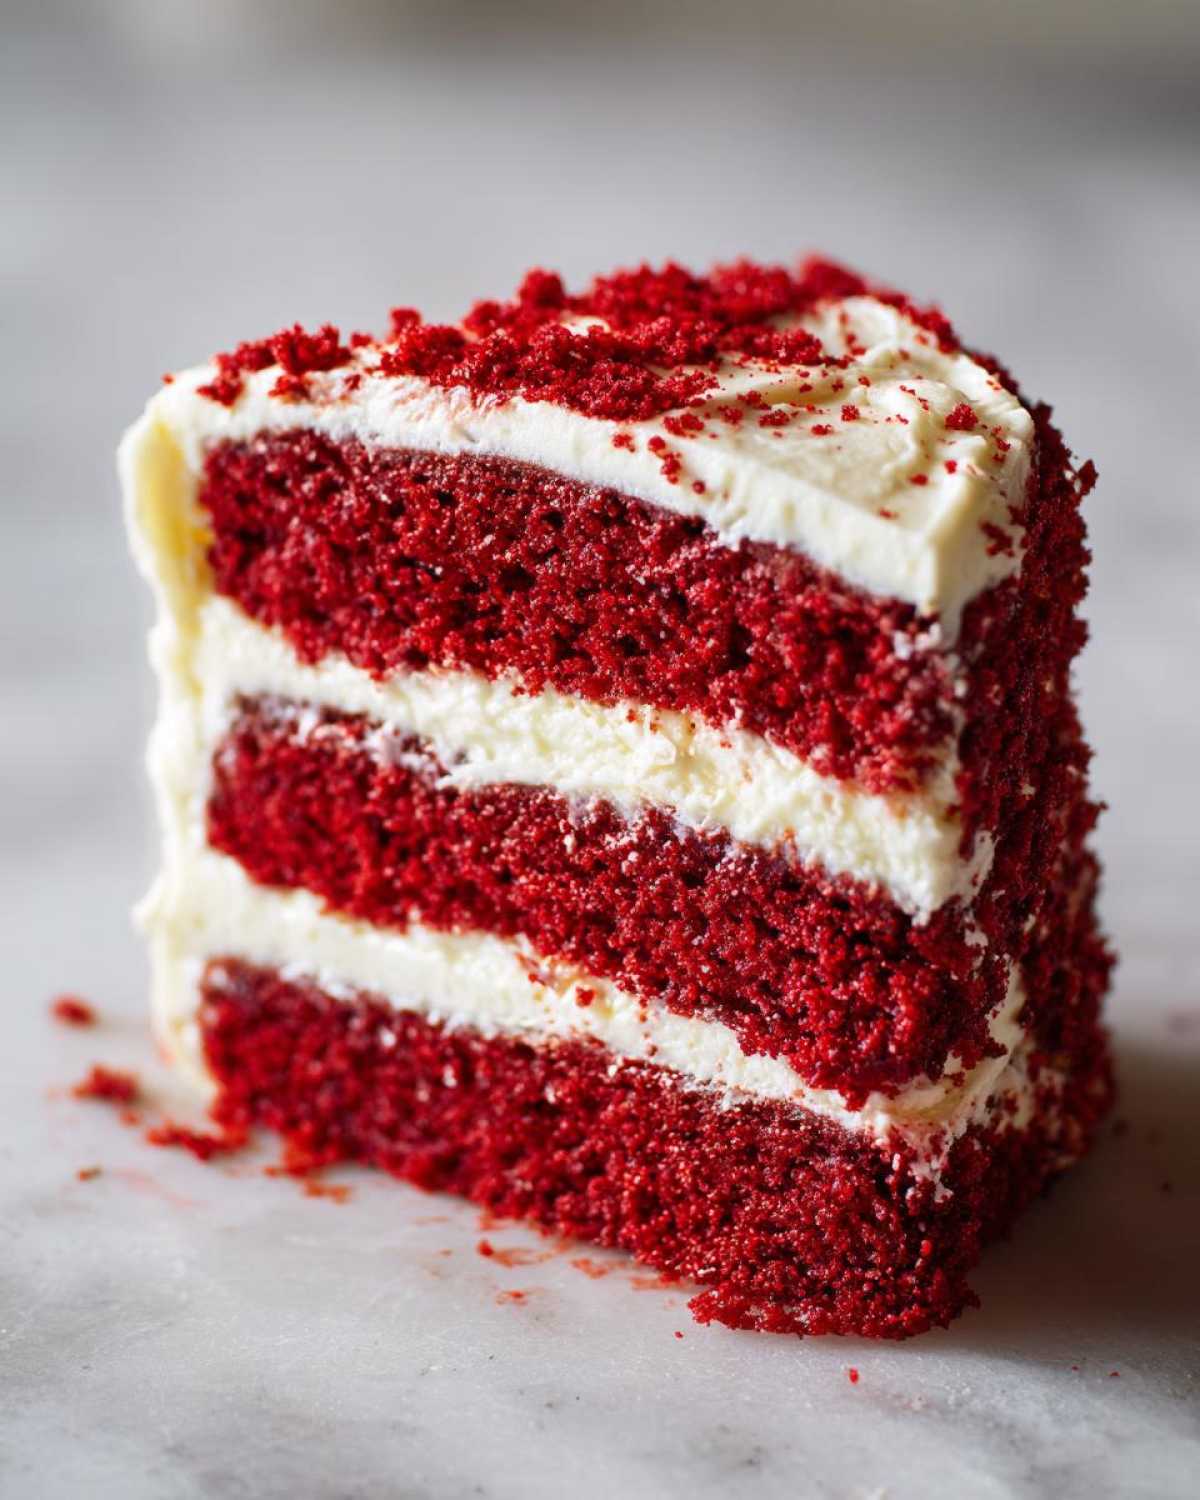
Remember, true authentic Southern red velvet gets its mild tang and tender crumb from the reaction between the buttermilk and the small amount of cocoa powder we use. It’s definitely not just a standard chocolate cake with a splash of dye! And speaking of dye, please use the gel kind! Liquid coloring just doesn’t cut it for that intense color we’re aiming for.
Now, what if you don’t have buttermilk? Don’t panic! That won’t stop you from getting one of the best cakes ever. For every cup of buttermilk needed in this recipe—or any good classic buttermilk recipe—just take one tablespoon of white vinegar (or lemon juice) and add it to a liquid measuring cup. Then, fill the rest of the cup up with regular milk. Let it sit for five minutes until it looks slightly curdled. Boom! You’ve got your own homemade buttermilk, and your cake will still be perfectly moist!
Tips for Success Making a Showstopping Red Velvet Cake
You have the recipe, you know the ingredients sound right, but how do you guarantee this turns out from ‘good’ to truly a showstopping dessert? Elias and I learned a few hard-won lessons over the years. Honestly, you can blame Batch #4 for this section—I pulled it out of the oven just a touch too late, and it went from beautifully tender to slightly crumbly in about three minutes flat!
Temperature control is everything when you are aiming for that perfect, soft crumb. Here are the few things I swear by now:
- Don’t Let Your Cocoa Bloom Too Much: Because we are using cocoa powder in this red velvet cake, we need to respect its flavor but not let it dry out the cake. Make sure you mix that small amount of cocoa right into the flour mixture, but don’t let that dry mix sit on the counter for hours before adding the liquids. Get it combined quickly!
- Mind the Frosting Temperature Clash: When assembling, ensure the cake layers are truly, completely cool—I mean room temperature cool, not just ‘cool enough to touch.’ If the cake is even slightly warm, the beautiful, tangy best cream cheese frosting recipe will melt right off the sides, creating a sloppy, unappealing slide. Patience in this step saves so much headache later!
- Measure Your Food Coloring Carefully: As I mentioned earlier, the gel coloring is strong, which is great! But if you use too much, you can actually slightly alter the delicate chemical balance that gives us the *velvet* texture. I find that 1.5 tablespoons is often the sweet spot for that deep hue without compromising the fluffy red velvet cake structure.
- For Super Smooth Layers, Try a Thin Wrap: If I know I won’t be frosting the cake the same day I bake the layers, I give them a little extra love. Once they are fully cooled on the rack, I wrap each layer tightly in plastic wrap while still slightly cool. This traps the remaining moisture inside. They stay beautifully soft overnight, ready for my favorite vanilla buttercream frosting if you decide to mix it up next time!
Storage and Make-Ahead Tips for Your Red Velvet Cake
Planning ahead is just smart baking, especially when you’re making something as special as this red velvet cake. We usually bake for big gatherings, so I’ve gotten really good at breaking down the steps! You absolutely don’t need to stress about doing everything the morning of the party.
The best approach is always to separate the components if you’re making things ahead of time. This keeps everything tasting its freshest and prevents sogginess, which is the last thing we want in our perfectly moist red velvet cake recipe.
If you’re looking for other great planning ideas to save time on busy mornings, you might love checking out how we prep our Make-Ahead Egg Bake!
Making the Cake Layers Ahead of Time
Cake layers are fantastic candidates for prepping early. Once they are completely cool—and I mean bone dry on the outside—wrap each layer tightly in plastic wrap. Then, pop them into an airtight container or a heavy-duty zip-top bag. They do perfectly well sitting on the counter for a day or two, but if your kitchen is warm, the fridge is safer!
If you freeze them? Even better! Properly wrapped layers will last up to three months in the freezer. When you’re ready to use them, just pull them out and let them thaw on the counter wrapped for a few hours. They don’t even lose any of that soft homemade cake perfection.
Preparing and Storing the Cream Cheese Frosting
The cream cheese frosting is slightly trickier than a standard buttercream because of the dairy content. I prefer to make the frosting the day before assembly. Once it’s mixed up, cover the bowl tightly with plastic wrap, making sure the wrap actually touches the surface of the frosting. This stops that dry skin from forming on top.
Keep the frosting chilled until about an hour before you plan to decorate your red velvet layer cake. Bringing it back to cool room temperature for about 45 minutes makes it soft enough to spread easily without deflating all that fluffy air we beat into it!
Assembly Timing for the Best Results
Here’s my rule: Only frost the cake the day you plan to serve it. Once the cake is frosted, it really starts losing moisture faster, even with the cream cheese acting as a shield. If you frost it the night before, cover the whole thing loosely with plastic wrap and keep it refrigerated. It will still be delicious, but assembling the day of ensures that striking, fresh flavor and those gorgeous, clean lines for your showstopping dessert!
Serving Suggestions for This Classic Red Velvet Cake
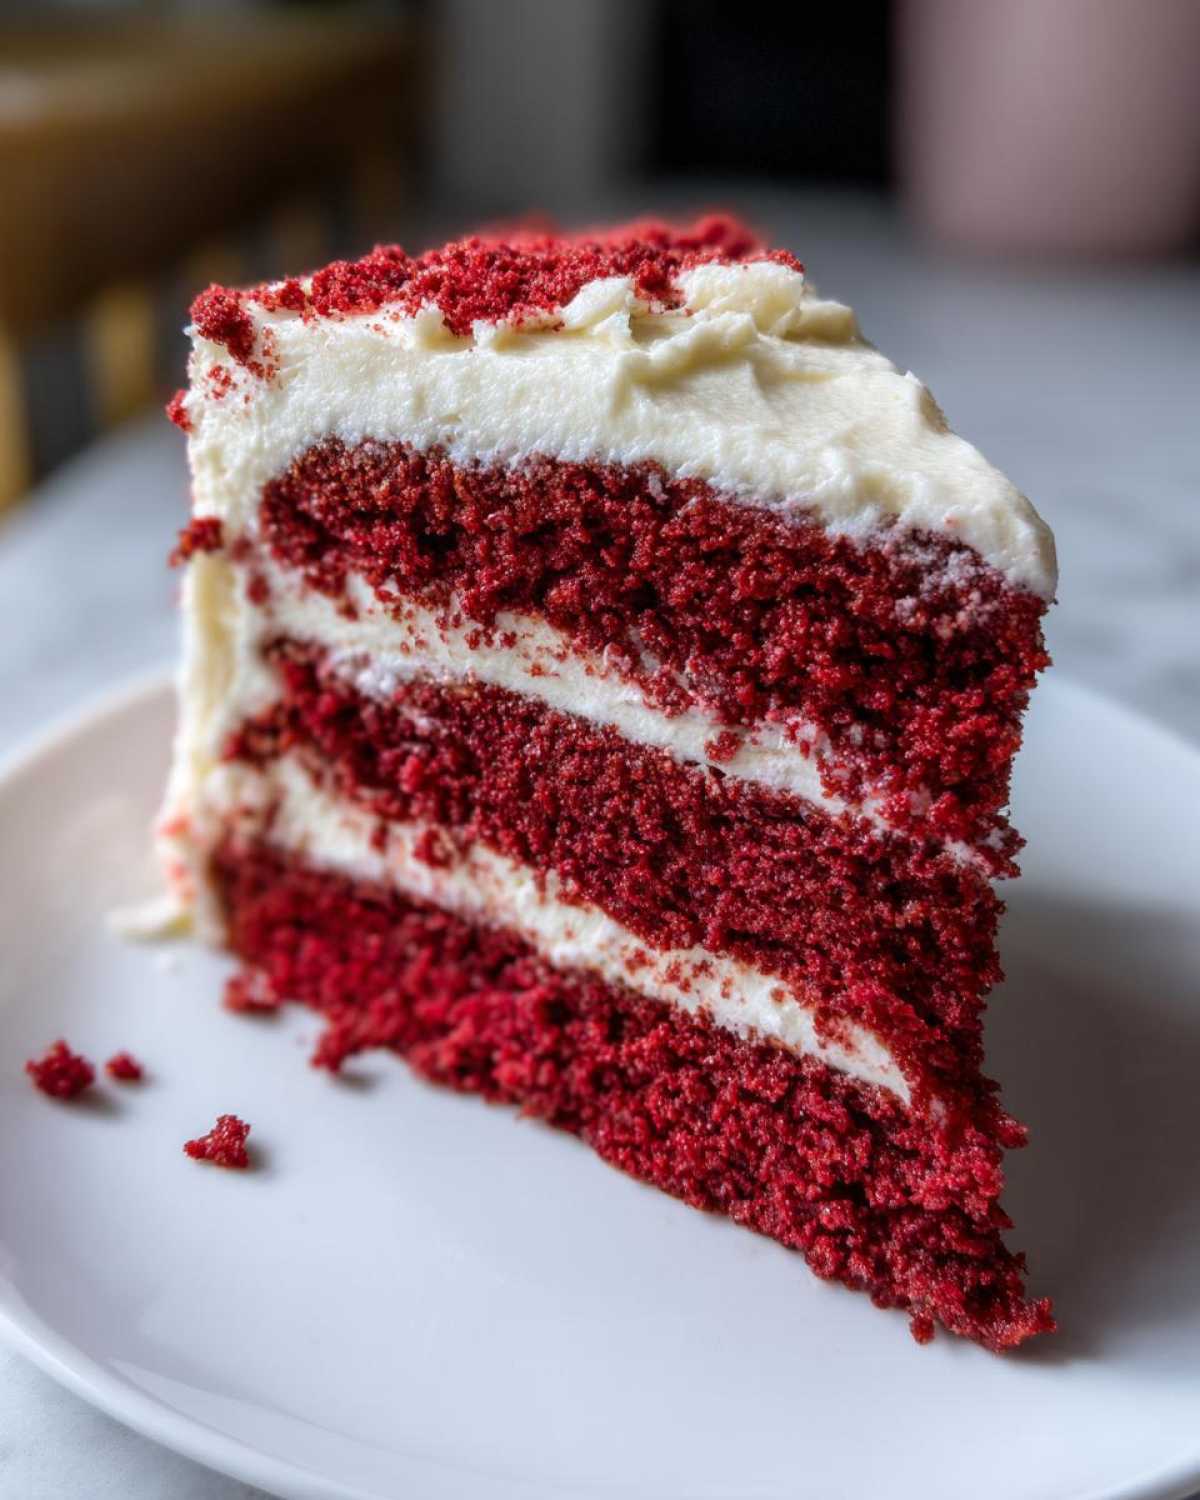
This red velvet cake is definitely the star of the show, right? It’s rich, it’s dramatic, and honestly, it doesn’t need much help looking amazing on the table. But whether you’re planning festive holiday cake recipes or hunting for the ultimate birthday cake ideas, a few little touches can really elevate the presentation!
Elias claims that the slightly tart cream cheese frosting is so flavorful it stands alone, and he’s not wrong! But for those times you want to go above and beyond, think about what side things will really complement that unique cocoa and tang flavor profile.
If you’re making this for a big gathering and need a less rich option for second helpings, you might want to explore some easy bar recipes, like our killer chocolate chip pumpkin bars—they are completely different but always a crowd-pleaser!
Elegant Presentation Ideas
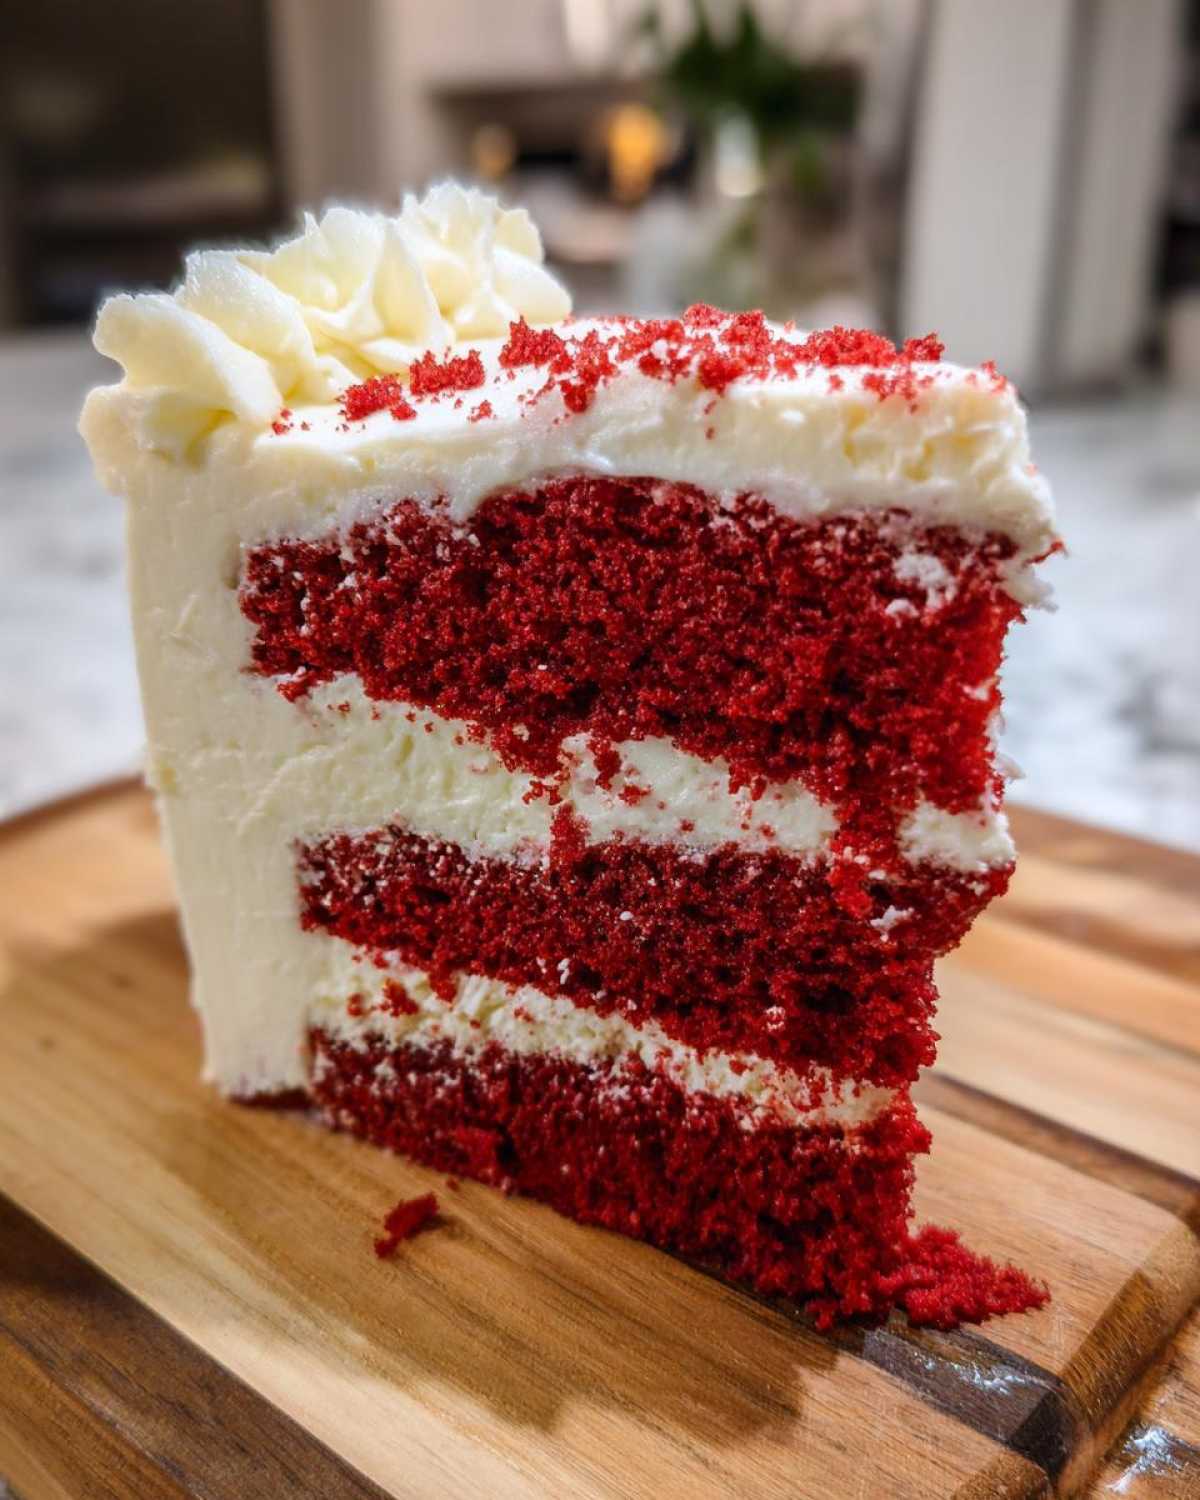
Since the color is already so bold, I often lean into simplicity for the final look. For birthdays, adding fresh red fruit like sliced strawberries or raspberries around the base of the cake is stunning. It brings a fresh, slightly acidic foil to the richness of the buttercream.
If you are delivering this as a showstopping dessert for a holiday party, skip the extra layer of fruit and just go for texture. A light scattering of very finely chopped pecans around the very bottom edge looks professional and adds a fantastic crunch that compliments the soft homemade cake.
Beverage Pairings That Work
Believe it or not, what you drink with your slice matters! Because this easy red velvet cake has that wonderful tang, you need something that won’t fight it. Forget overly sweet sodas.
We love serving this with strong, black coffee—the slight bitterness really cuts through the richness of the frosting. For a non-caffeine option, a simple sparkling cranberry juice or even a chilled glass of tart lemonade works beautifully, especially in the summer months when you need something light alongside a rich dessert.
When to Serve It
While this is a natural fit for Valentine’s Day because of the color, don’t limit it! We think it’s perfect for almost any Sunday dinner that needs a little uplift. Due to its flavor depth, it feels much more substantial than a standard vanilla cake, making it a great centerpiece for any celebration where you want that “wow factor” dessert.
Frequently Asked Questions About Red Velvet Cake
I figured that after reading all that, you might still have a few little questions swirling around! That’s totally normal, especially when tackling a classic like this beautiful red velvet cake. Elias and I get tons of messages about getting the texture and color just right, so I gathered the ones we hear most often. Don’t fret if you’re new to baking; these tips help even the most dedicated beginner cake recipes enthusiast succeed!
If I didn’t cover something here, feel free to reach out anytime on our contact page! We love hearing how your baking adventures turn out.
What makes an authentic Southern red velvet cake different from chocolate cake?
This is the most important question! If you think it’s just a chocolate cake with tons of red dye, you’re missing the magic. A real Southern cake uses a tiny bit of cocoa powder—just enough to give a subtle, almost earthy background note. The *real* difference comes from the buttermilk and vinegar reacting with the cocoa and baking soda. This chemical magic is what creates that trademark mild tang and helps keep the crumb unbelievably tender. It’s a distinct flavor profile altogether compared to a standard cocoa powder cake!
Can I use sour cream instead of buttermilk in this red velvet cake recipe?
You can, but I really wouldn’t advise it if you’re after the absolute best result. Sour cream is much thicker and has a higher fat content than buttermilk. While sour cream definitely adds richness, it can sometimes weigh down the batter a bit, which fights against the lift we get from the thinner buttermilk reacting with the vinegar. To keep that structure light and fluffy—and to guarantee that super moist red velvet cake recipe result—sticking to buttermilk (or the homemade substitute we mentioned earlier!) is strongly recommended.
What happens if I skip the vinegar in the batter?
Oh, don’t skip the vinegar! It seems so minor, just one teaspoon, but it’s doing heavy lifting here. The vinegar exists to activate that baking soda and react with the lactic acid in the buttermilk. If you skip it, you lose a huge chunk of your leavening power, meaning the cake won’t rise as well. Plus, you lose that little bit of bright acidity that balances the sweetness. It’s crucial for the flavor and texture balance we worked so hard to achieve!
Can this red velvet cake be made without any food coloring?
Yes, you absolutely can! If you skip the coloring, you will end up with a lovely, delicate, light brown or pale reddish-brown cake. The flavor is exactly the same—that wonderful mix of vanilla, tang, and hint of cocoa. We use the food coloring solely for that dramatic visual effect that everyone expects. So if you want to pass on the dye, the taste test will still be a huge success!
Estimated Nutritional Overview for This Red Velvet Cake
I always feel a *little* strange putting numbers next to something that brings so much joy, but I know some of you appreciate having the full picture! Keep this in mind: baking is chemistry, but frosting is artistry, so exact measurements can vary wildly based on how thick I slather that beautiful cream cheese frosting on there. These figures are based on the recipe yielding 12 generous slices of the frosted red velvet layer cake.
These are just estimates, of course! We are bakers, not certified dietitians, so please take these as a general guideline. If you want the full legal scoop on how we calculate this stuff, you can always check out our official site disclaimer.
Here is what you can generally expect per serving:
- Calories: Roughly 450 per slice. Rich, but worth every bite!
- Total Fat: Around 24g. Remember, that’s a mix of the oil in the cake and the butter/cream cheese in the frosting.
- Carbohydrates: About 60g. Sugar really is the backbone of a good cake, isn’t it?
- Protein: About 4g. That comes mostly from the flour, eggs, and cream cheese.
This isn’t an every-day treat, it’s a celebration cake, and when you break it down that way, it feels perfectly balanced for a special occasion!
PrintThe Best Southern Style Moist Red Velvet Cake from Scratch with Classic Cream Cheese Frosting
Bake the ultimate showstopper! This recipe delivers a perfectly moist and soft red velvet layer cake with a tender crumb and just the right hint of cocoa. We pair it with a classic, tangy cream cheese frosting for a truly authentic Southern dessert.
- Prep Time: 25 min
- Cook Time: 35 min
- Total Time: 60 min
- Yield: 12 servings
- Category: Dessert
- Method: Baking
- Cuisine: American
- Diet: Vegetarian
Ingredients
- 2 1/2 cups all-purpose flour
- 1 1/2 cups granulated sugar
- 1 teaspoon baking soda
- 1 teaspoon cocoa powder
- 1 teaspoon salt
- 2 large eggs
- 1 cup vegetable oil
- 1 cup buttermilk
- 1 teaspoon white vinegar
- 1 teaspoon vanilla extract
- 1 to 2 tablespoons red food coloring (for vibrant red velvet cake)
- 8 ounces cream cheese, softened
- 1/2 cup (1 stick) unsalted butter, softened
- 4 cups powdered sugar, sifted
- 1 teaspoon vanilla extract
Instructions
- Preheat your oven to 350°F (175°C). Grease and flour two 9-inch round cake pans.
- In a large bowl, whisk together the flour, sugar, baking soda, cocoa powder, and salt. This ensures your dry ingredients are well combined for a fluffy red velvet cake.
- In a separate medium bowl, whisk together the eggs, oil, buttermilk, vinegar, and vanilla extract. Add the red food coloring until you achieve your desired vibrant red color.
- Pour the wet ingredients into the dry ingredients. Mix on low speed until just combined. Do not overmix the batter.
- Divide the batter evenly between the prepared cake pans.
- Bake for 30 to 35 minutes, or until a wooden pick inserted into the center comes out clean. Let the cakes cool in the pans for 10 minutes before inverting them onto a wire rack to cool completely.
- Prepare the cream cheese frosting: In a large bowl, beat the softened cream cheese and butter together until smooth.
- Gradually add the sifted powdered sugar, beating until creamy. Mix in the vanilla extract. Beat on medium-high speed for 2 minutes until the frosting is light and fluffy.
- Once the cake layers are completely cool, place one layer on a serving plate. Spread about one-third of the frosting evenly over the top. Place the second layer on top.
- Frost the top and sides of the entire red velvet layer cake with the remaining cream cheese frosting. Slice and serve this showstopping dessert.
Notes
- For the most authentic Southern red velvet flavor, use real buttermilk and a small amount of cocoa powder; this is not just chocolate cake with coloring.
- To get that perfect vibrant red velvet cake color, use a high-quality gel food coloring rather than liquid drops.
- If you want a softer crumb, you can substitute 1 tablespoon of white vinegar with 1 teaspoon of lemon juice in the batter.
Nutrition
- Serving Size: 1 slice
- Calories: 450
- Sugar: 55
- Sodium: 310
- Fat: 24
- Saturated Fat: 10
- Unsaturated Fat: 14
- Trans Fat: 0
- Carbohydrates: 60
- Fiber: 1
- Protein: 4
- Cholesterol: 65