

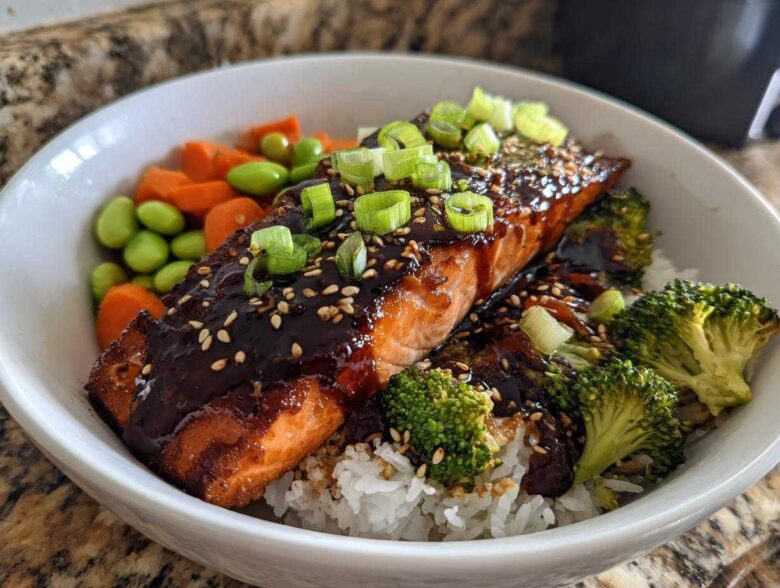
Oh, weeknights! They are the worst, right? You get home, you’re starving, and the thought of cooking anything complicated just makes you want to order takeout. I live for those nights when I can whip up something that tastes like I spent hours on it, but actually took maybe thirty minutes total. That’s where my absolute favorite lifesaver comes in: the **Teriyaki Salmon Rice Bowls**!
Seriously, these bowls are my secret weapon for fast, healthy dinners. I’ve made so many variations of Asian-inspired meals for busy weeknights over the years, especially trying to keep up with meal prepping, like when I do my teriyaki chicken prep, that I finally perfected this version. It has the perfect balance—flaky salmon, sweet-savory homemade glaze, and all those crunchy veggies you need. Trust me, once you try this glaze, you won’t ever go back to the stuff in the jar.
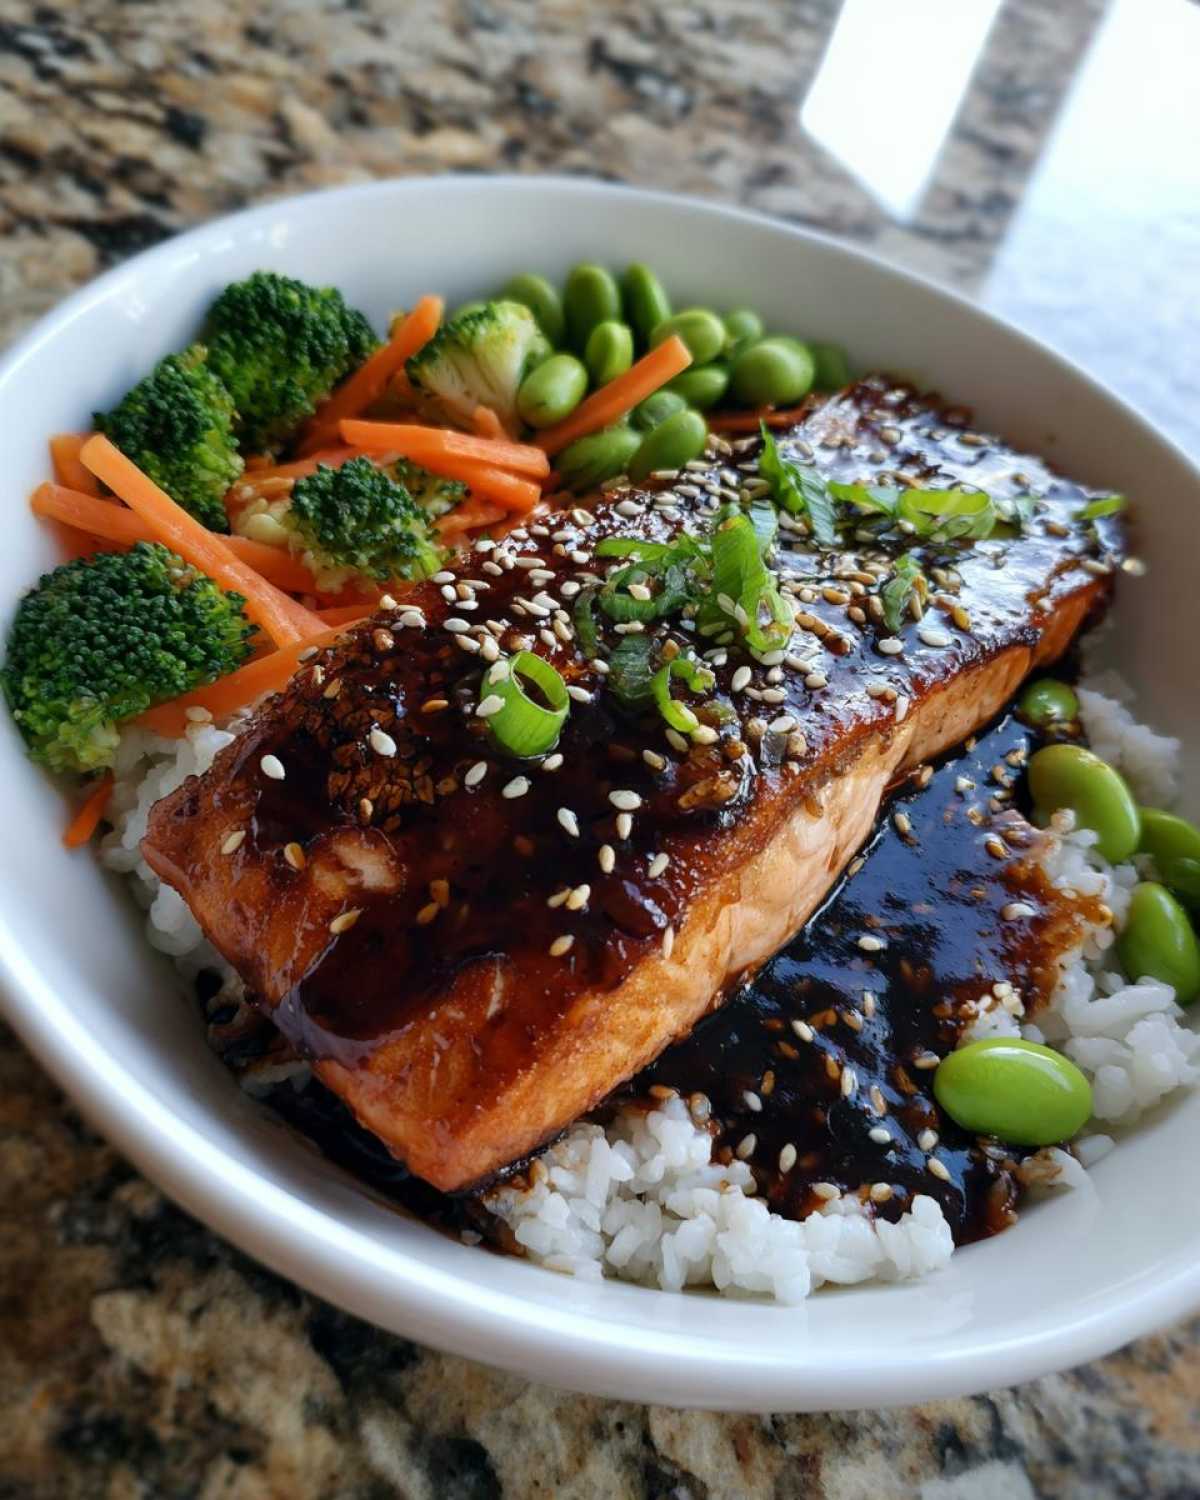
Why You Will Make These Teriyaki Salmon Rice Bowls Again and Again
It’s one thing to have a recipe, and another to have a recipe that actually fits into your busy life without stressing you out. This one? It’s a game-changer. I keep coming back to it week after week.
- It’s So Fast, It Feels Illegal: We’re talking under 35 minutes total time here. If you are looking for real quick salmon dinner ideas, this is it. You can even start the rice first and have everything timed perfectly.
- The Homemade Sauce Is Everything: I know buying a jar is easy, but making this Simple Salmon Glaze Recipe yourself? Wow. It tastes ten times fresher, and you control the sweetness. It really elevates these Easy Teriyaki Salmon Recipe bowls from weeknight fare to something special.
- Totally Balanced and Healthy: These aren’t just empty calories; they are fantastic healthy Asian fish bowls. You get tons of protein from the salmon, complex carbs from the rice, and I sneak in almost three servings of veggies per person without the kids complaining.
- Perfect for That Lunch Prep: If you need reliable salmon and rice meal prep candidates, these hold up incredibly well in the fridge. Just keep the sauce separate until you are ready to eat!
Essential Components for Perfect Teriyaki Salmon Rice Bowls
Okay, before we jump into the actual cooking, let’s talk about what you need sitting on your counter. These Easy Teriyaki Salmon Recipe bowls are straightforward, but having the right tools makes the 30-minute timeline actually happen. You don’t need a ton of fancy gadgets, but you do need a couple of specific things ready to go.
For the salmon and veggies, I swear by my 12-inch cast iron skillet. It gives the salmon the best sear—that beautiful crust you really want on your Pan Seared Salmon Vegetables combo—and I can toss all my veggies in there without overcrowding it. If you don’t have one, a good heavy-bottomed stainless steel skillet works great too!
Equipment Needed for Your Homemade Salmon Rice Bowl
Think about what you need to tackle three jobs at once: the rice, the sauce, and the main cooking. Here’s my must-have list for a successful dinner:
- A saucepan or rice cooker for perfect rice. I usually run the rice cooker first thing because I use short-grain white rice, which takes the longest.
- A small saucepan dedicated just for making our rich, homemade teriyaki sauce. You want something narrow so the sauce reduces nicely.
- That big 12-inch skillet I mentioned. This is where the magic happens for both the veggies and searing the salmon.
- A nice whisk for making sure that cornstarch slurry mixes in perfectly without any lumps!
Having these three cooking zones ready definitely helps speed things up. If you’re doing the air fryer salmon variation later, you can skip the skillet for the fish, but you still need it for the veggies!
Ingredients for the Best Teriyaki Sauce for Fish
This is where we build the flavor foundation! Forget that murky brown stuff in the bottle; our Best Teriyaki Sauce for Fish comes together in about five minutes on the stove, and it coats everything beautifully. It’s thick, glossy, and balances sweet and salty perfectly.
You’ll need:
- Half a cup of soy sauce—I use low sodium just because we add brown sugar later, but use what you love!
- A quarter cup of mirin. This sweet rice wine is essential for that authentic depth, so try not to skip it. If you absolutely must, dry sherry is a distant second, but mirin really sings with fish. Plus, you can check out my tips on Simple Salmon Glaze Recipe variations!
- A quarter cup of water, just to keep things moving while simmering.
- Two tablespoons of lovely dark brown sugar—no white sugar allowed here, we want that molasses richness!
- One tablespoon of fresh ginger, grated. Grating it fresh makes a world of difference in the aroma, trust me!
- Two cloves of garlic, minced super fine. Don’t even think about using the jarred stuff here, it’s just not the same power level.
- And finally, the secret thickener: one teaspoon of cornstarch mixed with one tablespoon of cold water—that’s our slurry—to make everything wonderfully sticky at the end.
Keep these measured out, and the whole process is ridiculously smooth. It’s the heart of these Japanese Inspired Salmon Bowls!
Ingredients for Flavorful Teriyaki Salmon Rice Bowls
Now that we’ve got the sticky, savory sauce locked down, we need the stars of the show! Making sure your components are prepped correctly is half the battle won for these Pan Seared Salmon Vegetables meals. Remember, success in this dish is all about the texture contrast!
The salmon itself is key. I usually go for four fillets, aiming for about 6 ounces each. You can absolutely use skin-on fillets if you like getting that crispy skin texture—which I highly recommend—or skip the skin, it doesn’t bother me either way. Just make sure they are ready to hit the hot pan later!
For the rice base, you need one cup of short-grain white rice, or if you’re trying to sneak in a little extra fiber, brown rice works beautifully too. We cook that with exactly one cup of water, following the pot directions. Keep it warm until assembly time! Consistency is everything here for that genuine Easy Teriyaki Salmon Recipe feel.
Next up, the crunch factor. We need brightness to cut through that rich glaze. I always measure out:
- One cup of broccoli florets. I keep them bite-sized, nothing too huge.
- One medium carrot, and I like to slice it thinly on a slight diagonal—it just looks prettier that way!
- About half a cup of shelled edamame. I buy them frozen and pre-cooked, so they just need a quick warm-up in the skillet with the other veg.
Finally, for presentation, which I swear makes the food taste better (don’t judge me!), you need the garnishes. Grab two tablespoons of sesame seeds—toasted is even better if you have a moment to spare—and slice up one green onion for that lovely pop of color right on top of your beautiful, finished Fresh Salmon Bowl Assembly!
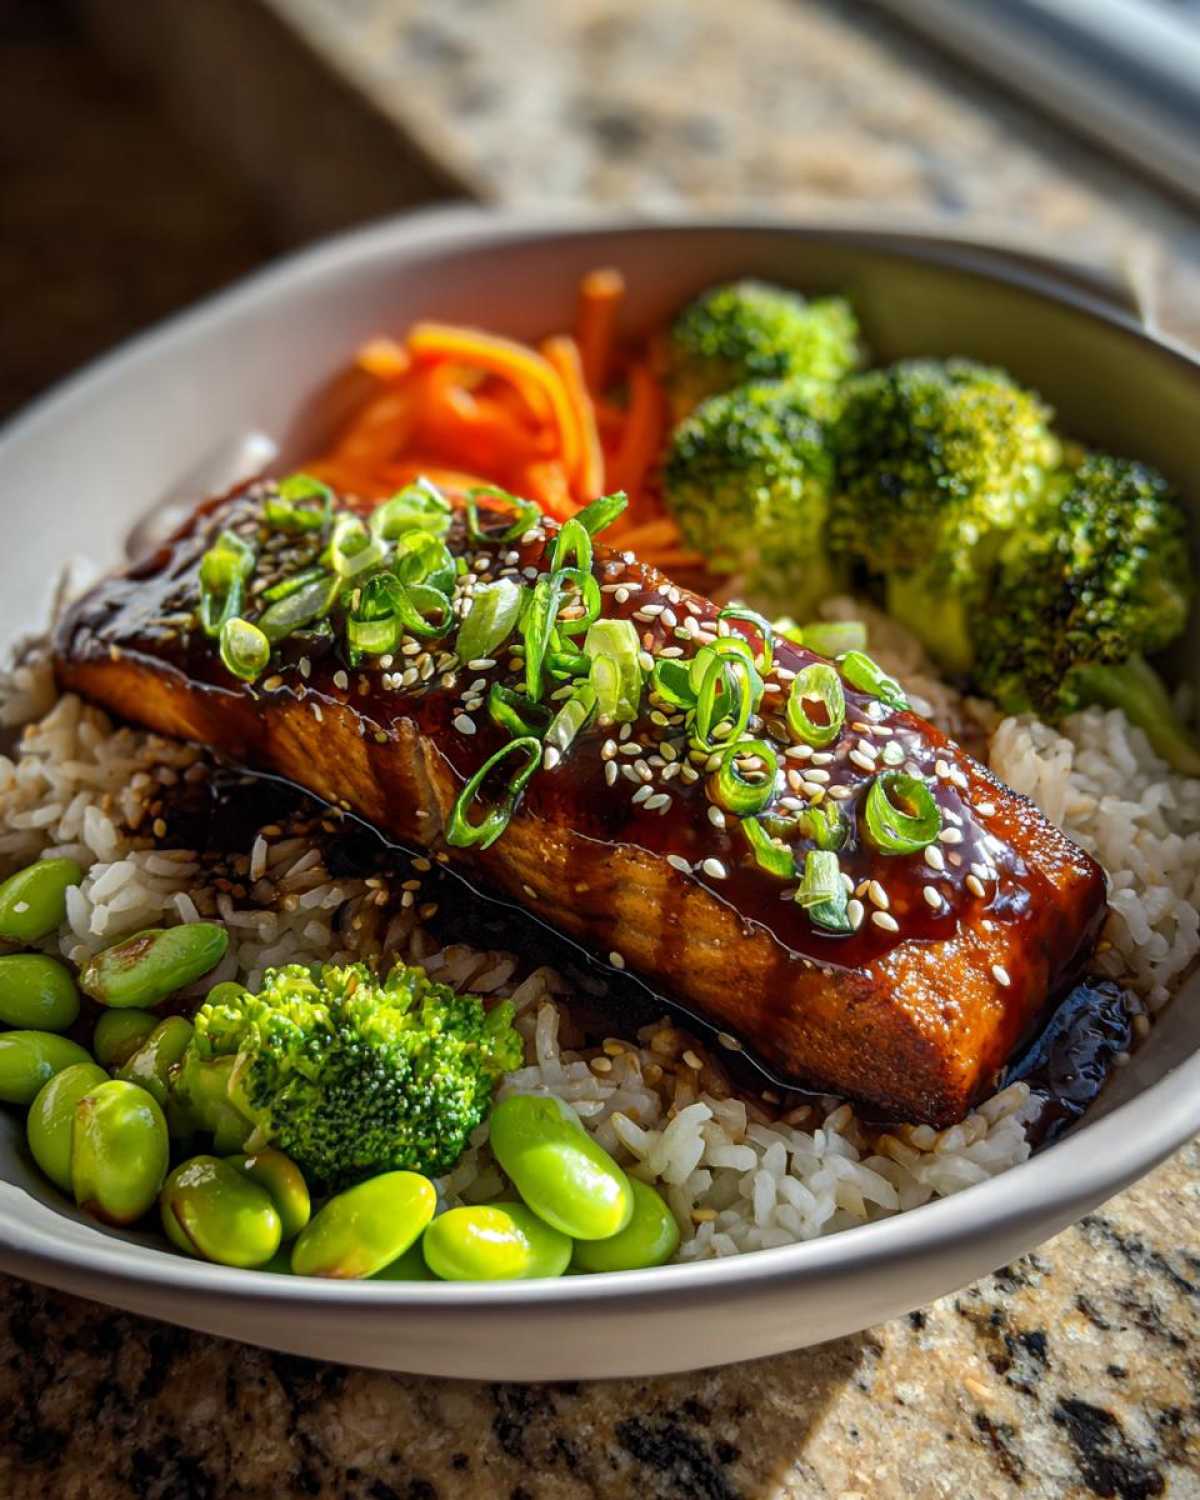
Step-by-Step Instructions for Your Teriyaki Salmon Rice Bowls
Alright, deep breath! This is where we actually bring it all together. I know getting four different components—rice, sauce, veggies, and fish—cooking at the right time can feel like a juggling act, but I promise you, if you follow this order, your kitchen stays calm and everything finishes at the same moment. It’s about working smart, not hard!
Cooking the Rice and Preparing the Simple Salmon Glaze Recipe
First things first: get the rice going! Pop that cup of rice and water into your cooker or pot and let it do its thing. Don’t worry about it; no need to stir or hover. While that’s bubbling away, we move straight to the sauce. This is our Simple Salmon Glaze Recipe, and it’s why these bowls are so good.
Grab a small saucepan and toss in the soy sauce, mirin, water, brown sugar, all that beautiful fresh ginger, and the minced garlic. Put it over medium heat and stir it gently until that brown sugar dissolves completely—you’ll smell the ginger waking up, and it smells incredible! Now, for the thickening part: take that cornstarch and cold water slurry and whisk it right into the simmering sauce. Don’t stop stirring! It only needs about a minute or so, and you’ll see it go from watery to perfectly syrupy. Once it coats the back of a spoon, kill the heat and set it aside. We’ll use half now and save the rest for drizzling later.
Sautéing the Pan Seared Salmon Vegetables
While the sauce simmers, we can manage the vegetables. Get your big skillet nice and hot over medium-high heat, add that tablespoon of olive oil, and toss in your broccoli and carrots right away. We’re cooking these long enough to get them tender-crisp. That means about 5 to 7 minutes of brisk tossing. I don’t want them mushy; I want flavor and a little snap!
About one minute before the veggies look done—just as they are starting to get that lovely bright green color—toss in your pre-cooked edamame. That just warms them up without turning them rubbery. Once they are all perfectly cooked, scoop everything out of the skillet and set it aside in a warm bowl. You need that skillet totally empty and hot again for the salmon!
How to Cook Perfect Salmon Fillets and Glaze
This is the moment! Lightly season your salmon fillets with just salt and pepper—you don’t need much since that homemade glaze is doing all the heavy lifting. Pop the skillet back over medium-high heat. If you’ve got skin on, put them skin-side down first. Sear them hard for about 4 minutes. That crisping skin is my favorite part of the How to Cook Perfect Salmon Fillets process!
After 4 minutes, flip them gently. Now, take half of that thick teriyaki sauce you already made and brush it generously all over the top of the fish. Let it cook for another 3 to 5 minutes. Here’s my temperature tip for perfect doneness: you are aiming for that internal temperature of 145°F, but I usually pull mine off just a hair early, around 140°F, because they keep cooking for a minute on the hot plate—that ensures they stay moist and flake beautifully. Don’t let that glaze burn, keep an eye on it!
Assembling Your Fresh Salmon Bowl Assembly
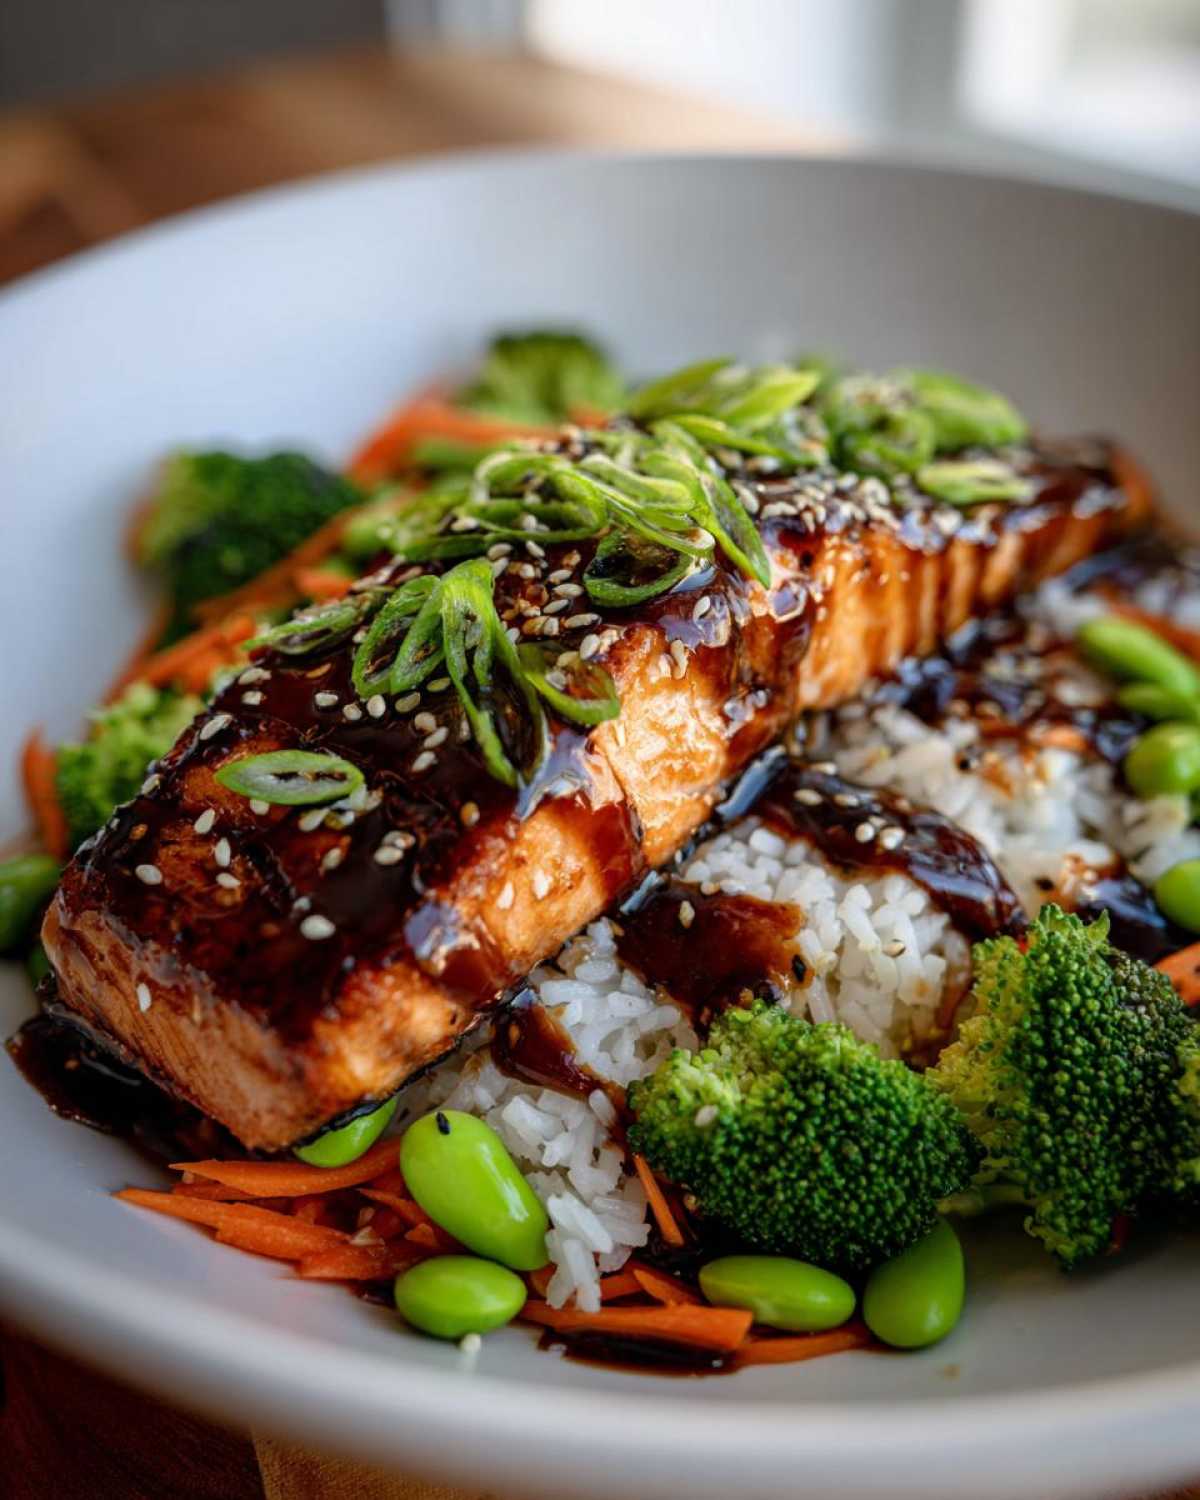
Everything is ready at once, which is the goal! Grab your four serving bowls. Start by spooning a good base of hot, fluffy rice into the bottom of each bowl. This is the foundation for your Glazed Salmon with Steamed Rice setup.
Next, arrange your tender-crisp vegetables (broccoli, carrots, and edamame) neatly next to the rice. Place one perfectly glazed salmon fillet right on top of the rice pile. Now, for the final flourish: take that remaining teriyaki sauce we held back and drizzle it liberally over the fish and the veggies. Don’t be shy!
Finally, reach for those garnishes! Sprinkle those colorful sesame seeds all over everything, and scatter the sliced green onion on top. That’s your gorgeous, balanced Fresh Salmon Bowl Assembly complete. Dinner is served!
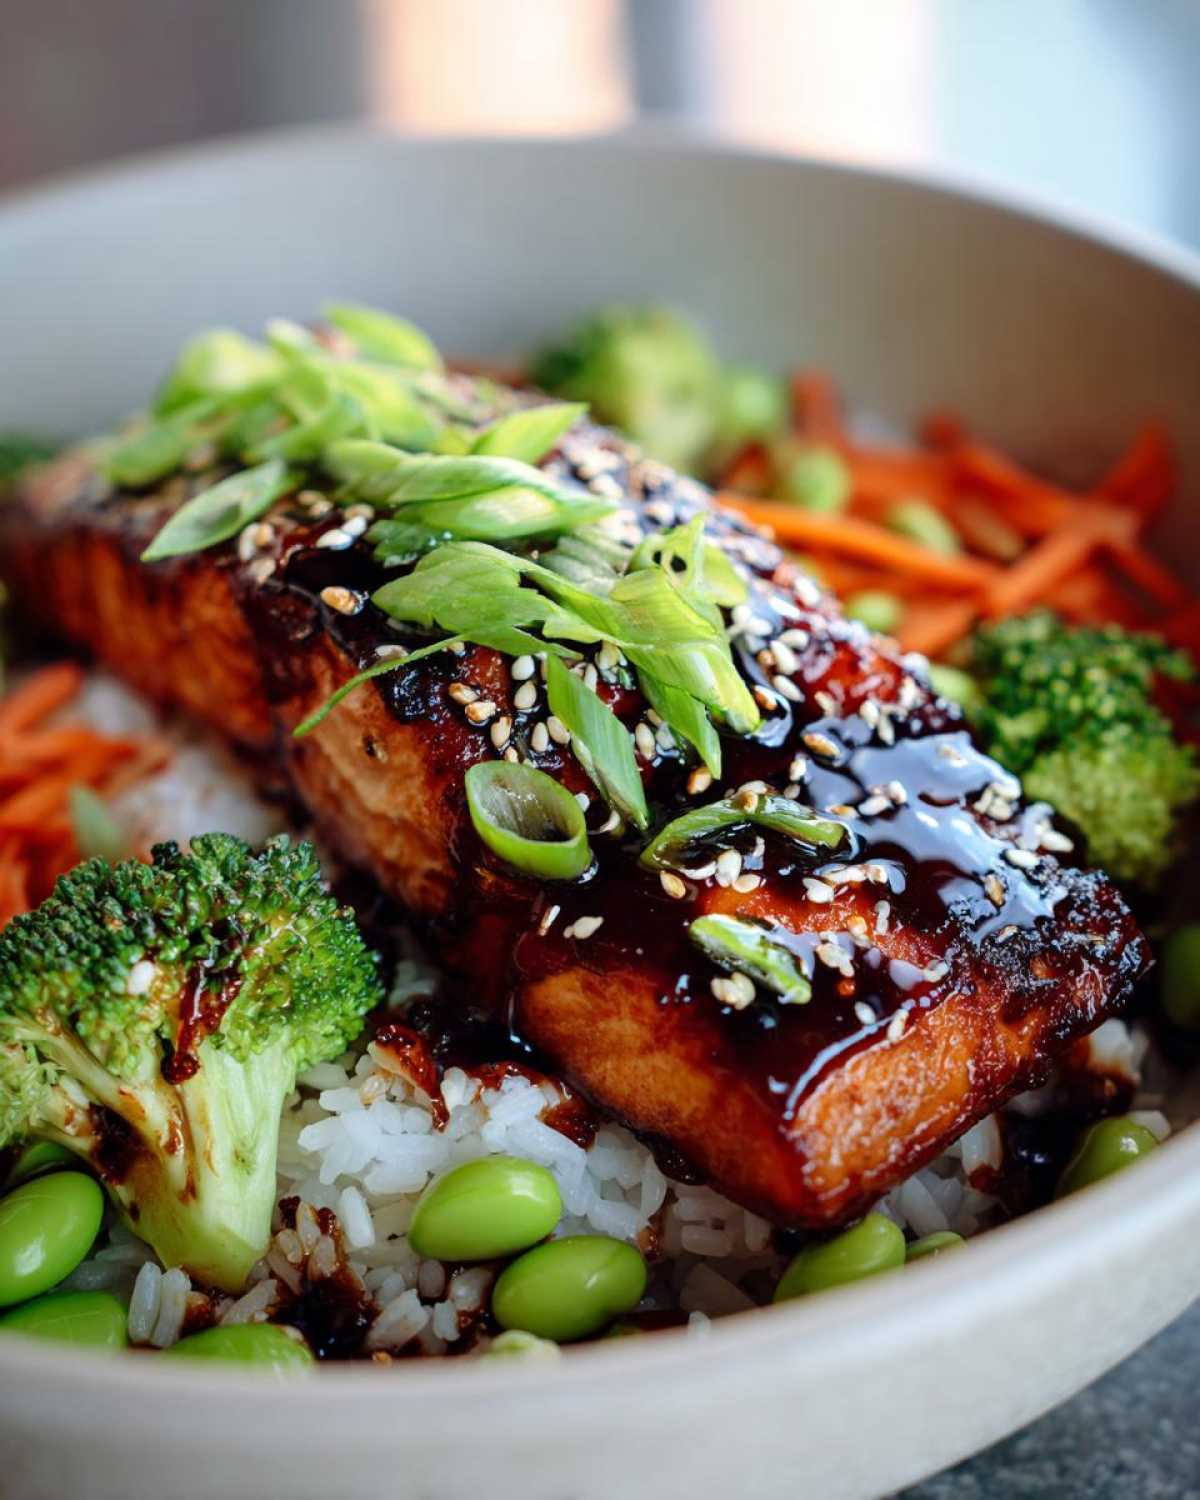
Tips for Success Making Teriyaki Salmon Rice Bowls
Even with a fantastic recipe, things can sometimes go sideways, right? Maybe your sauce came out a little thin, or maybe you’ve got beautiful salmon but you’re worried about it falling apart when you plate it up later. Don’t sweat it at all! I’ve made these bowls every way imaginable while figuring out the best methods for my Salmon and Rice Meal Prep schedule, so I’ve got a few tricks up my sleeve to bail you out or just help you make things perfect from the jump.
The goal here is always that glossy glaze and perfectly flaky fish. If you nail those two things, the rest is just assembly!
Ingredient Notes and Substitutions for Your Teriyaki Salmon Recipe
Let’s chat about the base ingredients because sometimes you run out of something important right when you need it. My preferred method uses short-grain white rice because it gets slightly sticky and catches the sauce beautifully—it’s the classic feel we want. But if you want something heartier, brown rice is an excellent, healthier swap, though it will soak up the sauce a little more quickly.
The biggest question I get is about the mirin. That sweet rice wine is what gives the sauce that specific Japanese balance. If you truly cannot find mirin, you can substitute it with dry sherry mixed with a teaspoon of sugar, but honestly, the flavor changes slightly. If you’re out of brown sugar? Stick to dark brown sugar if possible; it has the molasses flavor that complements the ginger so well. If you must substitute, use white sugar plus 1 teaspoon of molasses, but don’t leave it out entirely, or your sauce will taste flat!
Also, a quick note on the veggies: if you don’t have broccoli or carrots on hand, feel free to substitute with snap peas or thinly sliced bell peppers. Just remember that bell peppers cook way faster, so toss them in right after you add the salmon glaze so they don’t turn soggy. The key to any good Easy Teriyaki Salmon Recipe is making sure textures are managed!
Variations for Your Japanese Inspired Salmon Bowls
I love this recipe because it’s a fantastic base, but honestly, one of the best things about cooking at home is making it your own! These Easy Teriyaki Salmon Recipe bowls are flexible. Sometimes I need baked fish because I’m feeling lazy about washing the pan, and other days I need more heat because the kids are out of the house!
Don’t feel constrained by my pan-searing method; there are a couple of other ways you can cook the salmon that work just as well. A change in cooking vessel means a change in texture, and that keeps things exciting!
Here are a couple of my favorite little tweaks for when I want to switch things up on my Japanese Inspired Salmon Bowls:
- The Quick Bake Method: If you hate standing over the stove, this is for you! Just prepare your sauce base but don’t thicken it with the slurry yet. Lightly season your salmon, place it on a parchment-lined baking sheet. Pop it into a 400°F oven for about 8 minutes. Then, take it out, brush on half your sauce, and bake for another 5-7 minutes until it’s done. You can thicken the remaining sauce in a separate tiny pot on the stove while the fish bakes. It gives you that moist, evenly cooked interior every single time.
- Kicking Up the Heat: If you love that sweet-and-spicy kick—and honestly, who doesn’t?—you need some heat! Before you add the cornstarch slurry to the simmering sauce, whisk in about a teaspoon of Sriracha or a tablespoon of gochujang paste. You get that beautiful, sweet teriyaki flavor, but with a noticeable chili warmth on the finish. If you love spicy glaze action, you absolutely must check out my recipe for spicy honey lime salmon; it shares a similar sweet-heat profile!
- Veggie Swaps: The standard broccoli and carrot combo is classic, but if you’re looking for different textures, try this: swap the broccoli for snap peas and throw in some thinly sliced red bell pepper. Bell peppers caramelize nicely in the pan when sautéed quickly. Remember the rule: cook heartier veggies (like carrots) first, and delicate ones (like snap peas or peppers) in at the very end with the edamame so everything stays crisp.
It’s still the same foundation—great rice and that homemade sauce—but these small changes make it feel like a brand new meal!
Storing and Reheating Your Teriyaki Salmon Rice Bowls
So, you made a massive batch because you know how good these are going to be for lunch tomorrow, or maybe you just love having leftovers! That’s smart cooking. The key to keeping these Teriyaki Salmon Rice Bowls tasting as good on Day Two as they did hot off the skillet is separation. Everything stays delicious, but the textures start merging if you store it all mixed together.
If you are prepping these for your salmon and rice meal prep, definitely pack the components separately into your containers first. This is crucial for maintaining that wonderful crispness on the veggies and keeping the rice from getting gummy.
Here is how I divide everything up:
- The Rice: Keep the steamed rice tucked into its own sealed container. Rice tends to dry out or get really hard when cold, so this needs its own space.
- The Salmon: Place your glazed salmon fillet in its own spot. We don’t want any steam from the rice to make the beautiful sear we worked so hard on go soggy!
- The Veggies: Broccoli, carrots, and edamame can all hang out together, but keep them away from the rice.
- The Sauce: This is the most important part! Keep that extra drizzle of homemade teriyaki glaze in a tiny little jar or a separate compartment. If you pour it on now, the rice will soak it all up overnight and become a sticky mess by lunchtime.
When it’s time to eat, reheating is super simple, but you have to do it gently so you don’t dry out that gorgeous salmon. Skip the microwave if you can, honestly!
For the best result, reheat the rice first. Put it in a microwave-safe bowl, splash maybe a teaspoon of water over it, cover it loosely, and zap it for 45 seconds until it’s hot and fluffy again. If you need to revive the veggies, toss them in a pan with a tiny bit of oil for about two minutes or zap them for 30 seconds.
Then, reheat the salmon separately or just eat it cold if you are in a huge rush—cold salmon glazed with teriyaki is honestly not bad at all! If you are using the microwave for the fish, keep it super short—maybe 20 seconds—and cover it loosely so the glaze doesn’t explode everywhere. Once everything is warm, assemble your bowl exactly like we did the first time: rice, veggies, salmon, and then—the best part—drizzle that reserved sauce right over the top before garnishing with fresh sesame seeds. Easy leftovers!
Frequently Asked Questions About Teriyaki Salmon Rice Bowls
I know when you’re making a new recipe, especially one with a few components like these wonderful Easy Teriyaki Salmon Recipe bowls, you probably have a few lingering doubts. That’s totally normal! I’ve gathered the questions I always get asked whenever I serve these at dinner parties or when people ask me for Quick Salmon Dinner Ideas.
Hopefully, this clears up anything that might be holding you back from making the best Homemade Salmon Rice Bowl tonight!
Can I use frozen salmon instead of fresh fillets?
Oh yes, absolutely! I’ve done this probably fifty times when I didn’t plan ahead well enough. The trick when using frozen salmon is to thaw it thoroughly first. The absolute best way, if you have the foresight, is to move the fillets from the freezer into the fridge the night before. If you need a speedy thaw, place them in a sealed plastic bag and submerge that bag in very cold tap water, changing the water every 30 minutes until they are fully defrosted.
One big key, especially for searing: make sure you pat the thawed salmon completely dry with paper towels before seasoning and cooking. Any extra moisture will steam the fish instead of searing it, and we want that nice, golden crust!
What can I use if I don’t have mirin for the sauce?
This is the big one when it comes to the Best Teriyaki Sauce for Fish! Mirin is sweet rice wine, and traditional Japanese sauces really rely on it for that authentic slightly acidic sweetness that balances the soy sauce. If you are completely out, you can mimic the flavor profile by mixing a quarter cup of dry sherry (like a dry cooking sherry) with about one teaspoon of white sugar. Whisk that together until the sugar dissolves before adding it to the saucepan with the other sauce ingredients.
Now, it won’t be 100% identical to the authentic flavor, but it gets you very close and still results in a fantastic glaze! If you skip too many core ingredients, you start moving away from a true teriyaki flavor.
Can I grill these salmon fillets instead of pan-searing them?
Yes! Grilling is a fantastic way to make these Japanese Inspired Salmon Bowls, especially during nice weather. You get that lovely smoky dimension that you just can’t get on the stovetop. The main thing to watch out for is sticking, since the teriyaki sauce has a lot of sugar which loves to burn on hot grates.
My recommendation for grilling is to lightly oil your grates really well before preheating. Start cooking the salmon skin-side down (if you have skin) first and let it cook undisturbed for about 5 minutes before flipping. Brush on the teriyaki glaze only during the *last* 3 to 4 minutes of cooking time—otherwise, the sugar will blacken before the fish is cooked through. If you are worried about flare-ups, you can always use a cedar plank, which helps keep the fish moist and infuses an extra layer of flavor!
Can I make this recipe ahead of time for family-friendly salmon meals?
Definitely! As I mentioned when talking about storage, these are one of my go-to Salmon and Rice Meal Prep candidates, but you must treat the components separately. Cook the rice, cook the veggies until tender-crisp, and cook the salmon until just done.
They all keep great for 3-4 days in the fridge if sealed tight. When you go to eat them, reheat the rice and veggies gently, and only glaze the salmon right before you eat it, or just drizzle that reserved sauce over the top when you assemble the final bowl!
PrintTeriyaki Salmon Rice Bowls
Make easy, flavorful teriyaki salmon served over rice with fresh vegetables for a complete meal.
- Prep Time: 15 min
- Cook Time: 20 min
- Total Time: 35 min
- Yield: 4 servings
- Category: Dinner
- Method: Pan-Seared
- Cuisine: Japanese Inspired
- Diet: Low Lactose
Ingredients
- 4 (6 ounce) salmon fillets, skin on or off
- 1 cup short-grain white rice or brown rice
- 1 cup water (for rice)
- 1 tablespoon olive oil
- 1 cup broccoli florets
- 1 medium carrot, thinly sliced
- 1/2 cup shelled edamame, cooked
- 2 tablespoons sesame seeds, for garnish
- 1 green onion, sliced, for garnish
- For the Teriyaki Sauce:
- 1/2 cup soy sauce
- 1/4 cup mirin (sweet rice wine)
- 1/4 cup water
- 2 tablespoons brown sugar
- 1 tablespoon fresh ginger, grated
- 2 cloves garlic, minced
- 1 teaspoon cornstarch mixed with 1 tablespoon cold water (slurry)
Instructions
- Cook the rice according to package directions using 1 cup of water. Set aside and keep warm.
- Prepare the teriyaki sauce: Combine soy sauce, mirin, 1/4 cup water, brown sugar, ginger, and garlic in a small saucepan. Bring the mixture to a simmer over medium heat, stirring until the sugar dissolves.
- Whisk the cornstarch slurry into the simmering sauce. Cook for 1 minute, stirring constantly, until the sauce thickens slightly. Remove from heat and set aside.
- Cook the vegetables: Heat olive oil in a large skillet over medium-high heat. Add broccoli and carrots. Cook for 5 to 7 minutes until tender-crisp. Add the cooked edamame during the last minute of cooking. Remove vegetables from the skillet and set aside.
- Cook the salmon: Season the salmon fillets lightly with salt and pepper. Return the skillet to medium-high heat. Place the salmon skin-side down (if applicable) and sear for 4 minutes. Flip the salmon.
- Brush the top of the salmon generously with half of the prepared teriyaki sauce. Cook for another 3 to 5 minutes, or until the salmon reaches your desired doneness (internal temperature of 145°F).
- Assemble the bowls: Divide the cooked rice among four bowls. Top the rice with the cooked vegetables and one salmon fillet in each bowl.
- Drizzle the remaining teriyaki sauce over the salmon and vegetables. Garnish with sesame seeds and sliced green onions.
Notes
- For crispier salmon skin, pat the fillets very dry before searing.
- You can bake the salmon at 400°F for 12-15 minutes instead of pan-searing. Brush with sauce halfway through cooking.
- Use sushi rice for a traditional texture or brown rice for added fiber.
Nutrition
- Serving Size: 1 bowl
- Calories: 550
- Sugar: 18
- Sodium: 850
- Fat: 22
- Saturated Fat: 4
- Unsaturated Fat: 18
- Trans Fat: 0
- Carbohydrates: 45
- Fiber: 5
- Protein: 48
- Cholesterol: 105