


Oh my goodness, if you are looking for the ultimate brunch centerpiece, stop looking right now! You’ve landed on the absolute gold standard for White Chocolate Raspberry Scones. I swear, since I learned the secret to keeping everything ice cold, my scones have gone from decent to truly show-stopping. They are the lightest, flakiest things you’ll ever pull out of your oven—not dry, not dense, just perfect little clouds of buttery goodness!
I still remember trying to mimic those fancy bakery scones in my tiny old apartment kitchen, always ending up with pucks. But trust me, once you nail this technique, featuring that gorgeous contrast between tart raspberries and sweet white chocolate, you’ll never go back to the boxed mixes. This recipe, focusing on keeping the butter frigid, is what separates a good scone from a legendary one. If you’ve struggled with drier scones before, check out my tips on blueberry scones—the principles for flakiness are the same! We’re making magic here!

Why These White Chocolate Raspberry Scones Are Your New Favorite Breakfast Pastry Recipes
- You get flaky layers every single time, guaranteed! This becomes your new go-to for breakfast pastry recipes.
- We nail that delicate texture, making these the most tender scones you’ve ever made from scratch.
- The balance is just right—sweet white chocolate perfectly cut by tart raspberries.
- They look utterly elegant but take almost no time, making them perfect for weekend brunch baking ideas.
Achieving the Perfect Fluffy Scones Recipe Texture
Okay, the secret is the cold! We are aiming for cold butter pieces roughly the size of little peas when we mix it into the flour. When that hits the hot oven? Boom! Those little butter pockets release steam instantly, pushing the layers apart. That’s how you make tender scones!
Tips for Bright, Undiluted Raspberry White Chocolate Baked Goods
Listen, nobody wants a pink scone, right? If you are using fresh berries, go ahead and toss them in just a teaspoon of flour before you fold them in. This coats them just enough so the moisture stays locked in and prevents that ugly color bleed into your beautiful dough. It works like a charm for these raspberry white chocolate baked goods!
Essential Ingredients for Bakery Style Scones Recipe
You cannot skimp on quality or temperature here, friends! For these truly bakery style scones, everything needs to be cold—and I mean fridge-cold right before we start mixing. If your butter is warm, you might as well stop right there. That cold butter is what ensures you get those gorgeous, flaky layers we’re after. It’s all about precision in the prep work, even when we’re keeping the mixing quick!
Here is exactly what you need gathered on your counter:
- 2 cups all-purpose flour (sift it, it helps!)
- 1/4 cup granulated sugar
- 1 tablespoon baking powder (and make sure it’s fresh!)
- 1/2 teaspoon salt
- 1/2 cup (1 stick) unsalted butter, cut into small cubes—and keep it in the freezer until the absolute last second we need it.
- 1/2 cup heavy cream, plus 2 tablespoons reserved just for brushing the tops later.
- 1/4 cup buttermilk—this acidity makes such a difference for tenderness!
- 1 large egg
- 1 teaspoon vanilla extract
- 3/4 cup white chocolate chips (I like the finer ones better than large chunks)
- 3/4 cup fresh or frozen raspberries (do not thaw the frozen ones!)
- For the glaze: 1/2 cup powdered sugar and 1 tablespoon fresh lemon juice.
Seriously, the colder your dairy is, the more professional your finished sweet scone variations will look. It’s the secret to making them perfectly tender!
How to Prepare Perfect White Chocolate Raspberry Scones: Step-by-Step
Okay, time to put that beautiful, ice-cold butter to work! This is where we translate all that preparation into actual structure. Remember, the golden rule across all my favorite making scones from scratch techniques is to move fast and mix gently. Overmixing is the enemy of fluffy texture! We are preheating the oven to 400°F (200°C) right now so it’s roaring hot when these babies go in for that fast bake.
Mixing Dry Ingredients and Cutting in Butter for Flaky Scones
First, grab your biggest bowl and whisk together the flour, sugar, baking powder, and salt. We are making sure everything is perfectly distributed before we introduce the cold stuff. Now, drop in those cold butter cubes! If you don’t have a pastry blender, just use your fingertips, but work quickly—you want the butter to break down until the mixture looks like coarse crumbs, and you should still see some little pea-sized bits of solid butter hanging around. That is the secret to a guaranteed fluffy scones recipe. Don’t blend it smooth! That’s pound cake territory, not scone heaven.
Incorporating Berries and White Chocolate Chips into White Chocolate Raspberry Scones
In a separate, smaller bowl, combine the wet mixture: the heavy cream, buttermilk, egg, and vanilla. Pour that shaggy wet mixture right into your dry mixture. Use a fork and just mix enough until you see everything just barely come together. It should look messy, almost like wet sand—that’s perfect! Now, quickly fold in the white chocolate chips. If you are using those glorious fresh raspberries, toss them in just a tiny bit of flour first, then gently fold them in with the chips. If you’re using frozen ones, just toss them in, frozen solid, and work fast so you don’t get that dreaded pink dough. We want vibrant colors in these white chocolate raspberry scones!
Shaping and Baking Your White Chocolate Raspberry Scones
Turn the shaggy dough out onto a surface that’s barely dusted with flour. Gently, I mean *gently*, pat the whole thing into a thick disc, about 3/4 of an inch thick. Don’t knead it! We aren’t making bread here! Cut the dough into 8 clean wedges, like slicing a pizza. Lay them on your parchment-lined sheet, leaving about an inch between them so they have room to puff up. Remember those 2 tablespoons of heavy cream we saved? Brush that creamy wash right over the tops. This helps them get that gorgeous golden crust. Pop them in the 400°F oven for 15 to 18 minutes exactly. Seriously, check them right at 15 minutes—they are done when they smell irresistible and a quick toothpick test comes out clean!
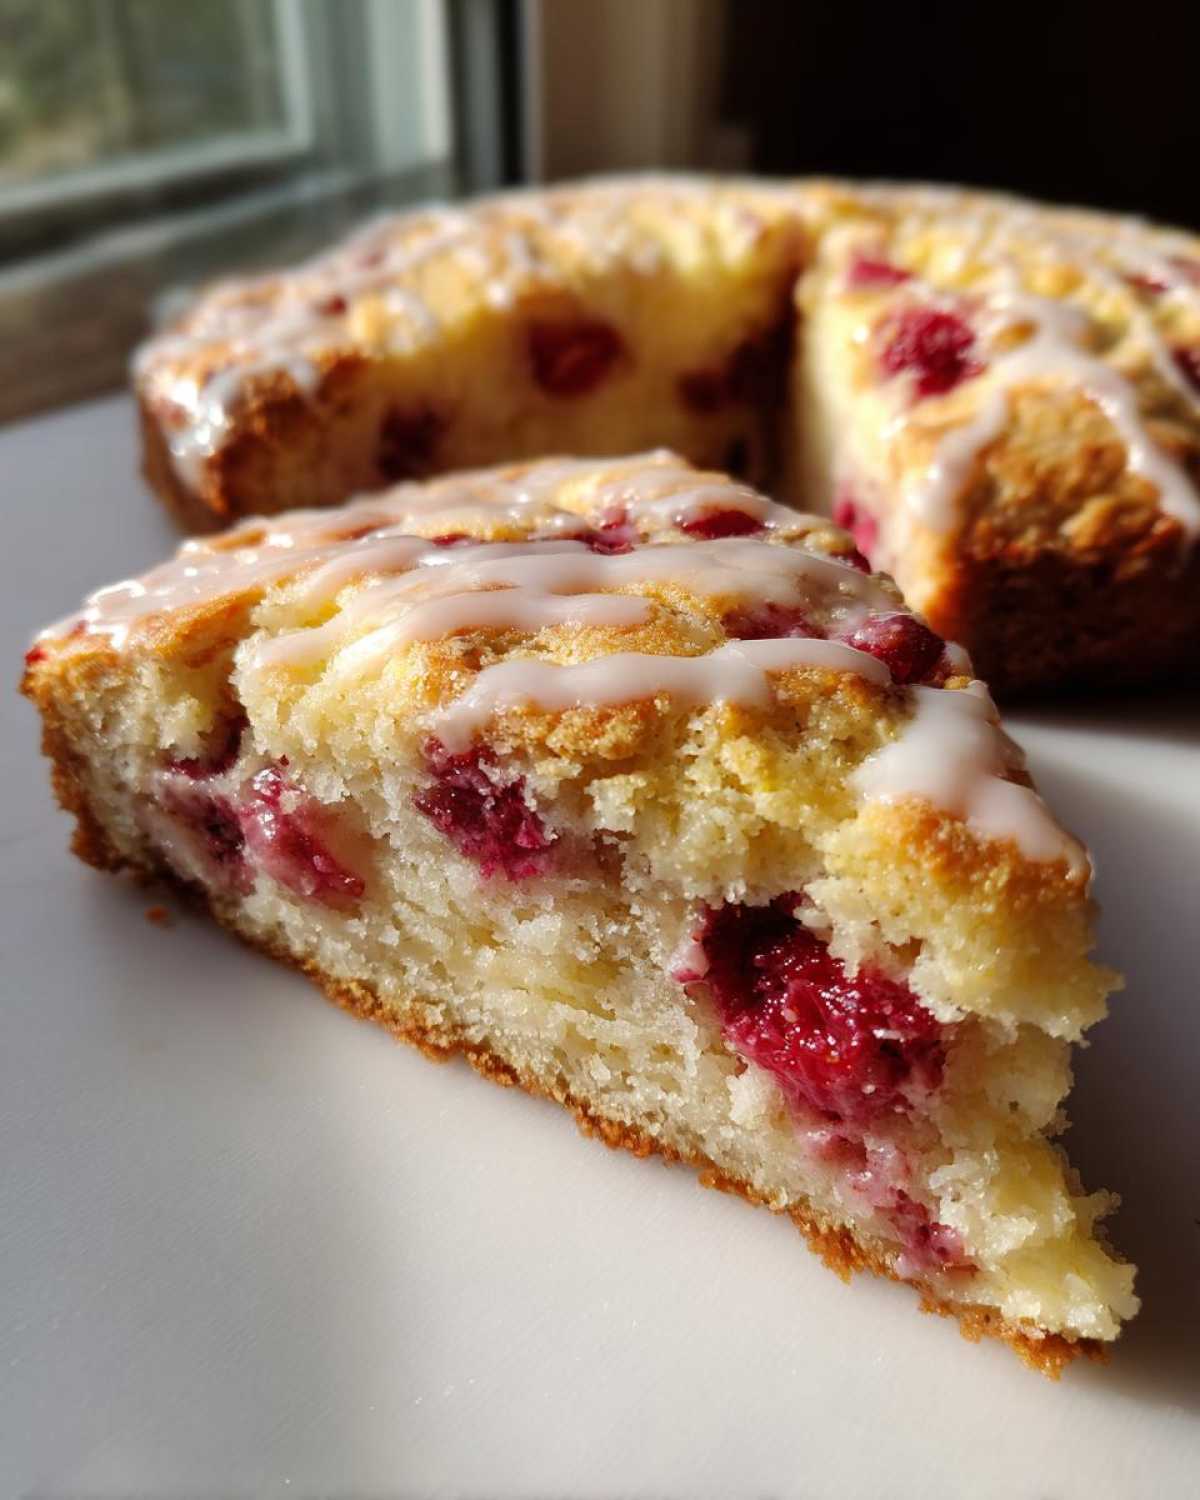
Glazing Your White Chocolate Raspberry Scones for an Elegant Breakfast Treat
You’ve done the hard work, they are golden brown, and now we get to the fun, gorgeous part! A good glaze takes these already amazing White Chocolate Raspberry Scones from ‘great homemade treat’ to ‘cafe-worthy masterpiece.’ Honestly, this simple lemon glaze is my absolute favorite—it just brings a little zing that cuts through the sweetness of the white chocolate so perfectly.
It’s so easy, you won’t even need a separate recipe, but if you’re feeling ambitious later, you can check out my favorite vanilla buttercream frosting recipe for other baked goods. For these, though, simplicity wins.
To whip up the glaze, grab about half a cup of powdered sugar and start whisking in the fresh lemon juice, drop by drop. You want a thick but pourable consistency—it shouldn’t run off the scone the second you drizzle it on. If you add too much juice, just throw in another tablespoon of powdered sugar until it looks right.
Now, timing is everything here! I prefer to glaze mine when the scones are still slightly warm. Not piping hot, mind you, because the glaze will just melt right off, but warm enough that the glaze sets up nicely but doesn’t just pool into a clear coating. If you wait until they are completely cool, the glaze will look thicker and more opaque, which is great too! Either way, drizzle it generously over the tops. It hardens up in about 20 minutes, giving you that beautiful, slightly crackly finish on top of your glaze for scones recipe.

Ingredient Notes and Substitutions for Tender Scones
Now that you’ve mastered the technique, let’s talk about what happens when your pantry looks a little different than mine. Don’t panic if you’re missing an exact ingredient! These are my favorite weekend baking projects, and I’ve had to improvise plenty of times. The key to these tender scones is maintaining the cold temperature, even when you swap things out.
First, let’s look at the liquid duo: buttermilk and heavy cream. The recipe calls for a specific balance because the fat in the heavy cream helps with richness, and the acid in the buttermilk tenderizes the gluten. If you don’t have buttermilk on hand, that’s totally fixable! Just take your regular milk—any kind works—and add a teaspoon of white vinegar or lemon juice to every cup. Let it sit for five minutes until it curdles slightly. That’s your substitute for the buttermilk. If you can only find milk instead of heavy cream, use the milk, but maybe add an extra ounce of melted, cooled butter to the mixture to compensate for the missing fat content.
Swapping Out White Chocolate and Berries
The white chocolate chips are divine, but what if you only have a big bar of white chocolate? Go for it! Just coarsely chop the bar yourself. Homemade chips tend to melt a little more, which means you get these gorgeous white chocolate pools when you bite in. I love that variation, honestly!
If you’re trying to use up other freezer items, you absolutely can swap the raspberries! If you love that tartness, these work beautifully as a cranberry raspberry scone alternative if you swap half of the berries for dried cranberries soaked briefly in hot water. If you hate raspberries, chocolate chunks alone are fantastic, or even dried cherries work wonders in this base dough for a sweet, slightly chewy bite.
Temperature is Everything if You Want to Make Scones From Scratch
I can’t stress this enough: even if you’re substituting ingredients, the cold temperature of the butter and dairy is what prevents you from ending up with dense disks instead of light, flaky layers. When you are making scones from scratch, think of the butter as your structural engineer. If it melts before it hits the heat, it just mixes into the dough like oil, and you lose all the steam pockets needed for that wonderful lift. So, even if you’re trying a different fruit or a different flavor of chocolate, keep that butter—and your buttermilk/cream mixture—in the fridge until the moment you need it. That’s the real secret to these elegant breakfast treats!
Storage and Reheating Instructions
So, you made a massive batch because you just couldn’t stop yourself—I totally get it! Now we need to make sure these gorgeous treats last long enough for you to enjoy them all week. The good news is that scones are actually fantastic keepers, unlike some other pastries that go stale in an hour. But we have to treat them right.
The absolute best way to store your White Chocolate Raspberry Scones is completely plain—no glaze! If you’ve already drizzled that beautiful lemon topping on, they are best eaten within 12 hours, as the moisture from the glaze can start to soften the crisp exterior too much. If they are plain, wrap them loosely in plastic wrap or pop them into a sturdy Ziploc bag. Keep them at room temperature, not in the fridge! Cold temperatures actually dry out baked goods faster.
Trust me on this: they will last beautifully for up to two full days stored this way. If you made a huge batch for the holidays and want them to last longer than that, you can freeze them! Just wrap individual scones tightly in plastic wrap, then place those wrapped scones into a heavy-duty freezer bag. They are good in the deep freeze for about a month. That way, you can pull one out whenever you need a quick, elegant breakfast treat!
The Secret to Reheating for That Fresh-From-The-Oven Experience
Handling them straight from the fridge or freezer requires a little revitalization—we want that melt-in-your-mouth flakiness back, right? Microwaving scones is a recipe for rubbery disappointment, so please avoid that temptation! We need dry heat to re-crisp the outside.
The absolute champion for reheating is the toaster oven. It’s fast, and it gives you that perfect crispy edge back instantly. If you’re just reheating one or two, set your toaster oven to about 325°F (160°C) and let it warm up for about three to five minutes. They’ll be warm through and delightfully crisp again!
If you have to use your conventional oven—maybe you’re reheating the whole batch—preheat it to 350°F (175°C). Lay the scones out on a baking sheet (no need for parchment if they aren’t glazed) and pop them in for about 6 to 8 minutes. When they come out, if you haven’t glazed them yet, this is the perfect time to dust them with powdered sugar or drizzle on that lemon glaze while they are warm!
Serving Suggestions for Classic Afternoon Tea Scones
The glaze is divine, truly, but these scones are so good they deserve the full royal treatment, especially if you are planning a proper tea service or just want to turn Saturday morning into an occasion. Think beyond just a drizzle; these White Chocolate Raspberry Scones are begging for accompaniments!
If you’re leaning into the whole *elegant breakfast treat* vibe, you absolutely must serve them warm with a side of something luxurious. My top pick, which honors the true spirit of a cream tea, is a little dollop of clotted cream. I know it can be hard to find sometimes, but honestly, a good quality, thick, slightly tart crème fraîche is a wonderful substitute. It melts just perfectly into those flaky layers.

And what goes with cream? Jam, of course! Since we already have so much flavor going on with the white chocolate and raspberry baked right in, I like to keep the jam simple and high-quality. A smooth raspberry preserve is a classic, but a tart strawberry jam or even a sweet, floral rose jam makes these feel extra special—perfect for your latest brunch baking ideas.
If you’re making these for a more casual breakfast, they are obviously fantastic all on their own. But pairing them with a strong cup of Earl Grey tea or a good, slightly spicy black coffee really makes the white chocolate shine. They don’t need much help to be amazing, but these little touches elevate them into something truly memorable. If you’re looking for other great partner recipes for your morning spread, check out my tips on making easy french toast!
Frequently Asked Questions About Making Scones From Scratch
I get so many questions about these beautiful scones after making them for brunches! It’s totally normal to have a few hang-ups when you’re working with flaky pastry for the first time. Honestly, understanding these little details is what helps you move from just following steps to truly mastering making scones from scratch. Here are the things I hear most often from folks trying this recipe!
Can I use frozen raspberries in this easy scone recipe for beginners?
Oh yes, absolutely! I use frozen all the time when fresh aren’t in season. The key part of this easy scone recipe for beginners is that you must add them straight from the freezer—do not thaw them! If they get warm, they start releasing juice immediately, and that’s when you get the pink dough disaster. Just toss the frozen berries in right at the end while you are folding everything together, and work quickly. You want them to stay mostly frozen when they hit the hot oven so they don’t bleed color.
What is the secret to making scones tender and not dense?
If you take one thing away from this whole process, let it be this: Cold butter and minimal mixing. Honestly, that’s the whole ballgame for light, **tender scones**! You want to cut the cold butter into the flour until it looks like coarse meal with some pea-sized chunks still visible. Then, once you add the wet ingredients, mix with a fork just until it *just* comes together. The moment you see dry flour patches disappear, stop mixing! Overworking the dough develops gluten, and gluten gives you tough, dense results instead of those wonderful, airy layers.
Can I make a lemon glaze for scones recipe variation?
You totally can, and I highly recommend leaning into that brightness! You’ll be happy to know that the glaze given in the main instructions is already built around that sharp lemon tang. It’s just powdered sugar and lemon juice, which pairs so perfectly with the white chocolate. But here’s a little secret I often use, especially if I’m serving these for a special occasion: add about a half teaspoon of fresh lemon zest right into your powdered sugar before you add the juice. It really concentrates that bright citrus aroma without making the glaze too runny. It takes this simple **glaze for scones recipe** right over the top!
Share Your Weekend Baking Projects
Whew! You did it! You tackled the best homemade scones recipe and produced bakery-worthy perfection right in your own kitchen. Now I want to hear all about it! Seriously, my favorite part of sharing these recipes is seeing your results—those flaky layers and that gorgeous marriage of white chocolate and raspberry just make my day.
Did the butter stay cold enough? Did you go for the simple sugar dusting or the zesty lemon glaze? Tell me everything! Please take a minute to pop down below and leave a rating for the recipe. Even a simple star rating helps other bakers gather the confidence to try these amazing White Chocolate Raspberry Scones for their own weekend baking adventures.
And when you snap a picture of that beautiful stack of golden pastries—maybe next to your morning coffee—don’t forget to share it on social media! Tag me so I can squeal over your success! Don’t be shy about sharing where you went wrong, either; we all have those learning moments (like that one time I accidentally used melted butter—never again!). If you need to reach out for a specific tip or just want to tell me how much you loved the texture, you can always send a private note through my contact page, too. Happy baking, friends!
PrintWhite Chocolate Raspberry Scones

A recipe for making light, flaky scones featuring white chocolate chips and fresh or frozen raspberries, finished with a simple lemon glaze.
- Prep Time: 20 min
- Cook Time: 18 min
- Total Time: 38 min
- Yield: 8 servings
- Category: Breakfast
- Method: Baking
- Cuisine: American
- Diet: Vegetarian
Ingredients
- 2 cups all-purpose flour
- 1/4 cup granulated sugar
- 1 tablespoon baking powder
- 1/2 teaspoon salt
- 1/2 cup (1 stick) cold unsalted butter, cut into small cubes
- 1/2 cup heavy cream, plus 2 tablespoons for brushing
- 1/4 cup buttermilk
- 1 large egg
- 1 teaspoon vanilla extract
- 3/4 cup white chocolate chips
- 3/4 cup fresh or frozen raspberries
- 1/2 cup powdered sugar for glaze
- 1 tablespoon fresh lemon juice for glaze
Instructions
- Preheat your oven to 400°F (200°C). Line a baking sheet with parchment paper.
- In a large bowl, whisk together the flour, granulated sugar, baking powder, and salt.
- Cut the cold butter into the flour mixture using a pastry blender or your fingertips until the mixture resembles coarse crumbs with some pea-sized pieces of butter remaining.
- In a separate small bowl, whisk together the heavy cream, buttermilk, egg, and vanilla extract.
- Pour the wet ingredients into the dry ingredients. Mix gently with a fork until just combined. Do not overmix; the dough will look shaggy.
- Gently fold in the white chocolate chips. If using fresh raspberries, lightly dust them with 1 teaspoon of flour before adding them to prevent sinking. If using frozen raspberries, do not thaw them. Gently fold the berries into the dough, working quickly to prevent color bleeding.
- Turn the dough out onto a lightly floured surface. Gently pat the dough into a 3/4-inch thick circle or rectangle.
- Cut the dough into 8 wedges or use a 2-inch biscuit cutter to cut rounds. Place the scones on the prepared baking sheet, spacing them about 1 inch apart.
- Brush the tops of the scones lightly with the reserved 2 tablespoons of heavy cream.
- Bake for 15 to 18 minutes, or until the tops are golden brown and a toothpick inserted into the center comes out clean.
- Let the scones cool on a wire rack for 10 minutes before glazing.
- For the glaze, whisk together the powdered sugar and lemon juice until smooth. Drizzle over the slightly warm or cooled scones.
Notes
- To keep the scones tender and flaky, ensure your butter and cream are very cold before mixing.
- If using frozen raspberries, do not thaw them, and fold them in quickly to minimize color bleeding into the dough.
- If you prefer a less sweet finish, skip the glaze and dust the warm scones with extra granulated sugar before baking.
- Store cooled scones in an airtight container at room temperature for up to 2 days. Reheat briefly in a toaster oven for the best texture.
Nutrition
- Serving Size: 1 scone
- Calories: 350
- Sugar: 20
- Sodium: 250
- Fat: 19
- Saturated Fat: 12
- Unsaturated Fat: 7
- Trans Fat: 0
- Carbohydrates: 40
- Fiber: 2
- Protein: 5
- Cholesterol: 60