

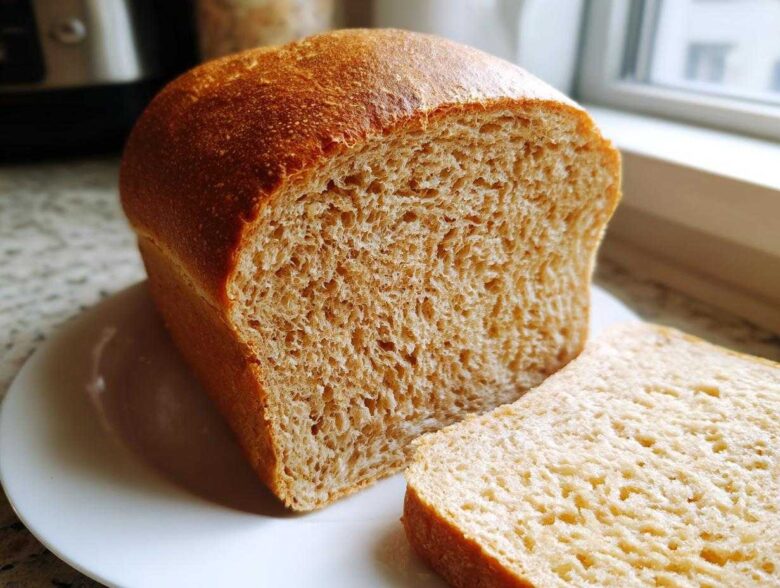
Oh, my friend, if you’ve ever tried to bake a loaf of 100% whole wheat bread at home only to end up with something that feels more like a paving stone than a sandwich slice, I know your pain! For years, my whole wheat attempts were disasters—dense, crumbly, and just sad looking. I thought achieving that soft, fluffy texture they sell in the stores was impossible without chemical additives. Well, I was so wrong! I finally cracked the code with this recipe from my latest baking adventures. Introducing my Easy Soft Honey Whole Wheat Sandwich Bread. It’s simple, it rises like a dream, and it’s exactly what you need for the best toast you’ve ever had. Trust me, this recipe changes everything!
Why This Soft & Easy Honey Whole Wheat Sandwich Bread Recipe Works
Listen, the secret to avoiding that brick-like texture everyone fears when dealing with 100% whole wheat flour is all about balancing the richness and giving the dough exactly what it needs to stretch. We aren’t looking for that weak, floppy texture you sometimes get from store-bought loaves; we want substance but with incredible softness. This is honestly the Soft Whole Wheat Sandwich Bread I keep coming back to! It makes people think I spent all day perfecting the baker’s craft, but really, it’s just technique!
Achieving a Fluffy Texture in Whole Wheat Bread
The honey isn’t just for flavor, although that sweet note is amazing. It helps keep the crumb incredibly tender, fighting off dryness before it even starts. Then there’s the kneading time. You absolutely must commit those 8 to 10 minutes. That vigorous work builds up the gluten structure, which is what traps the air and gives you that wonderful, fluffy homemade bread lift we are aiming for.
Simple Steps for Your First Whole Wheat Loaf
If you’ve been scared off by sourdough starters or complex kneading techniques, don’t worry! Despite using all whole grain flour, this is genuinely a brilliant Beginner Whole Wheat Bread recipe. It’s basically mix, knead a bit, let it rest, shape, rest again, and bake. If you can make a pancake, you can make this! You’ll find it’s a truly Simple Whole Wheat Recipe!
Ingredients for the Perfect Whole Wheat Bread
Okay, gather your supplies! Making this truly great Honey Wheat Bread Recipe is surprisingly easy because the ingredient list isn’t long or fussy. Remember, we are using 100% hard wheat here, so pay attention to those water temperatures!
- 1 cup warm water (aim for that sweet spot: 105-115°F – go too hot and you’ll kill your yeast, trust me!)
- 2 1/4 teaspoons active dry yeast (that’s one standard packet!)
- 1/4 cup honey
- 2 tablespoons unsalted butter, melted
- 1 1/2 teaspoons salt
- 3 cups whole wheat flour, plus more for dusting your surface later
- 1/2 cup warm water (extra, just in case!)
Having these simple things ready before you even turn on the oven makes the whole process feel smooth. You can check out my thoughts on baking with whole wheat flour if you’re curious about why we need these specific amounts!
How to Prepare Your Soft Whole Wheat Bread Instructions
Getting this Homemade Whole Wheat Bread right is all about following the flow! Don’t rush the first stages, because that yeast needs a little encouragement to get happy and active. Once the yeast is foamy, it’s like the green light for the rest of the process.
Activating the Yeast and Mixing the Dough
First up, get that warm water ready—remember that 105 to 115°F range is crucial! Whisk in your yeast and that lovely honey. You are waiting for it to look frothy, which usually takes about 5 to 10 minutes. If it doesn’t foam, your water was probably too hot and shocked the yeast, so start that step over! Once it’s bubbly, stir in the melted butter and salt. Now you can start adding the 3 cups of whole wheat flour slowly until you get a thick, messy ball of dough.
Kneading and First Rise for Whole Wheat Bread
This is where we build the structure, folks! Turn that shaggy dough out onto your counter. You need to knead this for a solid 8 to 10 minutes. I know, it seems long, but stick with it! Now, here’s my tip: don’t panic if the dough feels a little sticker or softer than standard white bread dough. Whole wheat loves to hold onto a bit more moisture until it really relaxes. Once it’s smooth and elastic, put it in a lightly oiled bowl, cover it, and let it double in size—that’s usually 1 to 1.5 hours in a warm spot. It’s worth the wait!
Shaping, Second Rise, and Baking the Whole Wheat Loaf
When it’s puffy, gently punch the air out—that’s the scary part, but it calms the dough down! Shape it nicely into a log and tuck it into your greased 9×5 inch loaf pan, seam-side down. Cover it again for that second, shorter rise, about 30 to 45 minutes, until it peaks nicely above the pan rim. Preheat your oven to 375°F while it’s on its final rise. Bake it for 30 to 35 minutes. You’ll know it’s done when it sounds hollow when tapped, or better yet, when that internal temperature hits 200°F! Slide it right out onto a cooling rack—don’t let it steam in that pan. This bread is fantastic warmed up with some butter, or for future sandwiches. Check out my breakfast ideas for meal inspiration!
Tips for Perfect 100 Percent Whole Wheat Baking
Okay, this is where we talk real talk about 100 Percent Whole Wheat Baking. Sometimes, no matter how perfectly we follow the recipe, whole wheat flour just throws us a curveball because it’s naturally more inconsistent than the bleached white stuff. Don’t panic! These are the pro tips I picked up after wasting a few too many bags of expensive flour.
Troubleshooting Dense Whole Wheat Bread
If your loaf comes out heavy and dense, that usually means the gluten network couldn’t hold onto the gas bubbles during the rise, or maybe the flour absorbed too much water without softening enough first. If you are finding your dough seems stiff, even after kneading, you need to adjust the liquid! Remember that whole wheat flour loves to hold onto liquid like a sponge, and humidity plays a huge role. If your dough looks dry during the kneading process, add water one teaspoon at a time—go slow! You need that elasticity to guarantee that Hearty Whole Grain Baking result you’re looking for.
Also, when you’re looking at that first rise, don’t just trust the clock! Whole wheat doughs can sometimes take longer to double because of the heavier bran content. You need to see that clear doubling in volume before you move on to shaping. Patience here pays off big time so you don’t end up with a compressed loaf!
For more insights into handling this amazing flour, check out my detailed guide over on baking with whole wheat flour!
Serving Suggestions for Your Whole Wheat Bread
Now that you’ve successfully baked a beautiful, soft loaf—congratulations! You deserve a snack! This whole wheat bread is sturdy enough for hearty use but has such a lovely soft crumb that it tastes amazing with simple things, too. Honestly, I always slice the first piece while it’s still slightly warm (don’t tell the purists!) and just smear it with a touch of salted butter. It’s pure heaven.
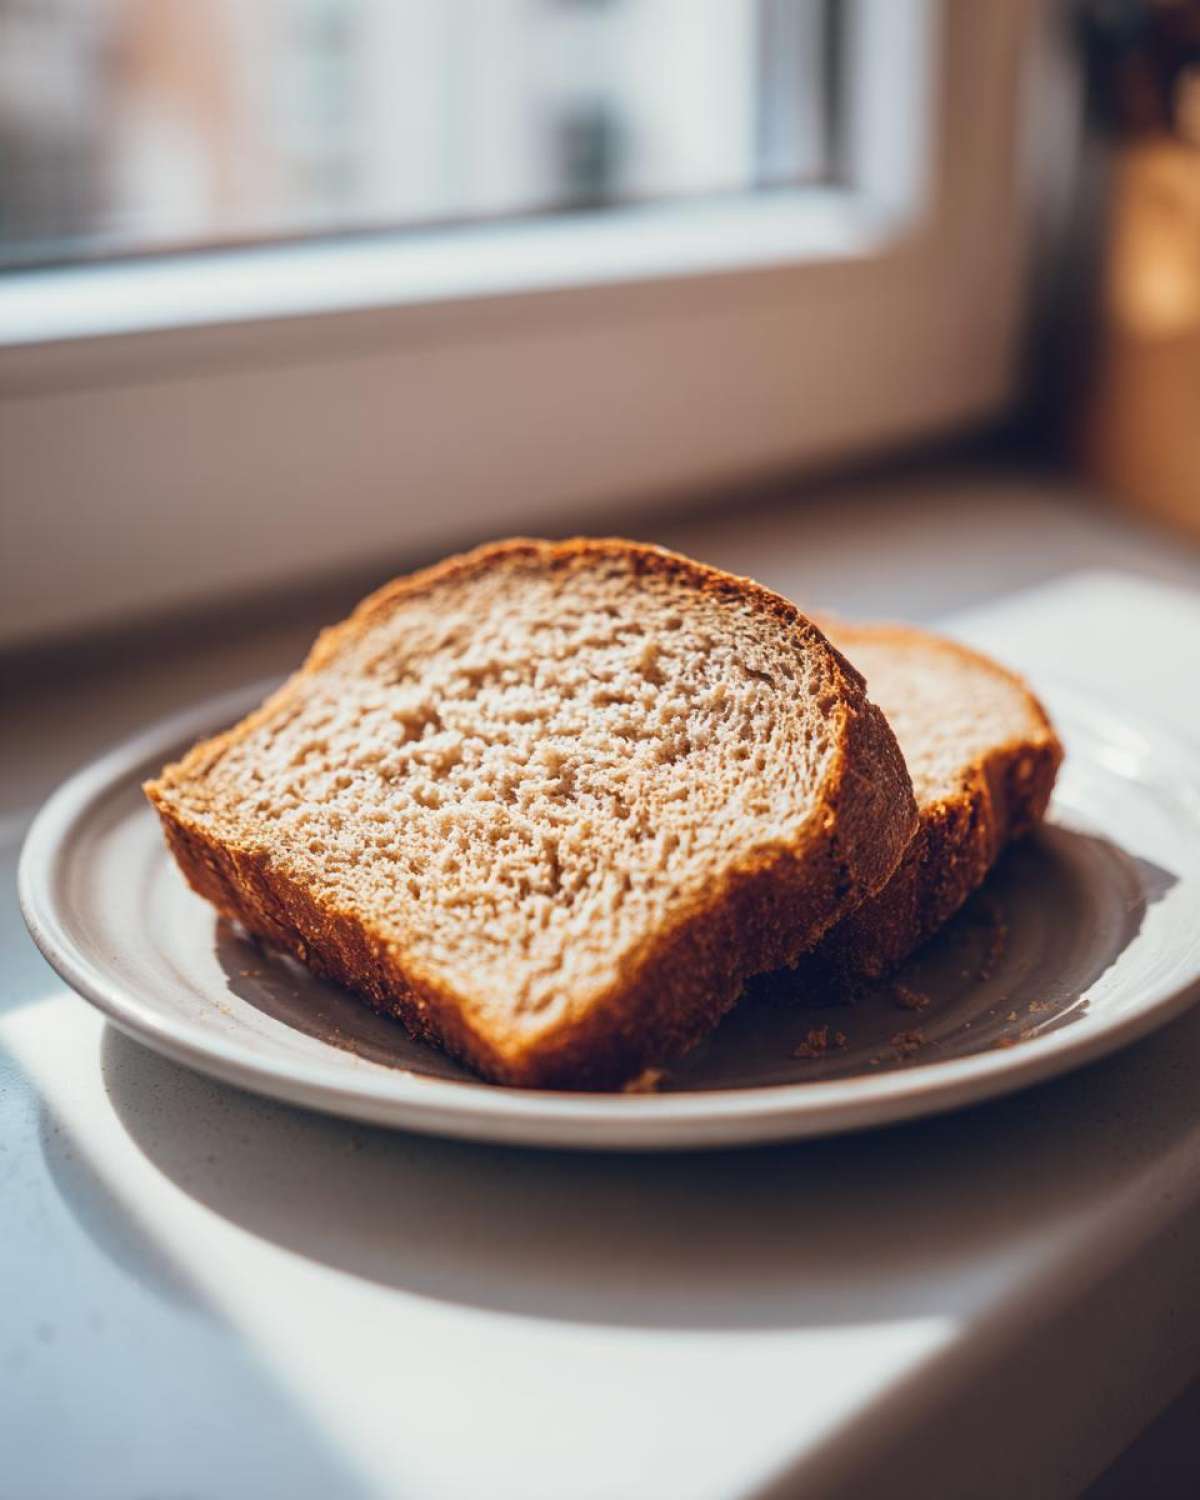
Of course, this recipe truly shines when it comes to packing lunches. It holds up perfectly and doesn’t fall apart like those flimsy store-bought versions. It’s the ultimate Bread for Sandwiches! Whether you’re loading it up with turkey and Swiss or going vegetarian, this loaf provides the perfect wholesome base. If you’re looking for a really satisfying sandwich filling that pairs perfectly with this rustic flavor, you have to try my recipe for the best creamy tuna salad—it makes for a lunch that actually keeps you full!
And don’t forget toast! Because it’s nicely sweetened with honey, it makes the best piece of toast for breakfast. Pop a slice under the broiler until it’s just golden brown on the edges, and top it with avocado, a fried egg, or even just jam. See? It’s so versatile, it earns its keep on the counter all week long!
Storage and Keeping Your Whole Wheat Bread Fresh
Part of making this a truly healthy homemade bread staple is knowing how to keep it tasting fresh, even after a few days! Since we didn’t use any artificial preservatives, we have to be a little smarter about storage. Luckily, because this whole wheat bread is so dense and high-quality, it holds up really well!
For short-term storage—say, you think you’ll eat the loaf within three or four days—just leave it on the counter. Don’t put it in the plastic bag it came in if it came from a store; those trap moisture and encourage mold. I prefer to keep mine wrapped tightly in a clean kitchen towel placed inside a paper bag. This lets the crust breathe just a little while keeping the inside soft.
But if you want this bread to last longer, you have to commit to freezing it! This is my secret for keeping loaves ready for months. Let the bread cool completely—I cannot stress this enough, completely cooled!—then slice it up first. Slicing before freezing means you can grab just two pieces whenever you want toast or a sandwich, instead of trying to thaw a giant rock!
Wrap the slices tightly in plastic wrap, then pop that whole bundle into a freezer-safe zip-top bag. It keeps beautifully for up to three months. When you need a slice, just pull it out and pop it straight into the toaster or leave it on the counter for about an hour. It thaws perfectly! If you love the idea of making things ahead for the freezer—and honestly, who doesn’t?—you should take a peek at my tips for freezer breakfast burritos; it’s another game-changer!
Frequently Asked Questions About Whole Wheat Bread
I get so many messages asking for clarification, which is awesome! It means you’re serious about making great whole wheat bread. Here are some of the biggest questions I get about this recipe. Hopefully, these clear things up so you can get baking stress-free!
Can I use bread flour instead of whole wheat flour in this Easy Whole Wheat Loaf?
You absolutely *can*, but it changes the bread entirely! If you substitute all three cups with standard bread flour, you won’t get the nutritional benefits or the hearty texture that makes this recipe special. It will turn into a significantly lighter, fluffier white loaf—more like a commercial loaf. You would also need less water because bread flour doesn’t absorb liquid the same way whole wheat does. For this recipe, I really recommend sticking to the full amount of whole wheat flour to get that perfect, wholesome result.
Is this recipe truly a Quick Whole Wheat Bread option?
That’s a fair question, because I call it the ‘Easy Whole Wheat Loaf,’ which can trick people into thinking it’s super fast! It is *easy* because the steps are straightforward—no fancy folding or overnight fermentation needed. However, baking bread takes time, right? Since we need two full rises for the yeast to work its magic and give us that soft texture, you are looking at just under three hours from start to finish. So, it’s definitely not a ‘Quick Whole Wheat Bread’ if you need a loaf in under an hour, but it’s definitely ‘quick’ for a hands-on, 100% whole grain bake!
If you have other questions or need some troubleshooting help, please don’t hesitate to reach out via my contact page. I love hearing from you!
Estimated Nutritional Data for This Whole Wheat Bread
When we talk about making our own whole wheat bread, we aren’t just doing it for the amazing taste—we love knowing exactly what we are feeding our families! Knowing what goes into your food is part of making it truly wholesome. Now, I’m not a certified nutritionist, so please take these numbers as a helpful guideline for eating and meal planning. These figures come straight from calculating the ingredients we used in the recipe.
This data is an estimate based on the recipe provided, using the ingredients listed for one standard slice serving. If you switch out the honey for maple syrup, or use a different brand of butter, these numbers will shift just a little!
- Serving Size: 1 slice
- Calories: Around 130
- Total Fat: Just about 3g (That’s low-fat for homemade bread!)
- Saturated Fat: 1.5g
- Carbohydrates: 23g
- Dietary Fiber: Fantastic! We get about 4g of fiber per slice.
- Protein: A solid 5g to keep you full until lunch.
- Sugar: Only 4g, thanks to the small amount of honey.
- Sodium: Roughly 180mg
- Cholesterol: Only 5mg
The fact that we get four grams of fiber in just one slice of this Healthy Homemade Bread is why I push everyone to bake their own! It’s so much better than the highly refined white stuff. If you want to see my full thoughts on reading nutrition labels or how ingredients impact your overall diet, take a peek at my official disclaimer page!
Share Your Soft Whole Wheat Bread Baking Journey
Now for the best part! I’ve given you all my secrets for soft, fluffy, truly delicious whole wheat bread. I’ve done my part, and now I’m so excited to see what you do with it! There is nothing better in my whole day than seeing a picture of a reader’s first successful loaf of homemade bread. It just fills my heart!
When you pull that golden, fragrant loaf out of the oven, I really want you to take a minute and admire it. You did that! Whole wheat can be tricky, but you mastered it!
If you loved how easy and soft this came out, please, please, please leave a rating below! Five stars is always lovely if you think this recipe deserves it, but honestly, I want to hear your thoughts no matter what. Tell me if you loved the honey flavor or if you tried adding a pinch of oats for extra flair. Your feedback helps other bakers feel brave enough to try this Wholesome Bread Baking adventure!
Don’t be shy—snap a photo of your beautiful sandwich slices or your first buttered piece and share it on social media! Tag me, or just let me know in the comments where you’re enjoying it. And of course, if you have any questions pop up while you’re kneading or rising, drop a note below, and I’ll get back to you as fast as I can. For those of you who stick around my blog, I always want to be transparent about how I use your information, which you can read all about on my privacy policy page!
Happy baking, and enjoy that soft, hearty bread!
PrintEasy Soft Honey Whole Wheat Sandwich Bread

Bake a soft, fluffy loaf of 100% whole wheat bread sweetened lightly with honey, perfect for daily sandwiches and toast.
- Prep Time: 20 min
- Cook Time: 35 min
- Total Time: 2 hours 50 min
- Yield: 1 loaf
- Category: Baking
- Method: Baking
- Cuisine: American
- Diet: Vegetarian
Ingredients
- 1 cup warm water (105-115°F)
- 2 1/4 teaspoons active dry yeast
- 1/4 cup honey
- 2 tablespoons unsalted butter, melted
- 1 1/2 teaspoons salt
- 3 cups whole wheat flour, plus more for dusting
- 1/2 cup warm water (additional)
Instructions
- Combine the 1 cup warm water, yeast, and honey in a large bowl. Let stand for 5 to 10 minutes until foamy.
- Stir in the melted butter and salt into the yeast mixture.
- Gradually add the whole wheat flour, mixing until a shaggy dough forms.
- Add the remaining 1/2 cup warm water slowly, mixing until the dough comes together.
- Turn the dough out onto a lightly floured surface. Knead for 8 to 10 minutes until the dough is smooth and elastic. It will remain slightly softer than white bread dough.
- Place the dough in a lightly oiled bowl, turning to coat. Cover the bowl with plastic wrap or a clean kitchen towel. Let rise in a warm place for 1 to 1.5 hours, or until doubled in size.
- Gently punch down the risen dough. Shape it into a loaf and place it seam-side down in a greased 9×5 inch loaf pan.
- Cover the pan loosely and let the dough rise again in a warm place for 30 to 45 minutes, or until the dough crests about 1 inch over the rim of the pan.
- Preheat your oven to 375°F (190°C) during the last 15 minutes of the second rise.
- Bake for 30 to 35 minutes, or until the top is golden brown and the internal temperature reaches 200°F (93°C).
- Remove the bread from the pan immediately and cool completely on a wire rack before slicing.
Notes
- Using warm water between 105-115°F activates the yeast correctly.
- For a softer crust, brush the top of the loaf with melted butter immediately after it comes out of the oven.
- If your dough feels too dry during kneading, add water one teaspoon at a time. Whole wheat flour absorbs liquid differently.
Nutrition
- Serving Size: 1 slice
- Calories: 130
- Sugar: 4g
- Sodium: 180mg
- Fat: 3g
- Saturated Fat: 1.5g
- Unsaturated Fat: 1.5g
- Trans Fat: 0g
- Carbohydrates: 23g
- Fiber: 4g
- Protein: 5g
- Cholesterol: 5mg