

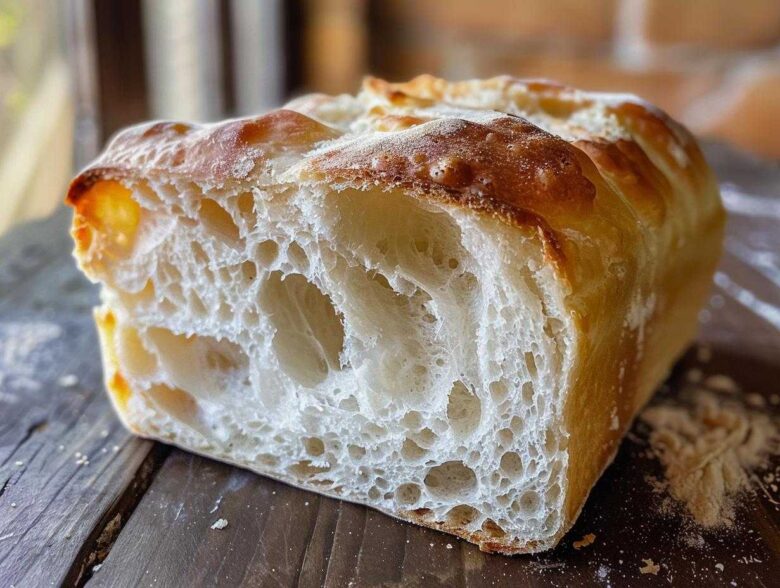
Oh, I know your struggle! You see those gorgeous loaves in the bakery window—that deep, crackly crust and the cloud-like inside—and you think, “There is no way I can make that at home.” Wrong! I was right there with you until I stopped messing around with complicated overnight schedules. This Easy Crusty Italian Bread Recipe changed everything for me. It’s my go-to anytime I need that perfect vehicle for dipping into Sunday sauce. Seriously, this recipe nails the crunch on the outside and keeps the inside just beautifully soft and chewy. I truly believe this bread is the one that made people finally start thinking I was a real baker, not just someone who burns toast! I fiddled with the water temperature and the steam setup for ages, but once I hit this sweet spot, this italian bread became a regular on my counter. Trust me, you don’t need to be a seasoned baker to nail this!
Why This Easy Crusty Italian Bread Recipe Works (Expert Tips)
So many recipes for a Bakery Style Bread at Home overcomplicate things, but this one keeps it real for Beginner Bread Baking. The success of this loaf really comes down to two main things: steam and gluten development. These simple elements are what separate a home loaf from something you’d pay too much for at a fancy shop. We aren’t making any sour-dough overnight miracle here; we are aiming for delicious bread in about two hours, and the steam is what makes it happen! I spent months chasing that bakery flavor, and this easy method finally brought that crispy, chewy magic right onto my weeknight table.
Achieving the Perfect Crust on Your Italian Bread
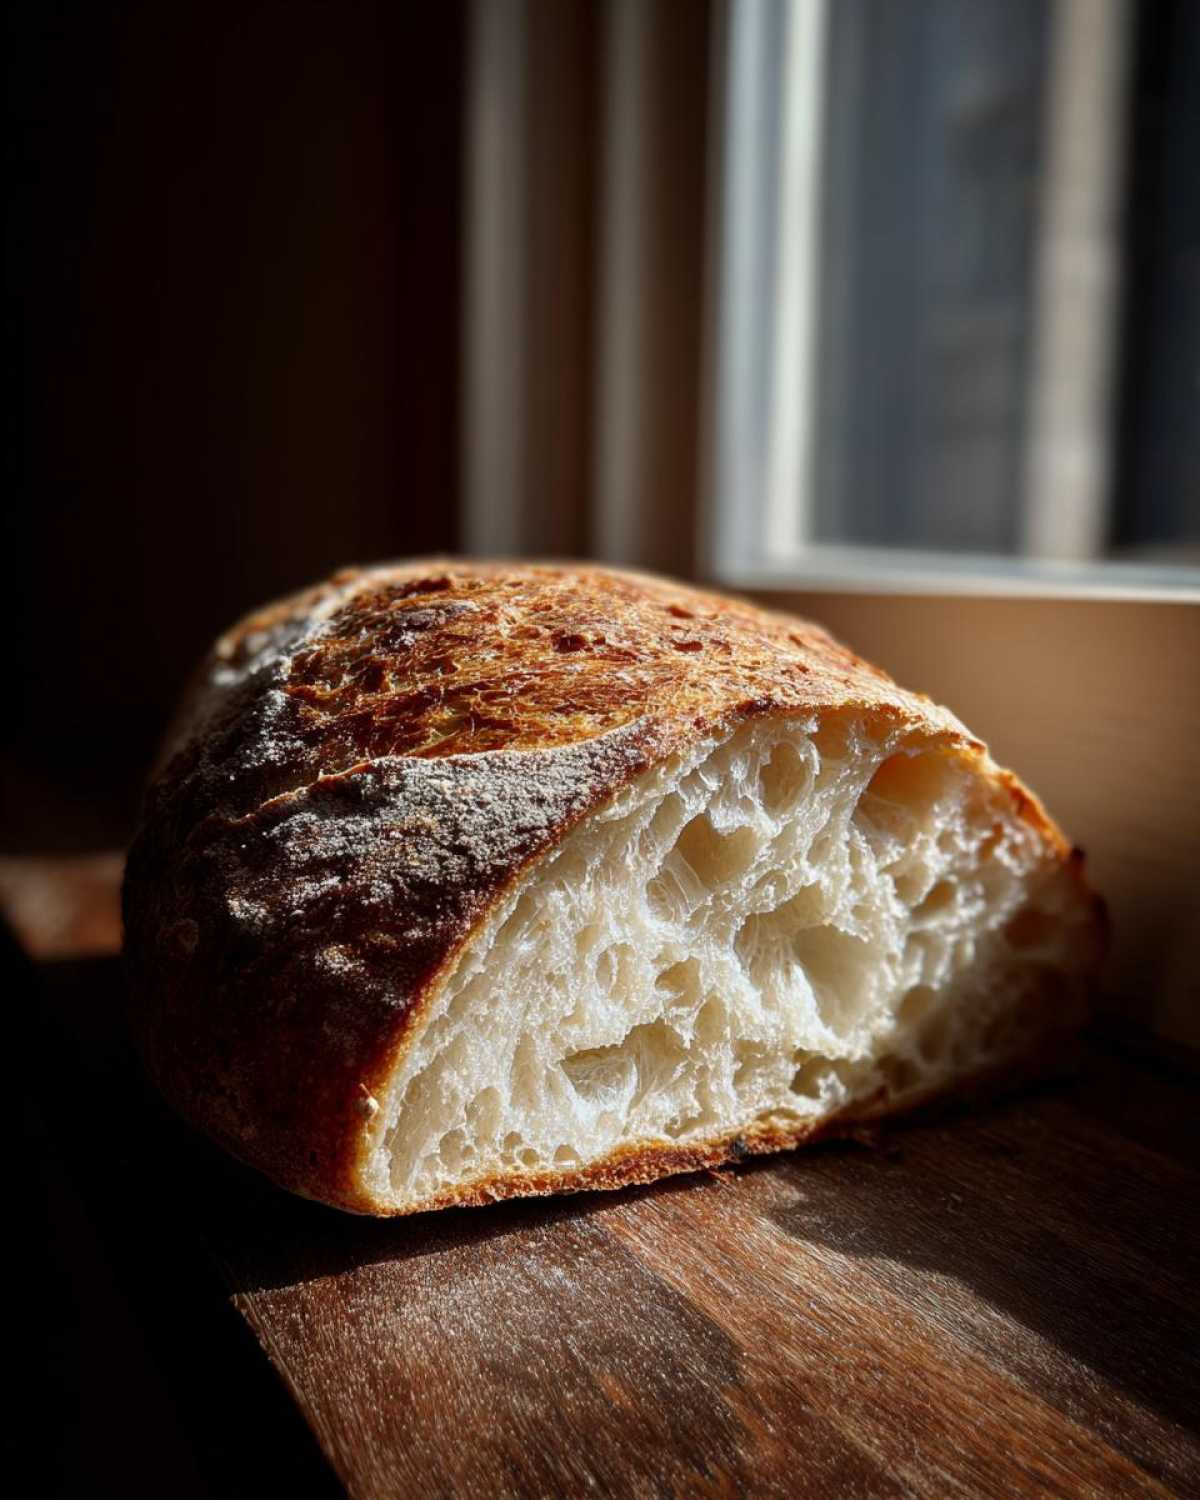
The crust is everything, isn’t it? That perfect shatter when you cut into it only happens if you fool the oven into thinking it’s a professional deck oven. The way we do that is with steam. When you preheat with that shallow pan on the bottom rack, you fill the entire baking environment with moisture. This buys you the critical extra minutes you need for the bread to fully expand before the crust sets. Don’t skip this step! For my ultimate Crispy Crust Bread Tutorial, I even take an extra step: while the bread is preheating, I make sure the oven walls are clean, and then, during the first 10 minutes of baking, I quickly open the door, spray the walls once or twice, and slam it shut. That little blast of moisture makes the crust sing!
Tips for a Soft and Chewy Italian Loaf Interior
If the crust is steam’s victory, the interior is elbow grease’s reward. We are using simple flour here, so we need to build that structure ourselves. You must knead it for a solid 5 to 7 minutes. If you stop too soon, you get a crumbly loaf. If you knead too long, it gets tough, so 5 to 7 is our sweet spot for that Soft and Chewy Italian Loaf texture. Also, if you really want that next level chewiness—like the place down the street—you can swap out the all-purpose flour for bread flour. It has a higher protein content, which equals more stretch and chew once it’s baked.
Simple Bread Ingredients for Your Homemade Italian Bread
You look at this recipe and think, “Where’s the complexity?” That’s the beauty of it! For this Simple Bread Ingredients list, we are keeping things very basic so the technique can shine through. Honestly, you probably have everything sitting on your shelf right now! We just need four main things to get that amazing loaf going. I always keep extra olive oil on hand, because sometimes you need that extra slick for shaping later on.
- 3 cups all-purpose flour (perfect for beginners!)
- 1 teaspoon instant dry yeast
- 1 1/2 teaspoons salt
- 1 cup warm water (make sure it’s between 105-115°F—not too hot!)
- 1 tablespoon olive oil
That’s it! No fancy starters, no milk powder, just the essentials for a fantastic italian bread loaf.
Step-by-Step Instructions for Quick Italian Bread
I’m going to walk you through this so you feel like you’re baking right alongside me. Because this is a Quick Italian Bread recipe, the timing is important because we are letting the yeast work efficiently, not slowly. We’re moving sections forward while others are resting, which really speeds up the whole process. Pay attention to the rest periods; they aren’t optional if you want that signature interior texture we talked about! We’re using instant yeast, which is why we can get great rise so fast—it’s one of my secrets for a fast rising bread recipe!
Mixing and Kneading the Italian Bread Dough
First things first, get those dry ingredients—flour, yeast, and salt—mixed together in your big bowl. I like to use a fork just to make sure the yeast is evenly distributed. Now, pour in your warm water and that tablespoon of olive oil. Mix it with a sturdy spoon until it stops looking like a crazy mess and turns into what bakers call a ‘shaggy dough.’ Don’t worry if it looks rough! Now, flour your counter lightly and turn that shaggy pile out. You need to knead this for a good 5 to 7 minutes. Get in there and work it until it feels smooth and elastic under your hands. That’s where the structure develops!
Proofing and Shaping Your Rustic Italian Loaf
Once kneaded, lightly oil your mixing bowl and plop the dough in there, turning it over once to coat. Cover it up—plastic wrap works best for me—and let it chill out in a warm spot for 1 to 1.5 hours. It needs to double in size, plain and simple. When it looks gloriously puffy, gently punch the air out—yes, it’s satisfying! Now you shape it. Whether you want a classic round boule or a long Rustic Italian Loaf shape, just tuck the edges underneath as you roll it to build tension on the outside. Place it on your parchment-lined baking sheet and let it rest again for just 30 minutes while the real fun begins: heating the oven.
Baking Your Golden Brown Italian Loaf with Steam
During that final 30-minute rest, crank your oven up to 425°F, and remember to put that shallow pan on the bottom rack; this is crucial for steam generation later. When the oven is hot and the dough has had its final rest, use a very sharp knife to slash the top once or twice. This lets the loaf expand beautifully, giving you that classic look. Now, for the grand finale: open the door carefully and pour about a cup of hot water into that bottom pan to create steam. Get out of the way quickly! Bake it for 25 to 30 minutes. You’re looking for that deep, rich color—a true Golden Brown Italian Loaf. We’re done when the internal temperature hits 200°F. Let it cool completely on a rack so that crunchy crust stays perfect!
Ingredient Notes and Substitutions for Better Italian Bread
Now that you know the steps, let’s talk about treating those simple ingredients right. Remember how I said the quality of your raw goods makes a difference? It’s totally true for italian bread! I included all-purpose flour because I want this to be accessible—it works great! But if you’re looking to level up that texture just a bit, swapping to bread flour is a marvelous little tweak. Bread flour has that higher protein content, which means more gluten develops when you knead, giving you that incredibly satisfying, slightly tougher, chewier texture you get in the best bakeries.
And listen, when it comes to yeast, we’re using instant dry yeast here because it’s the most forgiving for our shorter timeline. If, and I mean *if*, all you have is active dry yeast, you need to wake it up first! You’d dissolve that active dry yeast in the warm water (maybe with a tiny pinch of sugar) and let it foam for about five minutes until it looks foamy. If it doesn’t foam, your yeast is probably dead, and you need a new packet, so don’t bother mixing the rest in. This is a crucial check for any homemade bread recipe!
Also, don’t skimp on the salt! People sometimes want to cut the salt in bread because they think it’s unhealthy, but salt is essential for flavor *and* for controlling the yeast. It keeps the fermentation from running wild, ensuring all that beautiful structure we built during kneading doesn’t just collapse. Stick to the 1 1/2 teaspoons; your warm Italian loaf will thank you for the balanced flavor.
Serving Suggestions for Your Warm Italian Loaf
Okay, the bread is cooled just enough that you can handle slicing it without squashing that beautiful crumb—now what?! That’s half the fun! This warm Italian loaf is ridiculously versatile. Forget just slathering on plain butter; think about tearing off chunks specifically for Italian bread for dipping. It soaks up rich tomato sauce like a dream. If you’re making dinner, it’s the perfect accompaniment, whether that’s red sauce or something creamy, like the soup in my pesto chicken soup recipe.
But it doesn’t stop at dipping! Don’t forget that this totally works as a killer base for a sandwich. Slice it lengthwise for the ultimate hero subs, or cut thicker slices to toast up under the broiler with some garlic and cheese—hello, bruschetta! My favorite way to use the leftovers, if there ever are any, is to cube them the next day and toss them into a salad for crunch. Honestly, try wrapping some prosciutto and fresh mozzarella around a warm slice; you will never look at store-bought bread the same way again!
Storing and Reheating Your Homemade Italian Bread
We all know the tragedy: the crust that was gloriously sharp and crispy right out of the oven goes soft by morning. Don’t let that happen to your beautiful homemade italian bread! Keeping this loaf fresh is a delicate balancing act between protecting the tenderness inside and preserving that exterior crackle.
Here’s my rule for storage: the moment the bread is completely cool—and I mean *completely* cool, or you’ll trap steam and make it soggy—wrap it tightly. A good paper bag works best for the first day if you want to keep the crust firmest, but if you know you won’t finish it within 24 hours, I switch to plastic wrap or foil. That slows down moisture loss, keeping the inside light and soft for up to three days.
But let’s be real, you want it tasting like it just came out of my oven, right? To bring back that incredible flavor and texture, reheating is your secret weapon for getting that warm Italian loaf experience again. I never microwave it—that just makes it chewy in a bad way.
The best way to resurrect your loaf, especially if the crust has softened a little, is back in the oven. Preheat your oven to about 350°F (175°C). If you wrapped it in foil, take the foil off. Pop the entire loaf directly onto the rack and let it heat for about 8 to 10 minutes. That dry, consistent heat will pull any lingering moisture out of the crust while gently warming the center. When you pull it out, that snap should be back in full force. It’s like time travel for your baked goods!
Frequently Asked Questions About Making Italian Bread
I get so many great questions about this recipe once people start baking it! It’s natural that you’ll have a few hiccups when you start working with yeast, but don’t panic. Most problems can be fixed right away or avoided next time. This recipe is so straightforward, but a few small things can throw off your final product. I wanted to put together the answers to the questions I hear most often about getting that perfect crust and crumb.
Can I use this dough for Italian Sandwich Bread instead of a single loaf?
Absolutely, you totally can! This dough is super versatile and makes fantastic Italian Sandwich Bread. If you want smaller, more manageable loaves, you can divide the dough in half before the final 30-minute rest and shape those halves into two smaller football shapes. Just remember that smaller loaves bake faster, so start checking them around the 20-minute mark. You might lose a little bit of that artisan look, but the inside texture will still be amazing for layering your favorite cold cuts!
What should I do if my dough didn’t double in size during the first rise?
This is the classic beginner freak-out moment! Don’t worry, it happens to everyone. If your dough didn’t double, it usually means one of two things: either your kitchen is too cold, or your yeast wasn’t happy. If your kitchen is chilly, just find a warmer spot. Try placing the bowl in the oven *with the oven turned off*—sometimes the residual heat from a recent bake is perfect. If you use warm water that’s too hot (over 120°F), it can kill the yeast, so you might need to start over if it’s been many hours and nothing happened. If it only rose a little, go ahead and proceed, but know your final loaf won’t be quite as airy.
Is it possible to make this No Knead Italian Bread?
That’s a popular request! While you *can* make certain rustic doughs using a pure No Knead Italian Bread method, this specific recipe is designed around that 5-7 minutes of kneading to achieve that **soft and chewy** interior quickly. If you skip the kneading, you have to rely on super long, cold fermentation (like 12–24 hours in the fridge) to develop the gluten structure. If you’re looking for a fast loaf, stick to kneading! If you want to explore the slow route, check out my salad recipe sometime; while you eat that, you can plan your no-knead experiment!
Why is the internal temperature so important for this recipe?
Checking the internal temperature helps us guarantee that beautiful bake without drying out the exterior. When most recipes just say “bake until golden,” that leaves too much up to chance. Hitting 200°F (or checking for a hollow sound when tapped) tells you the starches have fully gelatinized and the bread is set. It’s a professional trick that makes your **Crusty Italian Bread Recipe** totally reliable every single time, preventing that gummy center. Trust me, investing in a cheap instant-read thermometer is the best thing you can do for your baking game!
Estimated Nutritional Data for This Italian Bread Recipe
Baking your own bread is so rewarding, but sometimes you just want to know what’s in that glorious slice. Because this recipe uses just simple flour, water, yeast, salt, and a tiny bit of olive oil, it’s surprisingly lean! It’s wonderful knowing what made it into the final product, especially compared to those highly processed store-bought loaves.
The figures below are based on dividing the entire recipe yield into 16 equal slices. Please take these as guidelines! The exact nutrition content can shift slightly depending on the specific flour brand you use, how much dough sticks to your bowl, or even the humidity that day. But generally, for a slice of this homemade goodness, here’s the breakdown:
- Serving Size: 1 slice
- Calories: 150
- Carbohydrates: 32g
- Protein: 4g
- Fat: 1g
- Sugar: 1g
- Sodium: 300mg
See? Low fat, low sugar—it really is just wholesome goodness. That’s the beauty of simple bread ingredients. If you’re eating a big thick slice, expect those numbers to double up, of course, but even then, it’s a fantastic, filling component of any meal. Enjoy knowing that you made an incredible, golden brown Italian loaf using only the best ingredients!
Share Your Golden Brown Italian Loaf Creations
Now that you’ve gone through all the steps—from kneading the shaggy dough to creating that perfect steam bath—it’s time for the best part: cutting into your creation! I absolutely live to hear how this italian bread turned out for you. Did that crust really snap? Was the inside exactly as soft and chewy as you hoped for?
Please, please, please leave a rating and a comment right below this section! Telling me about your success helps other beginner bakers feel confident enough to try it out. Did you brush it with garlic butter right out of the oven? Did you use it to scoop up every last bit of Bolognese? Spill the details!
And since seeing is believing, I’d love to see your beautiful loaves! Snap a picture of your perfectly baked, golden brown Italian loaf and tag me on social media. I’m always sharing your successes on my feed. If you have any final questions or maybe even a variation you loved, you can always reach out to me directly through my contact page as well. Happy baking!
PrintEasy Crusty Italian Bread Recipe
Make bakery-style Italian bread at home with a crusty exterior and a soft, chewy interior. This recipe is simple enough for beginners.
- Prep Time: 15 min
- Cook Time: 30 min
- Total Time: 2 hours 15 min
- Yield: 1 loaf
- Category: Bread
- Method: Baking
- Cuisine: Italian
- Diet: Vegetarian
Ingredients
- 3 cups all-purpose flour
- 1 teaspoon instant dry yeast
- 1 1/2 teaspoons salt
- 1 cup warm water (about 105-115°F)
- 1 tablespoon olive oil
Instructions
- In a large bowl, mix the flour, yeast, and salt.
- Add the warm water and olive oil to the dry ingredients. Mix with a spoon until a shaggy dough forms.
- Turn the dough out onto a lightly floured surface. Knead for 5 to 7 minutes until the dough is smooth and elastic.
- Place the dough in a lightly oiled bowl, turning to coat. Cover the bowl with plastic wrap or a clean kitchen towel. Let the dough rise in a warm place for 1 to 1.5 hours, or until doubled in size.
- Gently punch down the risen dough. Shape it into a long loaf or round shape. Place the loaf on a baking sheet lined with parchment paper.
- Cover the loaf loosely and let it rest for 30 minutes. Preheat your oven to 425°F (220°C) during this time. Place a shallow pan on the bottom rack for steam.
- Just before baking, slash the top of the loaf once or twice with a sharp knife. Pour 1 cup of hot water into the shallow pan on the bottom rack to create steam.
- Bake for 25 to 30 minutes, or until the crust is deep golden brown and the internal temperature reaches 200°F (93°C).
- Remove the bread from the oven and cool on a wire rack before slicing.
Notes
- For an extra crispy crust, spray the inside walls of the oven with water two times during the first 10 minutes of baking.
- You can use bread flour instead of all-purpose flour for a slightly chewier texture.
- This bread is excellent served warm with pasta sauce or butter.
Nutrition
- Serving Size: 1 slice
- Calories: 150
- Sugar: 1
- Sodium: 300
- Fat: 1
- Saturated Fat: 0
- Unsaturated Fat: 1
- Trans Fat: 0
- Carbohydrates: 32
- Fiber: 1
- Protein: 4
- Cholesterol: 0