

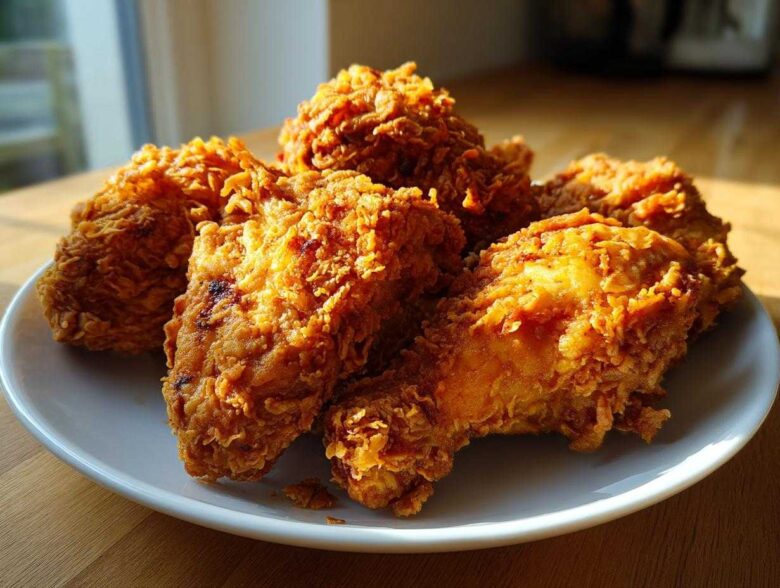
You know that sound? That incredible, shatteringly crisp crunch when you bite into perfect Southern fried chicken? Oh, my heart sings when I hear it! For years, I chased that elusive texture—you know, the kind that stays crunchy even after it sits on the buffet table for ten minutes. Well, I’m thrilled to tell you, I cracked the code! This isn’t just another recipe; this fried chicken delivers ultra-crispy, beautiful skin while keeping every single piece unbelievably juicy, thanks to the classic buttermilk soak and my perfected double dredge method. I must’ve made twenty batches just tweaking the flour ratio to get those craggy peaks just right!
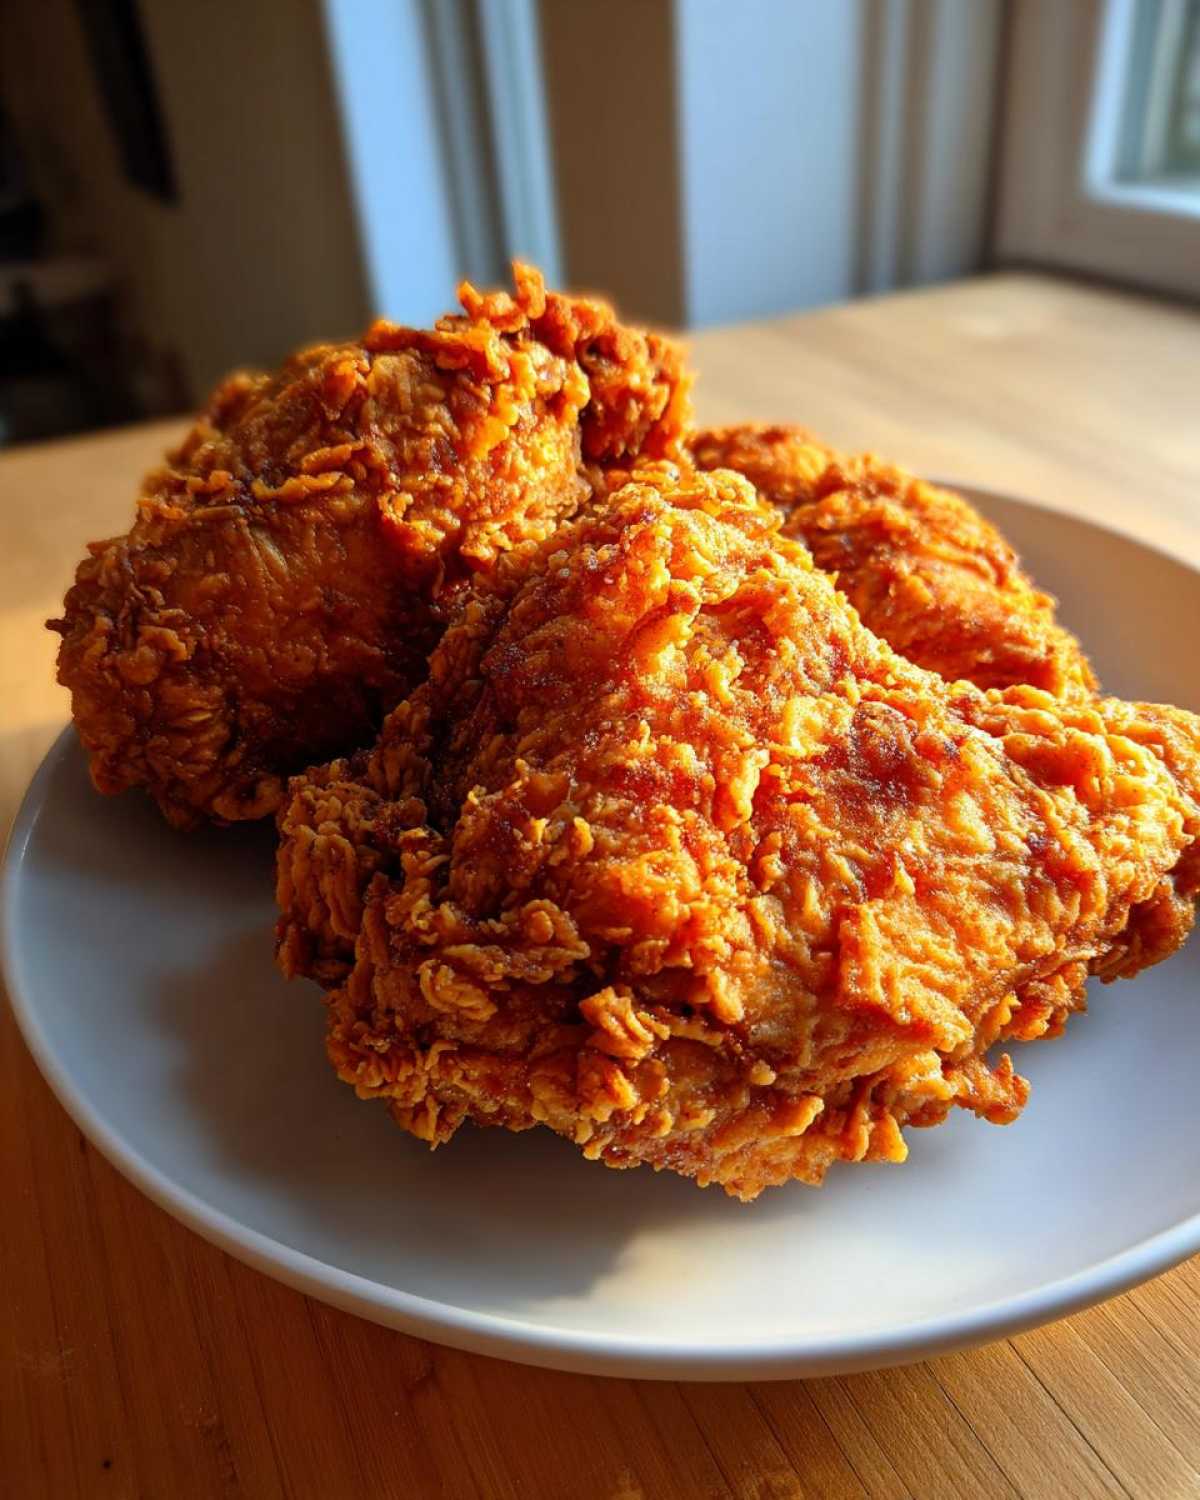
Why This Buttermilk Southern Fried Chicken Recipe Delivers Maximum Crunch
So, what’s the big secret to making truly Juicy and Crispy Chicken that outperforms anything you get takeout? It’s all in the chemistry, honey! We aren’t just throwing chicken into a pan; we are building texture layer by layer. The buttermilk is key for tenderness, but it’s the combination of cornstarch and the double dredge that locks in that unbelievable Crunchy Chicken Coating.
I spent weeks testing ratios just to make sure those little flour crags stuck perfectly. We learned from the best Southern cooks! This combination ensures you get that beautiful, textured exterior every single time you make this classic dish. If you love getting that perfect crust, check out my recipe for crispy garlic chicken sandwich—it uses similar textural building blocks!
The Power of the Buttermilk Brine for Juicy and Crispy Chicken
Forget just using milk—buttermilk is mandatory here. The lactic acid in the buttermilk works like magic! It gently breaks down the proteins in the chicken just enough so that when it hits the hot oil, the meat stays incredibly tender and moist inside. You absolutely must give it time to work its magic; I insist on a minimum of four hours, but honestly, letting your Buttermilk Brined Chicken sit overnight gives you the absolute best flavor payoff.
Building the Perfect Crunchy Chicken Coating with a Double Dredge
This is where we get that irresistible, rugged crust! Once your chicken is seasoned beautifully by the brine, we dredge it, then dip it *again*! The process should look like this: Chicken out of buttermilk, into the dry flour mix, press hard. Then, back into the leftover buttermilk bath for just a moment, and straight back into the flour for a second, heavier coating. That second coat creates those adorable, flaky peaks that crisp up into glorious armor when they fry. Trust me, that little extra step is totally worth the effort!
Gathering Ingredients for Perfect Fried Chicken
Okay, let’s get everything lined up. Having all your components ready beforehand is the key to calm deep frying later! For this Southern Fried Chicken, you’ll need about 3 pounds of chicken pieces—I usually use a mix of thighs and drumsticks, but breasts work too, just cut them evenly. You need two full cups of buttermilk for that amazing soak, plus a splash of hot sauce mixed right in there. For the dry dredge, we’re using a good amount of all-purpose flour, but I always sneak in half a cup of cornstarch—it’s a texture secret! Then we hit it hard with salt, pepper, paprika, garlic powder, cayenne, and a little bit of baking powder.
If you want to serve this amazing dish with something really comforting, try out my creamy tomato basil gnocchi later in the week!
Ingredient Notes and Substitutions for Your Fried Chicken
Listen, when it comes to the fat, don’t be scared of a little fat blend! I find that using half vegetable oil and half shortening gives the best flavor profile without burning too fast. The shortening just makes everything taste richer, like real Southern cooking. Also, pay attention to that baking powder in the flour mix; it seems small, but it creates microscopic air bubbles right under the crust, giving you that extra lift and ensuring a flaky, light crunch when you bite in. It’s a little trick that really helps solidify that Homemade Fried Chicken reputation!
Step-by-Step Instructions for Classic Fried Chicken
Now we move into the actual cooking, and this is where patience pays off! Getting this Fried Chicken right means paying close attention to what the thermometer tells you. Remember, we are aiming for perfectly cooked meat inside and that gorgeous, crunchy texture outside. This whole process, from getting the oil hot to pulling out the final piece, takes about 35 minutes of active cooking time, depending on your batch size. If you follow these steps for How To Make Fried Chicken, you’ll master Deep Fried Chicken!
Preparing the Buttermilk Soak and Seasoned Dredge
First things first: Get that chicken soaking! Cover your pieces completely with the buttermilk and hot sauce and pop them into the fridge. Seriously, if you can swing it, let them hang out there overnight—it makes all the difference in juiciness. While that’s chilling, take your time whisking all those dry ingredients together in a big, shallow pan. You want that salt, cornstarch, and spices totally incorporated so you don’t end up with one bite tasting only like garlic powder, you know? My absolute favorite technique for getting that first layer of texture is detailed in this previous post!
The Frying Process for Golden Brown Chicken
Heat up your oil—we need it steady at 325°F. Use a thermometer; this is non-negotiable for the Best Homemade Fried Chicken! When you start dropping the pieces in—and this is key—don’t crowd the pot! Overcrowding instantly drops the oil temperature, and then you end up with greasy, sad chicken instead of beautiful Golden Brown Chicken. Work in batches, turning the pieces every 6-8 minutes until they look perfect and hit 165°F internally. When they come out, put them straight onto a wire rack—never paper towels, or you’ll steam that lovely crust right away!
Tips for Achieving Foolproof Fried Chicken Success
Making truly Foolproof Fried Chicken is all about managing expectations and controlling the chaos! The number one mistake people make? Assuming the chicken will cook perfectly just because the outside looks brown. If you pull it too soon, you’ve got raw spots near the bone, and nobody wants that! That’s why monitoring the oil temperature between 300 and 325 degrees Fahrenheit is absolutely essential. If your oil starts sputtering too violently, turn the heat down a touch.
Another classic pitfall is the soggy bottom crust. This happens when you stack the cooked chicken on paper towels on a plate. The trapped steam ruins that beautiful crunch we worked so hard to build! Always, always let your perfectly cooked chicken rest on a wire rack set over a baking sheet. That airflow keeps the bottom crisp while the insides settle slightly. You can see my process for making sure the dredge really adheres in this detailed preparation guide.
Finally, if you are deep-frying chicken breasts, try cutting them horizontally an extra time if they are super thick. We want everything in the pot to finish cooking around the same time!
Serving Suggestions for Your Savory Chicken Dinner Ideas
Okay, you’ve got the best batch of Fried Chicken cooling on the rack—now what do we serve it with? This isn’t the time for fancy microgreens; this is true Comfort Food Chicken Recipes territory! My go-to, absolutely classic accompaniment has always been creamy mashed potatoes and a bright, tangy coleslaw to cut through all that savory richness. You just can’t skip that satisfying bite of starch soaking up any residual seasoning.
If you need a fantastic starch side, you simply must try my buttery maple cornbread muffins alongside it; they are divine for dipping into any stray juices. And for that cool element, my creamy coleslaw recipe is the perfect palate cleanser. Honestly, throw a basket of warm biscuits on the table, and the meal is essentially perfect. That’s really all you need for a fantastic Savory Chicken Dinner Idea!
Storage and Reheating Instructions for Leftover Fried Chicken
I know, I know—it never lasts long! But if you find yourself with glorious, extra Fried Chicken, handling the leftovers correctly is everything. Don’t wrap it tightly plastic wrap or slam it into an airtight container; that steam is the enemy of crispiness! Instead, let the pieces cool a tiny bit, then store them loosely covered in the fridge. This lets some moisture escape while keeping them sealed enough.
When you’re ready to eat them, banish the microwave! If you must bring it back to life, your best bet is the oven or, even better, your air fryer. Pop the pieces into a 375-degree oven or the air fryer for about 8-10 minutes. You want to get that crust singing again. I actually prefer using the air fryer for reheating; it gets the coating wonderfully crisp much faster. You can see how I use my air fryer for taquitos in this taquito recipe, and the reheating principles are the same!
Frequently Asked Questions About Making Fried Chicken
I totally get it—there are always a few last-minute things that pop into your head right before you commit to deep frying something delicious! Don’t worry; I’ve answered the questions I get asked most often about nailing this recipe. Hopefully, this helps you feel confident tackling your own batch of Fried Chicken!
Can I use chicken breasts or only thighs for this fried chicken recipe?
You certainly can use breasts, but you need to be a little more strategic because they are much thicker than thighs or drumsticks. If you use whole breasts, you risk burning the crust before the center is cooked through, and nobody likes a dry fillet! I always recommend cutting large chicken breasts into two or three evenly sized pieces before you even start the buttermilk soak. This ensures that every piece of your Homemade Fried Chicken finishes cooking at the same time. If you are using smaller cuts like wings or tenders, you’ll notice they cook much quicker!
What is the ideal oil temperature for the best fried chicken?
Temperature control is honestly the whole game when it comes to truly crispy results. You absolutely need a reliable thermometer for this, trust me! We are looking for an initial oil temperature between 325°F when you drop the chicken in. Now, here’s the tricky part: once the cold chicken hits the fat, the temperature will drop. You need to keep your eye on it and adjust the heat to keep that oil running between 300°F and 325°F throughout the entire frying process. If it drops below 300°F for too long, your coating will soak up too much oil and become greasy, not crunchy. So, watch that gauge!
If you’re looking for other ways to cook wings in oil, you should definitely check out my guide on air fryer chicken wings; sometimes oven methods bake up nicely too!
Can I make this recipe ahead of time or bake it instead of deep frying?
That’s a great question about making things simple! While you can certainly prepare the chicken (soak and dredge) a day ahead and keep it covered tightly in the fridge, I wouldn’t recommend doing the actual frying until you are ready to eat. The coating is always at its peak right after deep frying. As for baking it, you *can*, but I have to be honest: it won’t be the same experience. Deep frying is what creates that signature, rugged, shatteringly crisp texture we worked so hard for with the double dredge. Baking tends to result in a drier, more uniformly coated crust.
How important is the cornstarch in the flour mixture?
Don’t skip the cornstarch! This is one of those small ingredients that makes a huge difference in achieving that next-level crunch that separates great Fried Chicken from just okay fried chicken. Flour on its own tends to create a solid, sometimes heavy crust. Adding cornstarch changes the texture of the crust when fried; it helps it become lighter, crispier, and gives it that distinctive craggy look we want. It actually helps absorb moisture away from the flour particles during the quick fry!
Estimated Nutritional Information for Fried Chicken
Before you dive into this amazing batch of Fried Chicken, I want to give you a quick peek at the nutrition label. Now, you know how it is with deep-fried goods—these numbers are just a close estimate based on the portions listed! Since we used a mix of oil and shortening and kept the seasonings reasonable, we landed right around 450 calories per thigh-sized serving. Remember, the actual intake totally depends on how much oil your beautiful, crispy crust decided to absorb!
We’ve got about 30 grams of protein, which is fantastic, but be mindful of the sodium, as the buttermilk soak and seasoning blend add quite a bit. If you want to sneak in something healthier on the side, try my sweet chili roasted sweet potatoes; they pair wonderfully and give you a nice boost of vitamins!
Share Your Ultra-Crispy Fried Chicken Experience
Alright, that’s it! You’ve done the soaking, the double dredge, and you’ve managed the oil like a true pro. Now that you have this incredible, unbelievably crispy, and juicy Fried Chicken cooling on the rack, I absolutely need to hear about it!
When you finish your meal—and I mean *after* your family stops making happy noises—please zip back over here and hit that star rating button. Five stars if that crust shattered when you bit into it; that’s my goal here! I want to know if you noticed that beautiful, craggy texture we worked so hard to build in the flour dredge.
And if you took a photo—and you know you did because this chicken is gorgeous—tag me on social media! Seeing your beautiful Southern Fried Chicken on your table warms my heart more than anything. It proves that this classic comfort food is still alive and well in home kitchens everywhere. If you want to see what other amazing comfort food I’m whipping up, you can always check out what’s new on the main blog page!
Honestly, your feedback helps me keep perfecting these family favorites, so don’t be shy. Let me know how your Homemade Fried Chicken turned out!
PrintUltra-Crispy Buttermilk Southern Fried Chicken

Make juicy, flavorful fried chicken with an extra crunchy crust using a classic buttermilk soak and double dredge method.
- Prep Time: 20 min
- Cook Time: 35 min
- Total Time: 55 min
- Yield: 4 servings
- Category: Dinner
- Method: Deep Frying
- Cuisine: American
- Diet: Low Fat
Ingredients
- 3 lbs chicken pieces (thighs, drumsticks, breasts)
- 2 cups buttermilk
- 1 tablespoon hot sauce
- 2 cups all-purpose flour
- 1/2 cup cornstarch
- 2 teaspoons salt
- 1 teaspoon black pepper
- 1 teaspoon paprika
- 1 teaspoon garlic powder
- 1/2 teaspoon cayenne pepper
- 1/2 teaspoon baking powder
- Vegetable oil or shortening, for frying
Instructions
- Place chicken pieces in a large bowl. Pour buttermilk and hot sauce over the chicken. Mix to coat completely. Cover and refrigerate for at least 4 hours, or preferably overnight.
- In a shallow dish, whisk together the flour, cornstarch, salt, pepper, paprika, garlic powder, cayenne pepper, and baking powder. This is your dredge mixture.
- Remove chicken pieces from the buttermilk, letting excess drip off, but do not wipe them dry.
- Dredge each piece thoroughly in the flour mixture, pressing the flour onto the chicken to create a thick coating.
- For extra crispiness, dip the floured chicken back into the remaining buttermilk for just a second, then immediately return it to the flour mixture for a second, heavy dredge. Press again to build texture.
- Heat 2-3 inches of oil in a deep, heavy-bottomed pot or Dutch oven to 325 degrees Fahrenheit. Use a thermometer to monitor the temperature.
- Carefully place chicken pieces into the hot oil, ensuring you do not overcrowd the pot. Work in batches.
- Fry chicken for about 6-8 minutes per side, turning occasionally, until deep golden brown and cooked through (internal temperature should reach 165 degrees Fahrenheit). Adjust heat as needed to maintain oil temperature between 300 and 325 degrees Fahrenheit.
- Remove cooked chicken and place it on a wire rack set over a baking sheet to drain excess oil. Do not place directly on paper towels, as this can steam the crust and make it soggy.
- Serve hot.
Notes
- For the crispiest crust, use a mixture of half vegetable oil and half shortening for frying.
- If using chicken breasts, cut them into even pieces to promote uniform cooking time.
- If the oil temperature drops too low when adding cold chicken, the crust will absorb too much oil and become greasy.
Nutrition
- Serving Size: 1 piece (thigh)
- Calories: 450
- Sugar: 3
- Sodium: 650
- Fat: 28
- Saturated Fat: 8
- Unsaturated Fat: 20
- Trans Fat: 0
- Carbohydrates: 18
- Fiber: 1
- Protein: 30
- Cholesterol: 110