

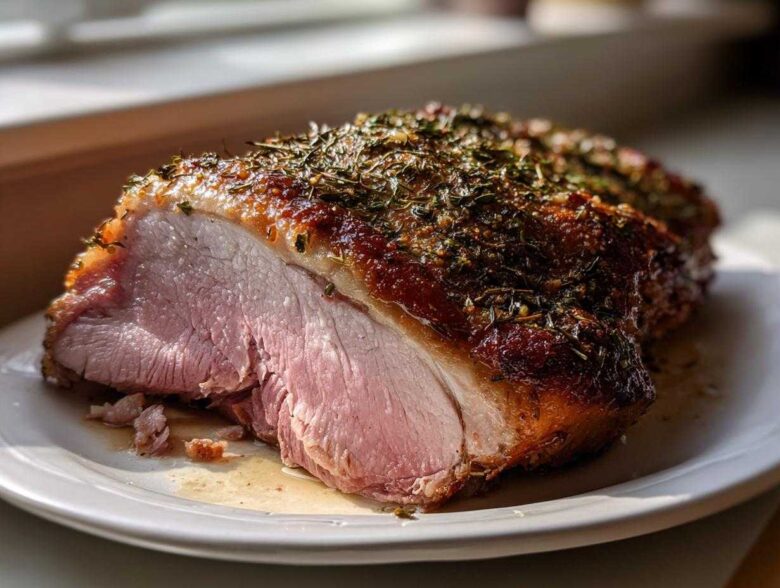
Oh, I remember the days when a roast felt like a huge, scary commitment. I used to dread slicing into a beautiful pork loin roast only to find it dry, tasting more like leather than pork! That’s ancient history now because I finally cracked the code. Forget complicated marinades or fussy equipment; this recipe for a **pork loin roast** is my absolute staple. It’s so straightforward, it’s perfect for when you need an easy pork dinner on a Tuesday, but honestly, it’s impressive enough to anchor a whole lazy Sunday roast. The real secret, and I mean the *real* secret, is nailing that internal temperature target. Get that right, and you get the most tender, juicy pork imaginable. If you’ve ever struggled with dry pork, trust me on this little method; it’s a total game-changer.
We’re talking about big flavor from just a handful of pantry spices, and you aren’t going to spend all day babysitting the oven. I promise this method sets you up perfectly for success, and by skimming through my favorite pork chop tips, you’ll see this principle applies everywhere! It brings me so much joy to share a foolproof technique.
Why This Juicy Pork Loin Roast Makes an Easy Pork Dinner
If you are looking for an easy pork dinner that cuts down cleanup without sacrificing flavor, this is it! This recipe truly shines because it uses what you probably already have on hand. Seriously, you just dump some spices together and rub them on. That’s 90% of the work!
We keep things simple so you can focus on the side dishes or just setting the table without rushing around like crazy beforehand. It hits that sweet spot for any busy cook.
- Minimal Ingredients: We rely on olive oil and four core dried herbs/spices. No chopping a whole head of garlic!
- Guaranteed Juiciness: The two-temperature cooking method helps lock in moisture, making this the juiciest pork loin roast you’ll ever bake.
- Perfect for Any Night: This wonderful pork loin roast is truly ideal for a relaxed Sunday roast, but it cooks fast enough to make it a reliable weeknight dinner option.
Quick Prep for Your Pork Loin Roast
I timed myself last week just to be sure, and I can confirm the prep time is barely 10 minutes! You need that time to just gather your spices, coat the roast in oil, and sprinkle everything evenly. That’s it! Because there’s no complicated trussing or hours of marinating required, you can have this pork in the oven getting happy long before you even think about getting out the pots and pans for vegetables. It’s truly the easiest way to make something that tastes like you worked all day on it.
Ingredients Needed for the Perfect Pork Loin Roast
When you’re aiming for the best texture and taste, you can’t skimp on the quality of what you put in, but thankfully, this list is nice and short. This is where you start building trust with flavor. I like to keep my seasonings classic because the pork loin itself has such a fantastic, clean flavor that doesn’t need a ton of masking—just a little boost!
You’ll need your roasting pan ready, but first, gather these specific items. Make sure that roast is bone-out; it cooks so much more evenly that way, which ties right into getting that perfect internal temperature later on.
Here’s exactly what you’ll need sitting on your counter before you begin:
- 3 lb pork loin roast, bone out
- 1 tablespoon olive oil
- 1 teaspoon salt
- 1 teaspoon black pepper
- 1 teaspoon garlic powder
- 1 teaspoon dried thyme
See? Nothing fussy! That combination of thyme and garlic powder works wonders when it hits that high heat initially. Grab everything now, and we can move on to the actual equipment you’ll need to get this show in the oven.
Essential Equipment for Your Oven Roasted Pork
Okay, so the ingredient list was short and sweet, but you still need a few trusty tools to make sure this roast doesn’t turn into a flop. If you’re serious about getting that perfectly cooked center, there are three things you absolutely must have ready to go before the oven even starts warming up.
I’ve tried baking roasts in glass dishes and metal pans, and I always come back to this setup for the best exposure to dry heat. Don’t worry if you don’t have fancy specialty gear—most of this is probably hiding in one of your drawers already!
Here is the absolute minimum gear I insist you use for this method:
- A Roasting Pan or Sturdy Rimmed Baking Sheet: You need something with sides to catch the flavorful juices. If you use a baking sheet, make sure it has a nice lip so nothing bubbles over when you turn the heat up high at the start!
- An Instant-Read Thermometer: This is non-negotiable, trust me. Guessing is how we ended up with dry roasts in the first place! You need this tool to check the **pork loin internal temp** right in the thickest spot. Honestly, investing in a good digital one was the best thing I ever did for my cooking confidence.
- Aluminum Foil: We need this for the resting phase. Don’t skip the foil—it’s what keeps all those hard-won juices locked inside while the roast relaxes after baking.
That’s it! No immersion circulators, no complicated racks needed for this straightforward recipe. Having these three items ready means you are set up for a successful, easy pork dinner.
Step-by-Step Instructions for a Tender Pork Loin Roast
Alright, let’s get this beautiful piece of meat into the oven! This is the part where simple technique truly transforms basic ingredients. You want that gorgeous, savory crust on the outside and a super tender, juicy pork loin on the inside, right? We achieve that using the one-two punch of temperatures. Pay close attention during the prep; if you skip patting it dry, you’re fighting a losing battle against sogginess!
First things first, get that oven preheated to 400 degrees Fahrenheit. Don’t wait! The heat needs to be ready to smack that roast right away. While it’s warming up, go grab some paper towels. You need to pat down the surface of your pork loin roast—I mean *really* pat it dry. Moisture is steam, and steam prevents browning. We want browning!
If you are looking for more deep-dive knowledge on how I manage timing and temperature secrets for all my pork efforts, you can check out some general tips over on my recipe blog index.
Seasoning and Preparing the Pork Loin Roast
While the oven is puffing up to temperature, mix your spices together in a tiny bowl—just the salt, pepper, garlic powder, and thyme. Make sure they are totally combined so you don’t end up with one bite tasting only of salt!
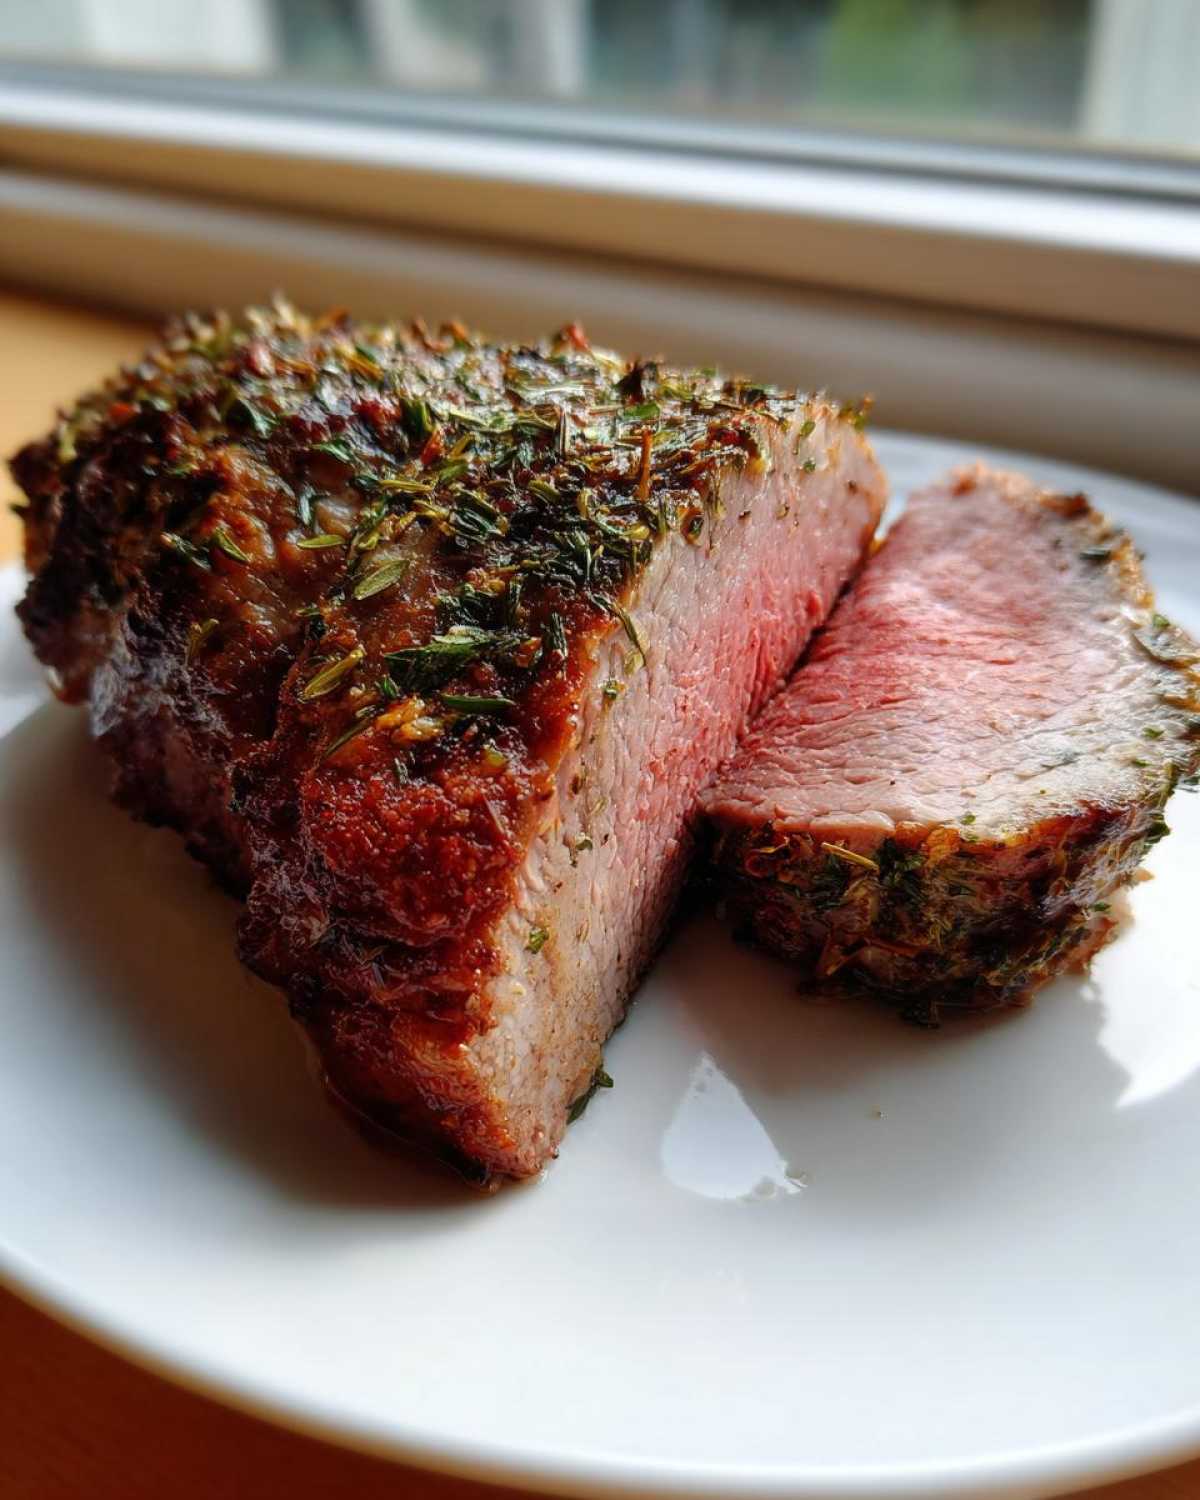
Next, drizzle that tablespoon of olive oil all over the roast. You can use your hands to spread it around—it’s just the glue for our seasoning. Now, sprinkle that dry mix over every surface. Really massage it in there, make sure every side gets covered nicely. This initial blast at 400 degrees F is crucial. It’s only for 15 quick minutes, but those 15 minutes create the flavor foundation and that beautiful, savory crust you look for in a good oven roasted pork.
Achieving the Correct Pork Loin Internal Temp
Once those 15 minutes are up, you’ll smell how good it’s getting! Immediately reduce the oven temperature down to 350 degrees F (175 degrees C). This lower temperature is what gently cooks the interior without burning the exterior we just worked hard to establish. This is the key to that perfect mouthfeel.
Now, you wait. And you let your thermometer do the thinking. You are looking for that sweet spot: 145 degrees F (63 degrees C) registered clearly in the very thickest part of the roast. Don’t probe the bone, and try not to hit any fat pockets near the surface—center meat, please! Once you hit that number, pull it out immediately. Remember, usually, for a 3 lb roast, you’re looking at about 15 to 20 minutes per pound *total* cooking time, but always, always go by the thermometer reading. If you want to know more about hitting perfection with pork, check out some other pork timing tricks I use!
The Non-Negotiable Resting Period for Your Pork Loin Roast
Seriously, do not skip this step, or everything you just did is wasted! When the pork loin roast comes out at 145 degrees F, the juices are all agitated and surging toward the center. If you slice it right away, all that glorious liquid just spills onto your cutting board. We don’t want that! We want that juice staying locked inside the meat fibers.
Take the pan out, move the roast onto a clean cutting board, and tent it loosely—and I mean *loosely*—with aluminum foil. Let it sit there and relax for a full 10 to 15 minutes. During this time, the internal temperature will sneak up a couple of degrees (called carryover cooking), and those juices will redistribute themselves perfectly throughout the entire **pork loin roast**. You’ll know it’s ready when the meat feels firm but still slightly tender when you poke it gently.
Making a Simple Pan Sauce Gravy for Your Pork Loin Roast
If you’ve let your roast rest properly, that pan sitting underneath it is pure liquid gold. Don’t you dare throw those browned, sticky bits away! That’s where all the deep, roasted pork flavor lives. Making a simple pan sauce gravy is honestly faster than scrambling to make a separate side sauce, and it instantly elevates this from a ‘weeknight thing’ to a proper Sunday roast recipe staple.
You’ll move the roasting pan right onto your stovetop. Quick tip: make sure you’re using an oven-safe pan if you plan on doing this directly on the burner! If you’re not sure about your specific pan, just scrape the drippings into a small saucepan first. This little sauce is what makes every slice of pork loin sing.
The process is all about deglazing. Pour in about a cup of broth—chicken or vegetable works great—and start scraping the bottom of the pan with a wooden spoon or spatula. You want to lift every single one of those caramelized brown flavors stuck to the metal. That scraping action is essential!
Let that broth bubble away for a minute or two until it reduces slightly. Then comes the magic touch that makes any sauce creamy and rich: cold butter. Whisk in one tablespoon of cold butter right at the end, off the heat if you can manage it, until it melts smoothly into the broth. This emulsifies the sauce, giving you a gorgeous, slightly glossy pan sauce gravy that is absolutely incredible spooned over the sliced meat. Seriously, I always tell people the leftovers taste amazing just reheated with a teaspoon of this gravy next to them. For more ideas on luxurious sauces that pair well with pork, you should check out my creamy Dijon sauce recipe!
Tips for the Juiciest Pork Loin Roast Every Time
If you take just one thing away from this entire guide to making a fantastic **pork loin roast**, let it be this: you have to trust your thermometer more than your clock! Reaching that perfect, safe temperature is the absolute cornerstone of getting a **juicy pork loin** that practically melts when you slice it. I’ve tried every trick in the book over the years, and these few extra bits of advice are what separate a good roast from an amazing one.
I know it seems contradictory, but pulling it out while it’s still slightly under the target is essential. When you check the temperature, aim for 142 or 143 degrees F. When you tent it with that foil—which you absolutely must do—the residual heat will gently carry it up those last two degrees to the safe 145 mark. This tiny buffer zone prevents the meat fibers from seizing up with one last blast of high heat!
For a truly exceptional result, here’s a little something I started doing that really makes a difference. Because the roast often cooks slightly faster on the ends than the middle, I actually take two pieces of balled-up aluminum foil and tuck one under each end of the roast before tenting. This actually slightly elevates the ends and directs the residual heat toward the thickest center part as it rests. It evens out the final temperature, giving you much more consistent slicing.
And hey, if you want to use this same temperature philosophy for smaller cuts, make sure you check out my detailed guide on juicy pork chops—the science is the same, just the timing changes!
Storage and Reheating Instructions for Leftover Pork Loin Roast
The best part about making a big roast is having amazing leftovers, right? Once you’ve mastered getting that perfect, tender interior, you want to treat those leftovers with respect! The way you store and reheat meat is almost as important as the cooking itself if you want to keep that juicy texture we worked so hard to achieve a few days later.
First, you have to let the roast cool down a little bit before you store it. Don’t put a steaming hot roast into a plastic container and tightly seal it—that just traps steam and makes things soggy when you put it in the fridge. Once it’s closer to room temperature, slice the meat thinly against the grain. Thin slices are the key to avoiding dry bites later on!
Tuck the slices into a shallow, airtight container. I always try to add just a tiny splash of liquid to the container before sealing it up. A little bit of water, broth, or even those amazing pan drippings reserved from earlier will help keep the meat fibers from completely drying out in the cold air of the refrigerator. This usually keeps the meat perfectly good for about three to four days.
When it’s time to eat the leftovers, high heat is your enemy! You don’t want to just blast it in the microwave until it’s hot, because that leeches out all the remaining moisture. The absolute best way to reheat slices is low and slow, with moisture present. Put your slices in a skillet over medium-low heat, add a tablespoon or two of broth, and cover the skillet for just a minute or two until the meat is warmed through and steamy. If you’re using the microwave, put the slices on a plate and cover them with a damp paper towel—it acts like a mini-steamer!
If you are planning on using them for sandwiches or chopping them up for something else later, keep them chilled until right before you need them. Honestly, a slice or two eaten cold right out of the fridge sometimes hits the spot too, especially if they’re already super moist!
Frequently Asked Questions About Your Pork Loin Roast
I get so many emails asking about last-minute changes or substitutions, which is totally understandable when you’re trying to pull off a fast meal, especially for a weeknight dinner! These questions pop up a lot, so setting the record straight here will hopefully save you some stress next time you pull out your pork loin roast.
I’ve gathered the most common things people worry about when roasting pork—especially when they are trying to hit that perfect **pork loin internal temp** without second-guessing themselves. Don’t worry, these standard concerns are often easily solved!
Can I cook this pork loin roast from frozen?
Oh, I really advise against that, sweetie. If you try to put a rock-solid frozen roast in the oven using this recipe, you’re setting yourself up for disaster! The exterior is going to cook way too fast trying to blast through that ice, while the center stays stubbornly cold. You’d end up burning the outside trying to get the middle safe.
Best practice is always to plan ahead and thaw it slowly in the refrigerator overnight, or for at least 24 hours if it’s a bigger piece. It makes hitting that magic 145 degrees F so much easier and ensures your whole dinner isn’t held up waiting for the middle to defrost!
What is the best internal temperature for a safe pork loin roast?
This is the question every cook needs to ask! The good news is that pork safety standards have changed over the years, and we don’t have to cook pork to that old, dry 160 degrees F anymore. For this recipe, and honestly for almost any pork loin, the current USDA-recommended safe temperature is 145 degrees F (63 degrees C). If you see that number pop up on your instant-read thermometer, that cut is safe, cooked through, and, most importantly, still juicy!
Remember what I told you earlier? That reading must be taken in the thickest part of the meat, away from any bone or large pockets of fat. I always check it in two slightly different spots just to be absolutely sure! Trust the metal probe over your oven’s temperature display!
We had a few other questions about cooking times and cuts, so I’ll answer those quickly too, in case they’ve crossed your mind while planning out your weeknight dinner:
- Boneless vs. Bone-In: This recipe uses bone-out, which cooks faster. If you use a bone-in roast, expect it to take about 10-15 minutes longer overall, and you might need to adjust your 145°F check point slightly depending on how the bone insulates the meat next to it.
- Can I use a Slow Cooker? You certainly can, but the crispy sear we get from that initial high oven blast will be missing, and you won’t get the nice drippings for the pan sauce gravy. If you use a slow cooker, cook on low for 4-6 hours, checking the pork loin internal temp diligently!
If you have any other burning questions about getting this roast right, please don’t hesitate to reach out; I’d love to chat through the details over on my contact page!
Serving Suggestions for Your Sunday Roast Recipe
Now that you have this absolutely perfect, tender pork loin roast ready, you need things to go next to it on the plate, right? We want this to feel like a real, satisfying Sunday roast! Since this recipe is simple and focuses on that rich pan sauce gravy, you want sides that can stand up to the savory meat juices without fighting the flavor profile.
Honestly, you can keep the sides just as easy as the main event. My biggest rule here is to make sure whatever you choose can either cook alongside the roast (if you have space in the oven) or be made quickly while the roast is resting. You’ve earned that break!
Here are two or three simple pairings that my family always votes for:
- Creamy Mashed Potatoes: What is a good roast without a pile of fluffy mashed potatoes waiting to soak up that pan sauce gravy? This might seem basic, but it is essential. Don’t try to be fancy here; just butter them up well, and you’re set.
- Roasted Root Vegetables: I love throwing carrots, parsnips, and maybe some small onions right into the roasting pan alongside the pork for the last 40 minutes or so. They soak up all those savory bits that drip off the meat. If you want to jazz up the root veg a little, try tossing them in a light maple glaze before roasting. These sweet chili roasted potatoes are one of my favorite variations, though you might want to tone down the heat if you’re serving kids!
- Simple Steamed Green Beans with Toasted Almonds: If you need something bright and green to cut through the richness of the pork and gravy, crisp-tender green beans are perfect. All you need to do is steam them until they’re bright green, then toss them quickly in a pan with a little butter and some slivered, toasted almonds right before serving. It adds a nice little crunch, which is something the soft roast really needs!
See? Nothing that requires its own complex schedule. Focus on getting that internal temperature right, let it rest, make that easy gravy, and then just steam some green things and mash some potatoes. That makes for a beautiful, hearty Sunday dinner!
Estimated Nutritional Data for This Pork Loin Roast
Okay, so we’ve focused heavily on making sure this roast is incredibly juicy and perfectly timed, but I know some of you also like to keep an eye on the numbers, especially if this is going into your routine as a favorite weeknight dinner option. Knowing the nutritional profile helps you fit it into your broader meal plan, even if it’s a hearty centerpiece for a larger Sunday roast!
I want to be super clear, though: because we are dealing with slightly different cuts of meat and the exact amount of oil residue left on the plate will vary wildly (especially depending on how much of that beautiful pan sauce gravy you add!), these figures are just an educated guess based on standard calculations. They give you a great baseline, but they aren’t certified lab results. For any strict dietary tracking, you might want to check my detailed disclaimer page.
Based on one serving size of the cooked meat (about 4 oz), here’s the breakdown we are looking at:
- Serving Size: 4 oz cooked
- Calories: 280
- Protein: 40g (That’s why this feels so satisfying!)
- Fat: 12g
- Saturated Fat: 4g
- Unsaturated Fat: 8g
- Carbohydrates: 0g
- Fiber: 0g
- Sugar: 1g (Mostly from the spice blend, not added sugar!)
- Cholesterol: 95mg
- Sodium: 450mg
As you can see, this is a protein powerhouse! It’s naturally zero-carb, which is fantastic for low-carb planning. The fat content is reasonable because we use a lean pork loin roast, and just a little bit of oil on the outside. As long as you’re careful with how much of that simple pan sauce gravy you drizzle on top, this is a wonderfully flavorful and lean option for any night of the week!
PrintSimple Juicy Pork Loin Roast
A straightforward recipe for a tender, juicy pork loin roast cooked in the oven with simple seasoning and instructions for a basic pan sauce.
- Prep Time: 10 min
- Cook Time: 75 min
- Total Time: 85 min
- Yield: 6 servings
- Category: Dinner
- Method: Roasting
- Cuisine: American
- Diet: Low Fat
Ingredients
- 3 lb pork loin roast, bone out
- 1 tablespoon olive oil
- 1 teaspoon salt
- 1 teaspoon black pepper
- 1 teaspoon garlic powder
- 1 teaspoon dried thyme
Instructions
- Preheat your oven to 400 degrees Fahrenheit (200 degrees Celsius).
- Pat the pork loin dry with paper towels.
- In a small bowl, mix the salt, pepper, garlic powder, and thyme.
- Rub the olive oil all over the pork loin.
- Sprinkle the seasoning mix evenly over the entire surface of the roast.
- Place the roast in a roasting pan or on a rimmed baking sheet.
- Roast for 15 minutes at 400 degrees F.
- Reduce the oven temperature to 350 degrees F (175 degrees C).
- Continue roasting until an instant-read thermometer inserted into the thickest part reads 145 degrees F (63 degrees C). This usually takes about 15 to 20 minutes per pound total cooking time.
- Remove the roast from the oven.
- Tent the roast loosely with foil and let it rest for 10 to 15 minutes before slicing.
- To make a simple pan sauce, place the roasting pan over medium heat on the stovetop. Scrape up any browned bits from the bottom of the pan. Add 1 cup of broth and simmer until reduced slightly. Whisk in 1 tablespoon of cold butter until melted and smooth.
Notes
- For the juiciest results, remove the roast when the internal temperature reaches 145 degrees F. The temperature will rise a few degrees while resting.
- If you prefer a crispier exterior, increase the initial temperature to 425 degrees F for 20 minutes before reducing it.
Nutrition
- Serving Size: 4 oz cooked
- Calories: 280
- Sugar: 1
- Sodium: 450
- Fat: 12
- Saturated Fat: 4
- Unsaturated Fat: 8
- Trans Fat: 0
- Carbohydrates: 0
- Fiber: 0
- Protein: 40
- Cholesterol: 95