

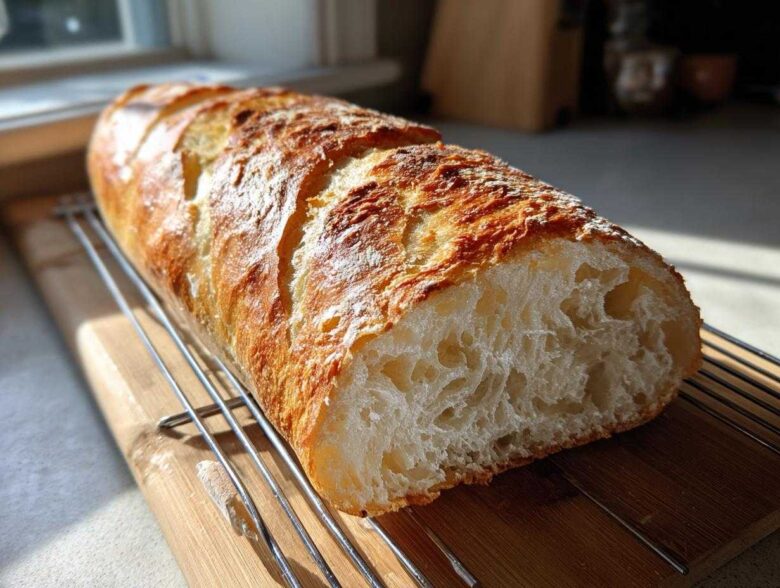
I used to think making real, bakery-quality bread at home was some kind of secret society skill only bakers with years of practice could pull off. Remember those first few times I tried making a simple French bread? I ended up with pale, slightly tough loaves that tasted more like doorstops than actual bread. It was so frustrating!
But listen to me now: you absolutely do not need a professional oven or complicated techniques to get glorious results. This recipe is my magic trick for achieving that heavenly contrast: a soft, fluffy interior that just melts, paired with a perfectly crackly, golden crust. Seriously, the best part of my day is pulling this out and hearing that satisfying crunch.
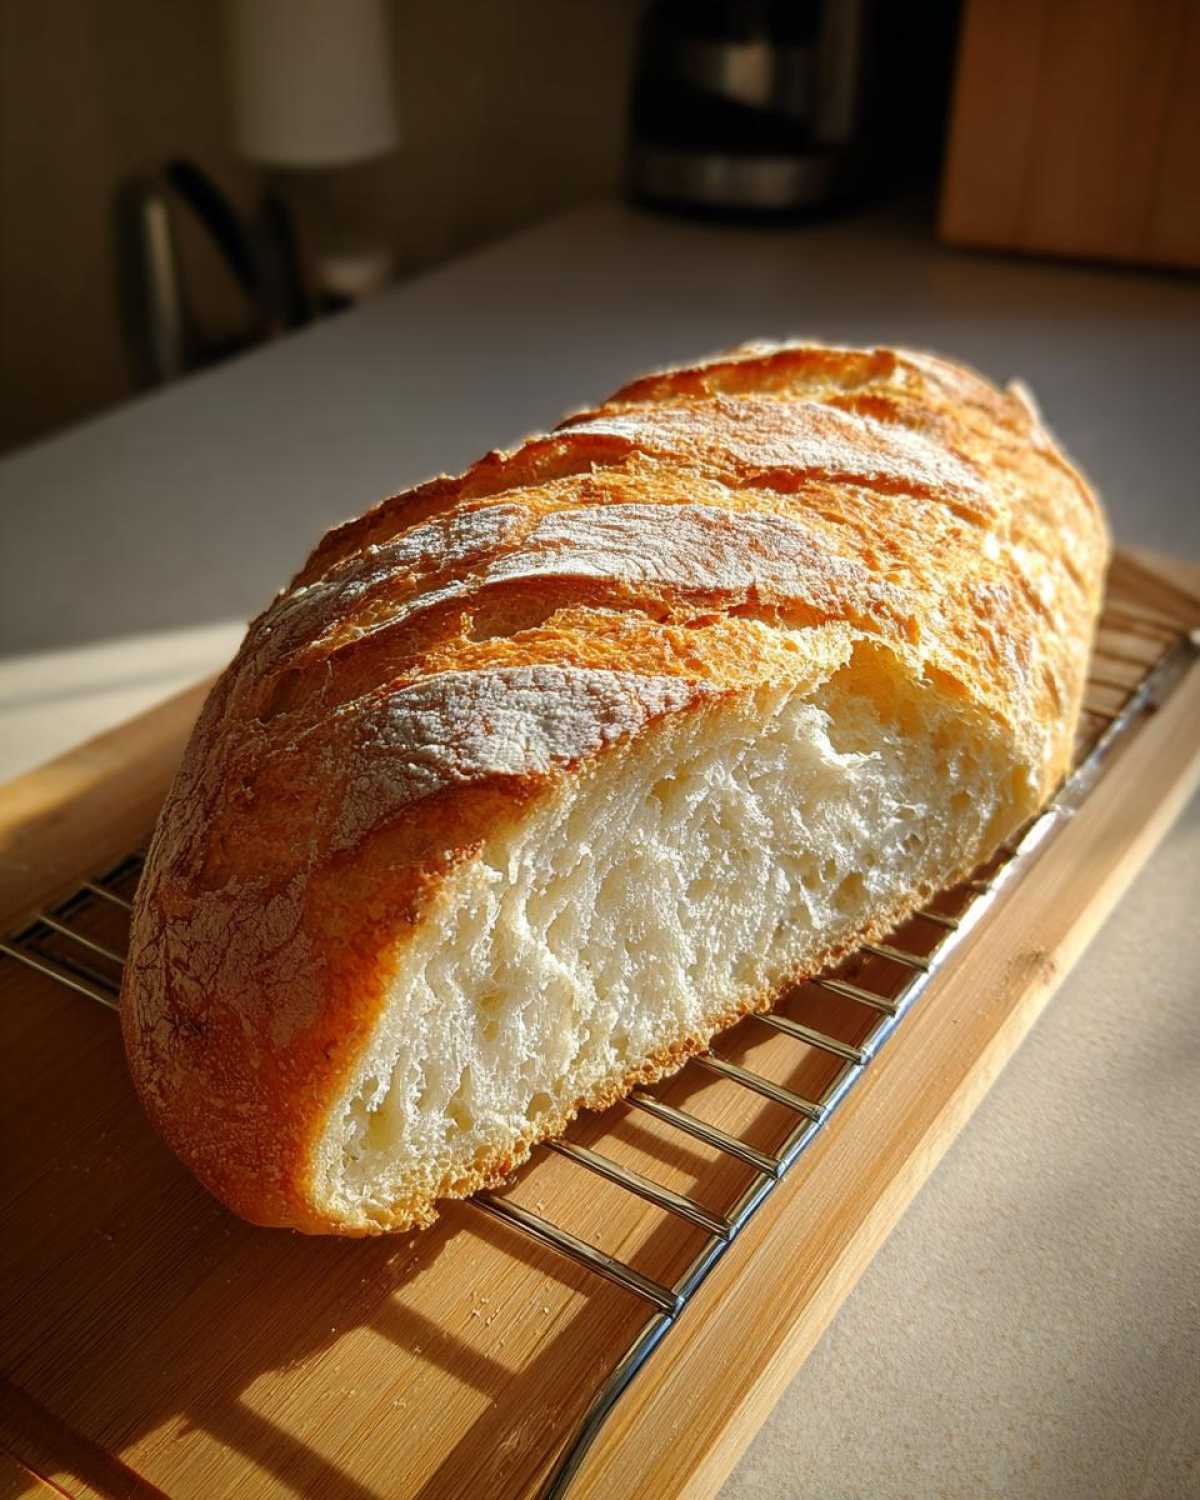
It’s so straightforward, even if you’ve only mastered toast up until now. We get those beautiful results in under two hours, thanks to a few clever steps I picked up over years of trial and error. You’re going to love baking with me, and I can’t wait for you to see what you can do! I’ve linked my absolute favorite loaf-making guide here for anything you want to explore deeper: the bread that makes people think baker.
Why This Homemade French Bread Recipe Delivers
Honestly, this recipe is the gold standard for a reason. It hits that sweet spot so many home bakers chase—that incredible chewiness inside without being heavy. If you’re looking for Soft French Bread at Home, this is it. You get all the rewards without all the fuss!
- We nail that crisp exterior thanks to a little trick with the oven steam, giving you that true Bakery Style Bread feel.
- The dough itself stays wonderfully supple and airy, never tough.
If you’ve ever wanted to try baking rolls, my recipe for buttery dinner rolls that steal the spotlight is my second favorite quick bake!
Texture Perfection: Soft Crumb Meets Crusty Exterior
It all comes down to how we treat the dough before it goes in the heat. We want that fluffy interior, so we focus on a gentle rise and minimal handling. But that crust? That’s all about temperature shock! A hot oven and steam work together instantly to set that beautiful shiny shell while the inside steams itself soft.
Achieving Quick French Bread Success
Don’t let the rise times scare you off! We are looking at a total bake time under two hours, which makes this truly a Quick French Bread Recipe. That’s faster than running to the store sometimes! You get real, amazing French bread on the table before dinner is even ready.
Essential Ingredients for Perfect French Bread
Okay, let’s talk about what you need. Unlike some of those really complicated artisan loaves, this recipe uses pantry staples you probably already have sitting around. But even though it’s simple, precision matters! Trust me on this: don’t eyeball the yeast or the water temperature. That’s where everything goes sideways!
When listing out what you need, I make sure to be super specific about anything temperature-related. Why? Because the yeast is alive, and we want it happy and bubbly, not dormant or, heaven forbid, dead! This is how we build the necessary structure for success.
Flour, Yeast, and Water: The Foundation of Great French Bread
You need three cups of all-purpose flour, which gives us that nice, soft crumb we are aiming for in our French bread. The yeast measurement has to be exact—we’re using about two and a quarter teaspoons, which is generally one standard packet. Make sure your water is warm, but not hot! We’re aiming for that 105 to 115 degrees Fahrenheit range so the little yeast guys wake up and start doing their job. Once that water is lightly sweetened with a tablespoon of sugar, the yeast just feasts and gets foamy. That foam is the visual confirmation that your bread is going to rise beautifully!
The Secret to a Golden Finish
You’ll notice the recipe calls for just one egg white at the end, and it needs to be lightly beaten. This isn’t for the dough itself; this is purely for presentation, and it’s non-negotiable if you want that shiny, deep golden basket appearance. If you skip this, your loaf will look dull, kind of floppy, and honestly, sad. The egg white wash creates a thin, crisp seal right on the surface that cracks appealingly when you cut into it. So thin it out with a tiny splash of water until it’s super runny before you brush it on the second rise!
Step-by-Step Instructions for Your Homemade French Bread Recipe
Okay, here’s the part where we roll up our sleeves! If you’ve followed along so far, you’re already miles ahead of most people just getting started. This entire process is surprisingly streamlined, which is what makes this such a great Homemade French Bread Recipe for anyone new to Beginner Bread Baking. Just follow the timing, and you can’t mess it up.
The key timing element here is the preheating. While the dough gets its second nap, your oven needs to get roaring hot—400 degrees Fahrenheit is our target temperature. And remember that steam trick I mentioned? Get that shallow pan of water in the bottom rack now so it starts heating up too!
Activating the Yeast and Mixing the Dough
First things first, we wake up the yeast! Take your warm water—it must be 105 to 115 degrees F, no hotter or you’ll kill it!—and stir in that little bit of sugar and the packet of active dry yeast. You have to let this sit for five minutes. If you don’t see foam, stop right there and start over, because something went wrong with your temp! Once it’s nice and foamy, stir in your melted butter.
Now, we add the dry stuff: three cups of flour and the teaspoon of salt. Mix it quickly, just until it starts to look shaggy like a messy ball. Don’t try to over-mix it in the bowl—we’re going to do the real work outside!
Kneading and First Rise for Tender Crumb Bread
Turn that shaggy mess out onto a lightly floured surface. This is where the magic happens. You’ve got to knead this dough for a solid 6 to 8 minutes. Push down, fold it over, turn it, and repeat. You’re looking for the dough to transform completely from sticky to perfectly smooth and elastic. It should feel soft, almost like a baby’s cheek! When you’re done, oil a clean bowl, put the dough in, turn it so it’s coated, cover it up, and let it chill out in a warm spot for 45 to 60 minutes. It needs to double in size!
Shaping and Preparing the French Bread for the Oven
Gently punch the air out of that risen dough—don’t mash it, just deflate it! Now, you can either shape it into one big log for a hefty loaf, or divide it if you want two smaller baguettes. Roll it out evenly until it’s the size and shape you want, and place it carefully onto your parchment-lined baking sheet. Cover it loosely again. This is the second rise, and it’s shorter, only about 20 minutes. Just before that 20 minutes is up, grab your sharp knife and score the top of your French bread with three quick diagonal slashes. These slashes aren’t just for looks; they let the loaf expand without tearing elsewhere!
Baking Your Crusty Exterior Bread
Brush that entire top surface lightly but evenly with your beaten egg white. Get it right to the edges! Then, slide that pan right into your preheated 400-degree oven. Bake it for about 25 to 30 minutes. You know it’s done when it’s beautifully golden brown all over and, this is important, when you tap the bottom, it sounds hollow. That sound means the inside has steamed perfectly and the crust is set. If you pull it out too early, it’ll collapse! You’re going to be shocked at how easily you achieved this Crusty Exterior Bread!
For more great kneading techniques, check out my guide on beginner bread baking!
Tips for Making the Best Homemade French Bread
Even though this recipe is deceptively easy, a few little insider secrets can take your loaf from great to absolute showstopper. I call these my survival tips for baking! I rely on these anytime I’m making this French Bread because they guarantee that perfect oven spring and crust. You can find my full breakdown of general advice over here: baking homemade bread tips.
The Steam Trick for Bakery Style Bread
If you want that incredible crunch—the kind that makes everyone stop mid-conversation when you slice it—listen up. You need steam! When you preheat your oven, put a shallow, metal baking dish on the absolute bottom rack. Right when you slide your French bread in, carefully pour a cup of hot water into that hot pan. Don’t splash yourself! That blast of steam keeps the crust soft for the first ten minutes of baking, letting the loaf expand fully before the crust hardens. It results in the most beautiful, shatteringly crisp Bakery Style Bread look.
Adjusting Flour for Texture in Your French Bread
We use all-purpose flour because it’s soft, which helps achieve that fluffy interior we adore in homemade French bread. But if you want a chewier texture, maybe something sturdier for serious dipping or big sandwiches, you can swap out about half of the all-purpose flour for bread flour. Bread flour has more protein, which builds stronger gluten strands. My advice is to try it once with all-purpose, then use bread flour the second time so you can really taste the difference in the chewiness. It’s a simple switch that changes the whole mouthfeel!
Serving Suggestions for Your Easy French Bread
Now that you have this amazing, perfectly structured loaf cooling on the rack, what do you do with it? This bread is so versatile, you should never just eat it plain—though I definitely sneak pieces while it’s still warm! It transitions perfectly from a simple Dinner Side Bread to the star of your lunch.
It’s all about pairing it with rich flavors that soak up that beautiful, soft crumb we worked so hard to achieve. You won’t miss the store-bought stuff, trust me on this one.
Perfect Pairing for Soups and Stews
This is where the steam trick really pays off! If you’ve got a rich, hearty dish simmering on the stove, this bread is its best friend. Think about dipping the crusty end into a big bowl of creamy tomato soup—classic comfort food right there. I also find it’s absolutely divine alongside a thick beef stew or chili. You need something sturdy enough to handle the broth but soft enough to soak up all those savory juices, and this loaf is exactly that!
If you’re looking for a great soup to pair it with, my recipe for creamy pesto chicken soup recipe is heavenly with a thick slice of this homemade loaf.
Building the Ultimate Sandwich with French Bread
Forget those flimsy supermarket white slices for your next deli creation! Using slices of this French bread instantly upgrades anything you put between them. Because it’s so sturdy after cooling, it handles wet ingredients really well without getting instantly soggy. It’s perfect for big, hearty melts or layered cold cuts.
If I’m making anything involving roasted meats or lots of fresh mozzarella and greens, I slice the loaf lengthwise, toast it lightly, and load it up. You can make incredible Cuban sandwiches or an amazing Philly-style cheesesteak with these loaves. For a recipe idea that uses this bread beautifully, try my crispy garlic chicken sandwich recipe—it’s a favorite around here!
Storage and Reheating Instructions for French Bread
The enemy of a great crust is moisture loss, so we have to store this loaf carefully! Once it’s completely cool—and I mean totally cool, or condensation will turn your crust soft—wrap it tightly in a clean kitchen towel and then place it inside a large paper bag. Don’t use plastic wrap; it traps moisture right against the crust! This keeps your French bread tasting fresh for about two days.
When you want to revive that beautiful crunch, just spritz the crust lightly with water and pop it back into a 350-degree oven for about five minutes. That heat will evaporate the water and relaunch that crisp texture!
Frequently Asked Questions About Making French Bread
I get so many emails about bread baking, and honestly, most of the issues boil down to a few key spots in the process! It’s easy to troubleshoot once you know what you’re looking for. If you’re curious about speeding things up, I actually have a sister article on one hour bread recipe, but for this specific loaf, patience pays off in texture!
Can I make this a No-Fuss Bread Baking recipe without kneading?
That is a great question if you’re looking for No-Fuss Bread Baking! Here’s the thing: while you *can* attempt to skip the kneading, I really don’t recommend it for this particular recipe. Kneading is what develops the gluten structure needed both for the strong crust and the super fluffy interior we’re aiming for. If you skip it, you risk a dough that spreads out instead of rising up, ending up dense. Just think of the 8 minutes of kneading as part of the relaxation hour!
How do I get the classic baguette shape for my French Bread?
Shaping is fun once you get the hang of it! For baguettes, instead of making one long log, you’ll divide the dough into two equal pieces. After you gently deflate the dough, flatten each piece into a rough rectangle. Then, you fold the top third down to the middle, press lightly with your thumbs to seal, and then fold the bottom edge up over that top fold, pressing firmly to seal the edge completely. Roll that sealed log gently back and forth with your palms, applying light, even pressure to elongate it until it’s the length of your baking sheet. Remember to give it space between the two loaves to bake evenly!
Can I skip the egg wash for a more rustic look on my French Bread?
You absolutely can skip the egg wash if you prefer a duller, more matte finish, often seen on true artisan loaves! If you skip the egg white, you might want to use that steam trick I mentioned earlier religiously, as the steam is what encourages that deep, rustic blistered look. If you skip the wash but still want *some* shine, you can just brush the top with plain water right before scoring, but it won’t be nearly as gold as when using the egg white.
Why isn’t my French Bread rising like it’s supposed to?
Nine times out of ten, failing to rise means your water was too hot and killed the yeast, or your kitchen is just plain cold! If you notice zero foam after five minutes in Step 1, it’s the water temperature. If the dough rises slowly or barely at all during the first rise, find your kitchen’s warmest spot. I often use the oven with just the light turned on—never the heat—to create a nice little incubator for the dough. Good dough needs a warm, draft-free nap!
Estimated Nutritional Data for This French Bread Loaf
I always tell people to take bakery nutrition facts with a massive grain of salt, especially when we’re making our own bread at home! This recipe is so simple, but remember, the nutrition facts I’m sharing here are just good estimates based on the standard ingredients listed, like the all-purpose flour and the small amount of sugar and butter we use. These numbers will shift around a tiny bit depending on exact brands or if you decide to swap in bread flour.
These averages are calculated per slice, assuming you get about 16 slices out of the entire loaf. It’s a wonderfully lean bread—low in sugar and fat, which is why it’s so perfect for dipping in soups or making light weekday sandwiches!
- Serving Size: 1 slice
- Calories: 150
- Total Fat: 1.5g (with only 0.3g saturated fat!)
- Cholesterol: 0mg
- Sodium: 180mg
- Total Carbohydrates: 30g
- Dietary Fiber: 1g
- Protein: 4g
- Sugar: 1g
See? Not bad at all for something that tastes this good slathered in butter fresh from the oven. Enjoy the fact that you know exactly what went into making this delicious loaf!
Share Your Experience Making This French Bread
I’ve shared all my best secrets, from the kneading time to the steam trick, and now it’s your turn! Baking is always better when we share the results, right? I genuinely want to know how this recipe worked out for you, especially when it comes to texture. Did you get that shatteringly crisp crust? Was the inside as soft and fluffy as you hoped for?
Please, please leave a rating below—five stars is always appreciated if this becomes your go-to recipe for French Bread! Even if you experimented with the ingredients, let us know in the comments how it turned out. Your feedback helps others feel confident trying this, and that community trust is everything!
And if you managed to snap a photo of your perfectly baked loaf cooling on the counter, I would absolutely love to see it! Tag me when you post it on social media so I can share your amazing baking success on my page. If you ever need to reach out directly with a detailed question or feedback, you can always head over to my contact page. Happy baking!
PrintEasy Homemade Soft and Crusty French Bread

Make soft, fluffy French bread with a crisp crust at home. This simple recipe is suitable for beginners and ready in under two hours.
- Prep Time: 15 min
- Cook Time: 30 min
- Total Time: 1 hour 50 min
- Yield: 1 large loaf
- Category: Baking
- Method: Baking
- Cuisine: French
- Diet: Vegetarian
Ingredients
- 3 cups all-purpose flour
- 1 teaspoon salt
- 1 packet active dry yeast (about 2 1/4 teaspoons)
- 1 cup warm water (105-115 degrees F)
- 1 tablespoon sugar
- 1 tablespoon butter, melted
- 1 egg white, lightly beaten (for wash)
Instructions
- In a large bowl, dissolve the yeast and sugar in the warm water. Let stand for 5 minutes until foamy.
- Stir in the melted butter.
- Add the flour and salt to the yeast mixture. Mix until a shaggy dough forms.
- Turn the dough out onto a lightly floured surface. Knead for 6 to 8 minutes until the dough is smooth and elastic. The dough should feel soft.
- Place the dough in a lightly oiled bowl, turning once to coat. Cover the bowl with plastic wrap or a clean towel. Let the dough rise in a warm place for 45 to 60 minutes, or until doubled in size.
- Gently punch down the risen dough. Shape it into a long, even loaf (or two smaller baguettes) and place it on a baking sheet lined with parchment paper.
- Cover the loaf loosely and let it rest for a second rise for 20 minutes. Preheat your oven to 400 degrees F (200 degrees C) during this time.
- Brush the top of the loaf lightly with the beaten egg white. Use a sharp knife to make three diagonal slashes across the top of the bread.
- Bake for 25 to 30 minutes, or until the crust is golden brown and sounds hollow when tapped.
- Cool the bread on a wire rack before slicing.
Notes
- For an extra crusty exterior, place a shallow pan of water on the bottom rack of the oven while preheating to create steam.
- If your kitchen is cold, place the dough in the oven while it is off, with the light on, to create a warm rising spot.
- Use bread flour instead of all-purpose flour for a slightly chewier texture.
Nutrition
- Serving Size: 1 slice
- Calories: 150
- Sugar: 1
- Sodium: 180
- Fat: 1.5
- Saturated Fat: 0.3
- Unsaturated Fat: 1.2
- Trans Fat: 0
- Carbohydrates: 30
- Fiber: 1
- Protein: 4
- Cholesterol: 0