

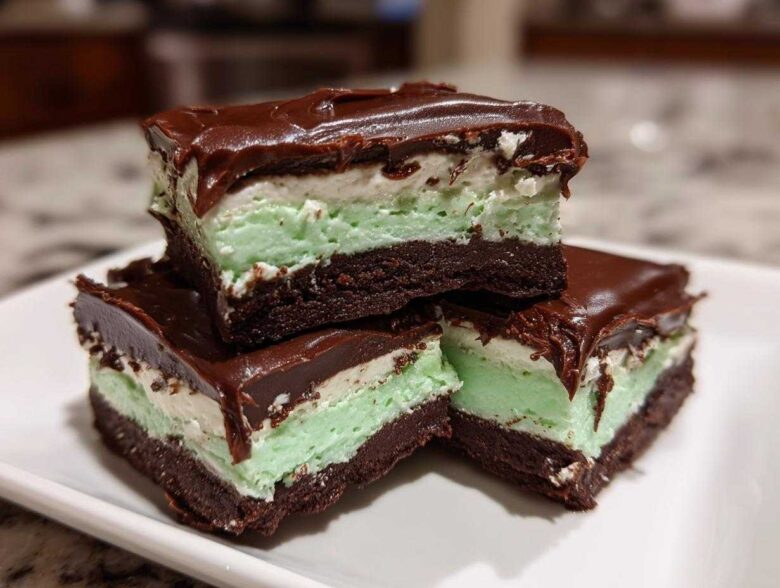
Oh my gosh, are you having one of those days where you just *need* chocolate, but the thought of turning on the oven fills you with dread? I totally get it! That’s when I reach for my absolute favorite emergency dessert: the ultimate No-Bake Chocolate Mint Icebox Bars. Seriously, these things are game-changers.
I first stumbled upon the idea for these layered beauties when I was hosting a huge potluck after a summer storm knocked out our AC. I needed something rich, something cool, and something utterly fabulous that didn’t require any baking whatsoever. These bars delivered everything! They combine that dark, crumbly chocolate crust with the brightest, creamiest mint layer you can imagine, all topped with a smooth, snappy chocolate blanket. If you loved my tips for chocolate chip pumpkin bars, wait until you see how easy these are! Trust me, these **No-Bake Chocolate Mint Icebox Bars** are about to save your busy weeknights and impress every single guest you have over.
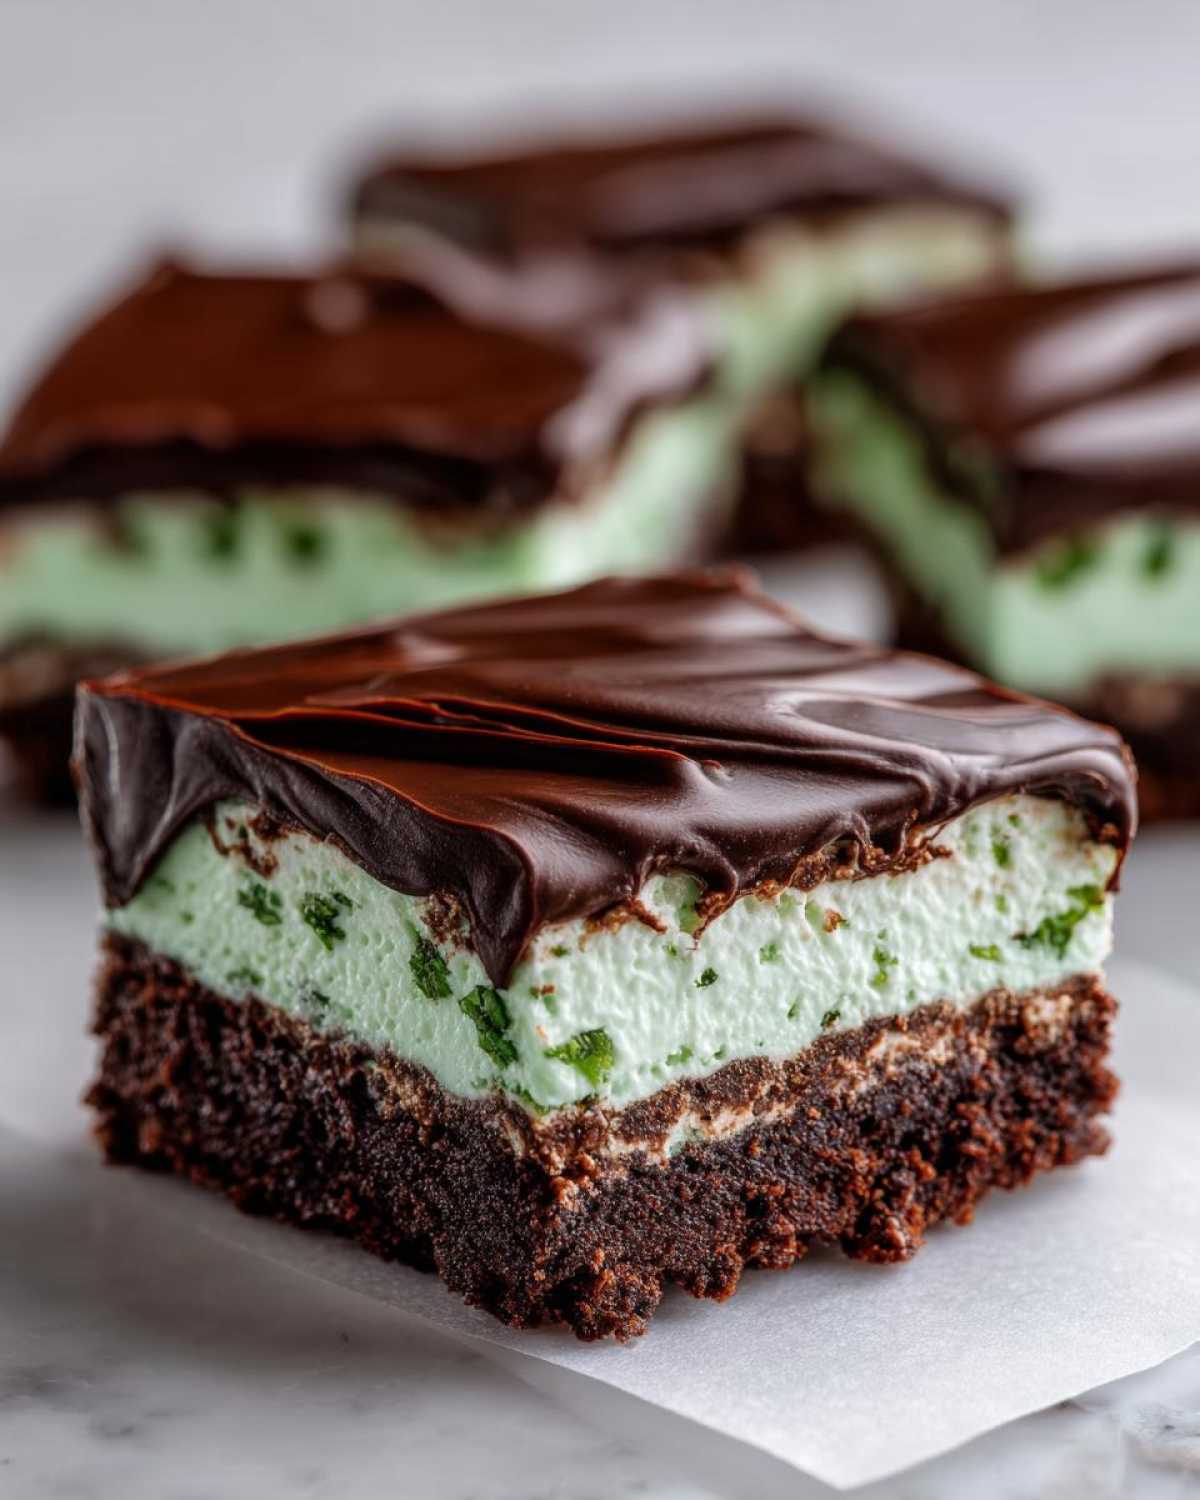
Why You Will Love These No-Bake Chocolate Mint Icebox Bars
Look, some days you just don’t want to deal with flour flying everywhere and worrying about oven temperatures. That’s why this recipe is my absolute go-to for instant dessert gratification. We’re talking about some of the best Easy no bake desserts you’ll ever make!
- They are lightning fast to assemble! Prep time is only about 25 minutes, and then it lets the fridge do all the hard work.
- The flavor combination is just perfect: that deep, dark chocolate crunch meeting that bright, cool mint filling—it hits every craving spot.
- No oven required means your kitchen stays cool, which is a lifesaver in the summer months.
- You can make this entire thing ahead of time, which makes them the ultimate make ahead chocolate mint treats for parties or holidays.
- They slice up beautifully into perfect squares, making them fantastic for potlucks or slice-and-serve situations. Forget fussy cakes!
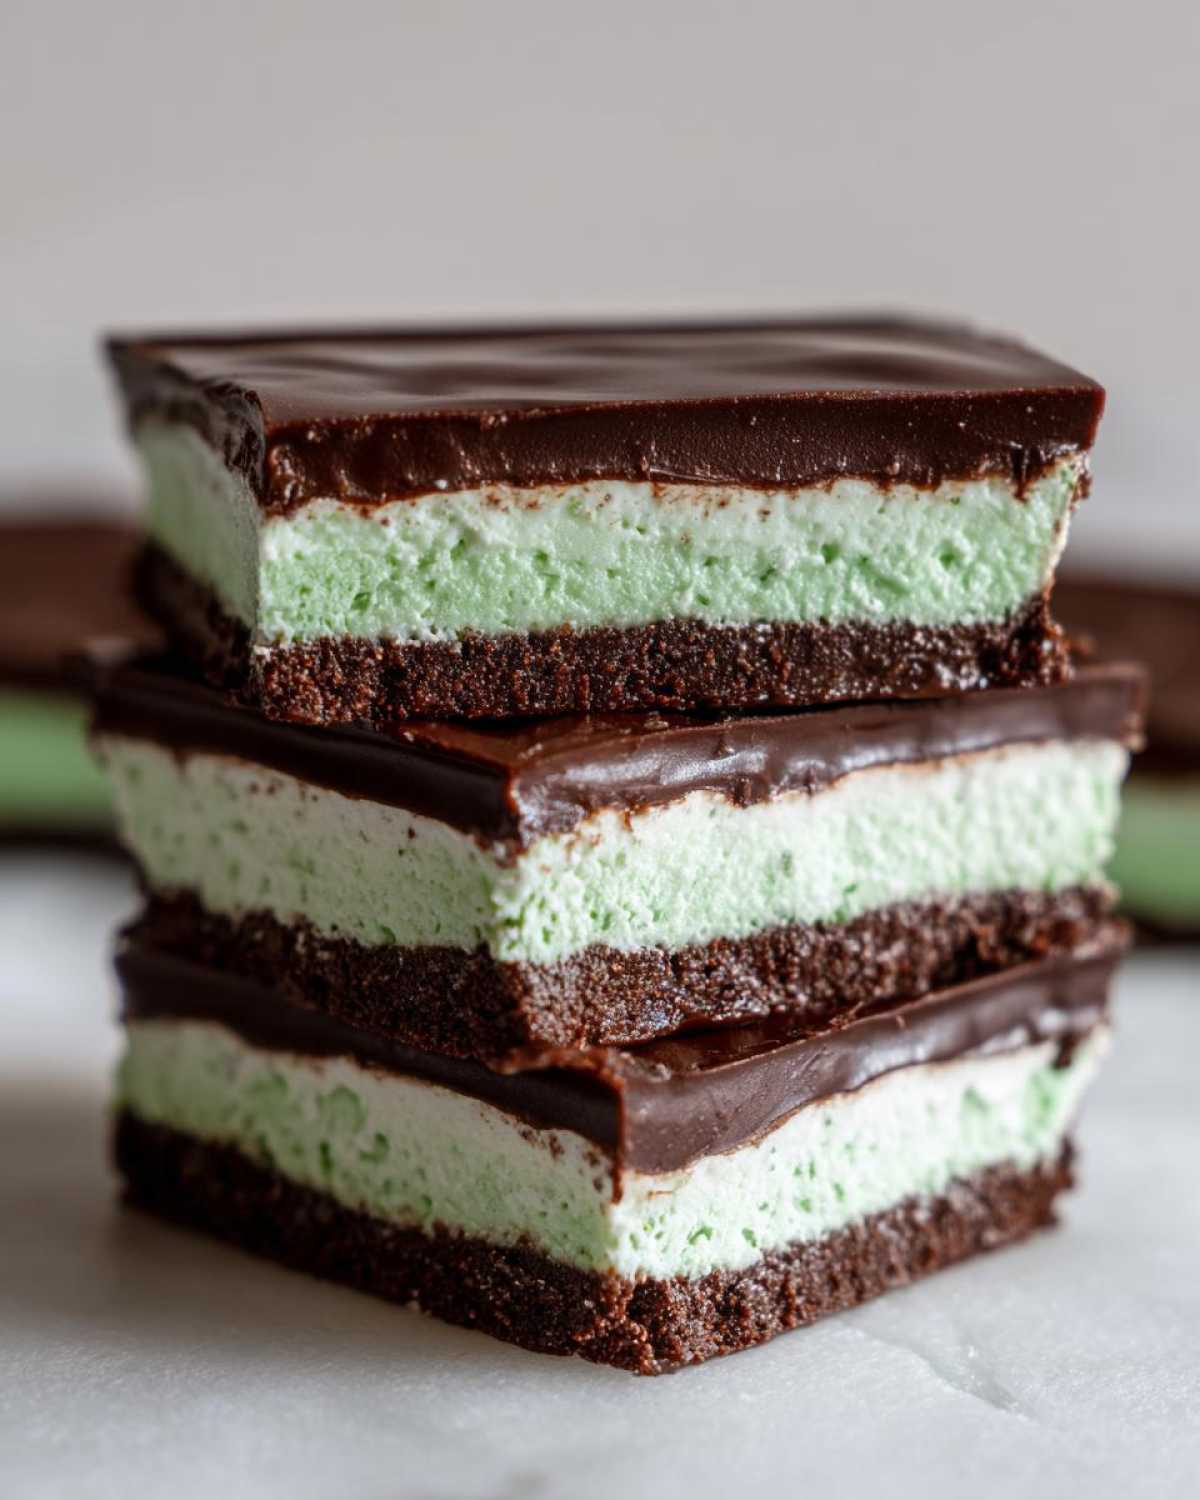
- The layers are just stunning! That green filling peeking out from under the chocolate ganache makes them look way fancier than they actually are.
- They freeze wonderfully, so you can always have a batch ready for those unexpected dessert emergencies.
If you struggle with finicky baking recipes, you should definitely check out my guide on making the best soft and chewy chocolate chip cookies next, just to remind yourself what oven baking *can* feel like when it goes right—but honestly, these bars are foolproof!
Ingredients Needed for No-Bake Chocolate Mint Icebox Bars
Okay, ready for the best part? Gathering the supplies for these is as easy as pie—or, well, as easy as making **Creamy no bake bars**! You’ll be thrilled at how short this list is. It’s basically three main components: the crunch on the bottom, the cool middle, and the chocolate hug on top. Remember, good ingredients make great no bake chocolate mint recipes no oven, so try to stick to what I wrote down here!
If you need a refresher on making perfect frosting, I’ve got that guide for vanilla buttercream frosting, but for these bars, we’re keeping it super simple.
For the Chocolate Cookie Crust
- 1 1/2 cups crushed chocolate sandwich cookies—you know, like Oreos without the cream filling, unless you leave it in, I won’t stop you! (This is about 30 cookies.)
- 1/4 cup unsalted butter, melted—make sure it’s measured right after melting!
For the Creamy Mint Filling
This is where the magic color happens! Don’t skip the extracts; they make these bars taste just like those special holiday mint treats.
- 8 ounces cream cheese, softened—this is critical, they must be room temperature so they mix without lumps!
- 1 cup powdered sugar (sift it if you have time, but honestly, I just whisk the bag first).
- 1 teaspoon vanilla extract—just a splash of the good stuff.
- 1/2 teaspoon peppermint extract—this gives that wonderful cooling sensation. Go up to 3/4 teaspoon if you really love that intense mint!
- 1/4 teaspoon green food coloring (totally optional, but it makes them look so festive).
- 1 cup heavy whipping cream, cold—must be icy cold to whip up right!
For the Rich Chocolate Topping
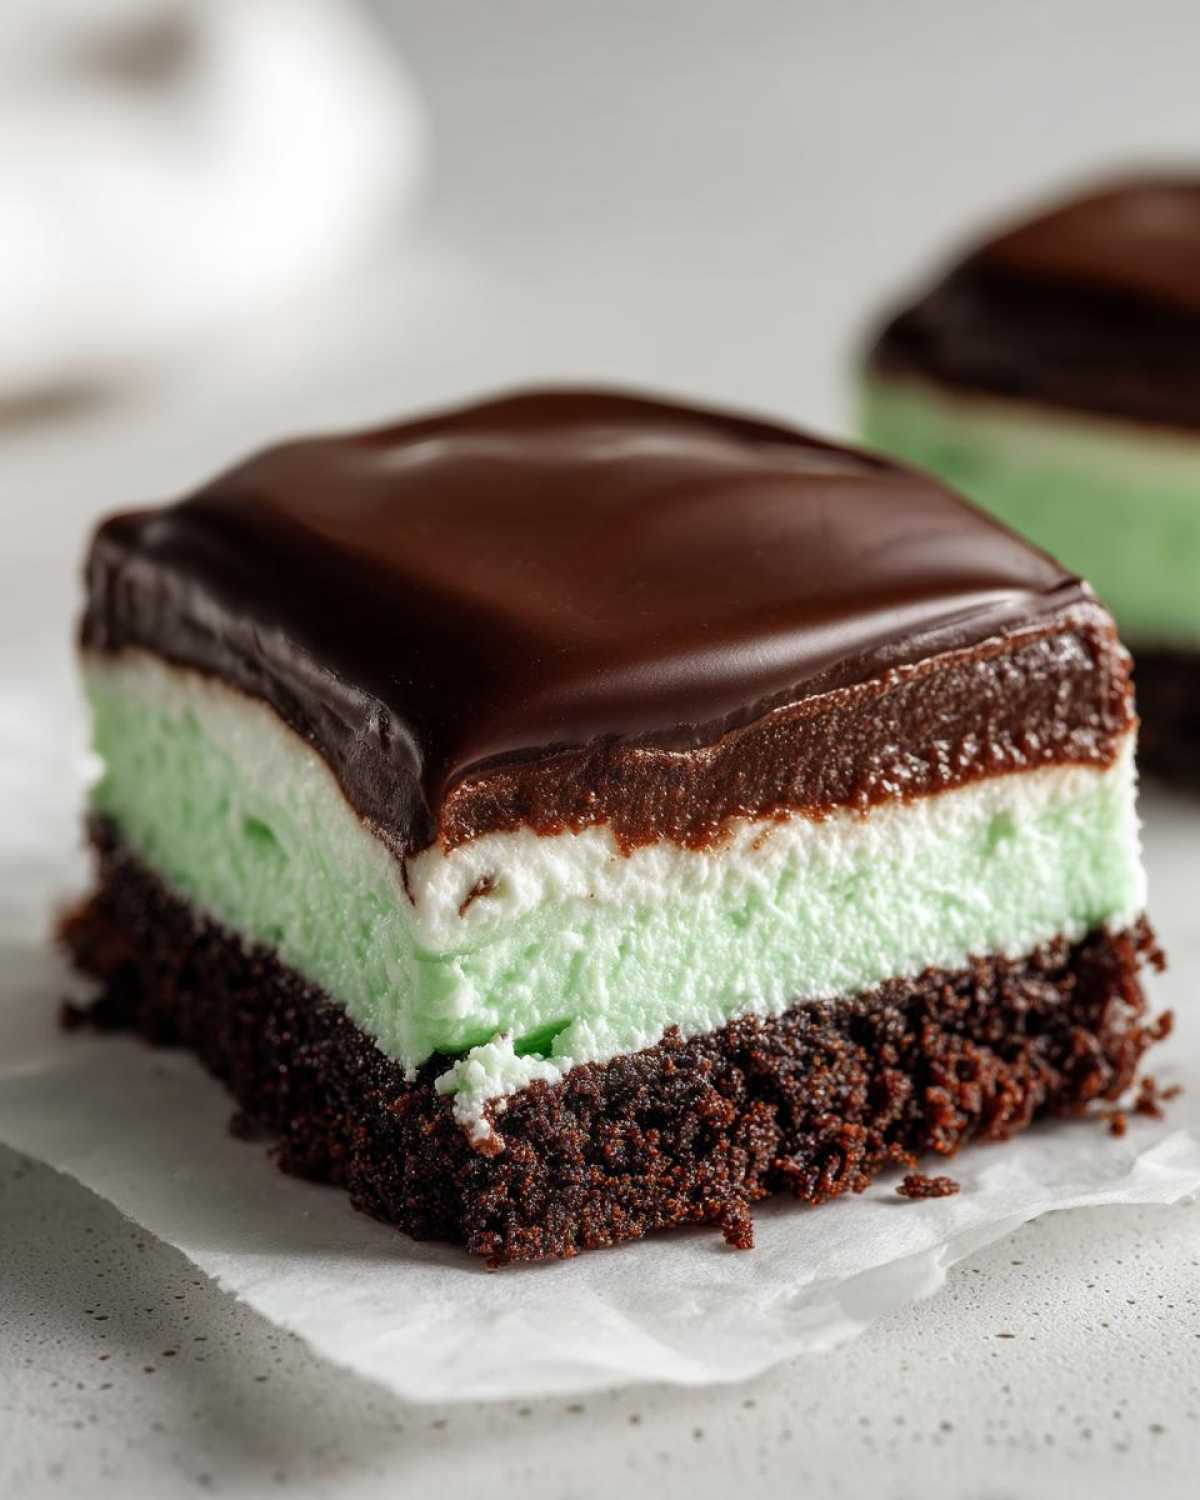
This topping sets up perfectly because it’s basically a simple, silky ganache. It’s what makes these the ultimate rich chocolate mint slice.
- 4 ounces semi-sweet chocolate, chopped—use chopped baking bars, not chips, for the smoothest melt!
- 1/4 cup heavy cream (this is the cream for melting the chocolate, not the cream you whipped for the filling).
Step-by-Step Instructions for No-Bake Chocolate Mint Icebox Bars
Alright, putting these together is an absolute joy because you get to see the layers build up, almost like making a tidy little edible sculpture! The key here—and this is vital for keeping these beautiful as **Layered freezer desserts**—is respecting the chill time. Don’t rush the freezing or the chilling, or things get messy fast. You’ll need an 8×8 inch pan for perfect squares!
Preparing the Pan and Chocolate Crust
First things first, we need to make sure these bars don’t try to hug the pan when it’s time to serve them! Take your 8×8 inch pan and line it with parchment paper. I always make sure I leave a generous overhang on two opposite sides—these paper ‘slings’ are your best friend when getting the set bars out later.
Next, mix your crushed cookies and melted butter. You want it to look like damp, dark sand. Now, here’s my little expert tip: after you dump the crumbs into the pan, grab the bottom of a measuring cup or a flat glass and just press that crust down *hard*. Really pack it in there! A solid crust means a solid base for our creamy layers. Once it’s perfectly flat and firm, pop that pan into the freezer while you start whipping up the mint layer.
Creating the Mint Cream Filling
While that crust chills, let’s make the star: our mint center! Get your softened cream cheese into a large bowl. Beat it with that powdered sugar, vanilla, and peppermint extract until it’s totally smooth. You should have zero lumps! If you’re using the green coloring, mix it in now until you get that lovely pale green color we all expect from a great mint dessert.
Now for the fluff factor! In a separate, clean bowl, beat that cold heavy whipping cream until you get nice, stiff peaks. This takes a minute or two. The most important move here is to *gently* fold this whipped cream into the cream cheese mixture. Do not stir aggressively! You want to keep all those air bubbles in there so you end up with gorgeous, fluffy **Creamy no bake bars**, not heavy cream cheese sludge. Fold until *just* combined, no more!
Assembling and Chilling the Layers
Pull your crust out of the freezer—it should be rock hard now. Carefully spread that beautiful mint filling evenly over the crust. Use an offset spatula if you have one, but the back of a spoon works fine too, just be gentle so you don’t drag the crumbs up! Once it’s looking smooth, it needs another chill. Put the whole pan back into the freezer for at least 30 minutes. This firms up the mint layer just enough so the chocolate topping doesn’t sink right through it.
While that’s setting, we make the topping. This is super fast! Put your chopped chocolate in a heatproof bowl. Heat the smaller portion of heavy cream (the 1/4 cup) on the stove until it just starts to simmer—don’t let it boil over! Pour that hot cream right over your chocolate. Let it sit there—don’t touch it—for five full minutes. Then, whisk it slowly until you have a smooth, glossy ganache. Check out my recipe for easy weeknight bolognese sauce if you want another example of following simple heating steps for the best result!
Finishing and Slicing Your No-Bake Chocolate Mint Icebox Bars
Time for the grand finale topping! Pour that warm ganache right over your chilled mint layer. Tilt the pan gently to get even coverage edge-to-edge. Smooth the top quickly before it cools down too much.
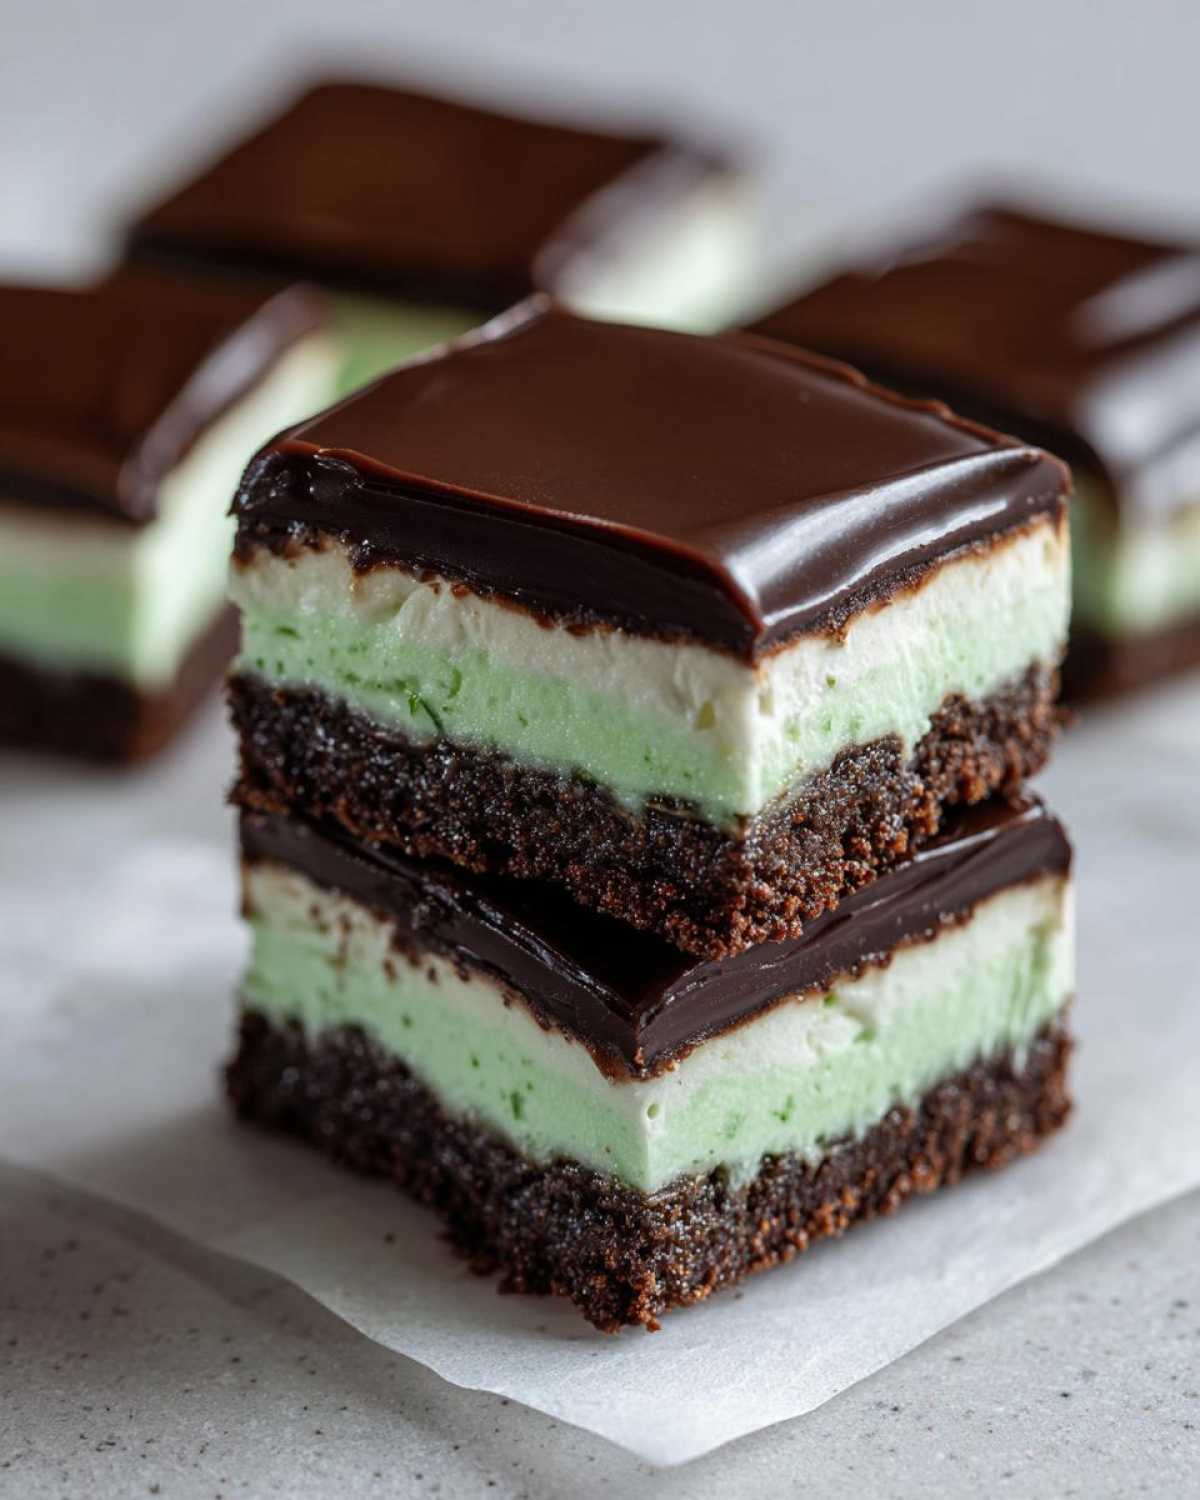
Now, we wait. This is the hardest part! Cover the pan loosely with plastic wrap (make sure the wrap isn’t touching the chocolate!) and get these into the refrigerator for a minimum of 4 hours. Honestly, overnight is best so the topping is completely firm and sliceable. When it’s time to serve, use those parchment paper overhangs to lift the entire block of dessert out onto a cutting board. Wipe your sharpest knife with a warm cloth between each cut—that’s the trick to truly clean slices for your **No-Bake Chocolate Mint Icebox Bars**!
Tips for Perfect No-Bake Chocolate Mint Icebox Bars
I’ve made these so many times I practically have them memorized, and over the years, I’ve picked up a few tricks to make sure these bars turn out absolutely perfect every single time. You want that strong mint flavor, right? And you definitely want that topping to snap instead of just squishing.
When I was testing, I realized the quality of the chocolate you use for the topping makes a massive difference. Since this is just chocolate and a little cream, use a baking bar that you genuinely enjoy eating plain. Don’t skimp on the chocolate here; it’s the strongest flavor besides the mint!
If you’re making these during the holidays when you want that *intense* cool sensation, go ahead and boost that peppermint extract! I noted that 3/4 teaspoon works wonders. But be careful if you are making a batch for kids or people sensitive to strong mint—staying at 1/2 teaspoon keeps it pleasantly refreshing. These little adjustments really elevate these **no bake chocolate mint recipes no oven** from good to legendary.
Also, remember what I said about slicing? It’s worth repeating! If you find your bars are just too soft to cut cleanly, give them an extra hour in the freezer before serving. A quick 2 hours in the deep freeze will make them much firmer. Then, when you bring them out to serve, let them sit on the counter for about 10 minutes before slicing. This lets the cream cheese filling soften just *slightly* to that perfect texture while keeping the topping nice and firm. It’s all about timing!
If you’ve ever struggled with muffins that refuse to bake evenly, you might want to check out my guide on making the best moist and fluffy blueberry muffins next—it talks a lot about temperature consistency, which is kind of what we are faking here with our chilling times!
Ingredient Notes and Substitutions for No-Bake Mint Chocolate Recipes No Oven
I know everyone has their own little stash of pantry staples, and sometimes you look at a recipe and think, “Darn, I’m out of X, can I use Y?” Since we are keeping this recipe simple and oven-free, most substitutions are pretty straightforward. But we have to protect the integrity of that cream layer, right? These aren’t just any no bake chocolate mint recipes no oven; they’re structured desserts!
For instance, if you don’t have chocolate sandwich cookies for the crust, you can absolutely use plain chocolate wafers or even graham crackers. If you use graham crackers, though, you might want to sneak in an extra tablespoon of butter to make sure that crust holds together well. It won’t have that deep dark chocolate base, but it will still be totally delicious and crunchy.
If you are trying to avoid artificial colors, please, go right ahead! The mint flavor comes entirely from the extract, so you don’t need the green food coloring for taste whatsoever. The bars will just have a creamy off-white filling instead of vibrant green, which is perfectly fine, especially if you’re serving them outside of the holidays.
Also, about the extracts! If you happen to have both peppermint and spearmint extracts, mixing half of each gives a slightly softer, less intense mint profile. I learned that trick when my nephew said peppermint was a little too strong for him. That’s the beauty of making your own desserts; you get to tailor every element!
Speaking of tailoring, if heavy cream is hard to find or you just want a slightly lighter filling, you *can* try substituting some of the heavy cream (whipped) with Cool Whip, but you have to be extra careful folding it in. Cool Whip is already airy, so fold it with a very light hand, or you’ll deflate all that lovely volume we worked so hard to beat into the cream cheese base. If you’re looking for other easy baking swaps, check out my guide on easy peanut butter cookies—swapping fats is sometimes trickier, but here, we are mostly dealing with textures!
Storage and Make Ahead Tips for Your Icebox Bars
One of the absolute best things about these No-Bake Chocolate Mint Icebox Bars is that they are practically begging you to make them ahead of time! They actually get better after a day in the cold because the crust and the mint layer really have time to mingle and set up properly. Honestly, these are my favorite types of make ahead chocolate mint treats.
Since these bars rely on chilling rather than baking, our storage technique is all about maintaining that perfect texture—firm but never icy, creamy but never runny. If you are prepping for a big holiday gathering or just want an easy dessert ready for when the craving hits, listen up!
Refrigeration for Short-Term Freshness
For short-term storage, meaning you plan to serve these within the week, the refrigerator is your best friend. After you’ve sliced them up (and I truly recommend slicing before storing so you don’t smash the layers!), place the squares into an airtight container.
Layer them carefully! If you have a large batch, use a piece of parchment paper between the layers of bars to prevent the chocolate topping from sticking to the bottom of the next layer. They should stay wonderfully fresh and delicious for about 5 to 7 days in the fridge. The mint layer stays unbelievably creamy, and the crust stays nicely crisp.
If you need a reminder on making things ahead for longer keeps, you might find my notes on storing moist date nut bread helpful—the principles of keeping moisture in are surprisingly similar!
Freezing for Long-Term Keeping
If I’m being honest, I usually make a double batch just so I can toss one pan directly into the deep freeze. These are fantastic as quick refrigerator desserts, but they are even better as emergency freezer stash items.
Here’s the trick for freezing them perfectly: Once you have poured the ganache topping, put the *entire, unsliced* pan back into the freezer for at least two hours. You want that topping to be completely solid, not just chilled.
Once totally firm, then you can quickly lift the whole slab out using the parchment slings and slice it into your desired squares. Wrap each individual bar tightly—and I mean *tightly*—in plastic wrap first. Once wrapped individually, stack them in a heavy-duty freezer bag or an airtight container. This double-wrapping method ensures you don’t get any freezer burn on the creamy layers or that beautiful chocolate top.
Thawing for the Best Texture
When you finally pull these amazing frozen treats out, you can’t just serve them straight from the freezer unless you want a super hard, maybe slightly icy experience. We want them soft and decadent!
To thaw properly, move the wrapped bars from the freezer to the refrigerator overnight—that’s about 8 to 10 hours. This slow thaw allows the cream cheese layer to come back to that perfect, rich, melt-in-your-mouth texture without getting watery.
If you’re in a pinch and need them sooner, you can thaw them on the counter for about 30 minutes, but move them to the fridge after that initial 30-minute window to prevent the mint layer from getting too soft and losing its shape. Honestly, the overnight fridge thaw yields layered freezer desserts that taste exactly like you just made them!
Serving Suggestions for Rich Chocolate Mint Slice
So, you’ve successfully navigated the chilling times, lifted your perfect No-Bake Chocolate Mint Icebox Bars out of the pan, and cut them into incredibly uniform squares. Congratulations! Now, how do we make the presentation for these amazing potluck friendly chocolate bars even better?
These bars are already rich and dense—they don’t necessarily *need* anything alongside them, but a little something extra never hurt anyone, right? When I bring these to a party, I like to do two simple presentation tricks to make them look absolutely professional.
First, when slicing, I always wipe my knife with a warm, damp cloth before each cut, as I mentioned before. This leaves the chocolate topping edges unbelievably clean, so when people see them laid out on a platter, the layers look super crisp. I usually arrange them in slightly staggered rows on a white serving platter to make that green layer really pop!
If you happen to be serving these after a heavy meal, you might want a light, acidic contrast. A small bowl of fresh raspberries or thinly sliced strawberries served alongside them brightens everything up beautifully. The tartness cuts right through the richness of the chocolate and cream cheese mixture. They look gorgeous next to each other!
As for drinks, you can’t go wrong in two directions. Either lean into the mint and chocolate theme with a decadent hot chocolate or a chilled glass of milk (yes, even as an adult, a cold glass of milk with this kind of bar is heaven!). Or, if you are having an evening gathering, a little espresso or a rich black coffee is the perfect counterpoint to the sweetness of the ganache. It’s a classic pairing for a reason!
If you ever need a savory companion to balance out a big dessert platter, I have a fantastic recipe for easy homemade garlic breadsticks—they disappear fast at parties!
Seriously though, these bars are so reliably delicious and easy to transport that they become the star of any spread. Enjoy watching everyone rave about your perfect, oven-free rich chocolate mint slice!
Frequently Asked Questions About No-Bake Chocolate Mint Icebox Bars
I figured we might have a few lingering questions about these no-bake wonders, because when you’re dealing with cold desserts, timing is everything! I’ve pulled together the things people ask me most often about turning these into foolproof quick refrigerator desserts.
Can I skip the chocolate cookie crust in these No-Bake Chocolate Mint Icebox Bars?
That’s a great question if you’re watching your carb intake or just feel like going straight to the creamy center! Yes, you absolutely can skip the crust and make **crustless mint desserts** instead. If you do this, you’ll want to line that pan extra meticulously with parchment because the mint layer will be directly against the pan surface.
However, I need to give you a little heads-up: the crust isn’t just for flavor; it adds necessary structure. Without it, your bars will be much softer and might start to slump when you go to cut or serve them. If you skip it, I highly recommend freezing the bars for an extra hour before slicing to help them hold their shape better.
What is the best way to achieve firm layers for these Quick Refrigerator Desserts?
This is probably the *most* important part of the whole process for these **quick refrigerator desserts**. If you want those distinct, clean layers that look so pretty when you slice them, you have to respect the chill time for each layer!
The crust needs enough time in the freezer (about 10-15 minutes) so it doesn’t absorb moisture from the filling you pour on top. The mint layer needs that minimum 30-minute chill in the freezer so it’s firm enough to support the slightly heavier chocolate ganache layer. If you skip that step, the ganache just melts right into the mint cream, and you get one big, messy brown layer instead of three beautiful ones.
And finally, the entire bar needs that minimum of 4 hours in the fridge—or better yet, overnight! That’s when the creamy filling firms up nicely, and the ganache sets to a satisfying snap rather than a squish. If you have time, always lean toward the longer chilling period!
If you’re interested in other recipes where chilling is key, you need to see my recipe for the no-bake creamy Oreo pie—it follows the exact same layering rules!
Estimated Nutrition Information for One No-Bake Chocolate Mint Icebox Bar
Okay, I’m going to be totally honest here: these **No-Bake Chocolate Mint Icebox Bars** are a total indulgence. They are rich, they are creamy, and they are made with butter, cream cheese, and real chocolate, so we aren’t looking for a light salad here! But hey, we deserve a treat, especially one that required zero baking on a hot day.
I ran the recipe numbers through a calculator so we have a general idea of what we’re diving into when we grab a square. Please remember that these numbers are just estimates, since how much you pack the crust or exactly how much chocolate sticks to your spatula can change things! If you’re looking for something truly healthier, you might want to check out my recipe for fudgy black bean brownies next time, but for pure, unadulterated minty chocolate joy, these bars are winners.
Here is the estimated breakdown for one generous serving (one bar, cut from a 16-square yield):
- Serving Size: 1 bar
- Calories: Approximately 280
- Sugar: Roughly 22 grams
- Fat: Around 19 grams total
- Saturated Fat: About 11 grams (That’s the butter and cream cheese talking!)
- Carbohydrates: About 26 grams
- Protein: 3 grams
- Sodium: 110 milligrams
Overall, they pack a punch of richness, which is exactly what you want in a decadent icebox bars dessert. Enjoy every single bite!
PrintNo-Bake Chocolate Mint Icebox Bars
Make these simple, layered bars featuring a chocolate crust, a creamy mint filling, and a rich chocolate topping. These bars require no oven time.
- Prep Time: 25 min
- Cook Time: 0 min
- Total Time: 4 hr 25 min
- Yield: 16 bars
- Category: Dessert
- Method: Chilling
- Cuisine: American
- Diet: Vegetarian
Ingredients
- 1 1/2 cups crushed chocolate sandwich cookies (about 30 cookies)
- 1/4 cup unsalted butter, melted
- 8 ounces cream cheese, softened
- 1 cup powdered sugar
- 1 teaspoon vanilla extract
- 1/2 teaspoon peppermint extract
- 1/4 teaspoon green food coloring (optional)
- 1 cup heavy whipping cream, cold
- 4 ounces semi-sweet chocolate, chopped
- 1/4 cup heavy cream
Instructions
- Line an 8×8 inch baking pan with parchment paper, leaving an overhang on two sides for easy removal.
- Combine the crushed cookies and melted butter in a bowl. Press this mixture firmly into the bottom of the prepared pan to form the crust. Place the crust in the freezer while you prepare the filling.
- In a large bowl, beat the softened cream cheese, powdered sugar, vanilla extract, and peppermint extract until smooth. Mix in the green food coloring, if using.
- In a separate bowl, whip the 1 cup of cold heavy cream until stiff peaks form. Gently fold the whipped cream into the cream cheese mixture until just combined.
- Spread the mint filling evenly over the chilled crust. Return the pan to the freezer for at least 30 minutes to firm up.
- Prepare the topping: Place the chopped chocolate in a small, heatproof bowl. Heat the 1/4 cup of heavy cream in a small saucepan until it just begins to simmer. Pour the hot cream over the chocolate. Let it sit for 5 minutes, then whisk until smooth to create a ganache.
- Pour the chocolate ganache over the set mint layer. Spread evenly.
- Cover the pan loosely and refrigerate for at least 4 hours, or until the topping is firm.
- Use the parchment paper overhang to lift the bars from the pan. Cut into squares before serving.
Notes
- For a firmer bar, freeze the finished product for 2 hours before slicing.
- If you prefer a stronger mint flavor, increase the peppermint extract to 3/4 teaspoon.
- Use high-quality chocolate for the best topping flavor.
Nutrition
- Serving Size: 1 bar
- Calories: 280
- Sugar: 22
- Sodium: 110
- Fat: 19
- Saturated Fat: 11
- Unsaturated Fat: 8
- Trans Fat: 0
- Carbohydrates: 26
- Fiber: 1
- Protein: 3
- Cholesterol: 45