

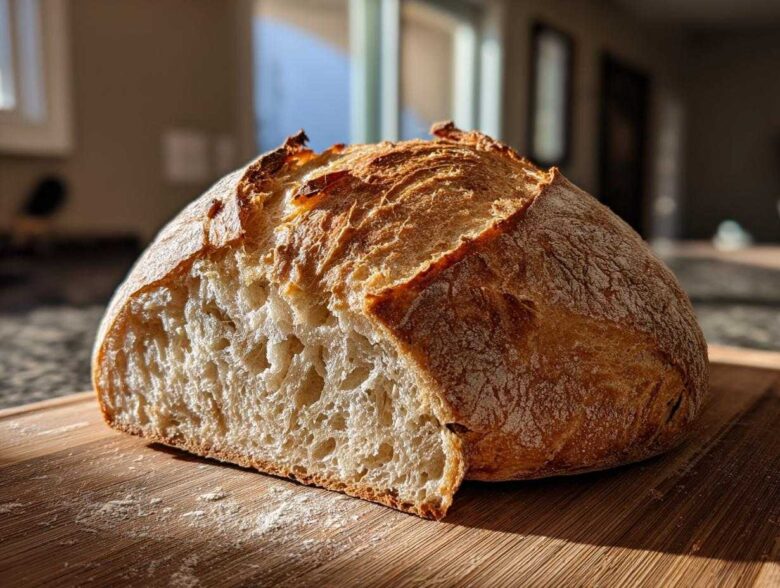
Oh, man, you know that feeling? You pull out your homemade loaf, expecting that glorious shatter when you slice it, but instead, you get that sad, soft chew? It just sinks your heart! I spent years fighting with recipes that promised rustic perfection but delivered squishy pillows. But don’t you worry one bit anymore. We’re cracking the code here to get rock-solid, authentically crackly **Crispy Italian Bread** using nothing more than your standard home oven. After years of chasing that perfect, audible crackle, I finally realized the secret lies totally in two things: super high hydration and making sure you pack in as much steam as humanly possible during the initial bake. Trust me, this no-knead method combined with my steam trick guarantees the crust you dream about.
If you’re ready to stop making chewy bread and start making bread that sounds like walking on autumn leaves when you tap it, check out my favorite breadstick recipe for practice while you wait for the dough to ferment!
Why This No-Knead Recipe Delivers the Ultimate Crispy Italian Bread
So, what makes this specific loaf the champion of crunch? It all comes down to fighting flatness and trapping moisture just long enough to create that glass-like exterior. We’ve said goodbye to kneading because, honestly, sometimes less manipulation means a better final texture for rustic loaves. This recipe directly tackles why your homemade loaves end up feeling soft or doughy right out of the oven.
When you nail these two core elements, you get that spectacular, shatteringly crisp result every single time you make this **Crispy Italian Bread**.
- We ditch excess kneading for a softer, more aerated crumb structure.
- We use high heat paired with mandatory steam injection. This is non-negotiable for that perfect crust!
- The long, slow fermentation develops flavor that reminds you of those amazing rustic loaves you find in Italy.
If you’ve been struggling with softness, take a peek at my guide for making perfect French bread—the principles for steam are almost identical!
The Magic of Wet Dough Bread Making and Hydration
If you look at the ingredients, you’ll see we use a lot of water relative to the flour. That’s what we call **wet dough bread making**! Water is your friend here. More water means the dough expands more dramatically when it hits the oven heat—that’s the oven spring. This extreme expansion creates a very thin cell wall structure, and thin walls turn brittle and crisp when baked properly. Don’t worry if the dough looks messy; that sticky texture is exactly what we want!
Oven Spring Bread Secrets: How Steam Creates the Crisp
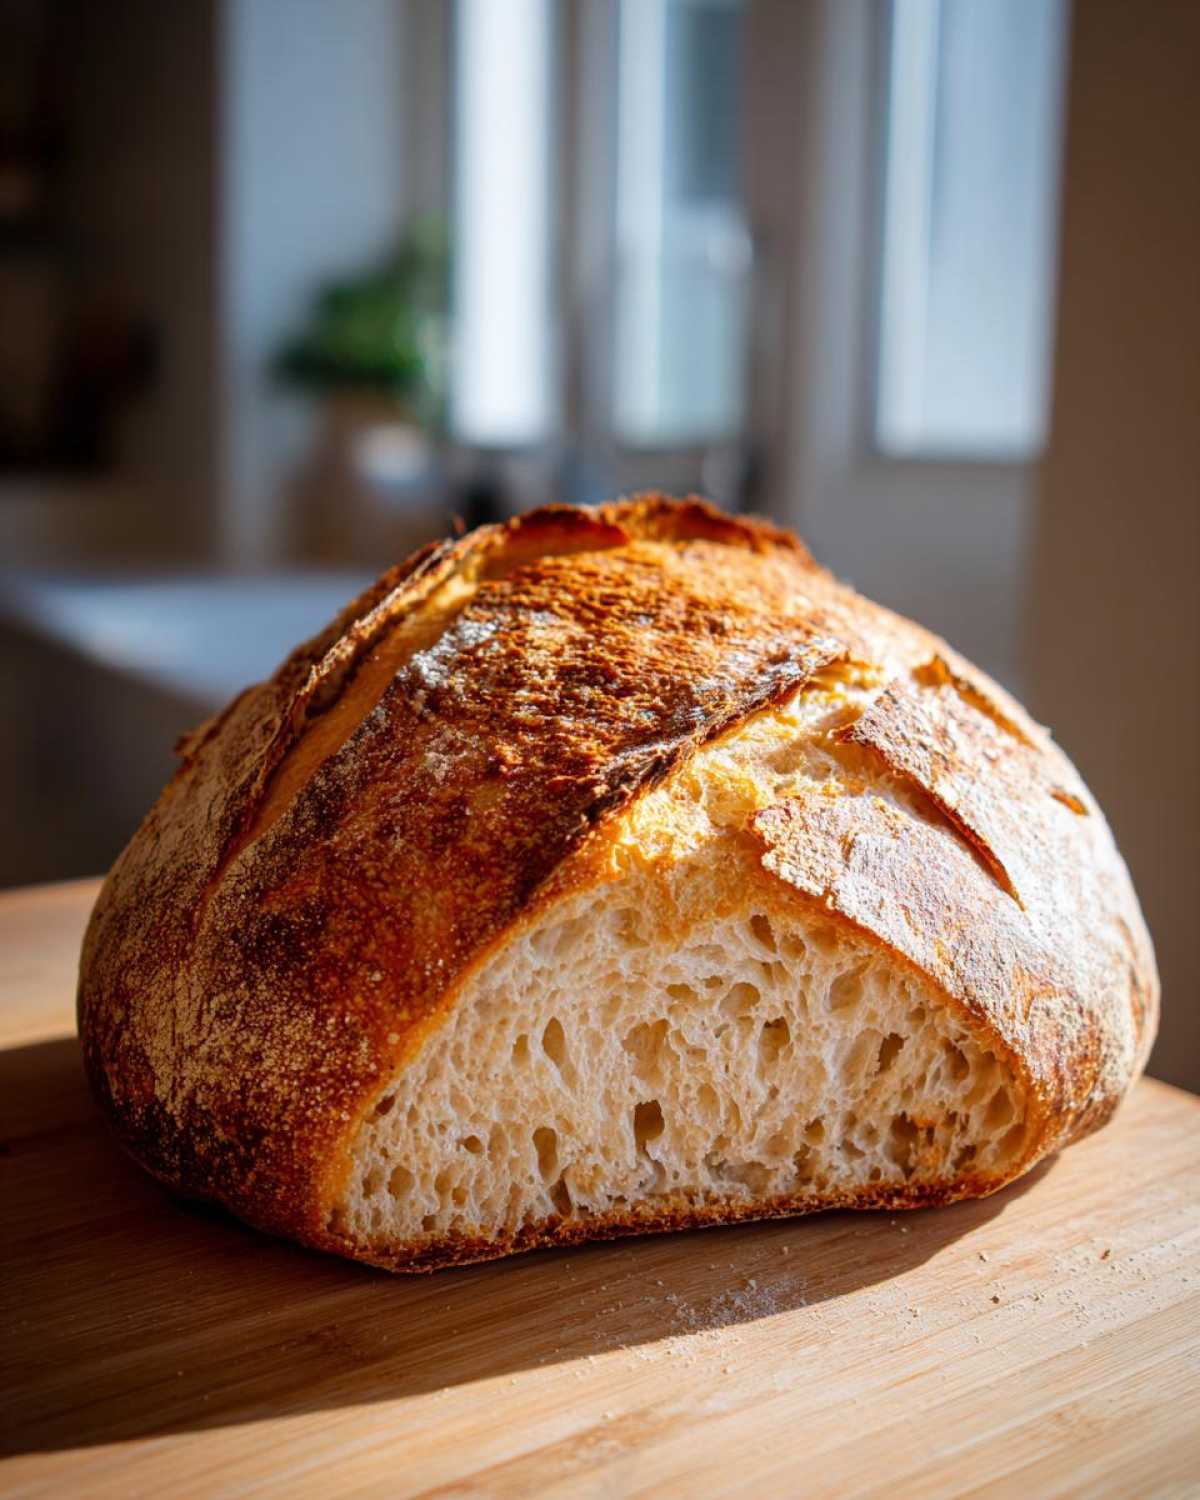
Steam is the secret weapon to guarantee a **how to get crispy bread crust**. In professional ovens, steam is pumped in, but we fake it at home! Steam keeps the outer surface of the dough moist during those first crucial 20 minutes. This delays crust formation, allowing the loaf to grow to its maximum volume. Once the steam is released, the exposed moisture rapidly evaporates, leaving behind a dry, papery, incredibly brittle shell. These **oven spring bread secrets** are what transform a regular loaf into a masterpiece!
Ingredients for Your Crispy Italian Bread
Okay, for this kind of dramatic crust, what we put *in* the bowl matters a lot! Remember, we aren’t using any fat here, which helps keep that crust totally clean and crackly. You need bread flour, which has a nice bit of protein, but if you can find Italian “00” flour, go for it! It gives a beautiful chew, though regular bread flour works just fine for our rustic bake. Don’t skimp on the salt; it controls our long ferment. Here’s exactly what you need:
- 3 cups Bread Flour (or Italian ’00’ flour—that’s your expert choice!)
- 1 1/2 cups Warm Water (about 105°F—temp matters for the yeast!)
- 1 teaspoon Instant Dry Yeast
- 1 1/2 teaspoons Fine Sea Salt
- 1/4 cup Semolina flour (you just need this for dusting the board, trust me!)
If you want to see how these fresh ingredients shine in a different way, check out my Italian Herb Cheese Bread recipe; it uses similar flavor foundations!
Step-by-Step Instructions for Perfect Crispy Italian Bread
This is where the magic happens, but you need patience for this part. This recipe is less about elbow grease and more about waiting! Seriously, the 18-hour rest is what gives this loaf such an amazing depth of flavor—it’s like fermentation does the kneading for you. Remember, we are making **Crispy Italian Bread** here, so every step that builds structure is important, especially that initial bake time inside the hot vessel.
Also, before you even mix step one, get your oven hot! You absolutely must preheat your Dutch oven or heavy baking pan inside the oven while you are mixing the dough. We need that metal screaming hot to shock the dough into rising beautifully.
Mixing and the Long Fermentation Rest
Start by gently waking up your yeast in the warm water—a little foam means it’s happy! Then, toss in the salt and the flour and just mix it until you have a shaggy mess. And here is the big rule: do not knead the dough! I mean it! You want shaggy and sticky. Cover that bowl up tight, find a warm spot, and just forget about it for 12 to 18 hours. It sounds crazy, but this long rest is non-negotiable for developing the structure needed for that great flavor and thin crust.
Shaping and Preparing for the Steam Bake
When you come back the next day, your dough will look like a bubbly swamp monster, and that’s fantastic! Lightly dust your counter with that semolina flour; it acts like tiny little ball bearings for shaping. Gently scrape the dough out—don’t punch it down! Just fold it over itself a couple of times to create a rough round. This keeps all those precious air pockets safe. Pop that dough right onto a piece of parchment paper. Cover it loosely and let it relax for one final 30-minute proof. While that’s happening, your Dutch oven should be fully preheated inside your 475°F oven.
Baking with Steam: The Key to a Crackly Crust Exterior Tips
This is the big moment! Carefully pull out your screaming hot Dutch oven. Use the parchment paper like a sling to gently lower your dough right into the hot pot. Now, for the steam step—grab a metal tray and place it on the rack below your Dutch oven. Quickly pour one cup of boiling water into that hot tray and shut the door fast! The resulting steam is one of the best **crisp bread exterior tips** I know. Bake it covered for 30 minutes. Then, carefully remove the lid (and the water pan if you used one) and drop the temperature to 450°F. Bake for another 15 to 20 minutes until it’s deeply browned and sounds hollow. Once it’s done, pull it out and let it cool completely on a wire rack!
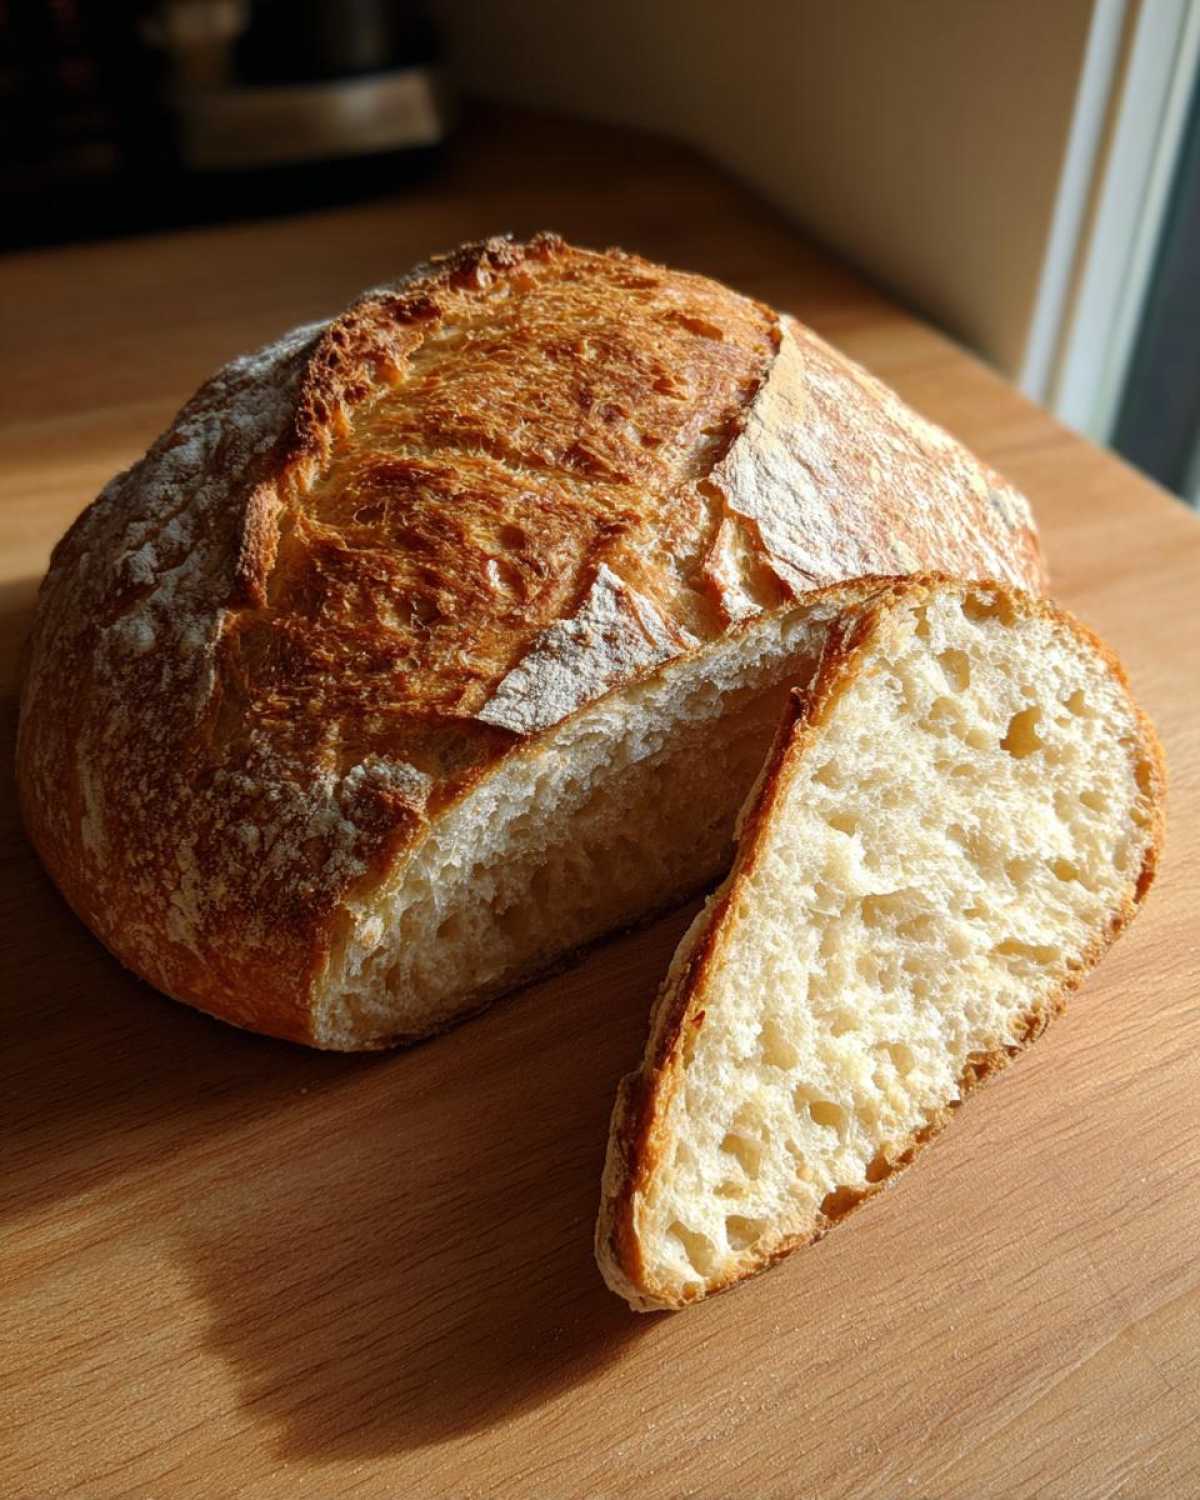
If you are looking for other textured loaves, you should check out my recipe for the perfect crusty Italian bread—it uses similar principles!
Expert Tips for Your Homemade Crusty Italian Loaf
You’ve made the dough, you’ve steamed the oven—but here are a few final nuggets of wisdom to ensure your **homemade crusty Italian loaf** reaches peak crispiness. Seriously, these are the little things that take your bread from ‘good’ to ‘I need to open a bakery’ level!
First off, hydration is everything. If you feel nervous about that super wet dough, try increasing the bread flour by just one tablespoon next time. It makes the dough slightly more manageable while still keeping it high enough for that thin crust development. Don’t mess with the ratio too much, though, or you lose the effect!
Now, if you don’t have one of those heavy cast iron Dutch ovens, don’t panic! You can still get that essential steam. You need a very hot baking surface, like a pizza stone or even a heavy baking sheet flipped upside down. Place your bread right on that hot surface (using parchment paper, of course). Then, and this is key, throw a handful of ice cubes into a hot, shallow metal pan you placed on the bottom rack *just* as you slide the loaf in. That burst of ice hitting the heat creates the steam we need. It works wonders!
Also, remember that cooling time is part of the baking process. You absolutely must let your finished loaf cool completely on a wire rack. Slicing into hot bread traps steam inside, which turns that beautiful, crackly shell soft again. Patience pays off!
If you want a quick taste test while you’re waiting for these big loaves to cool, you have to try my recipe for easy garlic and parmesan breadsticks—they use a similar quick-mix method!
Troubleshooting Common Crispy Italian Bread Issues
Sometimes, even when we follow the science, bread just acts stubborn, right? The biggest complaint I hear is still about that crust being too chewable instead of that perfect shatter. Don’t throw that loaf out! It still tastes amazing, and we can fix the texture next time.
If your crust came out soft, it usually means two things: not enough heat or not enough time exposed to dry heat. For your next bake, make sure that Dutch oven preheats for the full 30 minutes—it needs to be scorching! Also, once you take the lid off, don’t be shy about leaving it in the oven another five or ten minutes longer until it’s that deep mahogany color. Color equals crisp!
If your crumb is dense, that’s usually a proofing issue. Did you check your yeast? If your dough didn’t get bubbly during the 18-hour rest, your yeast might have been old, or your water was too hot when you mixed it. Always ensure that rest time is long enough. A dense crumb means those glorious air pockets didn’t form, and those pockets are what create the structure for the light, crisp exterior.
If you want some extra reading on preventing dough collapse, you should look at my tips for making French bread at home; it covers proper oven spring handling too!
Best Italian Bread Techniques for Texture and Flavor
We’ve got the crust sorted out, but what about that deep, complex flavor that makes this feel like an **Authentic Italian bread recipe**? That comes entirely from the long, slow rest we discussed! That 18-hour rest isn’t just for texture; it lets the enzymes in the flour break down starches into simple sugars, which amps up the flavor profile significantly. You just can’t get that kind of depth with a quick, kneaded recipe, period.
When it comes to presentation, you can try some quick scoring! You don’t need crazy artistry for this rustic loaf, but a simple slash right down the center before it goes into the steam works wonders. A good, intentional slash guides where the bread wants to burst open (that’s part of understanding **Italian bread scoring methods**). When you see that crust peel back along your score mark, you know you’ve done everything right to achieve that amazing **Crispy Italian Bread** exterior. If you want to see how scoring works on another loaf, check out my thoughts on making French bread; the science behind the burst is the same!
Storage and Reheating to Maintain Crispy Italian Bread Texture
Okay, this is important: You MUST let your loaf cool completely on a wire rack before you even think about slicing it. Don’t rush this step! If you cut it while it’s warm, all that wonderful steam you trapped escapes weirdly, and your gorgeous crust will go soft faster than you can say ‘baked goods.’ Trust me, waiting is hard, but necessary.
Once it’s totally cool, store it loosely wrapped in a paper bag, not plastic! Plastic traps moisture, which is the enemy of crispiness. If your bread sits overnight and loses a little of that outside crackle, don’t stress! Just pop the whole loaf (or a thick slice) back into a 350°F oven for about five minutes. It reactivates that crisp shell perfectly! If you need more quick snack ideas, check out my easy breadstick recipe; those are great for testing!
Frequently Asked Questions About Making Crispy Italian Bread
Can I skip the steam for Crispy Italian Bread?
Oh, please don’t! I know making that pan of boiling water sounds fussy sometimes, but skipping the steam is the number one reason people end up with soft, tough crusts instead of that perfect crackle. The steam keeps the surface pliable so the bread can fully expand its oven spring. Once it expands, the dry heat takes over and locks in that brittle, crisp exterior. It’s the foundation of this whole recipe!
What’s the difference between ‘crusty’ and truly ‘crispy’ Italian bread?
That’s a great question that trips a lot of home bakers up! ‘Crusty’ usually means thick and chewy, like a standard bakery loaf that’s been sitting out for a day. When we aim for ‘crispy,’ we are aiming for thin, brittle, and shatteringly crackly—the kind that flakes off when you slice it. That requires the high hydration and the steam bath we talk about in the main instructions.
Does this recipe work if I don’t have a Dutch oven?
Not at all! While a Dutch oven is fantastic because it traps the steam so well, you can absolutely achieve a **Homemade crusty Italian loaf** without one. You just need a heavy baking surface like a pizza stone or an upside-down baking sheet to act as your base. Then, you must use that separate, hot pan on the bottom rack filled with ice cubes poured in just as you load the bread. The key is the steam source heating up violently right next to your loaf!
How long does the crispy crust last once baked?
Sadly, the crispness is fleeting, that’s the nature of fresh bread! The crust will be at its absolute peak crunchy perfection within the first hour or two of cooling. After that, it starts to absorb moisture from the inside crumb, softening up. That’s why my tip above about reheating slices in the oven is so helpful when you want to revive that wonderful texture later on. If you want to try another great Italian bake, you can look at my Italian Herb Cheese Bread, though that one is much softer!
Nutritional Estimate for This Rustic Italian Bread
Now, I know most of us are not baking this rustic Italian loaf for a diet plan, but sometimes it’s just good to have a ballpark idea of what we’re eating, right? You should know that these numbers are rough estimates calculated from standard ingredient databases, and they can change based on the exact flour you use or how much flour you dust onto your counter during shaping!
This breakdown is based on slicing the final loaf into approximately 12 standard slices. Since we use no added fats or sugars outside of what’s naturally in the flour, it’s a pretty clean loaf overall!
- Serving Size: 1 slice
- Calories: 180
- Fat: 0.5g (Almost none, thank goodness—no butter or oil means a super crisp crust!)
- Saturated Fat: 0.1g
- Trans Fat: 0g
- Cholesterol: 0mg
Here are the macros:
- Carbohydrates: 38g
- Fiber: 2g
- Sugar: 0.5g (Just natural starches breaking down)
- Protein: 6g
- Sodium: 350mg (This is mostly due to the sea salt we add for flavor control)
See? Not terrible for something that tastes this amazing! It’s a beautifully simple bread, and that lack of added fat helps keep that crust brilliantly crisp. Enjoy!
PrintArtisan No-Knead Italian Bread with Maximum Crust Development
This recipe produces a rustic Italian loaf with a very crisp, crackly exterior achieved through high hydration and steam injection during baking.
- Prep Time: 15 min
- Cook Time: 50 min
- Total Time: 19 hours 5 min
- Yield: 1 large loaf
- Category: Bread
- Method: Baking
- Cuisine: Italian
- Diet: Vegetarian
Ingredients
- 3 cups Bread Flour (or Italian ’00’ flour)
- 1 1/2 cups Warm Water (about 105°F)
- 1 teaspoon Instant Dry Yeast
- 1 1/2 teaspoons Fine Sea Salt
- 1/4 cup Semolina flour (for dusting)
Instructions
- Combine the warm water and yeast in a large bowl. Let stand for 5 minutes until slightly foamy.
- Add the flour and salt to the yeast mixture. Stir with a wooden spoon until a shaggy, wet dough forms. Do not knead.
- Cover the bowl tightly with plastic wrap. Let the dough rest at room temperature for 12 to 18 hours. The dough will become bubbly and increase in volume.
- Lightly dust a work surface with semolina flour. Gently scrape the dough out of the bowl onto the surface.
- Fold the dough over itself a few times to create a rough round shape. Do not punch down or overwork the dough.
- Place the dough onto a piece of parchment paper. Cover loosely with a clean kitchen towel and let it proof for 30 minutes.
- Preheat your oven to 475°F (245°C) with a cast iron Dutch oven or a sturdy baking pan placed inside for at least 30 minutes to get it very hot.
- Carefully remove the hot Dutch oven (or pan). Use the parchment paper to lower the dough into the hot vessel.
- For maximum crispness, place a shallow metal pan on the bottom rack of the oven and pour 1 cup of boiling water into it immediately before closing the door to create steam.
- Bake covered for 30 minutes.
- Remove the lid (or carefully pour out the water from the bottom pan). Reduce the oven temperature to 450°F (230°C).
- Bake uncovered for an additional 15 to 20 minutes, or until the crust is deep golden brown and sounds hollow when tapped.
- Transfer the loaf to a wire rack to cool completely before slicing.
Notes
- High hydration (wet dough) is key to an open crumb and a thin, crisp crust.
- Steam is necessary for the first half of the bake; it keeps the crust soft long enough for the bread to expand fully (oven spring) before hardening into a crisp shell.
- If you do not have a Dutch oven, bake the loaf directly on a preheated pizza stone and place ice cubes in a hot pan underneath to generate steam.
Nutrition
- Serving Size: 1 slice
- Calories: 180
- Sugar: 0.5
- Sodium: 350
- Fat: 0.5
- Saturated Fat: 0.1
- Unsaturated Fat: 0.4
- Trans Fat: 0
- Carbohydrates: 38
- Fiber: 2
- Protein: 6
- Cholesterol: 0