

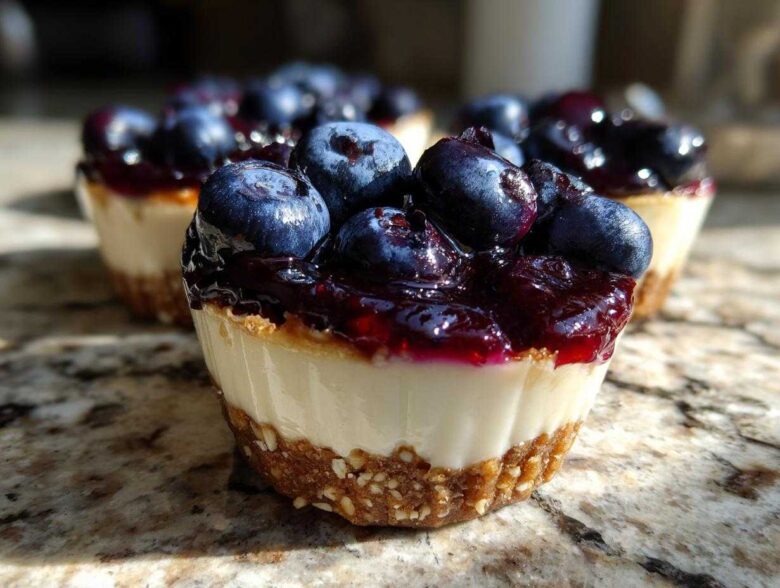
Oh, when the summer heat hits and you just *cannot* turn on the oven, I totally get it! We need something cool, satisfying, and ready in a flash. That’s why these **No-Bake Blueberry Cheesecake Oat Cups** shot right to the top of my go-to list. Seriously, they are a lifesaver when company pops over unexpectedly or when I need a portion-controlled treat before dinner even starts!
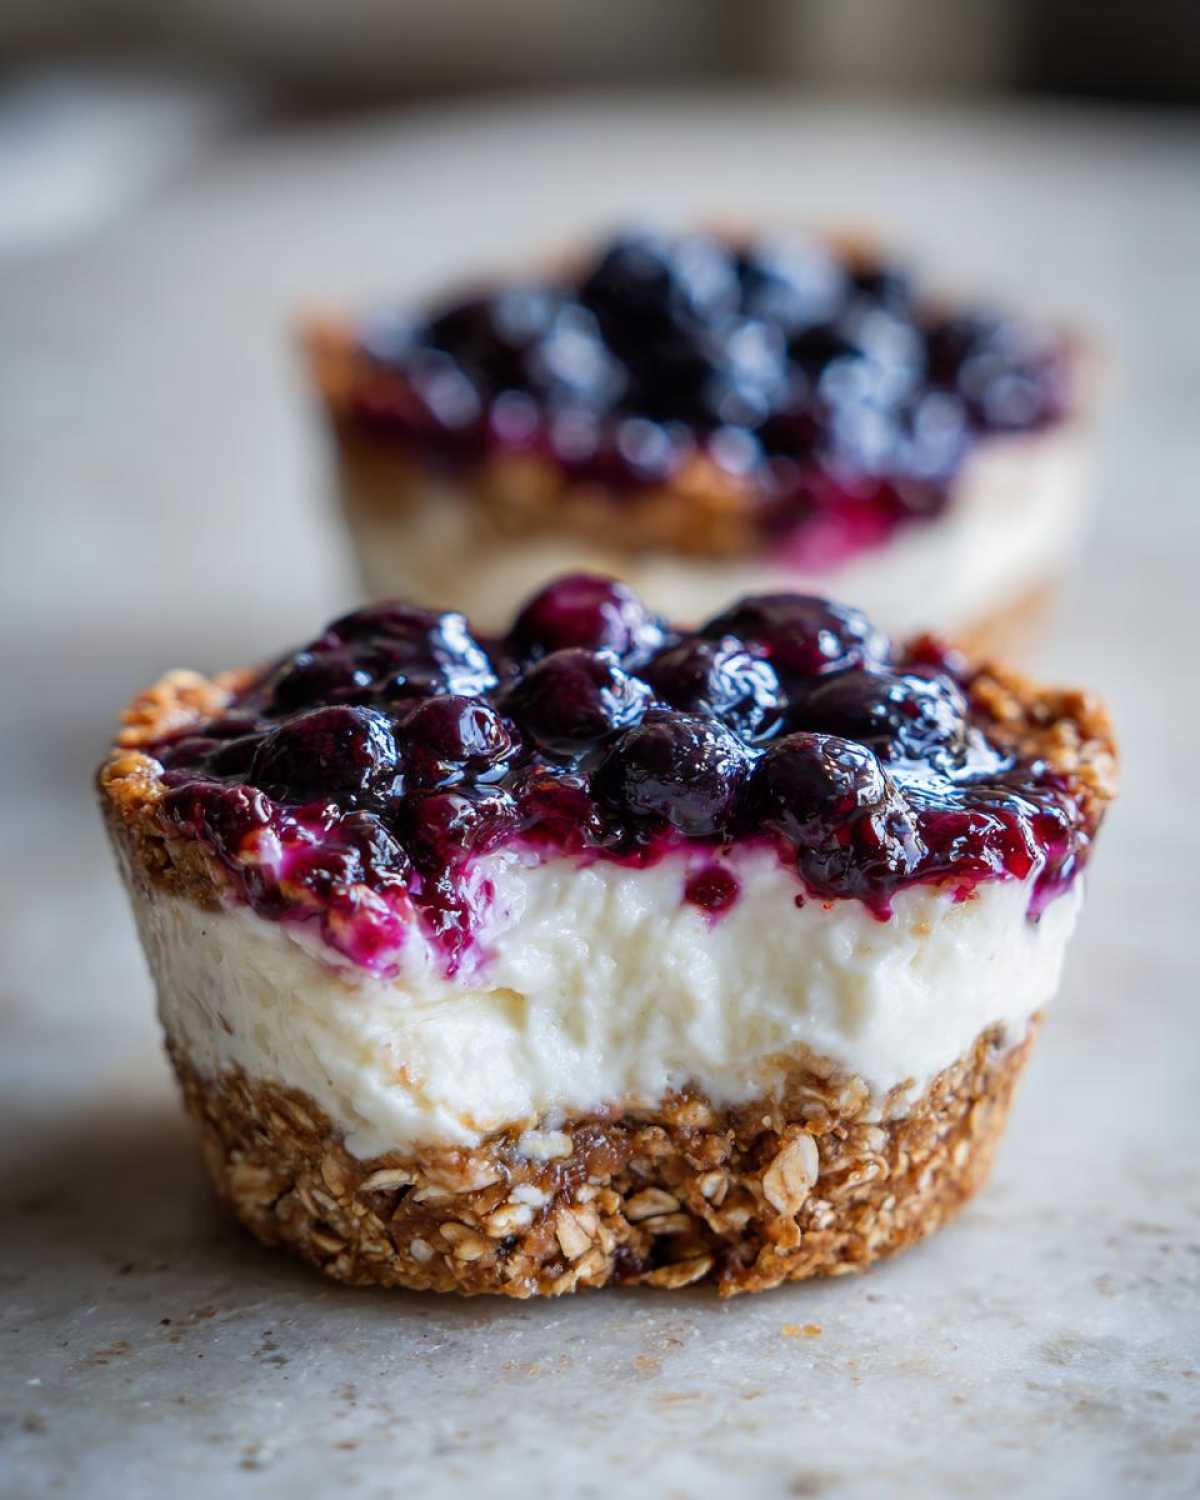
These little cups are everything: you’ve got that satisfying oatmeal crunch on the bottom, the tangiest, creamiest cheesecake filling imaginable, and bright bursts of blueberry flavor. The best part? Zero baking involved. I whip these up right after lunch, and by the time we’re ready for dessert, they’ve firmed up perfectly in the fridge. You can check out more of my quick fixes over at the blog, but this recipe is truly special. Trust me, once you see how fast they come together, this recipe is going straight into your rotation.
Why You Will Love These No-Bake Blueberry Cheesecake Oat Cups
Honestly, I make these because they save me when I’m short on time, but the flavor is what keeps me hooked! They are just so perfectly tailored for easy snacking or quick desserts.
- Zero Oven Time Needed: This is crucial in July! Everything sets up cold, meaning your kitchen stays cool and you can assemble these in under 20 minutes prep time.
- Perfect Portion Control: Since they are made in muffin tins, you get a satisfying individual cheesecake cup every time. No need to fight over who gets the biggest slice of pie!
- Incredible Texture Contrast: You get that slightly chewy, sturdy oat base working against the incredibly smooth, airy cheesecake filling. It’s textural heaven, trust me.
- Make-Ahead Magic: These are fantastic for meal prepping or having ready for unexpected guests. They hold up beautifully in the fridge. You can grab one for a quick healthy snack cup anytime!
- Bright Blueberry Flavor: The combination of the sweet-tangy jam and those fresh berries on top just screams summer. They taste way more complicated than they are.
- Versatile Snack: While they are a glorious dessert, they work just as well as a quick, energizing breakfast cup if you skip the jam layer and add a few extra oats. You can find some other great grab-and-go ideas on my site, like these easy no-bake protein bars!
Essential Ingredients for Your No-Bake Blueberry Cheesecake Oat Cups
Getting these right is all about having the right stuff ready to go. Since there’s no oven doing the heavy lifting, the quality of your ingredients really shines through, especially in that creamy layer. You’ll see I listed all the specifics below. I always recommend grabbing the full-fat cream cheese, honestly. Low-fat just won’t give you that decadent, perfectly dense texture we’re aiming for in these individual cheesecake cups.
- 1 cup rolled oats (not instant, we need some texture!)
- 1/4 cup coconut oil, melted (gives the crust just the right amount of sturdiness)
- 2 tablespoons maple syrup (for natural sweetness in the base)
- 8 ounces cream cheese, softened (make sure this sits out a bit first!)
- 1/4 cup Greek yogurt (adds that lovely tang)
- 1/4 cup powdered sugar (keeps the filling totally smooth)
- 1 teaspoon vanilla extract
- 1/2 cup blueberry jam or preserves (your main flavor boost!)
- 1/2 cup fresh or frozen blueberries (the crowning jewels)
If you want to see how I handle cream cheese in other recipes, like my frosting, check out the tips at my guide on perfect frosting. But for now, make sure your cream cheese is nice and soft—it makes beating it so much easier!
Step-by-Step Guide to Assembling No-Bake Blueberry Cheesecake Oat Cups
Putting these together is seriously like building small desserts layer by layer, and it’s so satisfying. We’re working quickly here because we want everything to stay cold and set up tight. If you’ve ever made one of my no-bake pies, the concept is similar, just way faster and in individual servings! You’ll see me refer back to the process of making a no-bake crust, which you can see in detail in my no-bake Oreo pie guide.
Preparing the Oat Crust Base for Your No-Bake Blueberry Cheesecake Oat Cups
First things first, we need a solid foundation for these little cups. Take your rolled oats, the melted coconut oil, and the maple syrup, and just mix them up in a bowl until every single oat flake looks coated and glossy—you want it to look like damp sand. Now, line your muffin tin with paper liners; this step is non-negotiable for easy removal later! Scoop about two tablespoons of that oat mixture into the bottom of each cup. Here’s the key: press it down *firmly*. A good tamper or the back of a spoon works perfectly. Once they are packed tight, pop the muffin tin into the freezer for just 10 quick minutes so that crust sets up solid before we layer anything wet on top.
Creating the Creamy Cheesecake Filling for No-Bake Blueberry Cheesecake Oat Cups
While the crusts are chilling, we attack the filling. Grab your softened cream cheese—remember, room temperature is your friend here!—and whip it until it’s absolutely lump-free and lightened up. Don’t rush this part! Once it’s smooth as silk, we gradually mix in the Greek yogurt, powdered sugar, and the vanilla extract. Just mix until everything is beautifully unified and creamy. I always check that no gritty sugar lumps remain. If you need a deeper dive into getting that perfect creamy consistency without over-mixing, check out my tips for frosting techniques—it uses the same principles!
Layering and Setting the No-Bake Blueberry Cheesecake Oat Cups
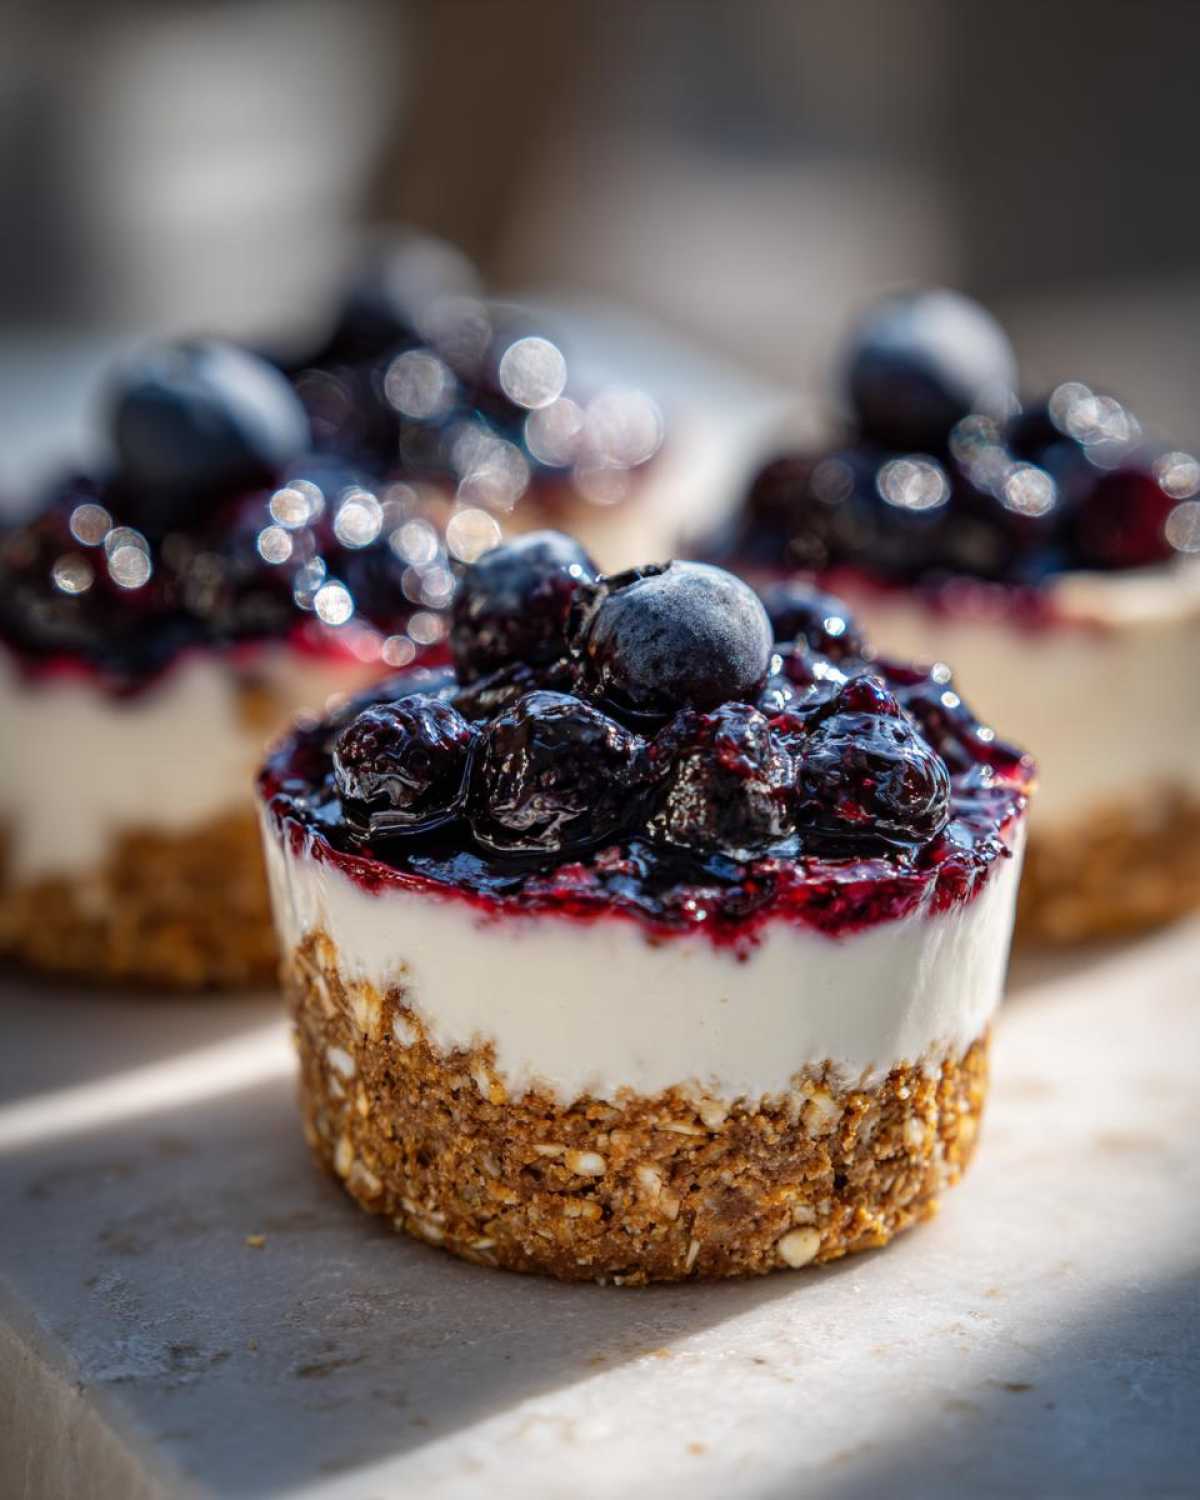
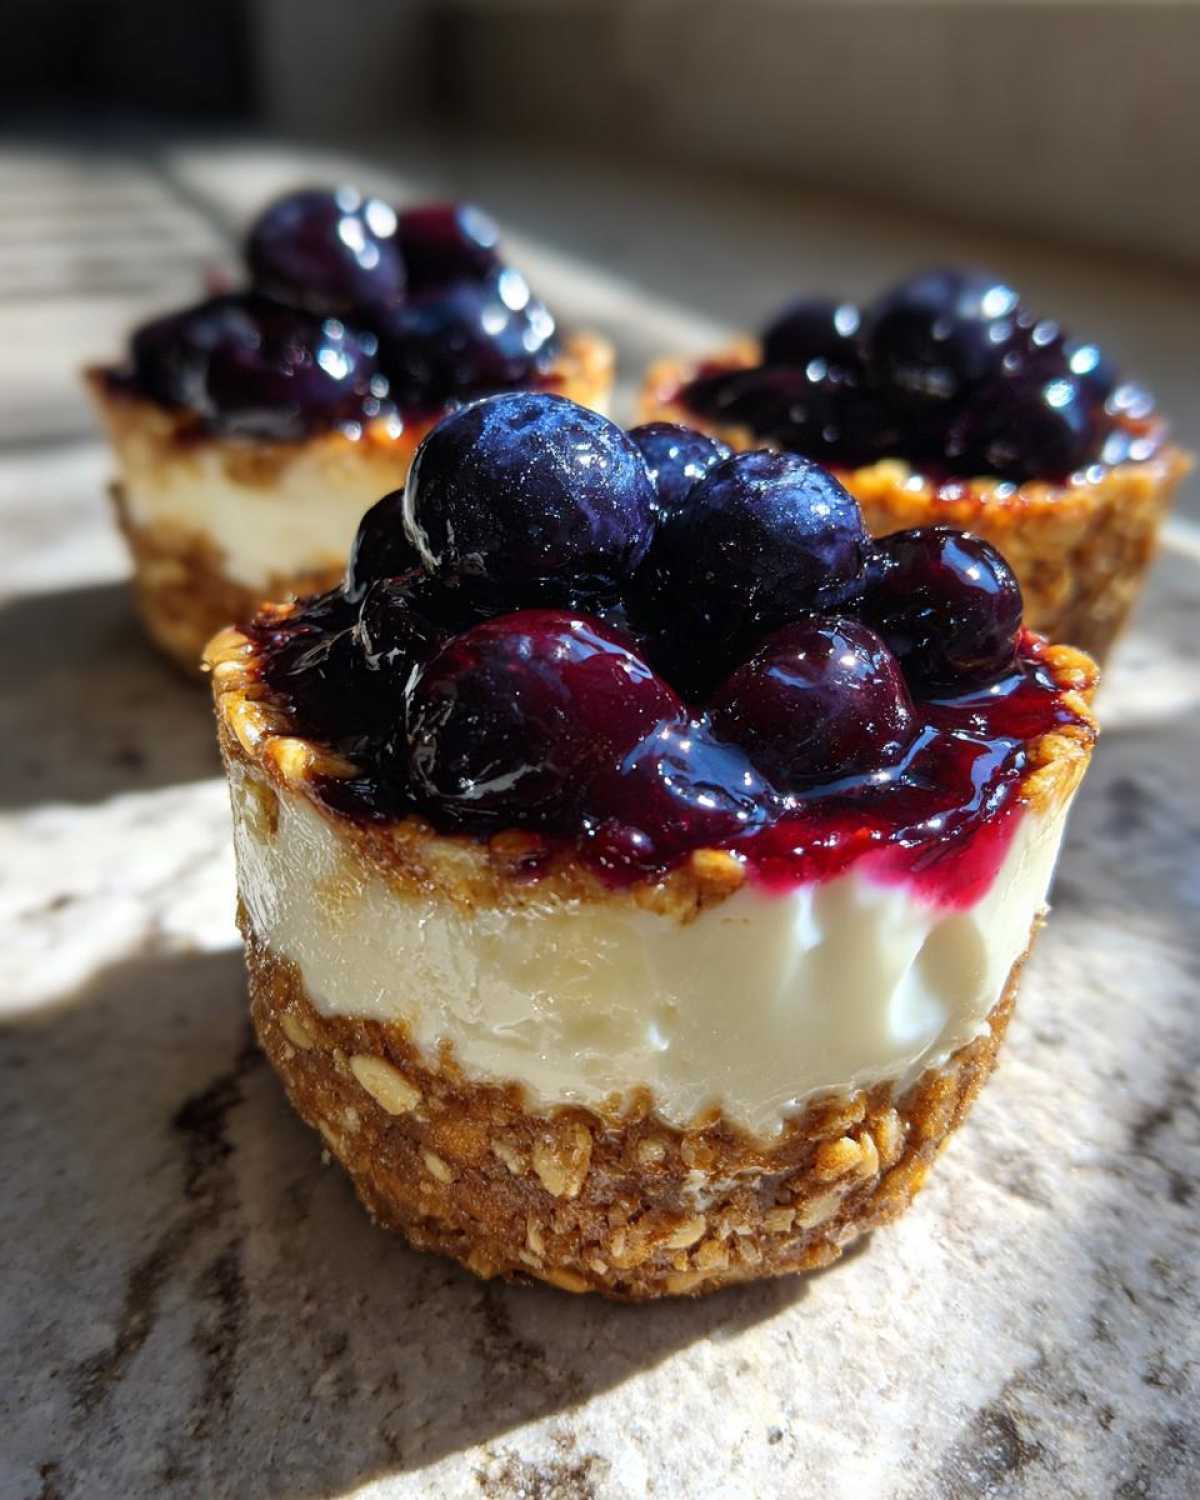
Okay, the crusts are firm, and the filling is smooth. Time to assemble! Spoon that gorgeous cheesecake filling right over the chilled oat crusts, dividing it evenly between your cups. Now, for the blueberry magic: top each one with a spoonful of your blueberry jam. Don’t spread it too roughly across the top, just let it sit there waiting for the final touch. Then, arrange a few of your fresh or thawed blueberries right on top of the jam layer. Remember, these need time to truly firm up—don’t try to eat them immediately! They must chill in the refrigerator for a minimum of two full hours before serving. If you want more ideas on how to work with blueberries in desserts, I have a great recipe for blueberry protein muffins, too!
Expert Tips for Perfect No-Bake Blueberry Cheesecake Oat Cups
Look, these are easy, but a few little tricks I learned over countless failed batches guarantee success. The notes section from the original recipe card is pure gold in my book—it’s the secret sauce for making these keep well. First off, if you’re using frozen blueberries for your topping, you absolutely have to thaw them a bit first and then pat them totally dry with a paper towel. Soggy berries lead to weepy cheesecake, and we absolutely don’t want that!
Also, one tip I added myself is about the liners. If you use those nice, deep paper liners, they make peeling them off so much easier when the mixture is chilled, preventing any sticking or tearing. And here’s what Grandma always preached: these individual cheesecake cups are great make-aheads! They keep wonderfully in the fridge for up to four days, so you can easily prep for a busy week. If you want to see another one of my favorite quick resources, poke around my main recipe index.
One final note on texture: for an extra tangy kick that cuts through the sweetness, try swapping half of that Greek yogurt for sour cream. It gives the filling a little extra body, too!
Ingredient Notes and Substitutions for Your No-Bake Blueberry Cheesecake Oat Cups
I know everyone’s pantry looks a little different, so let’s talk about swapping things out, because sometimes you just don’t have exactly what the recipe calls for! The goal here is keeping that creamy filling smooth and the oat crust holding together. If maple syrup isn’t your jam, don’t panic! You can absolutely substitute it with an equal amount of honey or even agave nectar for the crust. They both offer that sticky, binding quality we need.
We touched on it before, but I have to stress the blueberry situation again. Fresh blueberries are gorgeous on top, but if you’re making this in the middle of winter, frozen ones work perfectly well, as long as you thaw them enough to pat them completely dry. You don’t want excess water sneaking into your cheesecake layer! If you happen to have extra blueberries lying around needing to be used up, you should try my bakery-style blueberry scones recipe—they are dangerously good.
Now, if you’re trying to make these dairy-free, you can absolutely grab a tub of plant-based cream cheese. Just be aware that those alternatives often soften up a little quicker than the real dairy stuff. When substituting, you might need to chill those cups for an extra 30 minutes before layering the jam on top, just to make sure that non-dairy base is super firm. Also, if you go with a lower-fat yogurt, you might lose a tiny bit of that satisfying richness, so the full-fat Greek yogurt is always my top recommendation!
Serving Suggestions for Your Individual Cheesecake Cups
So, you’ve got these perfect little No-Bake Blueberry Cheesecake Oat Cups chilled and ready to go—now how do you present them? Since these are my favorite cool, creamy dessert for lazy afternoons, I usually keep the garnish minimal because the colors are already so pretty!
They are absolutely divine served straight from the fridge alongside a piping hot cup of coffee. That hot/cold contrast really brings out the sweetness of the berries. If you’re serving them after dinner, a tiny sprig of fresh mint stuck right into the top blueberry layer adds a pop of color that makes them look instantly fancy, even though they took zero effort.
If you want to really wake up that blueberry flavor, try grating just a tiny bit of fresh lemon zest right over the top just before serving. Don’t use too much, just enough to smell that bright citrusy scent mingling with the vanilla. It cuts through the richness of the cream cheese perfectly without overpowering the oats.
They are fantastic on their own, but if you’re looking for something savory to balance the sweetness later—maybe you made too many and they turned into a morning snack—I’ve got a great recipe for homemade garlic breadsticks that would be a fun contrast for later in the day, though that’s usually saved for a totally different occasion!
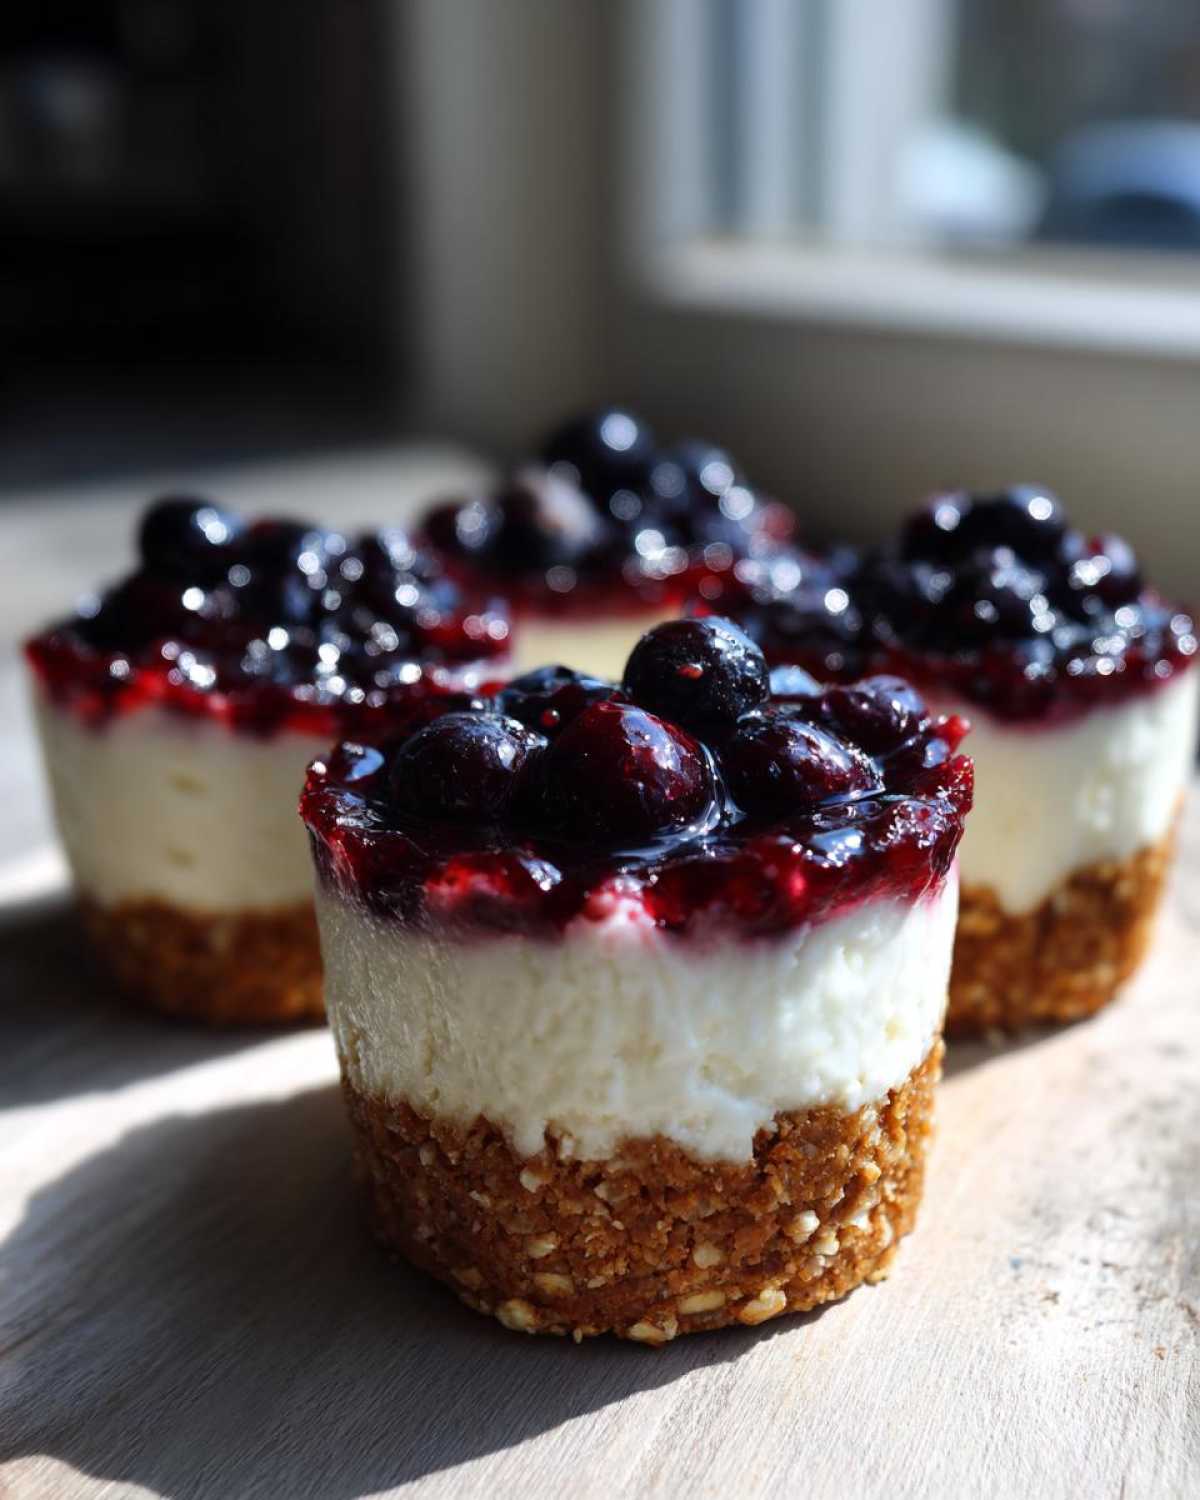
Storage and Make-Ahead Instructions for No-Bake Blueberry Cheesecake Oat Cups
This is where these beauties really shine, because they are tailor-made for planning ahead! Since there’s no baking involved, the texture actually gets *better* as it chills, provided you keep everything sealed up tight. We’re talking about having perfect, portion-controlled desserts ready for nearly a full week!
For refrigeration, the recipe notes say they last up to four days, and that’s totally accurate if you keep them stored properly. I always suggest keeping them inside the muffin tin if you’re going to eat them within the first day or two, just to help them maintain their perfect cup shape. If you’ve already peeled the paper liners off, put them into an airtight container. Placing a small square of parchment paper between layers can help stop them from sticking together if you stack them.
Now, can you freeze them? Yes, you absolutely can try! I’ve popped a few of these little cheesecake cups into the freezer, and they hold up surprisingly well, especially since the crust is oil-based. If you plan on freezing them, I strongly recommend keeping the blueberry jam and fresh berry topping off until you thaw them out. Freeze the oat crust and plain cheesecake filling layers together.
When you’re ready to eat a frozen one, just move it to the refrigerator for about 2 to 3 hours, and it should be perfectly thawed and firm again. Once thawed, you can add your jam and fresh berries. We definitely don’t have to worry about reheating these mini fruit desserts no oven! Always check out my other make-ahead wonders, like these make ahead breakfast cups, for more ideas on prepping snacks in advance.
Frequently Asked Questions About No-Bake Blueberry Cheesecake Oat Cups
I always get questions whenever I post about these little beauties online, and that’s wonderful! It means you’re excited to try them, and I want to make sure you have all the answers for making these easy no bake desserts perfectly.
A lot of people ask if these can be adapted because they look so good as a single serving dessert idea. If you need a different flavor profile, just swap the blueberry jam for strawberry or raspberry preserves! The ratios for the creamy blueberry dessert filling stay the same.
Can I make these No-Bake Blueberry Cheesecake Oat Cups gluten-free?
Oh, absolutely! If you need gluten-free no bake dessert options, this recipe handles that switch super easily. Just make sure you grab certified gluten-free rolled oats in the ingredient list. Since we aren’t baking, the oats themselves are the only potential gluten source in that oat crust base. They’ll set up just as nicely.
What is the best way to achieve a creamy texture in these individual cheesecake cups?
This is all about temperature control and mixing smart! The secret for that rich, creamy texture is ensuring your cream cheese is truly softened—think room temperature, not just slightly warm. Beat the cream cheese by itself first until it’s completely smooth, like silk. Then, slowly incorporate the sugar and yogurt. Over-mixing after the oats are added can sometimes make the filling dense, but if you follow those initial whipping steps, you’ll have the best individual cheesecake cups!
If you love this style of handheld dessert, you might want to try out my lemon raspberry cheesecake cups next week for a flavor change!
Nutritional Snapshot of These Creamy Blueberry Dessert Cups
I always try to keep track of what we’re eating, even with treats! Now, look, these little No-Bake Blueberry Cheesecake Oat Cups are definitely a dessert, not a salad, so they have a little sugar and fat, but honestly, for a homemade, portion-controlled dessert, I think the numbers are pretty reasonable. I ran the calculations based on the ingredients list we used.
Just remember, these are just estimates based on the standard ingredients used, like 2% Greek yogurt and standard cream cheese. If you swap out ingredients, these numbers will certainly change, so treat this like a fun guideline rather than strict diet tracking!
- Serving Size: 1 cup
- Calories: About 310 per cup
- Total Fat: Around 18g (with about 12g saturated fat)
- Total Carbohydrates: Roughly 33g
- Sugar Content: Approximately 25g (remember, this includes natural sugars from fruit/maple syrup!)
- Protein: About 7g
I always feel better grabbing one of these knowing I made them myself, and having that 7 grams of protein helps me feel like I’m getting a little something extra from this creamy blueberry dessert! If you are focused on upping the protein content, you could definitely look at my blueberry protein muffins for another option, but these cups are delicious as is!
Share Your Experience Making the No-Bake Blueberry Cheesecake Oat Cups
I have shared all my best secrets, my family history with treats, and every tip I know to make these No-Bake Blueberry Cheesecake Oat Cups turn out absolutely perfect for you! But honestly, the best part of sharing recipes is hearing back from you wonderful bakers. I live for those kitchen adventures!
So, once you’ve made a batch of these, please, please come back and let me know how they turned out. Did you try using sour cream instead of yogurt? Did you swap out the maple syrup? Drop a comment below and tell me what changes you made; I love seeing your creativity!
If you took some gorgeous photos of your individual cheesecake cups—maybe styled them with mint or served them up on a sunny afternoon—I’d be tickled pink if you shared them on social media. Tag me! It truly makes my day to see my recipes showing up in your homes.
And if you have any lingering questions that I somehow missed, don’t hesitate to reach out via my Contact Page. Happy layering, and I hope these easy no bake desserts bring a little cool sweetness to your week!
PrintNo-Bake Blueberry Cheesecake Oat Cups
Make these simple, individual no-bake blueberry cheesecake oat cups. They require no oven time and assemble quickly for a satisfying dessert or snack.
- Prep Time: 15 min
- Cook Time: 0 min
- Total Time: 2 hours 15 min
- Yield: 6 servings
- Category: Dessert
- Method: Chilling
- Cuisine: American
- Diet: Vegetarian
Ingredients
- 1 cup rolled oats
- 1/4 cup melted coconut oil
- 2 tablespoons maple syrup
- 8 ounces cream cheese, softened
- 1/4 cup Greek yogurt
- 1/4 cup powdered sugar
- 1 teaspoon vanilla extract
- 1/2 cup blueberry jam or preserves
- 1/2 cup fresh or frozen blueberries
Instructions
- Combine the rolled oats, melted coconut oil, and maple syrup in a small bowl. Mix until the oats are evenly coated.
- Press about 2 tablespoons of the oat mixture firmly into the bottom of six standard muffin cups lined with paper liners. Place the cups in the freezer for 10 minutes to set.
- In a separate bowl, beat the softened cream cheese until smooth. Add the Greek yogurt, powdered sugar, and vanilla extract. Mix until the filling is creamy and well combined.
- Spoon or pipe the cheesecake filling evenly over the chilled oat crusts in the muffin cups.
- Top each cup with a layer of blueberry jam, followed by a few fresh or thawed blueberries.
- Refrigerate the cups for at least 2 hours, or until the filling is firm. Remove the paper liners before serving.
Notes
- If you use frozen blueberries, thaw them slightly and pat them dry before adding them to the top layer.
- For a tangier filling, substitute half of the Greek yogurt with sour cream.
- These cups keep well in the refrigerator for up to 4 days.
Nutrition
- Serving Size: 1 cup
- Calories: 310
- Sugar: 25
- Sodium: 95
- Fat: 18
- Saturated Fat: 12
- Unsaturated Fat: 6
- Trans Fat: 0
- Carbohydrates: 33
- Fiber: 2
- Protein: 7
- Cholesterol: 45